Knitting Gauge

Learn to check your knitting gauge. Make and measure a gauge swatch to make sure your knits will be the right size - a knitting lesson from Liz Chandler @PurlsAndPixels.

Patterns often provide a “gauge” and ask you to “check your gauge” before you start. But what does that mean?

What is gauge? A knitting lesson from Liz @PurlsAndPixels.

Knitting gauge is a way of measuring how big your stitches are. Gauge will change based on the size of your needles, the weight of your yarn, and the tightness by which you knit.

If you use a larger knitting needle, your knitting will have a larger gauge. Similarly, a smaller needle knitting up the same yarn will create a fabric with a smaller gauge.

Knitting gauge changes with the size of your knitting needles and your knitting tension. Learn about knitting gauge with Liz @PurlsAndPixels.

But even when using the same needles and yarn, stitch size can vary from person to person; it depends on how tightly they each loop the yarn around the knitting needles.

Why Do Patterns Include Gauge Instructions?

Knitting patterns contain gauge instructions to help you ensure you make your finished object the same size as the author’s finished object. If your gauge is bigger (you knit more loosely) than the pattern-writer’s gauge, you will knit an item that is too big. On the other hand, if your gauge is smaller than the pattern-writer’s gauge (you knit more tightly), you will knit an item that is too small.

Usually, gauge is checked by knitting a small practice square, called a “gauge swatch.” After knitting the practice square, you will measure it to see if your knit stitches are the same size as the author’s stitches.

How to make and measure a gauge swatch -  a knitting lesson from Liz Chandler @PurlsAndPixels.

Gauge swatches are most often made in one of two sizes: 1-inch by 1-inch or 4-inches by 4-inches. One-inch gauge swatches are typically used only on projects with very fine yarn and thin needles. The larger 4-inch gauge swatch gives you a more accurate estimate of your average stitch size, especially with heavier-weight yarns. The pattern writer will tell you what size gauge swatch to make in the gauge section of the instructions.

Below you will find both video and written guides to help you learn how to make a gauge swatch and measure it to ensure your knitting will be the correct size. I’ve also included some sample patterns for knitting borderless and bordered gauge swatches.

Video Guide: Knitting Gauge

Written Guide: Knitting Gauge Swatches

Do You Have to Make a Gauge Swatch?

I have been told that you should never, ever skip the gauge check. Well, that seems just a little daunting. So, here is my advice: when size matters, you should not skip a knitting gauge check.

For example, if you are making a blanket or dishcloth and you do not care if it turns out a few inches larger or a few inches smaller than the pattern predicts, go ahead and skip the gauge. Just know you will be gambling with the size of your knit.

On the other hand, you should absolutely check your knitting gauge when the size of your finished knit matters. Especially for wearable knits like hats, gloves, and sweaters, you will want to be sure to check your gauge. If you don’t, you may knit too tightly and end up with an extra small version of what you wanted. Or you could knit too loosely, and your work will be too big.

Why check knitting gauge? If you don't your finished object may be too big or too small. Learn about gauge in knitting with Liz @PurlsAndPixels.

For the purposes of this guide, you can absolutely skip your gauge check for your first few projects. You may end up with a slightly small or slightly oversized washcloth at first, but this is fine, especially when you are learning.

To successfully make a gauge swatch, you will need to understand the basics of knitting. Once you have studied the cast on, knit stitch, purl stitch, and bind off, you will have the skills to make a gauge swatch. Come back and review this section when you are ready to make your first clothing item; you really should check your gauge for ear warmers, hats, gloves, and mittens.

Understanding Gauge Instructions in Patterns

Most patterns will contain a section phrased something like this:

            Gauge:   19 stitches x 26 rows = 4 x 4 inches

These are the instructions for your gauge swatch.

The above gauge instruction example is telling you that a row of 19 stitches should measure 4 inches. A column of 26 stitches should also measure 4 inches. Stated another way, to check your gauge, you need to cast on 19 stitches and knit for 26 rows; the resulting square should measure 4 inches on each side.

Learn to check your knitting gauge. Make and measure a gauge swatch to make sure your knits will be the right size - a knitting lesson from Liz Chandler @PurlsAndPixels.

If the pattern does not tell you otherwise, assume your gauge swatch should be knit in stockinette stitch (knit one row, purl one row, repeat).

Before you start, be sure you have enough yarn for both your project and your gauge square. You should always make your swatch with the same yarn and knitting needles you will use for the main project. If you do not account for the yarn you will use to make the gauge swatch, you may not have enough yarn left to finish your project.

Making Gauge Swatches

Once you have found the gauge instructions, you will need to knit your swatch. If you are in a hurry, you can make a quick borderless gauge swatch. Or, if you want to make your measurements more accurate, you can add a small border to your swatch; this will keep your swatch from curling and make it easier to measure.

Quick Borderless Gauge Swatch

The simplest way to check gauge is to cast on the number of stitches listed in the gauge pattern. Then, usually in stockinette stitch (knit one row, purl one row, repeat), you will knit the number of rows the gauge pattern calls for.

Example Pattern for a Quick Borderless Gauge Swatch:

Simple gauge swatch knitting pattern example - a lesson from Liz @PurlsAndPixels.

The pattern reads, “Gauge: 19 stitches x 26 rows = 4 x 4 inches in stockinette stitch on US No. 7 (4.5 mm) needles.”

Row 1: Cast on 19. Turn.
Row 2: Purl 19. Turn.
Row 3: Knit 19. Turn.
Rows 4 through 25: Repeat Rows 2 and 3.
Row 26: Bind off with purl stitches.

Bordered Gauge Swatch for Accuracy

Because stockinette stitch tends to curl at the edges, it can be tricky to measure all the stitches on a borderless stockinette stitch square.

A border makes a gauge swatch a bit easier to measure.

To reduce the curling, you can add a two row and a three 3 stitch border in garter stitch (all knit stitches). Do this by adding six stitches when you cast on. Knit two rows, and begin your stockinette square, adding 3 knit stitches on both ends of your rows. After you have knit all the gauge rows, end with a garter stitch border. If the gauge has an odd number of rows, you can simply add one knitted row and bind off. If the gauge pattern called for an even number of rows, knit those rows, turn, then add the following border: Knit 3, purl the number of stitches called for in the gauge, knit 3, turn. Bind off.  

To clarify, let’s look at some example patterns that add a border to common gauge swatches.

The patterns in my Learn to Knit guide are in one of three gauges.

  • Cotton washcloths and face scrubbies are in a gauge of 19 stitches x 26 rows = 4 x 4 inches in stockinette stitch on US No. 7 (4.5 mm) needles.
  • Hats, baby blankets, and leg warmers are in a gauge of 18 stitches x 24 rows = 4 x 4 inches in stockinette stitch on US No. 8 (5.0 mm) needles.
  • Ear warmers, fingerless gloves, and mittens will be made in a gauge of 20 stitches x 28 rows = 4 x 4 inches in stockinette stitch on US No. 5 (3.75 mm) needles.

You can make bordered gauge swatches for each of these with the patterns that follow.

Example Patterns for Quick Bordered Gauge Swatches:

Bordered gauge swatch knitting pattern example - a lesson from Liz @PurlsAndPixels.

(This example adds a border to the borderless gauge swatch above.)

The pattern reads, “Gauge: 19 stitches x 26 rows = 4 x 4 inches in stockinette stitch on US No. 7 (4.5 mm) needles.”

Row 1: Cast on 25. Turn.
Row 2: Knit 25. Turn.
Row 3: Knit 25. Turn.
Row 4: Knit 3, purl 19, knit 3. Turn.
Rows 5 – 30: Repeat rows 3 & 4.
Row 31: Knit 3, purl 19, knit 3. Turn.
Row 32: Bind off with knit stitches.


Bordered gauge swatch knitting pattern example - a lesson from Liz @PurlsAndPixels.

The pattern reads, “Gauge: 18 stitches x 24 rows = 4 x 4 inches in stockinette stitch on US No. 8 (5.0 mm) needles.”

Row 1: Cast on 24. Turn.
Row 2: Knit 24. Turn.
Row 3: Knit 24. Turn.
Row 4: Knit 3, purl 18, knit 3. Turn.
Rows 5 – 28: Repeat rows 3 & 4.
Row 29: Knit 3, purl 18, knit 3. Turn.
Row 30: Bind off with knit stitches.


Bordered gauge swatch knitting pattern example - a lesson from Liz @PurlsAndPixels.

The pattern reads, “Gauge: 20 stitches x 28 rows = 4 x 4 inches in stockinette stitch on US No. 5 (3.75 mm) needles.”

Row 1: Cast on 26. Turn.
Row 2: Knit 26. Turn.
Row 3: Knit 26. Turn.
Row 4: Knit 3, purl 20, knit 3. Turn.
Rows 5 – 32: Repeat rows 3 & 4.
Row 33: Knit 3, purl 20, knit 3. Turn.
Row 34: Bind off with knit stitches.

Finishing Gauge Swatches

If your gauge swatch looks a bit too big right off the needles, it may be because it needs to be prepared like you would prepare your finished knitted object. Weave in your ends, wash, and block the gauge square the same way you plan to do in the pattern. This step can be particularly important if you are using cotton, wool, or another shrinkable yarn. Washing and blocking your gauge swatch will show you how your finished object will wash and block. Cotton and wool, for example, shrink quite a bit in the wash.

Finishing gauge swatches - wash a gauge swatch that is too big before you try different needles - a knitting lesson from Liz @PurlsAndPixels.

Measuring Gauge Swatches

Measure Borderless Gauge Swatch

For a borderless gauge swatch, simply measure across and then top-to-bottom.

Measure Bordered Gauge Swatch

For a bordered swatch, make sure to measure the square inside the border you have created. The border should not be included in your measurement.

In our examples, the gauge swatch should measure four inches by four inches (4″ x 4″).

If your swatch matches the pattern’s guide, your gauge is correct. You can start knitting your main project.

Adjusting to Reach the Correct Gauge

If your swatch is too big or too small, you will need to make some adjustments. If the square is too big, select a smaller set of knitting needles and try knitting your swatch again. On the other hand, if your swatch came out too small, choose a larger set of knitting needles and try again. You will need to continue testing needle sizes by making gauge swatches until your square is the correct size.

To conserve your yarn, you may want to frog (unravel) your swatch and re-knit it with the same yarn. If you don’t know how to frog, you can learn to unravel your knitting here.

Practice With My Knitting Patterns

Simple Washcloth Knitting Pattern Collection from Liz @PurlsAndPixels

Are you ready to knit something new? Browse all of my free and deluxe knitting patterns here.

Why check knitting gauge? If you don't your finished object may be too big or too small. Learn about gauge in knitting with Liz @PurlsAndPixels.
Remember, if you don’t check your gauge, your finished object could be too small or too big.

Up Next

In the next lesson we will learn to neaten the edges of flat knits by intentionally slipping the first stitch of every row.

Go Back to the Learn to Knit Index

Following Knitting Patterns

Learn to follow knitting patterns, counting rows, with Liz Chandler @PurlsAndPixels.
Following knitting patterns, counting rows, with Liz Chandler @PurlsAndPixels.

There are a  number of ways to keep your place in a knitting pattern as you work. When following knitting patterns, it is important to pay attention to the details and instructions provided. Here are some tips to help you in following knitting patterns.

Read the pattern carefully:

Start by reading the entire pattern before you begin knitting. Make sure you understand the abbreviations, symbols, and techniques used.

Take note of pattern repeats:

Many knitting patterns have repeated sections. Repeated sections are often noted by asterisks surrounding the instruction. For example: *Knitting Instruction* would mean, “repeat the Knitting Instruction between these asterisks” Pay attention to these repeats and mark them if necessary. It will make it easier to maintain consistency throughout your project.

Check your gauge:

Always check your gauge before starting a project. Gauge refers to the number of stitches and rows per inch. It ensures that your finished project will have the correct size and fit.

Why check knitting gauge? If you don't your finished object may be too big or too small. Learn about gauge in knitting with Liz @PurlsAndPixels.

Use highlighters, sticky notes, or paperclips: Highlight or mark the specific instructions or sections you are working on. You can make tick marks on some scratch paper as you finish each row.

Or, try following along by aligning a paperclip with your current row in the knitting pattern. This can help you stay focused and prevent any confusion.

Counting rows in knitting and crochet patterns, row counter or paperclip, tip from PurlsAndPixels

Count your stitches and rows:

Use stitch markers or a row counter to keep track of your stitches and rows. This will help you stay organized and ensure accuracy in your knitting.

You can also check your row-count by looking at your work.

Count each knit or purl stitch in a column, beginning at the bottom of the work.

If you started with a long-tail cast-on, don’t count the straight edge stitch.

Do count the loop on your needle.

Remember, practice makes perfect. As you gain experience, you will become more comfortable with interpreting and following knitting patterns.

Now, choose a pattern and start a new project. Happy knitting!

Up Next

Now that you’ve learned the basics, let’s work on perfecting your skills. In the next lesson, we will learn how to make stitching more even by improving knitting tension.

Learn how to improve your knitting tension to avoid loose stitches and holes in your knits - a knitting lesson from Liz Chandler @PurlsAndPixels

Go Back to the Learn to Knit Index

Reading Knitting Patterns

Reading knitting patterns and understanding abbreviations, knitting lesson from PurlsAndPixels
Learn to read knitting patterns with Liz Chandler @PurlsAndPixels.

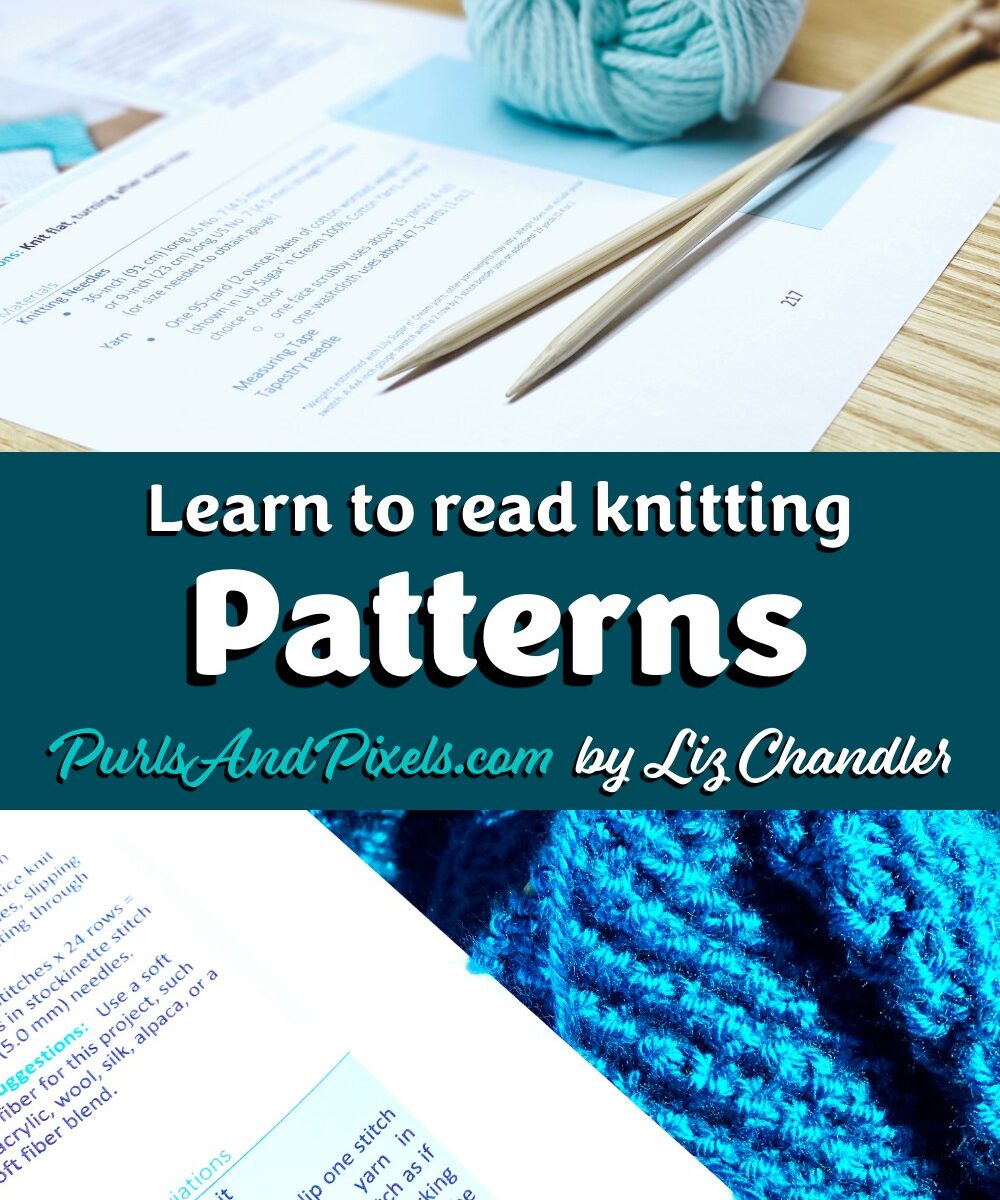
Much like recipes in baking, knitting patterns try to break down a project into simple steps to help you create a copy of the designer’s creation. Looking at your first knitting pattern can sometimes be overwhelming; there tend to be many sections and a lot of abbreviations. But when you break them down, you will find that almost all knitting patterns are made up of similar parts.

Most patterns structured in the same way. They will usually include:

  • An introduction.
  • A materials list.
  • The gauge of the pattern.
  • An abbreviations key.
  • Instructions for knitting.

Materials

Almost every knitting pattern will list the materials required to make the item exactly as the author did. You should see knitting needle sizes as well as a yarn suggestion. In most cases, the author has not attempted to make the item with more than one type of yarn. Often, they have only knit it in one color. If you wish to replicate the pattern exactly, you must find the recommended yarn.

Substituting Materials

If you are unable to locate the yarn used by a pattern’s author, you can try substituting yarn. If you attempt this, you will need to ensure you select yarn in the same weight as the suggested yarn. For example, in the pattern above, the suggested yarn is a worsted weight. This means you should select a worsted weight yarn if you want to try another brand or yarn material. Because the thickness of yarns in the same weight category can vary slightly, before you substitute, always make sure you work up a gauge swatch to ensure your knit will work out to be the correct size.
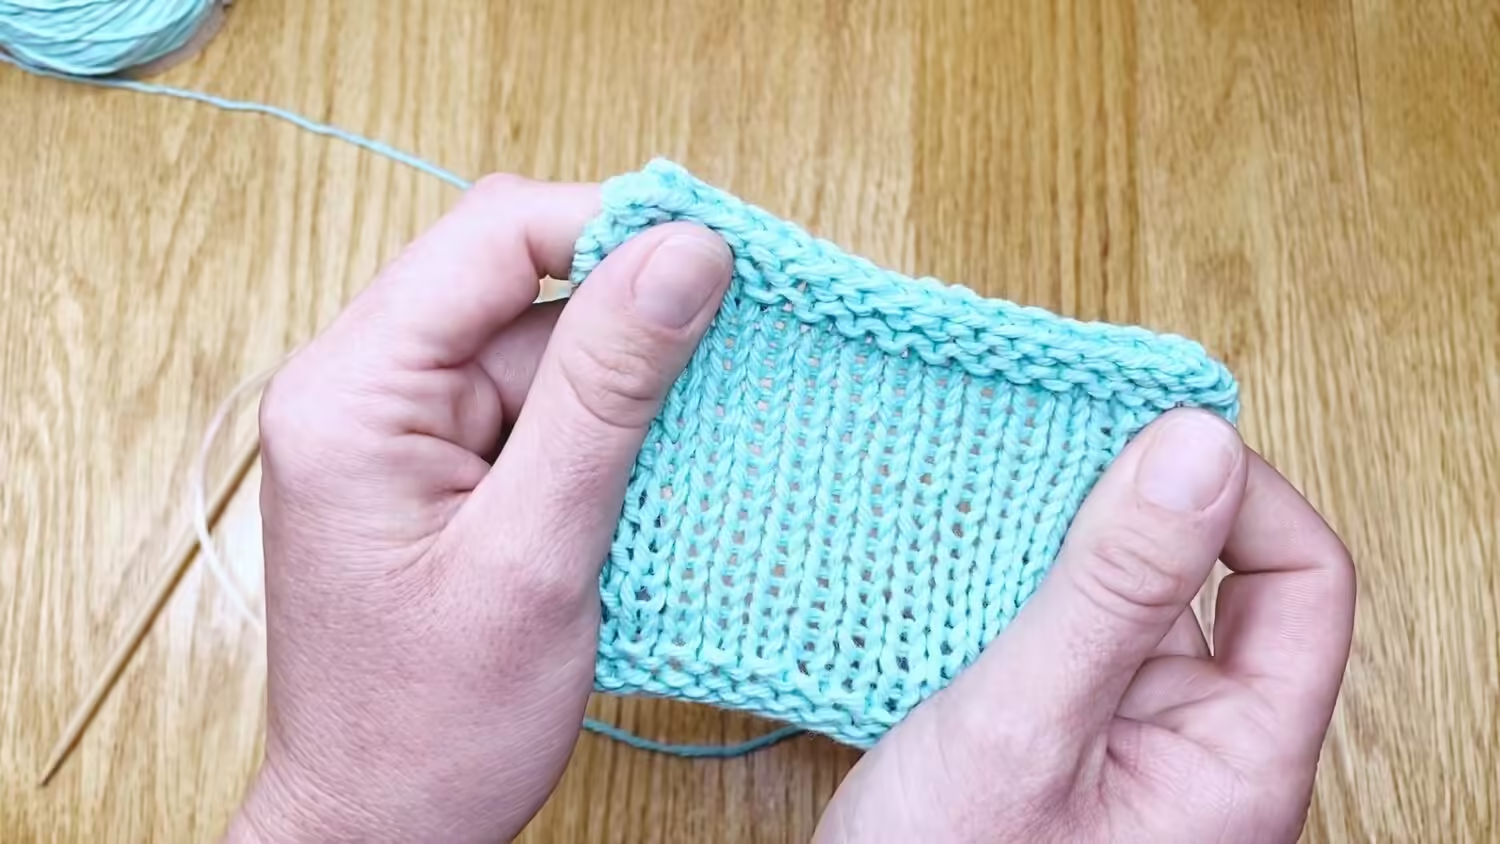
Substituting yarn in knitting patterns, reading knitting patterns with Liz Chandler @PurlsAndPixels.

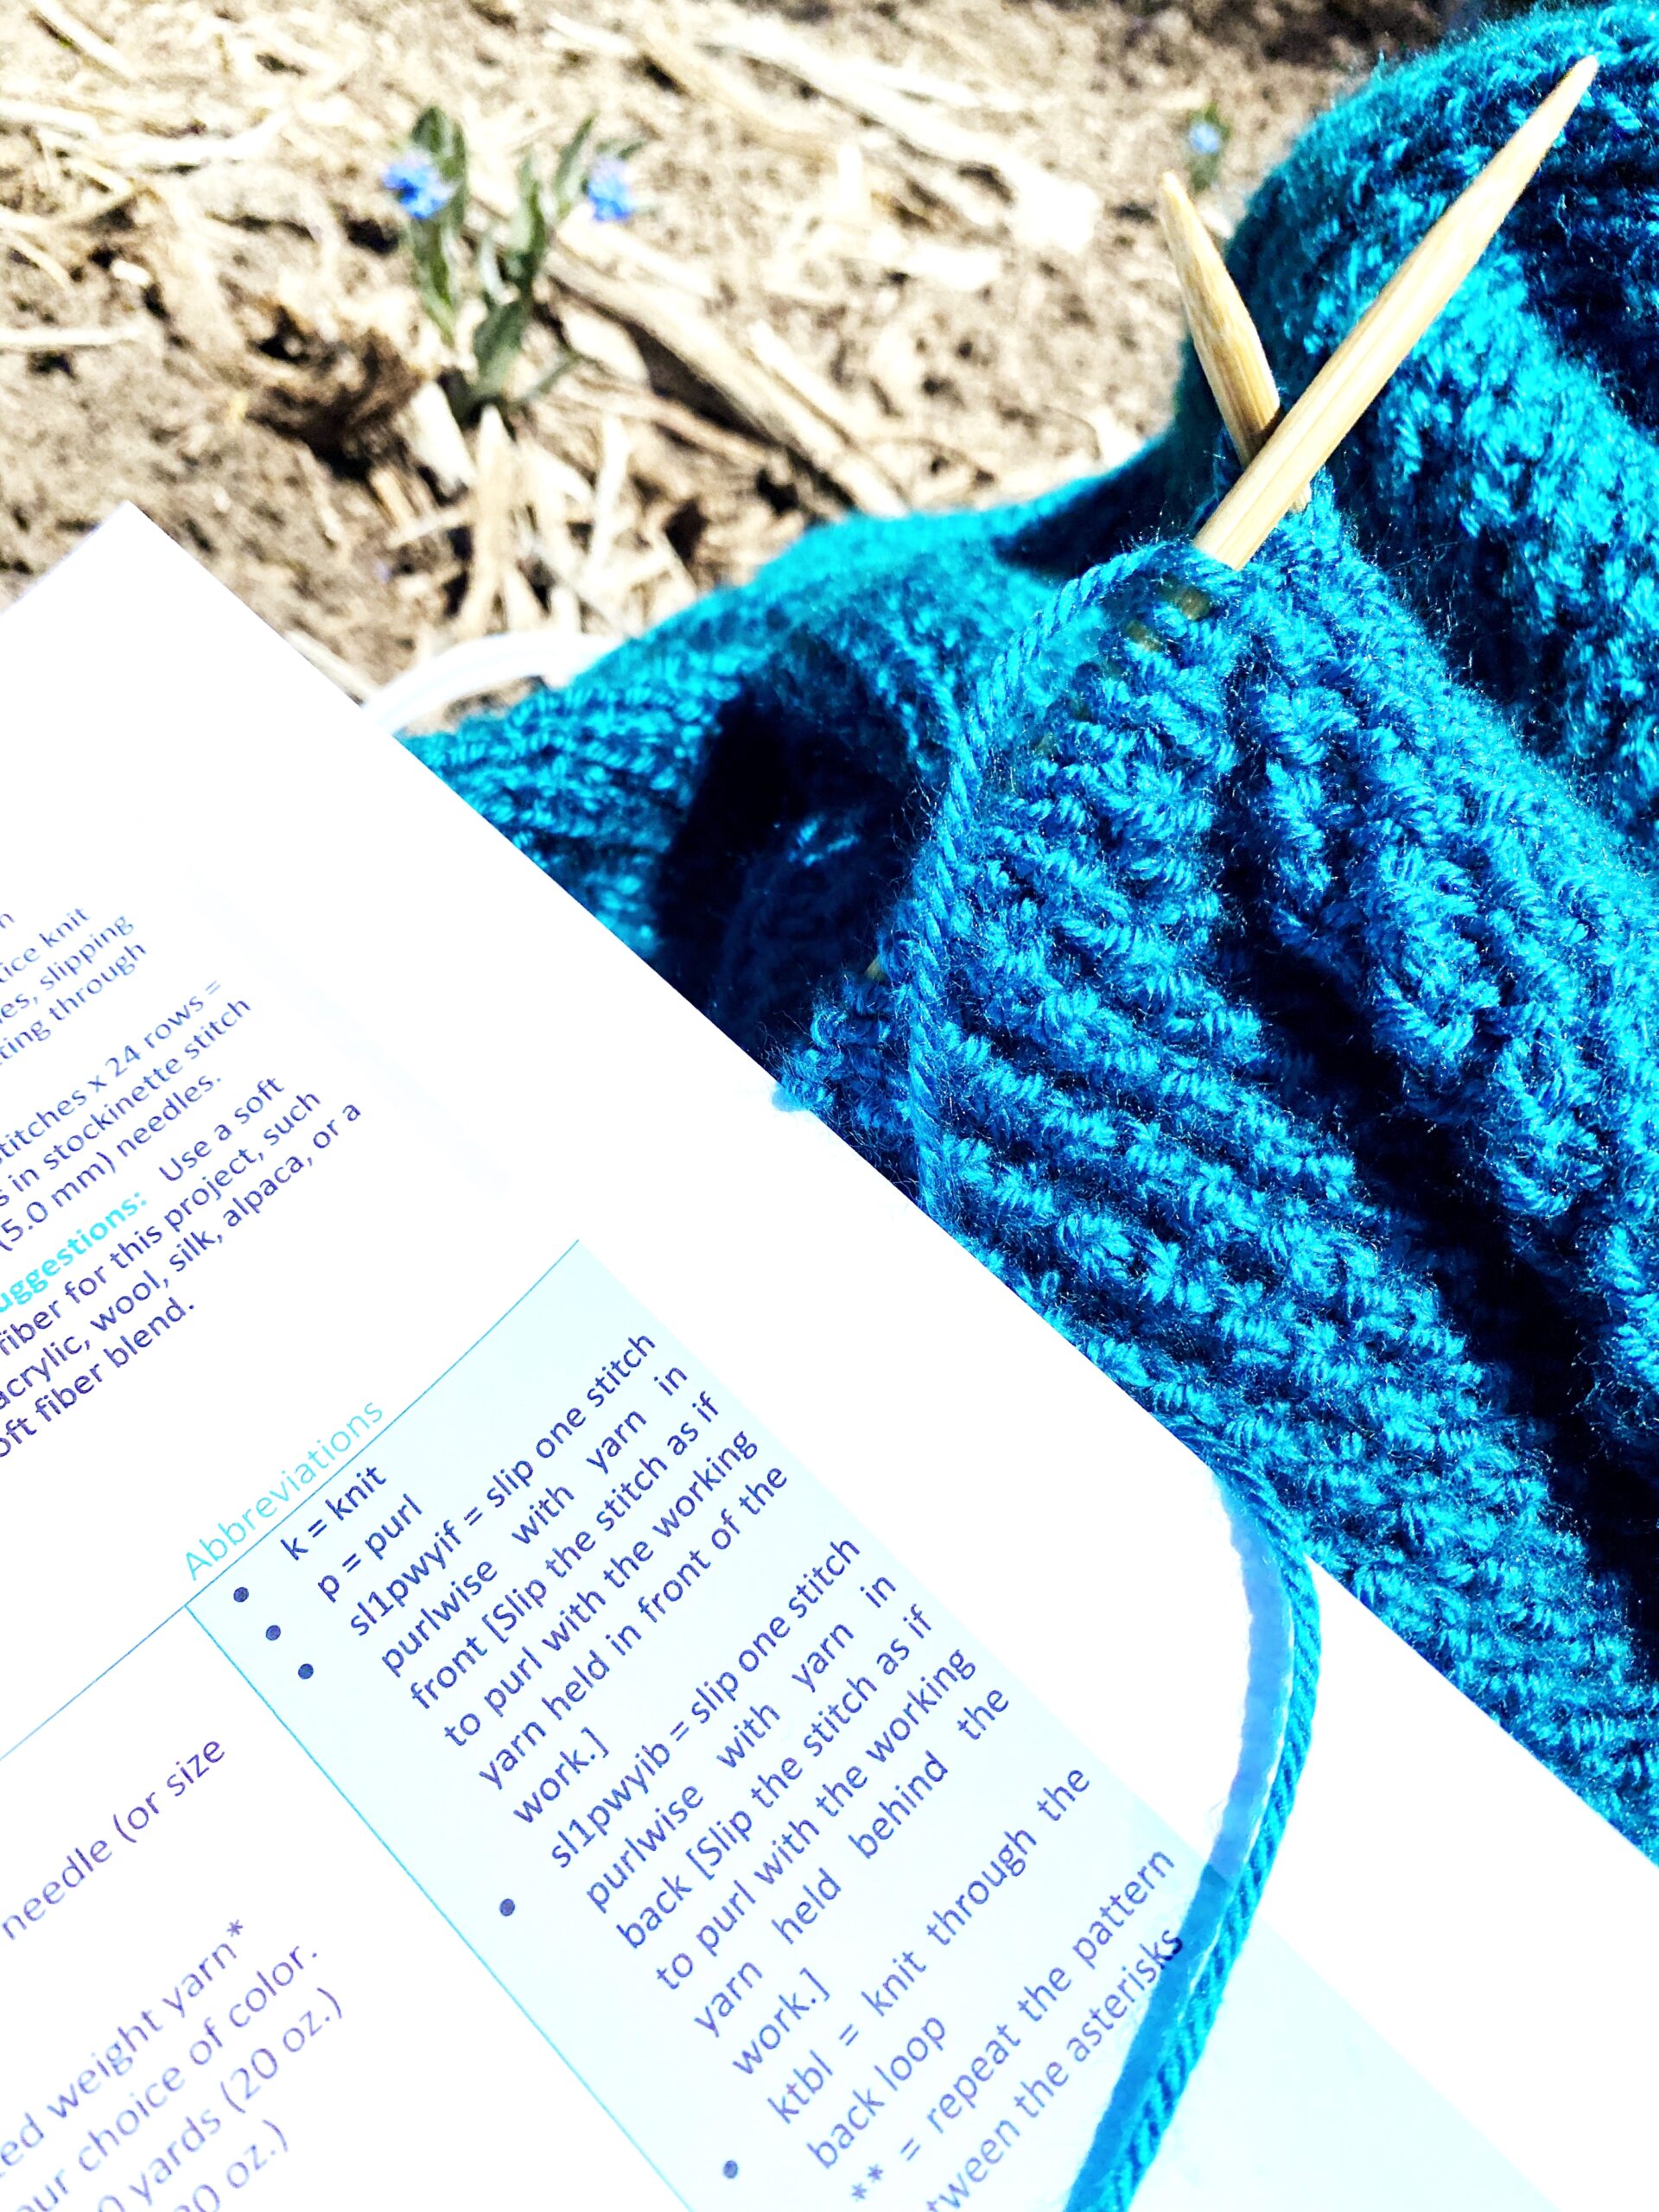
Understanding Abbreviations

Knitting patterns are full of abbreviations and learning what they mean makes reading knitting patterns easier. Knitters use a shorthand to keep track of the stitches they make when writing a pattern. Knitting designers usually provide a key at the beginning of the pattern, which explains their abbreviations. Always refer to this key. Some designers do not follow the standardized abbreviations, and others will create their own abbreviations for unique stitches.

If you find a pattern with no key, you can follow the more standard knitting abbreviations. Below are some basic knitting abbreviations that most knitters use; this is also a complete list of the abbreviations used throughout my Learn to Knit Guide. You will want become familiar with these as you start learning to knit.

Knitting Abbreviations Used in My Learn to Knit Guide

CO = cast on

k = knit

p = purl

** = repeat the pattern between the asterisks

sl1pwyif = slip one stitch purlwise with yarn in front

sl1pwyib = slip one stitch purlwise with yarn in back

sl = sl1pwyib = slip one stitch purlwise with yarn in back

sl marker = slip the stitch to which a marker is clipped purlwise with yarn in back [Slip the stitch as if to purl with the working yarn held behind the work.]

ktbl = knit through the back loop

k2tog = knit two together

ssk = slip, slip, knit

M1L = make one left [Pick up the strand between the stitch just worked and the next stitch from front to back with the left needle and knit into the back of it.]

M1R = make one right [Pick up the strand between the stitch just worked and the next stitch from back to front with the left needle and knit into the front of it.]

BO = bind off

Learn More Abbreviations

Want to explore more abbreviations with a side of silly fun? Read my Knitting Abbreviations Explained Series here.

As your knitting becomes more complex, you will come across abbreviations for increasingly more advanced stitches. Many knitters follow the Crafty Yarn Council’s collection of knitting abbreviations as a standard way of shortening words in knitting patterns. If the pattern you are working does not come with a key, you can look online at the Crafty Yarn Council’s list of standard knitting abbreviations, which can be found at:  https://www.craftyarncouncil.com/knit.html.

Knitting patterns by Liz Chandler @PurlsAndPixels.

Now, select a pattern, and practice reading it before you start knitting. Find my full collection of knitting patterns here.

Up Next

Find tips and tricks to help you with Following Knitting Patterns in the next lesson.

Following knitting patterns, counting rows, with Liz Chandler @PurlsAndPixels.

Go Back to the Learn to Knit Index

Blocking Knits, When and How to Block Knitwear

Learn about blocking knits in this knitting lesson from Liz Chandler @PurlsAndPixels.

Blocking Knits

A Free Knitting Lesson from Liz @PurlsAndPixels
Learn about blocking knits in this knitting lesson from Liz Chandler @PurlsAndPixels.

You’ve done it! Congratulations on your beautiful knit piece. You may notice one last instruction after knitting and tying up the loose ends of your project. Often, at the end of a knitting pattern the final step will read, “block if desired.” Blocking knits is a way of forming your project into a more perfect shape. There are several techniques you can use to block knitwear, including wet, dry, steam, and damp blocking. No matter what method you use, the blocking process will stretch and smooth your stitching.

What is blocking knitwear?

Blocking in knitting is a finishing touch for your knit work. It allows you to stretch and manipulate your knitting into a more consistent, even stitch pattern.

Below, you will see two fingerless mittens I have made. These mittens were made two at a time on the same pair of needles in the same knitting session. The glove on the left has not been blocked. The glove on the right has been blocked. As you can see, the right mitten has a much better shape and the stitching seems much more even.

How to block knits

To block your knitting, you will need to prepare a blocking board. You will lay or pin your knits to the blocking board to ensure they keep their shape. If you do not have a blocking board, you can usually substitute an ironing board or a spare mattress covered in towels.

You can order a blocking board on Amazon.com with this affiliate link.

There are a few techniques you can use when blocking your knits. You will want to consider the type of yarn you have used for your piece when choosing a blocking method. Wool and natural fibers hold their shape better after wet or damp blocking, while acrylics seem to do well with damp and dry blocking. All these blocking methods involve stretching your knitting work a bit, in order to even out the stitching. Then you will lay your item out flat or pin it to a blocking board, while forming it into the correct shape and size.  

Wet blocking knits

For wet blocking, you will completely submerge your newly knitted item in water. Let the piece soak until the yarn is fully saturated, then gently wring out any extra drippy water. I shake the item out a bit; this not only gets rid of excess water but also helps the stitches to pull themselves into a more even pattern. Next, lay your item on your mattress or blocking board. Gently pull your work into the desired shape.

Your pattern may ask you to block your knit to a certain measurement. This happens often when you are making patchwork blankets or other knit pieces that should line up perfectly to be sewn together. In this case, stretch the piece to match the given measurements and pin your knit to the board. Pinning it down keeps your piece from shrinking back out of shape while it dries. Once your knit is completely dry, you are ready to continue with your pattern or use you item.

Learn about wet blocking knits in this knitting lesson with Liz Chandler @PurlsAndPixels.

Dry blocking knits

While wet blocking is the most effective way to make sure your knits are in perfect shape, dry blocking sometimes does the trick for items like gloves and hats. Simply tug and pull on your completed work to even out the stitching. When you have focused on your tension while knitting and have a well-shaped knit from the start, a gentle stretch may be all your work needs.

Learn about dry blocking knits in this knitting lesson with Liz Chandler @PurlsAndPixels.

Steam Blocking knits

Another option to block your knits is to use a stream iron to moisten the stitches. First, stretch your knit into shape and pin it to your blocking board. Wave a steam iron a half inch or so above the knitting to moisten the fabric. Then, use your hands to gently smooth the stitching. Allow your knit to fully dry before unpinning. Be very careful if you try this with acrylics; acrylic yarn is made of plastic and too much heat could make it melt. In most cases, it is best to avoid steam blocking acrylics for this reason.

Learn about steam blocking knits in this knitting lesson with Liz Chandler @PurlsAndPixels.

Damp blocking knits with the washing machine

Toss your knits in the washing machine on hand wash or gentle cycle with cold water. Once the wash cycle has finished, the machine will have wrung out just enough water to leave the knits damp, but not wet. This allows for a bit more malleability than just stretching out your dry knits, which helps the stitches to fall into an even pattern. The stitches wont shift around as much as wet blocking, so it doesn’t allow the knit to change its shape as dramatically as a wet blocking would. On the other hand, drying time is cut dramatically when using a washing machine to damp block.

Learn about damp blocking knits in this knitting lesson with Liz Chandler @PurlsAndPixels.

Knit These Projects

Washcloth and Face Scrubby Knitting Pattern

Free Beginner Face Scrubby knitting pattern by Liz @PurlsAndPixels.

In this post, I blocked a Beginner Face Scrubby and Beginner Washcloth. Both patterns are included in my Simple Washcloth Knitting Pattern Collection.

Fingerless Glove Knitting Pattern

Simple fingerless glove knitting pattern in all sizes by Liz Chandler @PurlsAnd Pixels.

Also pictured, are gloves made by following my Simple Fingerless Glove Knitting Pattern.


Learn how to block knitting projects in this lesson with Liz Chandler @PurlsAndPixels.

Find More Knitting Patterns

If you like this, check out the other knitting patterns I’ve written. They’re all gathered on one page, which you can find here.

Find all of the knitting patterns by Liz Chandler @PurlsAndPixels.

After making some simple projects, you may want to know how to customize your knitting to make it more unique. Find out how in the next knitting lesson.

Learn to customize simple knitwear by substituting yarn and adding embellishments in this knitting lesson with Liz Chandler @PurlsAndPixels.

Go Back to the Learn to Knit Index

How to Tie Off & Weave in Loose Yarn Ends

How to weave in yarn ends, knitting lesson from PurlsAndPixels

How tie up loose yarn ends on your knitting

A tutorial from Liz @PurlsAndPixels
Tying up loose ends in knitting, weave in or tie off, tips from PurlsAndPixels

After you make and bind off a piece of knitting, you will almost always have one or more yarn tails to weave into your piece. There are two schools of thought on how to get rid of loose yarn ends on knitting. Knitting purists say you should weave in your ends so there are no knots in your knitting. I say go ahead and knot if a knot will anchor your yarn better. Here I’ll introduce you to how I finish off my knits. I’ll show you how to knot in a loose end, as well as a standard way to weave in your loose ends using a “duplicate stitch” pattern.

This page is just an introduction. For more detailed tutorials (with video guides), check out these pages:

Weave in and Tie Off Loose Ends on Flat Knits

Knot in Yarn Ends

Learn to tie off loose ends in your knitting with this knitting lesson from Liz Chandler @PurlsAndPixels.

To knot in your loose end, first split the strand of yarn in two; using a tapestry needle makes this easier.

Learn to tie off loose ends in your knitting with this knitting lesson from Liz Chandler @PurlsAndPixels.

Next, put one of the new strands of yarn on the tapestry needle and sew the yarn under a leg of a knit stitch to anchor it in place. Take the yarn off the tapestry needle.

Learn to tie off loose ends in your knitting with this knitting lesson from Liz Chandler @PurlsAndPixels.

Pick up an end of the yarn in each hand. Tie a simple knot with the two ends (loop the left strand of yarn over then under the right strand). Let go of the ends of the yarn. The left strand of yarn will now be the right strand, and vice versa, since the knot will cause the pieces to switch places. Pick up the two strands of yarn again.

Learn to tie off loose ends in your knitting with this knitting lesson from Liz Chandler @PurlsAndPixels.

Tie another simple knot in the exact same manner as the first. Pull tight. If the knot slips when pulled, tie a third knot in the same manner and pull tightly.

Learn to tie off loose ends in your knitting with this knitting lesson from Liz Chandler @PurlsAndPixels.

Cut the yarn close to the knot.

Knot off knitting to bind off a knitted piece, free knitting guide from PurlsAndPixels

Weave in Yarn Ends

Instead of tying in your loose end, you can choose to weave in your loose end without knots. This is a good option for rougher yarns like raw wool, since these yarn fibers grab onto each other.

Thread the loose end onto a tapestry needle. Following the pattern of the stitches in your knitting, weave your ends in with the stitches of the fabric. You can follow one row down your work until at least 4 inches of your loose end has been woven into the fabric. Or to make your end more secure, weave it up diagonally through the knitted work.

Learn more about weaving in and tying off your loose ends on flat knits with another knitting lesson you can find here.

Now that you are free of loose yarn ends, your work can be finished and use your knit now. Or, you can learn to “block” your knits to make your stitches look more perfect.

Go Back to the Learn to Knit Index

Bind Off or Cast Off Stitches to Finish Knitting

Learn to take knit stitches off needles with a standard bind off, a knitting lesson from Liz @PurlsAndPixels.

Once you have finished knitting a project, you will want to know how get your work off the needles. You’ll need to “bind off” or “cast off” the piece to secure your last row of stitches in place. There are several ways to end a knitted project. Here I will show you a basic bind off, commonly known as the “standard bind off.” This method can be used on a wide variety of knitted items.

A standard bind off chains together the stitches in your last row so you can remove them from your needles without your work coming undone. To finish your knitted piece, you will work the first two stitches of you last row. Then, you’ll slip the first stitch over the second, which will start removing stitches from the needles and keep them securely in place.

Here, you will learn to bind off in only knit stitches. Later, after you have learned the purl stitch, you can learn to cast of a piece that was made in a pattern of knits and purls.

Before you start, remember to loosen up:

Keep in mind that this bind off tends to be a bit tight, so you may want to loosen up your tension when knitting this last row. Many patterns will specifically tell you to “bind off loosely,” to remind you to adjust the tightness of the stitches.

Or, go up two or three needle sizes:

Instead of adjusting how tightly you knit, you can also switch needle sizes. Try moving to a needle that is two or three sizes larger than the one you have been using for the rest of the pattern. This allows you to keep the same knitting tension in your yarn as you cast off, while still loosening the bind off stitches enough to match the rest of the piece. Some patterns instruct you to switch needle sizes for the last row, to help you ensure your ends are more even.

Video Guide: How to Bind Off Knitting

Written Guide: How to Bind Off Knitting

The steps below assume you have been working in a pattern of only knit stitches (garter stitch). Find a free sample pattern to follow here; it is a face scrubby made of only knit stitches. If you have been knitting in a pattern of knits and purls, make sure to follow your pattern as you bind off.

Step 1: Learn to take knit stitches off needles with a standard bind off, a knitting lesson from Liz @PurlsAndPixels.

Bind Off, Step 1:

Following the pattern you have been using for previous rows, knit the first two stitches of your last row.

Step 2: Learn to take knit stitches off needles with a standard bind off, a knitting lesson from Liz @PurlsAndPixels.

Bind Off, Step 2:

Insert the left needle tip into the front loop of the first knit stitch on your right needle from front to back.

Step 3: Learn to take knit stitches off needles with a standard bind off, a knitting lesson from Liz @PurlsAndPixels.

Bind Off, Step 3:

Lift the first stitch on the right needle up and over the second stitch on the right needle.

Step 4: Learn to take knit stitches off needles with a standard bind off, a knitting lesson from Liz @PurlsAndPixels.

Bind Off, Step 4:

Pull the second stitch on the right needle through the first stitch on the right needle. 

Step 5: Learn to take knit stitches off needles with a standard bind off, a knitting lesson from Liz @PurlsAndPixels.

Bind Off, Step 5:

Slide the left needle out of the stitch on the right needle.

Step 6: Learn to take knit stitches off needles with a standard bind off, a knitting lesson from Liz @PurlsAndPixels.

Bind Off, Step 6:

At this point, the first knit stitch should be anchored onto the second and only one loop should remain on your right-hand needle.

Step 7: Learn to take knit stitches off needles with a standard bind off, a knitting lesson from Liz @PurlsAndPixels.

Bind Off, Step 7:

Knit the next stitch off your left needle and onto the right needle.

Step 8: Learn to take knit stitches off needles with a standard bind off, a knitting lesson from Liz @PurlsAndPixels.

Bind Off, Step 8:

In the same manner as before, lift the first stitch on your right-hand needle over the second stitch, drawing the second stitch through the first, leaving only one stitch on your right-hand needle.

Step 9: Learn to take knit stitches off needles with a standard bind off, a knitting lesson from Liz @PurlsAndPixels.

Bind Off, Step 9:

Repeat steps seven and eight until you have reached the last two stitches and freed the left-hand needle from your work.

Step 10: Learn to take knit stitches off needles with a standard bind off, a knitting lesson from Liz @PurlsAndPixels.

Bind Off, Step 10:

Lift the first stitch on the right needle over the second, leaving only one stitch on your right-hand needle.

Step 11: Learn to take knit stitches off needles with a standard bind off, a knitting lesson from Liz @PurlsAndPixels.

Bind Off, Step 11:

Set your work down, leaving the knitting needle in the last stitch. With very sharp scissors, clip the working yarn about eight or ten inches away from your last  stitch. This will free your work from the ball of yarn.

Step 12: Learn to take knit stitches off needles with a standard bind off, a knitting lesson from Liz @PurlsAndPixels.

Bind Off, Step 12:

Pull the yarn tail through to anchor it in; do this by enlarging the last stitch with your knitting needle until the tail slides completely through. The loop will become a straight loose end.

Practice With My Knitting Patterns

Free Beginner Face Scrubby knitting pattern by Liz @PurlsAndPixels.

Knit along with me and practice your knit stitches with my Free Beginner Face Scrubby Pattern.

Simple garter stitch scarf easy beginner scarf knitting pattern by Liz @PurlsAndPixels

If you would rather try a longer pattern, my Free Beginner Scarf Pattern is made entirely of knit stitches, as well. Because it has more stitches in the pattern, it will take longer than a scrubby to finish.

 Learn to take knit stitches off needles with a standard bind off, a knitting lesson from Liz @PurlsAndPixels.

Up Next

Once have learned to take your knitting off the needles, you will have a couple of loose ends to take care of. Next, you can learn to weave in and tie off the ends on your flat knitted piece.

Go Back to the Learn to Knit Index

Fix Knitting Mistakes

Learn to spot knitting mistakes then fix dropped and twisted stitches in this tutorial from Liz @PurlsAndPixels

Sometimes, you will notice a stitch in your knitting that looks just a bit strange. As you begin to recognize the shapes of knits and purls, you will learn to “read” your knitting as you work. Once you know what your stitches should look like, you will start to spot mistakes. Twisted, dropped, and slipped stitches are common errors that almost every knitter makes. If you learn to identify them, you can fix knitting mistakes before you bind off your project.

The video lesson below will show you how to spot and fix twisted and dropped stitches. Then, continue reading to see more about spotting and fixing common knitting mistakes.

Video Guide: Common Knitting Mistakes, Fixing Dropped & Twisted Stitches

Written Guide: Common Knitting Mistakes, Dropped & Twisted Stitches

Fixing Knitting Mistakes with a Crochet Hook

Many common knitting mistakes are fixed by intentionally dropping a stitch off your knitting needles. This allows you to correct your mistake, then return the stitch to its place. When correcting a mistake, you will want to be sure to always put the stitch back onto the needles with the right leg in front, if you do not want a twisted stitch.

Using a crochet hook helps when fixing mistakes in knitting that a few rows back. Learn to fix mistakes with Liz @PurlsAndPixels

When you have knit several rows before you notice your mistake, dropping the column of stitches directly above your mistake will allow you reach the problem stitch and fix it. Then, you will re-loop the dropped stitches by climbing up the “ladder” of stitches, anchoring them back in place one at a time. When you reach the top, you can put the last stitch back on the needle and resume your project.

While this can be completed with just your hands, using a crochet hook makes straightening the column of stitches an easier task. Choose a crochet hook that is the same size or just a bit smaller than your knitting needles. Crochet hooks and knitting needles are both labeled with millimeter measurements, so you can easily compare sizes. Here, I am working US No. 7 (4.5 mm) knitting needles and a G (4.0 mm) crochet hook.

Examining Correct Knit Stitches

Before you can spot mistakes, you need to know what a proper knit stitch and purl stitch should look like. So, let’s first look more closely at what knit stitches typically look like, without mistakes.

The “knit-side” of a stockinette stitch pattern should be flat and should be completely made up of the V-shaped stitches.

This knit has no twisted or dropped stitches. Learn more about knitting mistakes with Liz @PurlsAndPixels.

If you examine a correct (untwisted) knit “V” closely, you will notice the point at the bottom of the “V” should stretch apart, like so: “ /”. Each half of the “V” is referred to as a “leg.”

An untwisted knit stitch is open, not crossed, at the tip of the "V" - a knitting lesson from Liz @PurlsAndPixels

Identify Twisted Stitches

Unlike a regular knit stitch, a twisted knit stitch will have its legs crossed.

Learn to identify twisted knit stitches and fix knitting mistakes with Liz @PurlsAndPixels.

Fixing Twisted Stitches

Fix a Twisted Stitch, Step 1:

You can find the complete step-by-step tutorial to fix twisted stitches on its own page. Go to full tutorial.

Identify Dropped Stitches

A dropped stitch is simply one that has fallen off the needles at some point in your work.

Fixing Dropped Stitches

Learn to fix dropped stitches with this knitting lesson from Liz Chandler @PurlsAndPixels.

Fix a Dropped Stitch, Step 1:

You can find the complete step-by-step tutorial to fix dropped stitches on its own page. Go to full tutorial.

Identify Slipped Stitches

A slipped stitch is an unworked stitch. This will cause one stitch to look much bigger than the others.

There will also be a loose loop on the purlside where you have slipped a stitch.

Fixing Slipped Stitches

Learn to fix slipped stitches with this knitting lesson from Liz Chandler @PurlsAndPixels.

Fix a Slipped Stitch, Step 1:

You can find the complete step-by-step tutorial to fix slipped stitches on its own page. Go to full tutorial.

“Tink” – Knit Backward to Fix Mistakes

Learn to knit backward ("tink") to fix mistakes in this knitting lesson with Liz Chandler @PurlsAndPixels.

Tink, Step 1:

You can find the complete step-by-step tutorial to knit backward to fix mistakes on its own page. Go to full tutorial.

Practice With My Knitting Patterns

Basic Washcloth and Face Scrubby knitting pattern by Liz @PurlsAndPixels

In this guide I was making a Simple Face Scrubby. Knit along with me. This pattern is part of my Simple Washcloth Knitting Pattern Collection.

Up Next

After you have learned to fix knitting mistakes, you may want to know how to unravel a few rows to correct a problem. Or undo an entire knitting project to reuse the yarn. Either way, knitters call this “frogging,” and I will show you how in the next tutorial.

Go Back to the Learn to Knit Index

How to Knit the Purl Stitch

Learn to make the purl stitch, a knitting lesson from Liz @PurlsAndPixels.

Now that you understand the knit stitch, you are ready to move on to your next knitting challenge: learning to make the purl stitch.

A purl stitch is essentially a backwards knit stitch. You will hold your yarn in front of your needles to create a “U” shaped stitch, which looks like a bump. If you make a knit stitch, turn it over: the back side of a knit stitch looks exactly like the front side of a purl stitch.

If you purl every stitch in every row of a flat knitted piece, you end up with a garter stitch pattern, just as you do when knitting with only the knit stitch.

Combining knits and purls can create all sorts of fun patterns and textures.

Two important things to remember when making the purl stitch:

  1. Hold the working yarn in front of your needles, and
  2. Insert your right needle into each stitch from back to front.

Below are both video and written tutorials to help you learn how to make a purl.

Video Guide: How to Make the Purl Stitch

Written Guide: How to Make the Purl Stitch

Step 1: Learn to make the purl stitch, with a knitting lesson from Liz @PurlsAndPixels.

Purl, Step 1:

Hold your yarn and needles as if to knit, except place the working yarn in front of your left needle.

Step 2: Learn to make the purl stitch, with a knitting lesson from Liz @PurlsAndPixels.

Purl, Step 2:

Insert your right-hand needle tip into the front loop of the next stitch on your left needle from back to front.

Step 3: Learn to make the purl stitch, with a knitting lesson from Liz @PurlsAndPixels.

Purl, Step 3:

With your left pointer finger, bring the working yarn down, towards you, over then behind the right needle tip. This will form a loop on the right-hand needle tip.

Purl, Step 4:

Pull the new loop of yarn on the right-hand needle through the first stitch on your left needle.

Purl, Step 5:

Slide the stitch you just worked into off the left needle, allowing the new stitch to remain on your right needle.

Purl, Step 6:

You have made your first purl stitch!

Repeat steps one through five each time a pattern asks you to purl a stitch. 

Practice With My Knitting Patterns

Free Beginner Face Scrubby knitting pattern by Liz @PurlsAndPixels.

If you purl an entire piece of knitting work, you end up with a garter stitch pattern, just as you do when knitting with only the knit stitch. Because of this, one way to learn and practice the purl stitch is to make a Face Scrubby with only purls. You can follow the free Beginner Face Scrubby Pattern, except replace all the knit stitches with purl stitches.

Basic Washcloth and Face Scrubby knitting pattern by Liz @PurlsAndPixels

When you are ready to start a new project, you can to learn to purl with the Basic Face Scrubby or Washcloth pattern found in my Simple Washcloth Knitting Pattern Collection. You will combine knits and purls in to create the traditional, smooth Stockinette stitch pattern that is commonly used in knitwear.

Learn to make the purl stitch, a knitting lesson from Liz @PurlsAndPixels.

Up Next

To help you “read” your knitting and make sure you are following patterns correctly, you can start to see the knit stitches as “V” shaped and the purl stitches as upside down “U” shapes. Learn to identify knits and purls next.

Go Back to the Learn to Knit Index