
As its name suggests, the “make one left” increase is a left-leaning stitch. Use this increase to add live stitches to a work that is already in progress. This will lengthen your knitted rows and enable you to shape your knitwear.
Note: When knitting a pattern that states “make one” it is usually safe to assume the pattern means make one left.
Below you will find both video and written guides to help you learn how to knit increases.
Video Guide: How to Knit Make One Left (M1L) Increases
Written Guides: How to Knit Make One Left (M1L) Increases

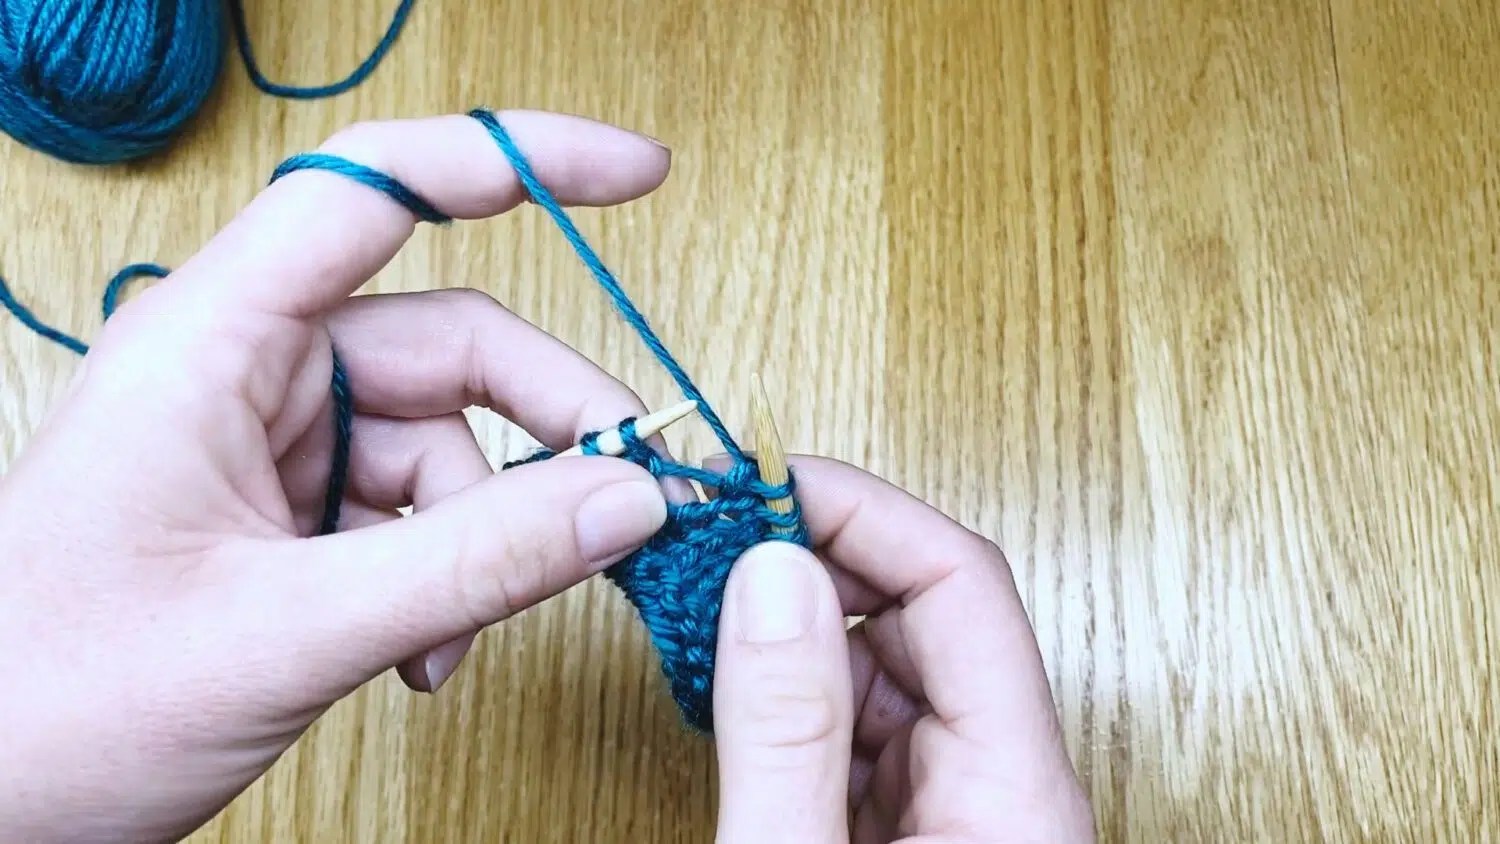
M1L, Step 1:
Locate the strand of yarn that is between two live stitches and just below your needles.

M1L, Step 2:
Insert the tip of your left needle under the strand between the live stitches from front to back.

M1L, Step 3:
You will now have a new live stitch on your left needle tip.

M1L, Step 4:
Insert the right needle tip into the back leg of the new live stitch.

M1L, Step 5:
With the right needle tip, grab the working yarn and draw it through the stitch.

M1L, Step 6:
Slide the stitch you have just worked into off your left needle, allowing the new stitch to remain on your right needle.

Return to the Knitting Increases Page to learn more increases.
Practice With My Knitting Patterns
Ready to try it?

Try knitting Simple Fingerless Gloves, which use increases to shape the thumb opening.

In my pattern for Basic Knit Mittens you will also use increases to make the thumb gussets.

Up Next

Once you have shaped the thumb opening of a glove or mitten, you will usually be instructed to slip the thumb stitches onto a stitch holder. In the next lesson I will show you how.
Go Back to the Learn to Knit Index