Unsure of which hat or mitten size to choose? Here are my standard sizing measurements. I generally follow the Crafty Yarn Council’s size guidelines when designing my knit and crochet clothing. My knitwear size guide should help you take your measurements and choose the size that will fit best.
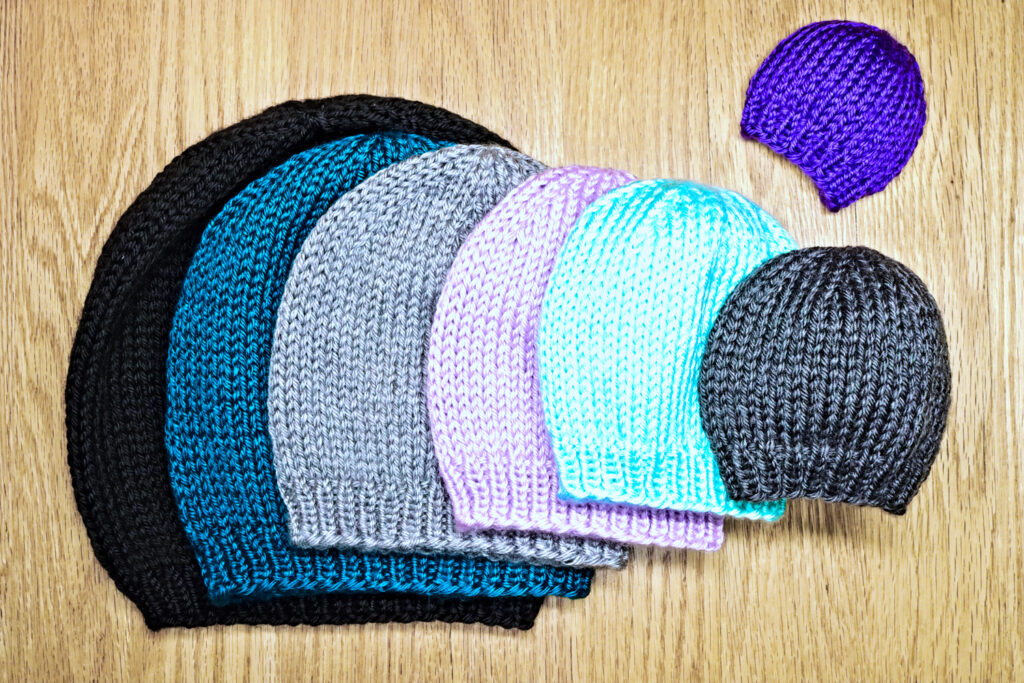
Hats
Adult Extra Large size fits adults with larger heads, or measuring 23 to 25 inches around.
Adult size fits most adults and teens, or heads measuring 21 to 24 inches around.
Child size fits children ages 2 – 14 years, or heads measuring 19 to 21 inches around.
Toddler size fits children ages 3 months – 2 years, or heads measuring 16 to 19 inches around.
Baby size fits infants from birth to 3 months, or heads measuring 13 to 16 inches around.
Preemie size fits extra small babies, or heads measuring 10.5 to 13 inches around.
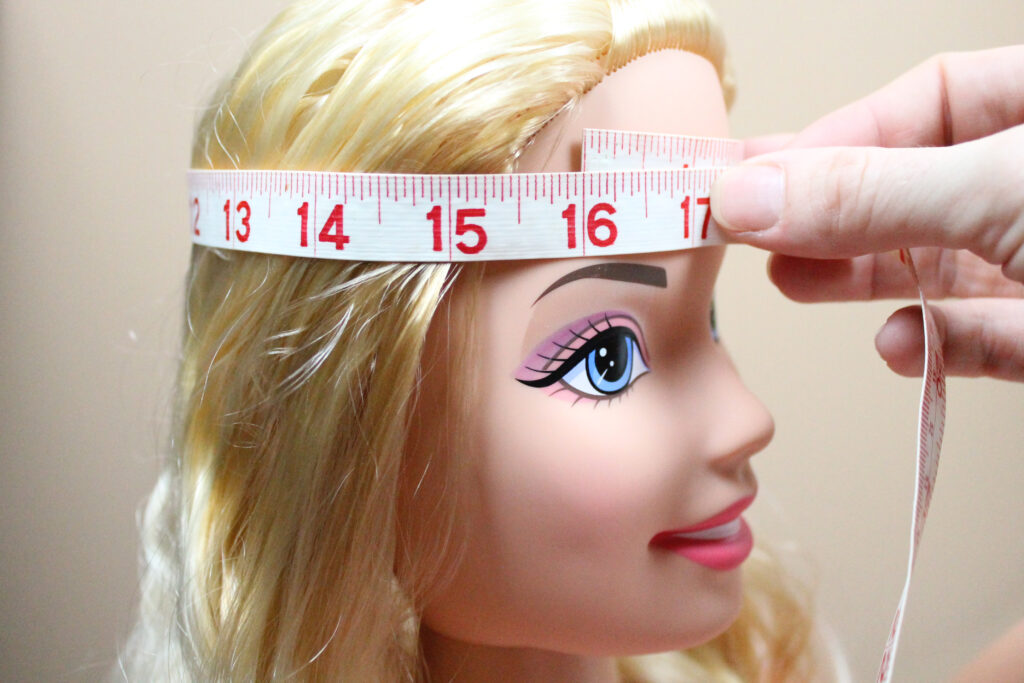
How to Measure for Hat Size
If you are unsure of the size you need, choose the size that most closely matches your measurements. You can easily find your head measurement if you have a soft measuring tape. Wrap the measuring tape around your head just above your eyebrows, as if you were wearing a headband low across your forehead. This will give you your head circumference (the length around your head). Use the length you measure as a guide to select your hat size.
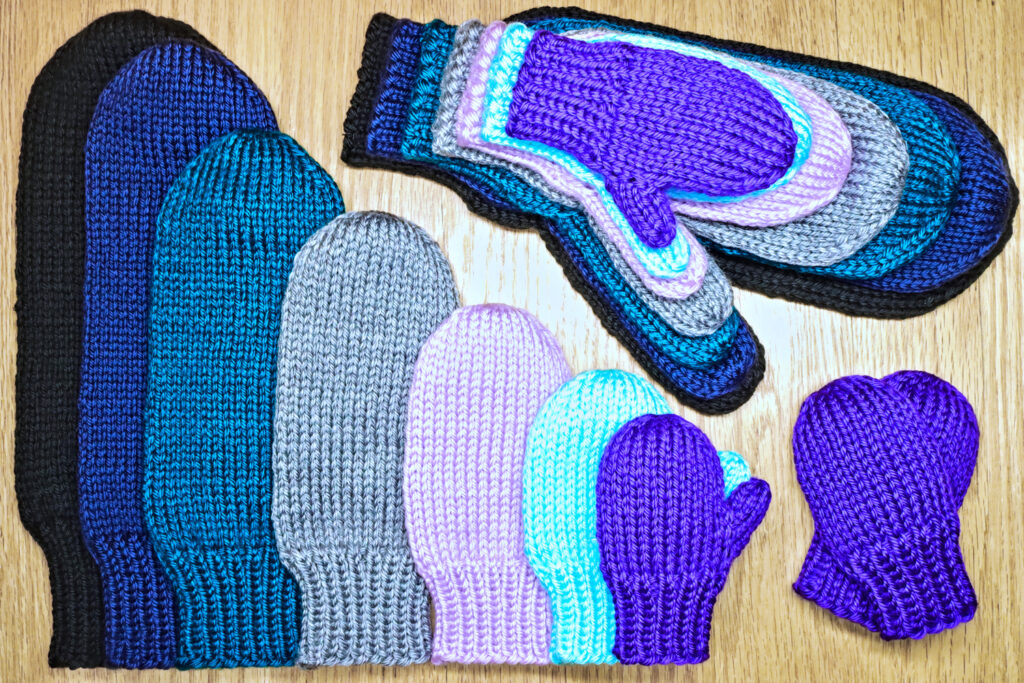
Gloves and Mittens
Adult Extra Large size fits men with larger hands or 9 to 11 inches around hand, without thumb.
Adult Medium/Large size fits men and women with larger hands or 7.5 to 9 inches around hand, without thumb.
Adult Small size fits women with small hands and older children or 6 to 7.5 inches around hand, without thumb.
Child size fits most boys and girls age 4-10 years of age or 5.5 to 6 inches around hand, without thumb.
Toddler size fits most boys and girls age 2 to 4 years of age or 4.5 to 5 inches around hand, without thumb.
Baby size fits most boys and girls age 0 to 2 years of age or 3 to 3.5 inches around hand, without thumb.
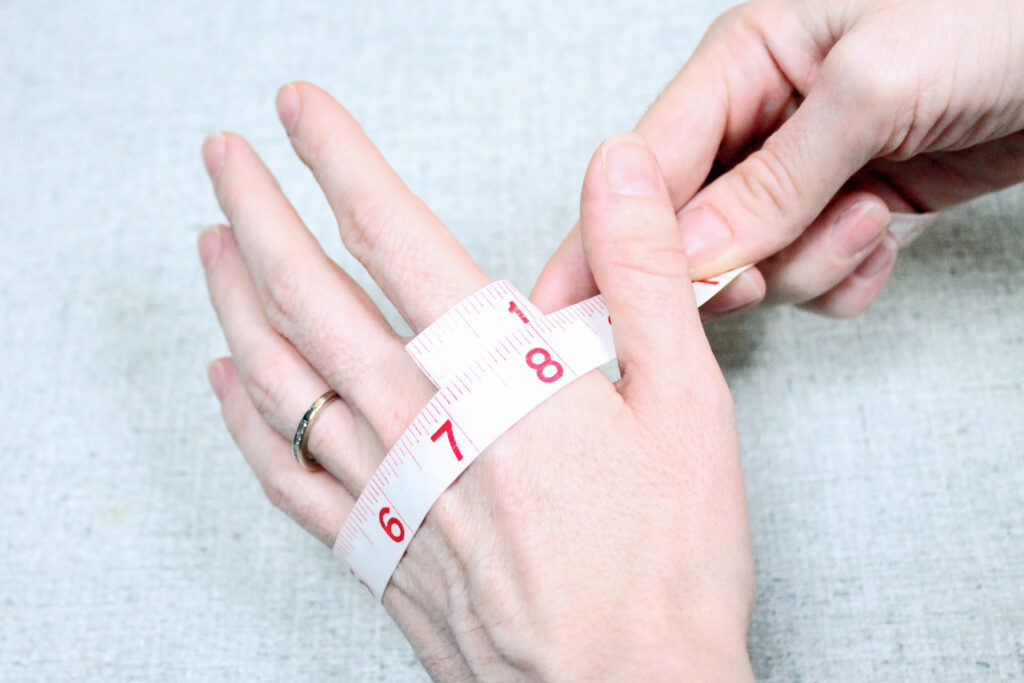
How to Measure for Glove Size
As with hats, choose the gloves or mittens that match your measurements most closely. To measure your glove size, wrap your measuring tape around the palm of your hand and measure it at the widest part of your hand that does not include your thumb. You will be measuring across your knuckles. Use this number to select your best fitting pair of gloves or mittens.
Love cozy knitting projects? Follow along on YouTube, Pinterest, and Instagram, or join the newsletter for more free patterns and gentle knitting tips.
This is a legacy colorwork chart created for knitters who want to incorporate the World of Warcraft Horde symbol into knitted projects. The chart is provided as-is for personal use and can be adapted to hats, accessories, or other colorwork designs.
About the Horde Symbol Knitting Chart
The Horde symbol was charted stitch by stitch so it can be worked directly into stranded colorwork or adapted for duplicate stitch or embroidery. Two small diamond motifs are included alongside the symbol to make the chart more practical for knitting by shortening long floats.
The chart was originally knit into an adult-sized hat using a basic knit hat pattern, with the chart substituted for solid-color rows. Multiple repeats can be used around a hat, or the motif can be centered as a single design depending on your stitch count and project.
Free Knitting Chart: World of Warcraft Horde Symbol
You are welcome to use this chart for personal projects such as hats, mittens, socks, sweaters, or other fan-inspired knits. The chart may also be used as an embroidery reference. Adjust sizing and placement as needed to fit your chosen pattern.
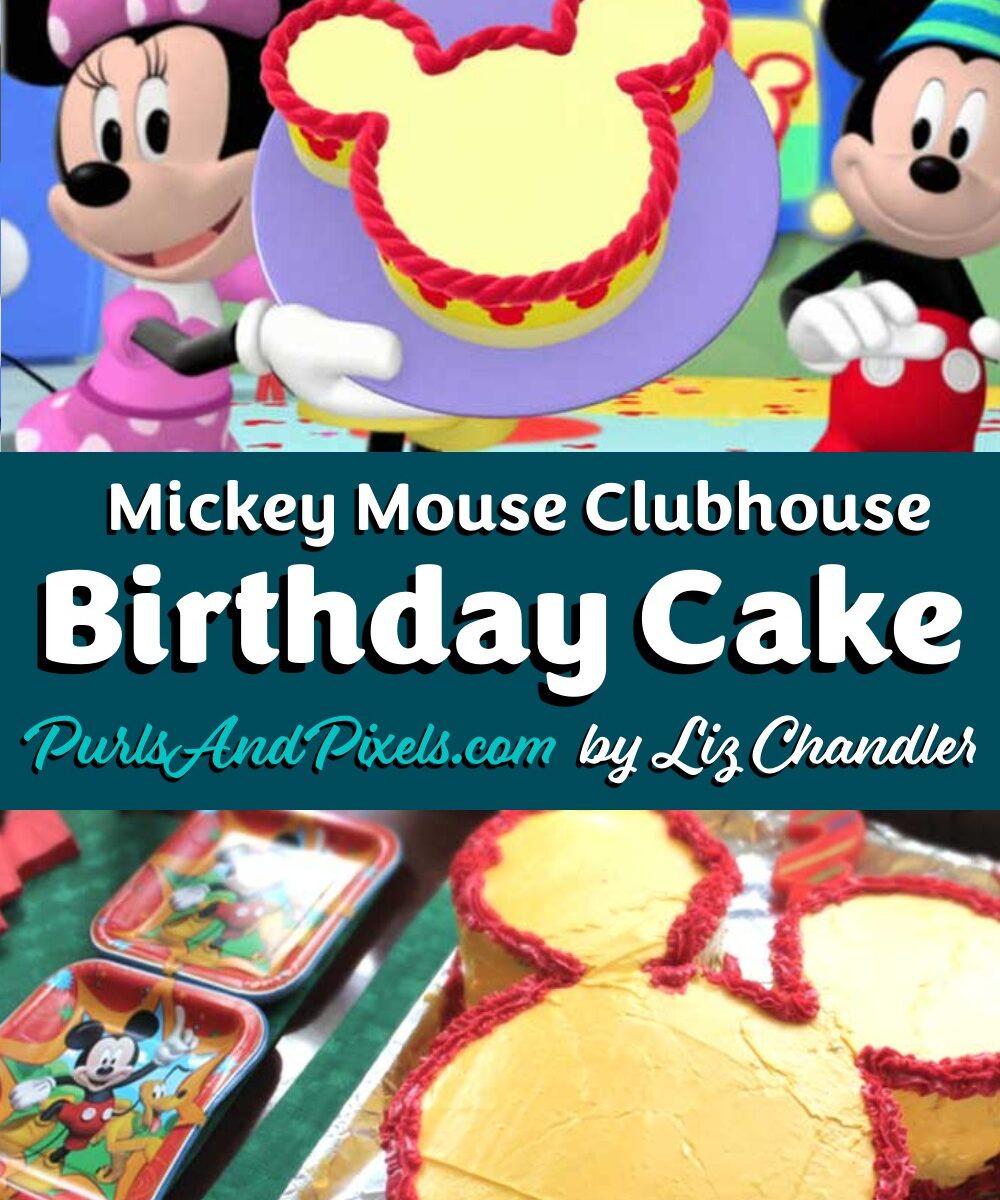
When my little one turned 2, he was completely obsessed with Disney Junior’s Mickey Mouse Club House. So, of course, I decided to throw him a Mickey themed birthday party. The most important part of the party was his mickey cake. Mickey Mouse has a birthday in one of the episodes, and his cake is a yellow and red Mickey head. I tried to mimic this cake, and here is how I did it.
How to Make Mickey’s Birthday Cake
Baking Pans
First things first, you will need three round cake pans to make Mickey’s Birthday Cake. One should be 8 inches and two should be 4 inches. I used two sets of these pans for my cake:
This will be a two layer cake. The 8 inch pan will make Mickey’s face, and the 4 inch pans will be his ears.
Cake Recipe
I used my all time favorite chocolate cake recipe for this cake. It comes from Hershey Kitchens and you can get the full recipe and see other people’s reviews of it here. I love this chocolate cake because it is extremely moist and fluffy. It has the consistency of a box mix cake, but the flavor of homemade. Love it!
If you already have a favorite cake recipe, use it. This Mickey cake is all about the cake’s shape, so as long as your recipe can be baked into round layer cake pans, you can use any flavor or recipe you desire.
You’ll need to make a double batch of cake. So, either double your cake recipe, or make the cake twice. I made the cake twice, since my mixer just won’t hold two batches worth of ingredients. And, since my oven isn’t enormous, I was worried all the cakes wouldn’t fit at the same time.
For the first set of cakes, divide your batter between one 8-inch cake pan and two 4-inch cake pans. Put a little more than half of the cake batter into the 8-inch pan, and divide the rest between the two 4-inch pans. Don’t overfill the pans or you’ll have spillage during baking.
Bake as directed in the cake recipe you are following.
While these three cakes are cooling on wire racks, repeat this process. So, make another batch of cake and divide it among an 8-inch pan and two 4 inch pans. Bake and cool these cakes as well.
Once your cakes are cool, you can stack them and decorate.
Decorating Mickey’s Birthday Cake
Stack the cakes
First, frost one of the 8-inch cakes with a filling or frosting of your choice. I used chocolate frosting, but this is where you can get creative with flavor.
Carefully stack the second 8-inch cake on top of the first.
Place two of the 4 inch cakes so they make Mickey’s ears. Frost them with your filling frosting, then stack the other 4 inch cakes on top. You should now have a two layer cake that looks like mickey.
Frost your cake
You’ll need two batches of vanilla frosting – or two cans if you use store bought like I did. Dye one can of the frosting with a generous amount of yellow food coloring. I used Lemon Yellow from the Wilton icing color set.
Frost the cake yellow, as smoothly as you can. Then pipe red along the top outside of the Mickey shape, then around the bottom of the cake.
All done! Hip Hip Hooray!
Did you try making a Mickey’s birthday cake for your little one? Let me know how it turned out. Comment below or share pictures with #PurlsAndPixels on Pinterest, Instagram, Facebook, or Twitter.
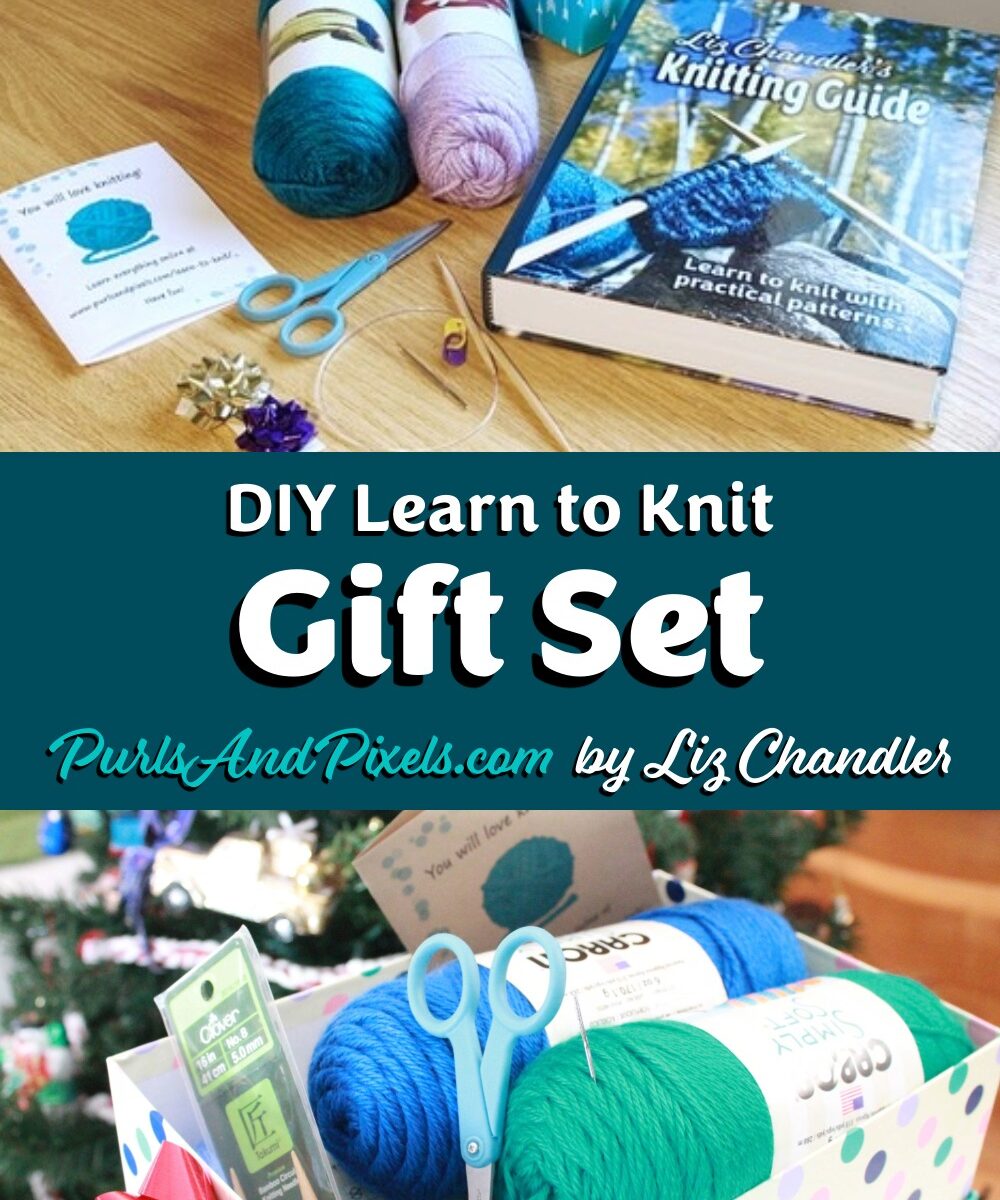
Do you have a friend who always says, “I wish I knew how to knit”? Well, it’s time to make their yarn dreams come true with a DIY Learn to Knit Gift Set! This thoughtful gift idea is perfect for birthdays, holidays, or just as a “thinking of you” surprise. Expectant and new moms love this too; it’s a cozy and creative baby shower gift that won’t end up in the ‘never used’ pile. Trust me; this kit has everything they need to knit their stress away.
Let’s dive in! Here’s your shopping list (with handy Amazon links) and a sprinkle of crafty advice.
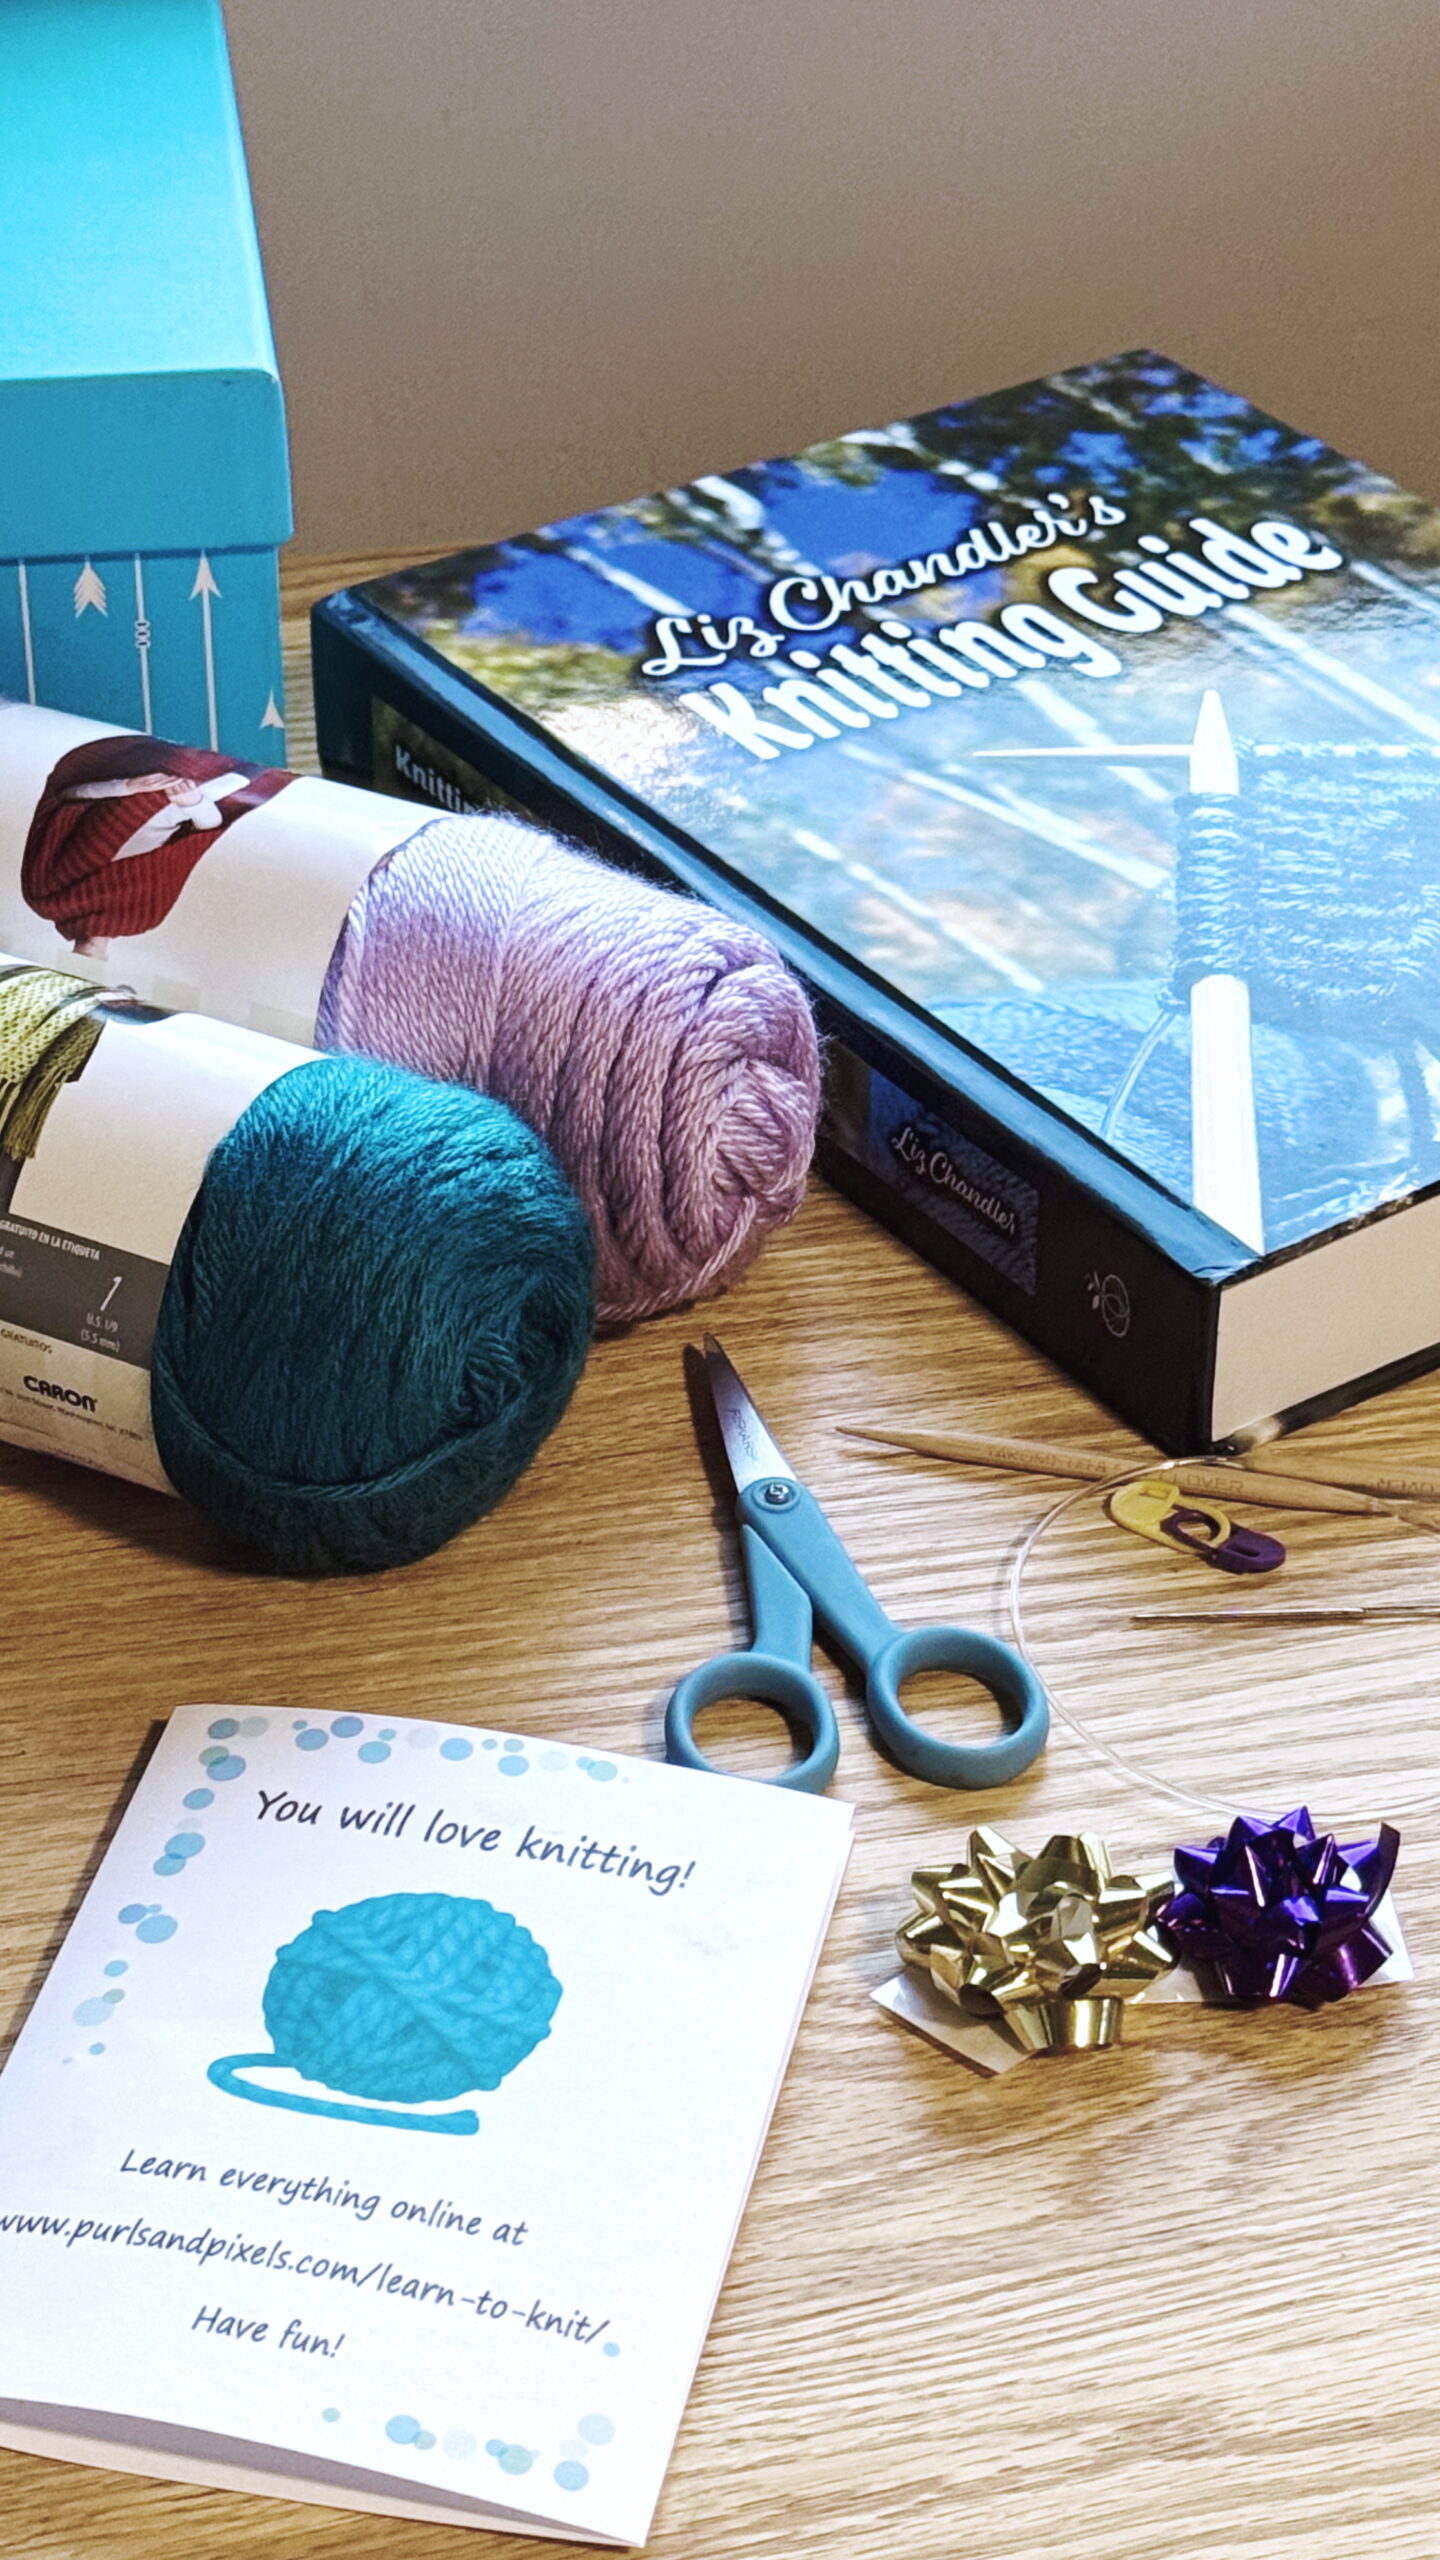
Let’s start simple! My top choice for beginner projects is Lily Sugar ‘n Cream 100% Cotton Yarn. It’s sturdy, easy to work with, and perfect for learning basic stitches while making something useful like a washcloth. Plus, it’s 100% cotton, making it an eco-friendly option for those who prefer natural fibers. Grab one or two balls of washcloth yarn in their favorite colors so they can start off on the right foot.
Once your new knitter masters the basics, they will quickly want to level up to something more suitable for scarves and hats. Be sure to include two balls of a scarf yarn as well. My go-to is Caron Simply Soft Yarn. This yarn is fluffy, squishy, and machine washable: everything a newbie needs for creating their first cozy scarf. Feeling eco-conscious? Opt for Patons Classic Wool Worsted instead (it’s biodegradable, while acrylic yarn isn’t).
No matter what brand you choose, just make sure it’s labeled “worsted weight.” This yarn thickness is beginner-friendly and will allow them to make a variety of projects. Pick one or two colors you know your recipient will love—there’s no need to overcomplicate things!
🪡 Knitting Needles
If your giftee gets confused by all the needle options (spoiler: they will), save the day with these two staples:
Circular needles don’t look like your grandma’s chopsticks: they’re even better. These versatile tools can knit almost anything, and they’re easy on the hands. Your new knitter will need both sizes to get off to a great start. Save the day, by giving them the perfect tools.
✂️ Sharp Scissors or Yarn Cutting Pendant
Yes, everyone has scissors. But sharp sewing scissors are a game-changer. They’re perfect for snipping yarn without fraying or splitting the fibers.
If this kit is for a little one or if you want a safer option, consider adding a yarn cutting pendant instead. It’s stylish, safer, and just plain cool. Check out this pendant that cuts yarn cleanly without the risk of sharp blades—ideal for on-the-go knitting projects!
🪡 Tapestry Needles
These big-eyed needles are what your new knitter will need to weave in yarn ends, essentially tidying up their masterpiece. A pack of six tapestry needles will do the trick. Bonus tip: If you’re making multiple gift sets, split the package up. Sharing is caring (and cost-effective).
Pair it with a Knitting Journal, where they can jot down notes, track projects, and doodle their creative ideas. Together, these knitting books make a killer combo for anyone just starting out.
🖊️ Gift Card with Link to Free Video Tutorials
Include a cute gift card with a link to my Free Learn to Knit Tutorials. You can print the card on pretty paper (bonus points for brown cardstock – it’s got that rustic chic vibe) and write a personal message. With this guide, they’ll be casting on and purling in no time. It’s like giving them a one-way ticket to the wonderful world of knitting.
Click to download the clear background card.
Click to download the teal background card.
🎁 Gift Wrap: Storage Box Edition
Time to wrap it up! Skip the flimsy gift bags and go for a decorative photo storage box or a sturdy tote. Not only do these make for pretty packaging, but they’re also practical for storing yarn, needles, and other knitting treasures. I’ve linked a few of my favorites on Amazon, but you can also find cute options at your local craft store.
Top it all off with a fancy gift bow, and voilà! Your DIY Learn to Knit Gift Set is ready to impress. 🥳
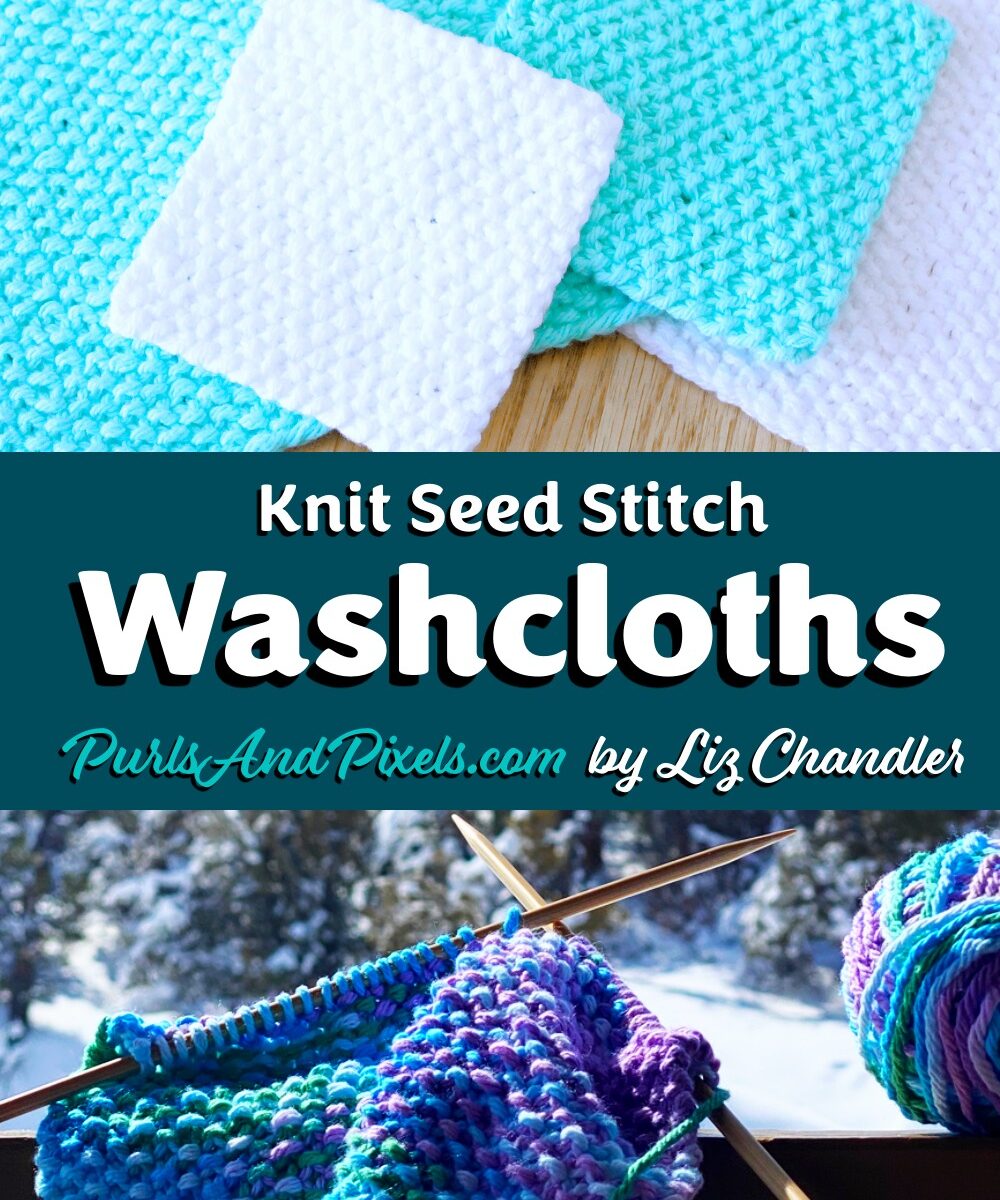
This seed stitch washcloth is designed as a practical, beginner-friendly project that teaches texture without complicated steps. Knit flat using simple repeats, it lets you focus on learning the seed stitch rhythm and maintaining even tension.
This article explains how to knit a seed stitch washcloth with clear, step-by-step instructions suitable for complete beginners. This free seed stitch washcloth knitting pattern uses worsted weight cotton yarn and alternating knit and purl stitches to create a soft, nubby fabric for dishes, face washing, or everyday cleanup.
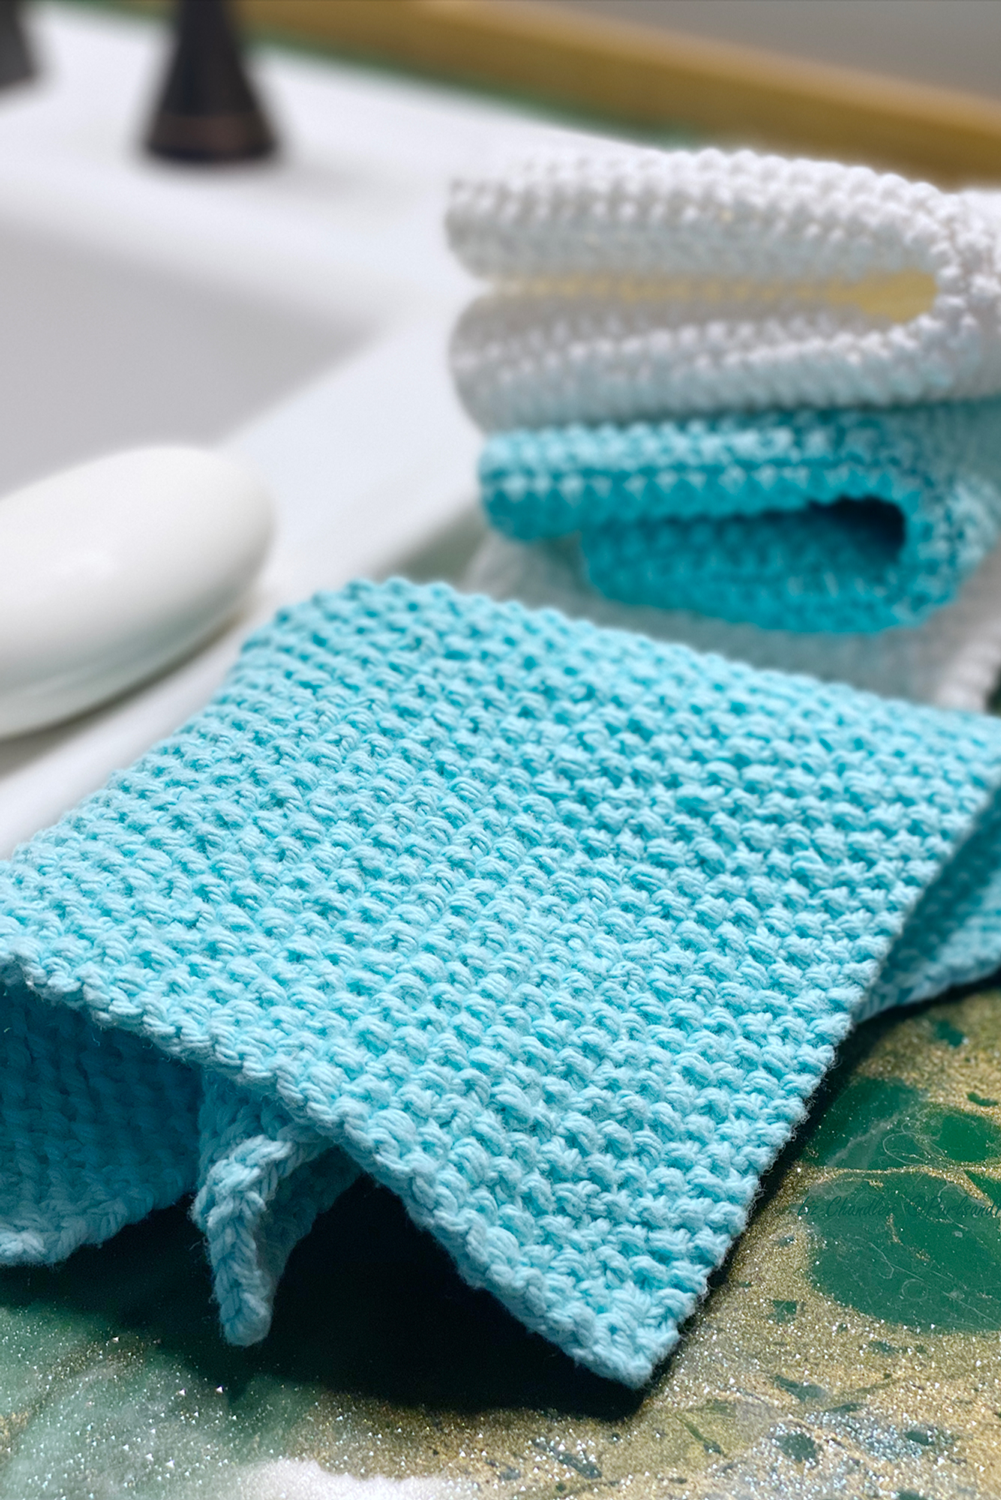
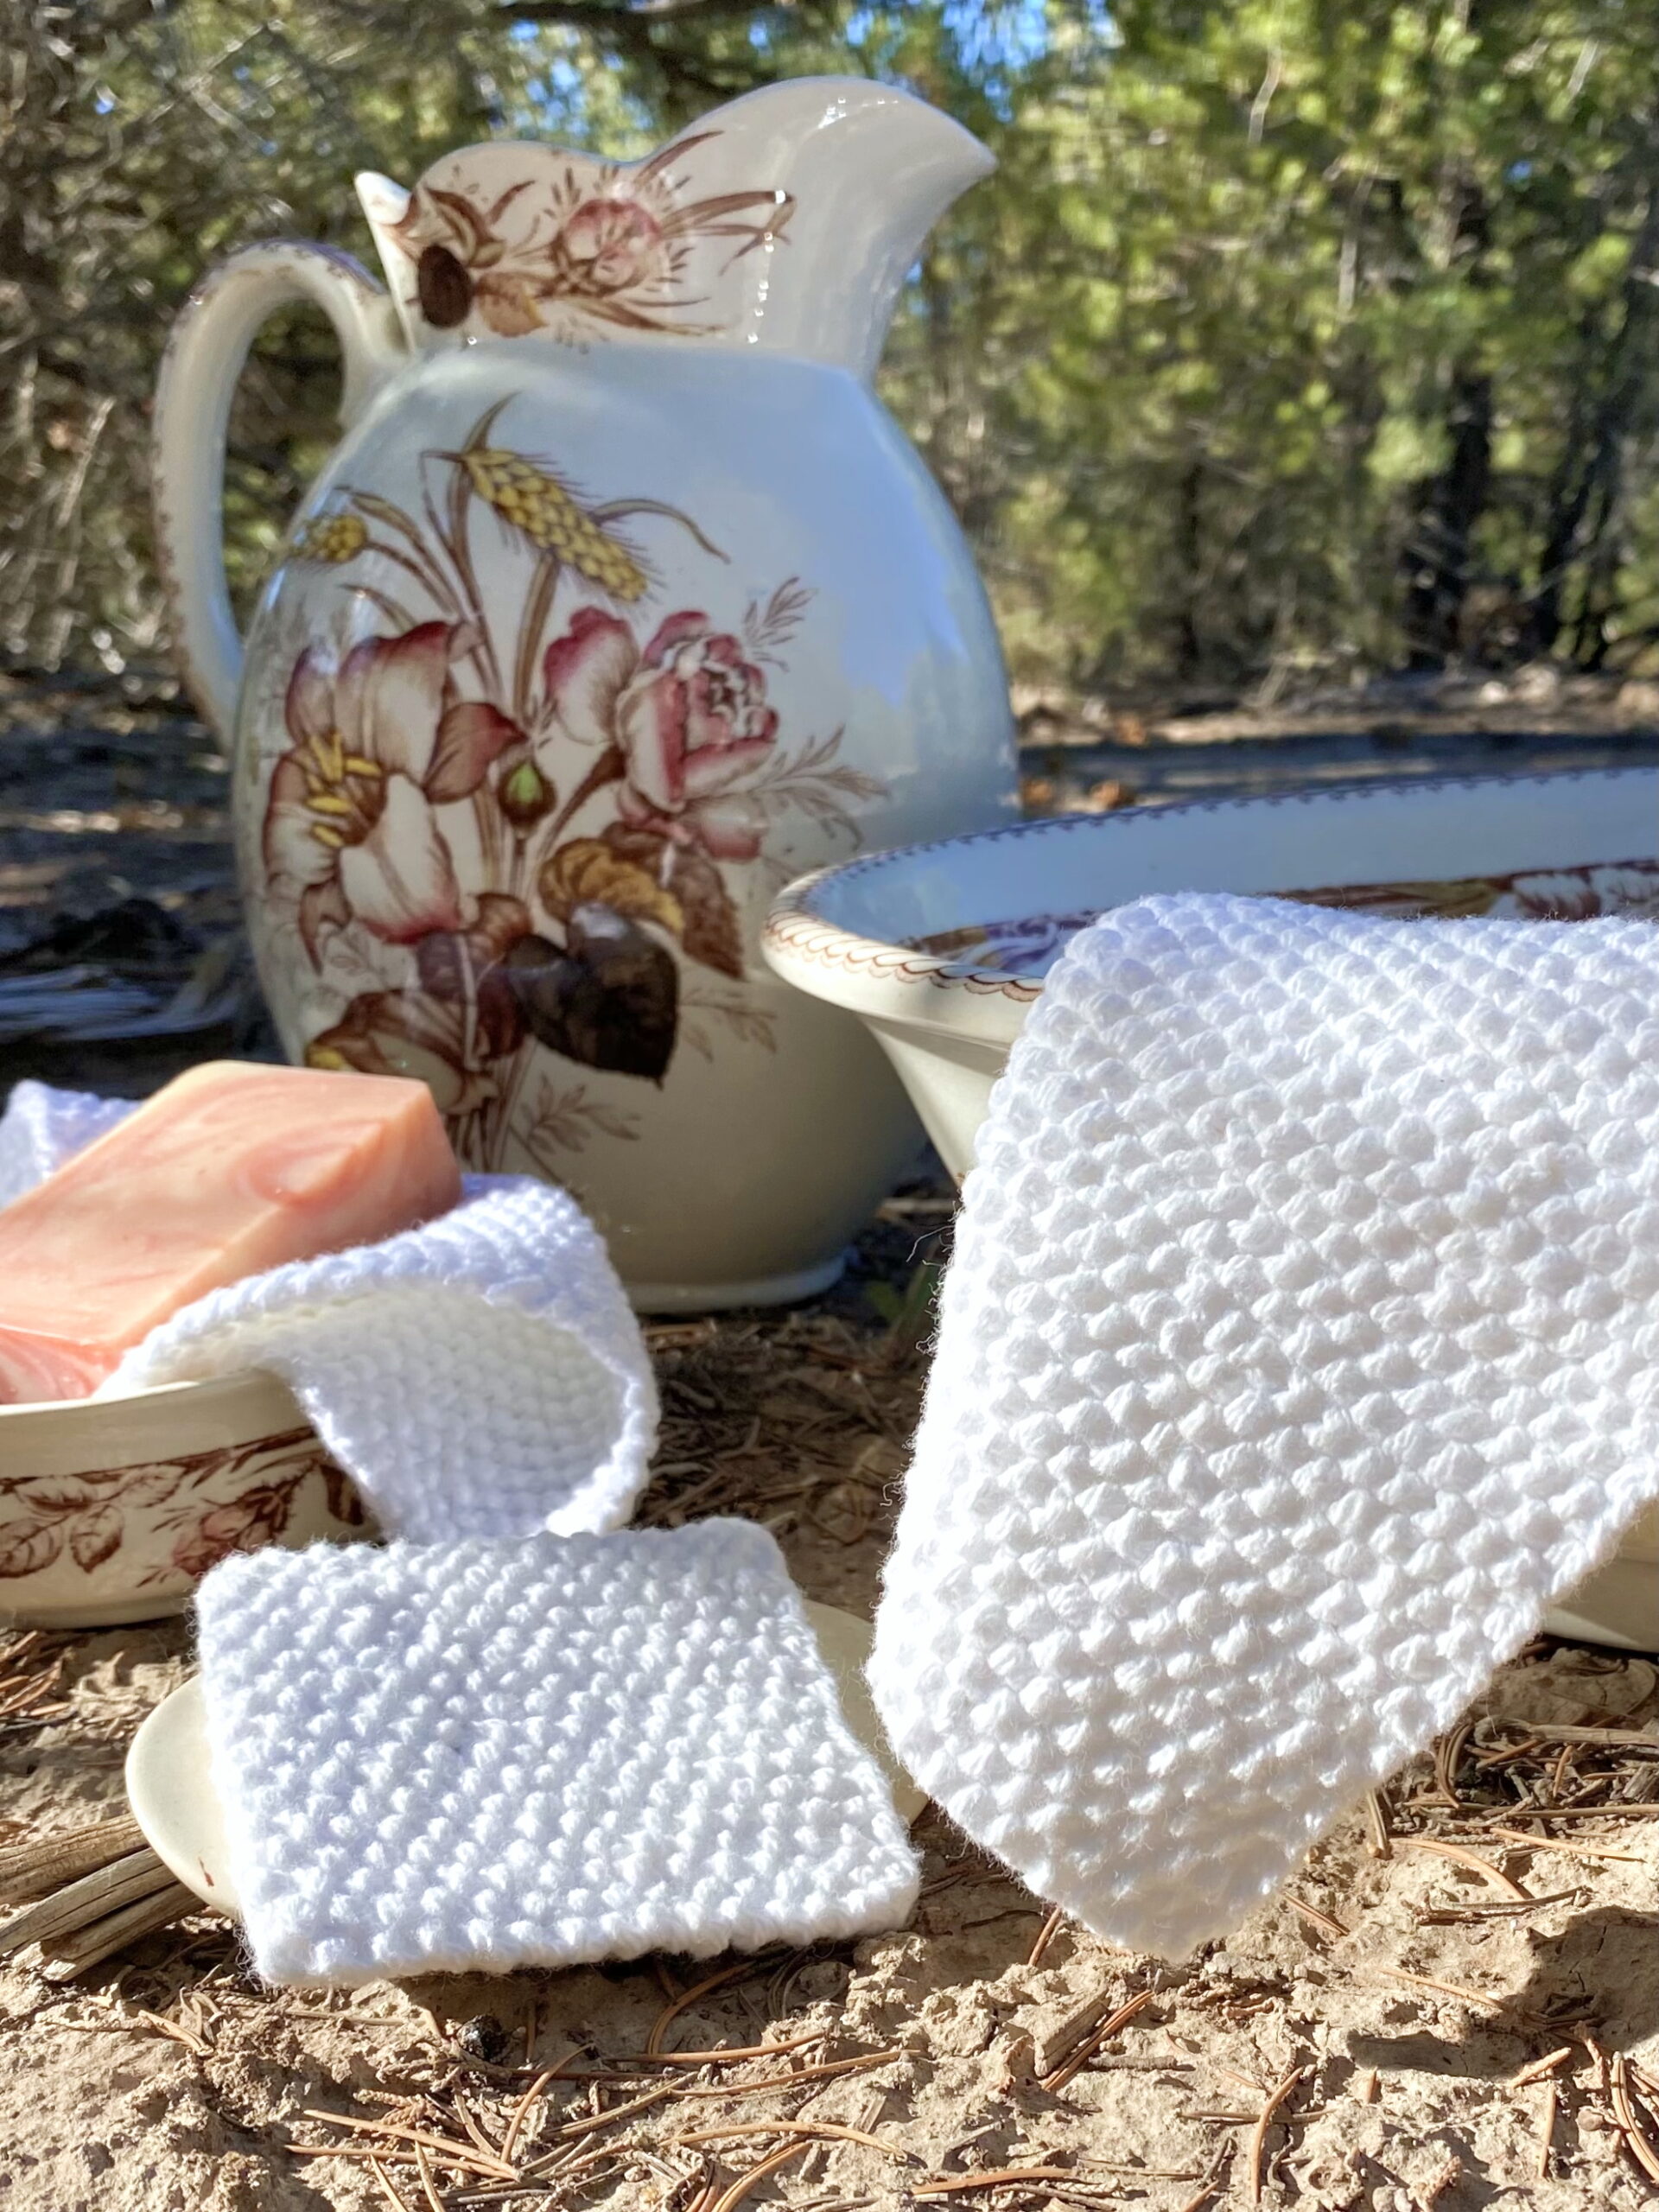
Knit with 100% cotton yarn, these reusable washcloths are eco-friendly, long-lasting, and way better than anything store-bought. Stack a few in cheerful colors, tie them with twine, and you’ve got a thoughtful handmade gift for baby showers, housewarmings, or just because.
Materials
Yarn
One 95-yard (2-ounce) skein of worsted weight cotton yarn. One washcloth uses about 71.25 yards (1.5 oz.).
Shown in Lily Sugar ‘n Cream 100% Cotton Yarn in “Robins Egg” and “White“.
*Weights estimated with Lily Sugar ’n Cream yarn; other yarn weights may vary.
19 stitches x 26 rows = 4 x 4 inches in stockinette stitch on US No. 7 (4.5 mm) needles. (Learn how to check your gauge here.) Exact gauge is not critical for this project.
This seed stitch washcloth is a beginner-friendly project that introduces texture through simple, repeating stitches. To make the seed stitch washcloth, you’ll only need to know how to:
Seed stitch is made by alternating knit and purl stitches, then switching the order on the next row. The result is a bumpy, textured fabric that looks more complicated than it is. Once you get the rhythm, it becomes a calm, repeating pattern.
As you knit, try to keep your stitches even on the needles. They should be snug, but not tight. The stitches should slide easily so you can insert your needle into each loop without forcing it.
Prefer to knit offline?
This pattern is free to read below, but if you’d rather print it or save it for later, I’ve created a clean, ad-free PDF version for you.
If you use cotton yarn, your finished washcloth will be machine washable. To keep your seed stitch washcloth looking its best, hand wash or machine wash separately on delicate in cold water. You may tumble dry on low heat.
This pattern is for personal use, gifting, and charitable donation of completed items. You may also sell handmade items created using this pattern. Do not copy this pattern and distribute it. If you’d like to share the pattern, refer your friends to my website, purlsandpixels.com so they may obtain a copy.
If you find any errors or have any questions, email purlsandpixels@gmail.com and I will do my best to help.
I’d love to see your finished work! Tag your photos with @PurlsAndPixels on Twitter or Instagram.
Love cozy knitting projects? Follow along on YouTube, Pinterest, and Instagram, or join the newsletter for more free patterns and gentle knitting tips.
Patterns often provide a “gauge” and ask you to “check your gauge” before you start. But what does that mean?
Knitting gauge is a way of measuring how big your stitches are. Gauge will change based on the size of your needles, the weight of your yarn, and the tightness by which you knit.
If you use a larger knitting needle, your knitting will have a larger gauge. Similarly, a smaller needle knitting up the same yarn will create a fabric with a smaller gauge.
But even when using the same needles and yarn, stitch size can vary from person to person; it depends on how tightly they each loop the yarn around the knitting needles.
Why Do Patterns Include Gauge Instructions?
Knitting patterns contain gauge instructions to help you ensure you make your finished object the same size as the author’s finished object. If your gauge is bigger (you knit more loosely) than the pattern-writer’s gauge, you will knit an item that is too big. On the other hand, if your gauge is smaller than the pattern-writer’s gauge (you knit more tightly), you will knit an item that is too small.
Usually, gauge is checked by knitting a small practice square, called a “gauge swatch.” After knitting the practice square, you will measure it to see if your knit stitches are the same size as the author’s stitches.
Gauge swatches are most often made in one of two sizes: 1-inch by 1-inch or 4-inches by 4-inches. One-inch gauge swatches are typically used only on projects with very fine yarn and thin needles. The larger 4-inch gauge swatch gives you a more accurate estimate of your average stitch size, especially with heavier-weight yarns. The pattern writer will tell you what size gauge swatch to make in the gauge section of the instructions.
Below you will find both video and written guides to help you learn how to make a gauge swatch and measure it to ensure your knitting will be the correct size. I’ve also included some sample patterns for knitting borderless and bordered gauge swatches.
Video Guide: Knitting Gauge
Written Guide: Knitting Gauge Swatches
Do You Have to Make a Gauge Swatch?
I have been told that you should never, ever skip the gauge check. Well, that seems just a little daunting. So, here is my advice: when size matters, you should not skip a knitting gauge check.
For example, if you are making a blanket or dishcloth and you do not care if it turns out a few inches larger or a few inches smaller than the pattern predicts, go ahead and skip the gauge. Just know you will be gambling with the size of your knit.
On the other hand, you should absolutely check your knitting gauge when the size of your finished knit matters. Especially for wearable knits like hats, gloves, and sweaters, you will want to be sure to check your gauge. If you don’t, you may knit too tightly and end up with an extra small version of what you wanted. Or you could knit too loosely, and your work will be too big.
For the purposes of this guide, you can absolutely skip your gauge check for your first few projects. You may end up with a slightly small or slightly oversized washcloth at first, but this is fine, especially when you are learning.
To successfully make a gauge swatch, you will need to understand the basics of knitting. Once you have studied the cast on, knit stitch, purl stitch, and bind off, you will have the skills to make a gauge swatch. Come back and review this section when you are ready to make your first clothing item; you really should check your gauge for ear warmers, hats, gloves, and mittens.
Understanding Gauge Instructions in Patterns
Most patterns will contain a section phrased something like this:
Gauge: 19 stitches x 26 rows = 4 x 4 inches
These are the instructions for your gauge swatch.
The above gauge instruction example is telling you that a row of 19 stitches should measure 4 inches. A column of 26 stitches should also measure 4 inches. Stated another way, to check your gauge, you need to cast on 19 stitches and knit for 26 rows; the resulting square should measure 4 inches on each side.
If the pattern does not tell you otherwise, assume your gauge swatch should be knit in stockinette stitch (knit one row, purl one row, repeat).
Before you start, be sure you have enough yarn for both your project and your gauge square. You should always make your swatch with the same yarn and knitting needles you will use for the main project. If you do not account for the yarn you will use to make the gauge swatch, you may not have enough yarn left to finish your project.
Making Gauge Swatches
Once you have found the gauge instructions, you will need to knit your swatch. If you are in a hurry, you can make a quick borderless gauge swatch. Or, if you want to make your measurements more accurate, you can add a small border to your swatch; this will keep your swatch from curling and make it easier to measure.
Quick Borderless Gauge Swatch
The simplest way to check gauge is to cast on the number of stitches listed in the gauge pattern. Then, usually in stockinette stitch (knit one row, purl one row, repeat), you will knit the number of rows the gauge pattern calls for.
Example Pattern for a Quick Borderless Gauge Swatch:
The pattern reads, “Gauge: 19 stitches x 26 rows = 4 x 4 inches in stockinette stitch on US No. 7 (4.5 mm) needles.”
Row 1: Cast on 19. Turn. Row 2: Purl 19. Turn. Row 3: Knit 19. Turn. Rows 4 through 25: Repeat Rows 2 and 3. Row 26: Bind off with purl stitches.
Bordered Gauge Swatch for Accuracy
Because stockinette stitch tends to curl at the edges, it can be tricky to measure all the stitches on a borderless stockinette stitch square.
To reduce the curling, you can add a two row and a three 3 stitch border in garter stitch (all knit stitches). Do this by adding six stitches when you cast on. Knit two rows, and begin your stockinette square, adding 3 knit stitches on both ends of your rows. After you have knit all the gauge rows, end with a garter stitch border. If the gauge has an odd number of rows, you can simply add one knitted row and bind off. If the gauge pattern called for an even number of rows, knit those rows, turn, then add the following border: Knit 3, purl the number of stitches called for in the gauge, knit 3, turn. Bind off.
To clarify, let’s look at some example patterns that add a border to common gauge swatches.
Hats, baby blankets, and leg warmers are in a gauge of 18 stitches x 24 rows = 4 x 4 inches in stockinette stitch on US No. 8 (5.0 mm) needles.
Ear warmers, fingerless gloves, and mittens will be made in a gauge of 20 stitches x 28 rows = 4 x 4 inches in stockinette stitch on US No. 5 (3.75 mm) needles.
You can make bordered gauge swatches for each of these with the patterns that follow.
Example Patterns for Quick Bordered Gauge Swatches:
(This example adds a border to the borderless gauge swatch above.)
The pattern reads, “Gauge: 19 stitches x 26 rows = 4 x 4 inches in stockinette stitch on US No. 7 (4.5 mm) needles.”
If your gauge swatch looks a bit too big right off the needles, it may be because it needs to be prepared like you would prepare your finished knitted object. Weave in your ends, wash, and block the gauge square the same way you plan to do in the pattern. This step can be particularly important if you are using cotton, wool, or another shrinkable yarn. Washing and blocking your gauge swatch will show you how your finished object will wash and block. Cotton and wool, for example, shrink quite a bit in the wash.
Measuring Gauge Swatches
Measure Borderless Gauge Swatch
For a borderless gauge swatch, simply measure across and then top-to-bottom.
Measure Bordered Gauge Swatch
For a bordered swatch, make sure to measure the square inside the border you have created. The border should not be included in your measurement.
In our examples, the gauge swatch should measure four inches by four inches (4″ x 4″).
If your swatch matches the pattern’s guide, your gauge is correct. You can start knitting your main project.
Adjusting to Reach the Correct Gauge
If your swatch is too big or too small, you will need to make some adjustments. If the square is too big, select a smaller set of knitting needles and try knitting your swatch again. On the other hand, if your swatch came out too small, choose a larger set of knitting needles and try again. You will need to continue testing needle sizes by making gauge swatches until your square is the correct size.
There are a number of ways to keep your place in a knitting pattern as you work. When following knitting patterns, it is important to pay attention to the details and instructions provided. Here are some tips to help you in following knitting patterns.
Read the pattern carefully:
Start by reading the entire pattern before you begin knitting. Make sure you understand the abbreviations, symbols, and techniques used.
Take note of pattern repeats:
Many knitting patterns have repeated sections. Repeated sections are often noted by asterisks surrounding the instruction. For example: *Knitting Instruction* would mean, “repeat the Knitting Instruction between these asterisks” Pay attention to these repeats and mark them if necessary. It will make it easier to maintain consistency throughout your project.
Check your gauge:
Always check your gauge before starting a project. Gauge refers to the number of stitches and rows per inch. It ensures that your finished project will have the correct size and fit.
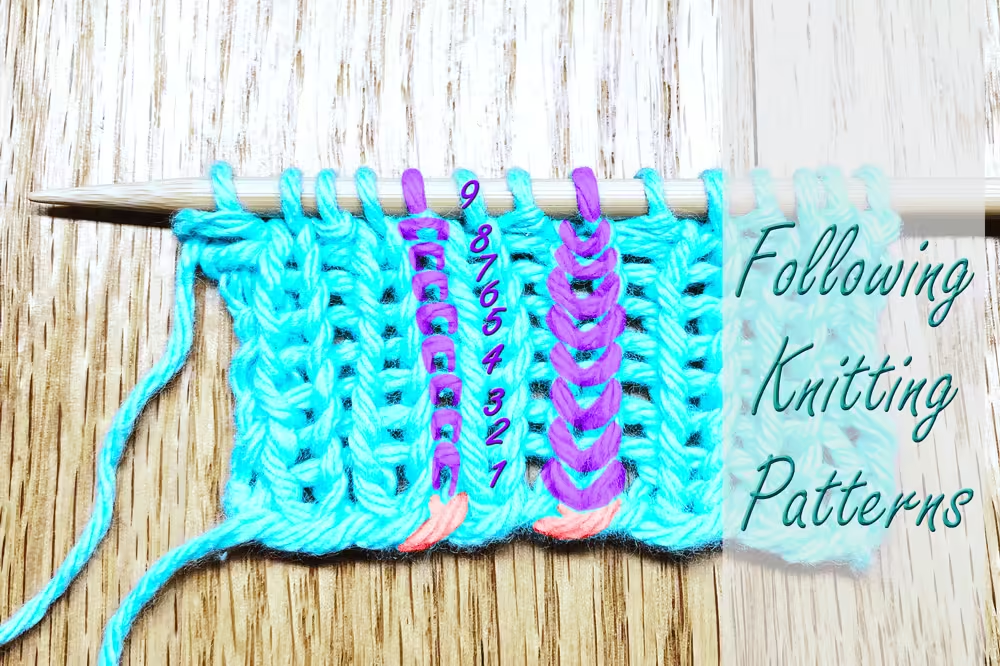
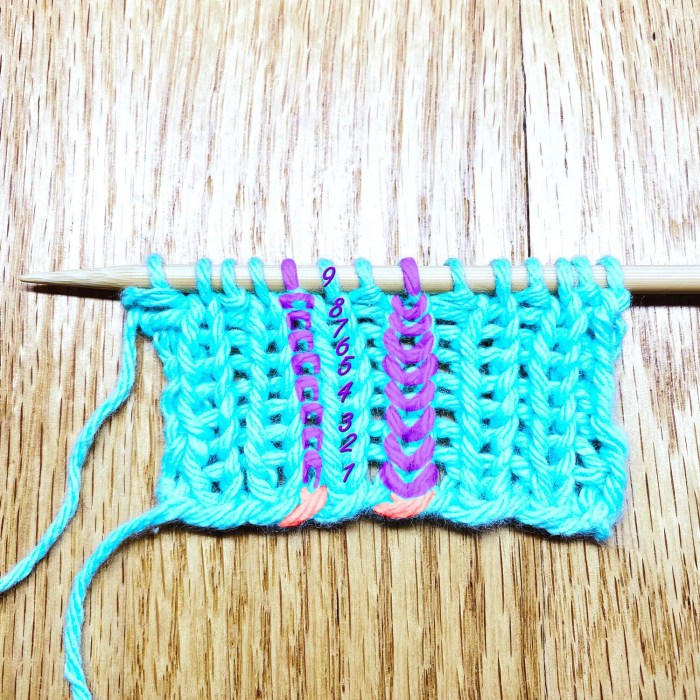
Use highlighters, sticky notes, or paperclips: Highlight or mark the specific instructions or sections you are working on. You can make tick marks on some scratch paper as you finish each row.
Or, try following along by aligning a paperclip with your current row in the knitting pattern. This can help you stay focused and prevent any confusion.
Count your stitches and rows:
Use stitch markers or a row counter to keep track of your stitches and rows. This will help you stay organized and ensure accuracy in your knitting.
You can also check your row-count by looking at your work.
Count each knit or purl stitch in a column, beginning at the bottom of the work.
If you started with a long-tail cast-on, don’t count the straight edge stitch.
Do count the loop on your needle.
Remember, practice makes perfect. As you gain experience, you will become more comfortable with interpreting and following knitting patterns.
Now, choose a pattern and start a new project. Happy knitting!
Now that you’ve learned the basics, let’s work on perfecting your skills. In the next lesson, we will learn how to make stitching more even by improving knitting tension.
Much like recipes in baking, knitting patterns try to break down a project into simple steps to help you create a copy of the designer’s creation. Looking at your first knitting pattern can sometimes be overwhelming; there tend to be many sections and a lot of abbreviations. But when you break them down, you will find that almost all knitting patterns are made up of similar parts.
Most patterns structured in the same way. They will usually include:
Almost every knitting pattern will list the materials required to make the item exactly as the author did. You should see knitting needle sizes as well as a yarn suggestion. In most cases, the author has not attempted to make the item with more than one type of yarn. Often, they have only knit it in one color. If you wish to replicate the pattern exactly, you must find the recommended yarn.
Substituting Materials
If you are unable to locate the yarn used by a pattern’s author, you can try substituting yarn. If you try this, you will need to ensure you select yarn in the same weight as the suggested yarn. Because the thickness of yarns in the same weight category can vary slightly, before you substitute, always make sure you work up a gauge swatch to ensure your knit will work out to be the correct size.
What is Gauge?
Your pattern will likely have a section that reads something like: “Gauge: 19 stitches x 26 rows = 4 x 4 inches in stockinette stitch on No. 7 (4.5 mm) needles.” This tells you how large each stitch needs to be for your final knitting project to be the correct size. Check your gauge when you need your knitted item to fit properly or match a specific dimension. Learn how to check your gauge in this free knitting guide.
Understanding Abbreviations
Knitting patterns are full of abbreviations and learning what they mean makes reading knitting patterns easier. Knitters use a shorthand to keep track of the stitches they make when writing a pattern. Knitting designers usually provide a key at the beginning of the pattern, which explains their abbreviations. Always refer to this key. Some designers do not follow the standardized abbreviations, and others will create their own abbreviations for unique stitches.
If you find a pattern with no key, you can follow the more standard knitting abbreviations. Below are some basic knitting abbreviations that most knitters use; this is also a complete list of the abbreviations used throughout my Learn to Knit Guide. You will want become familiar with these as you start learning to knit.
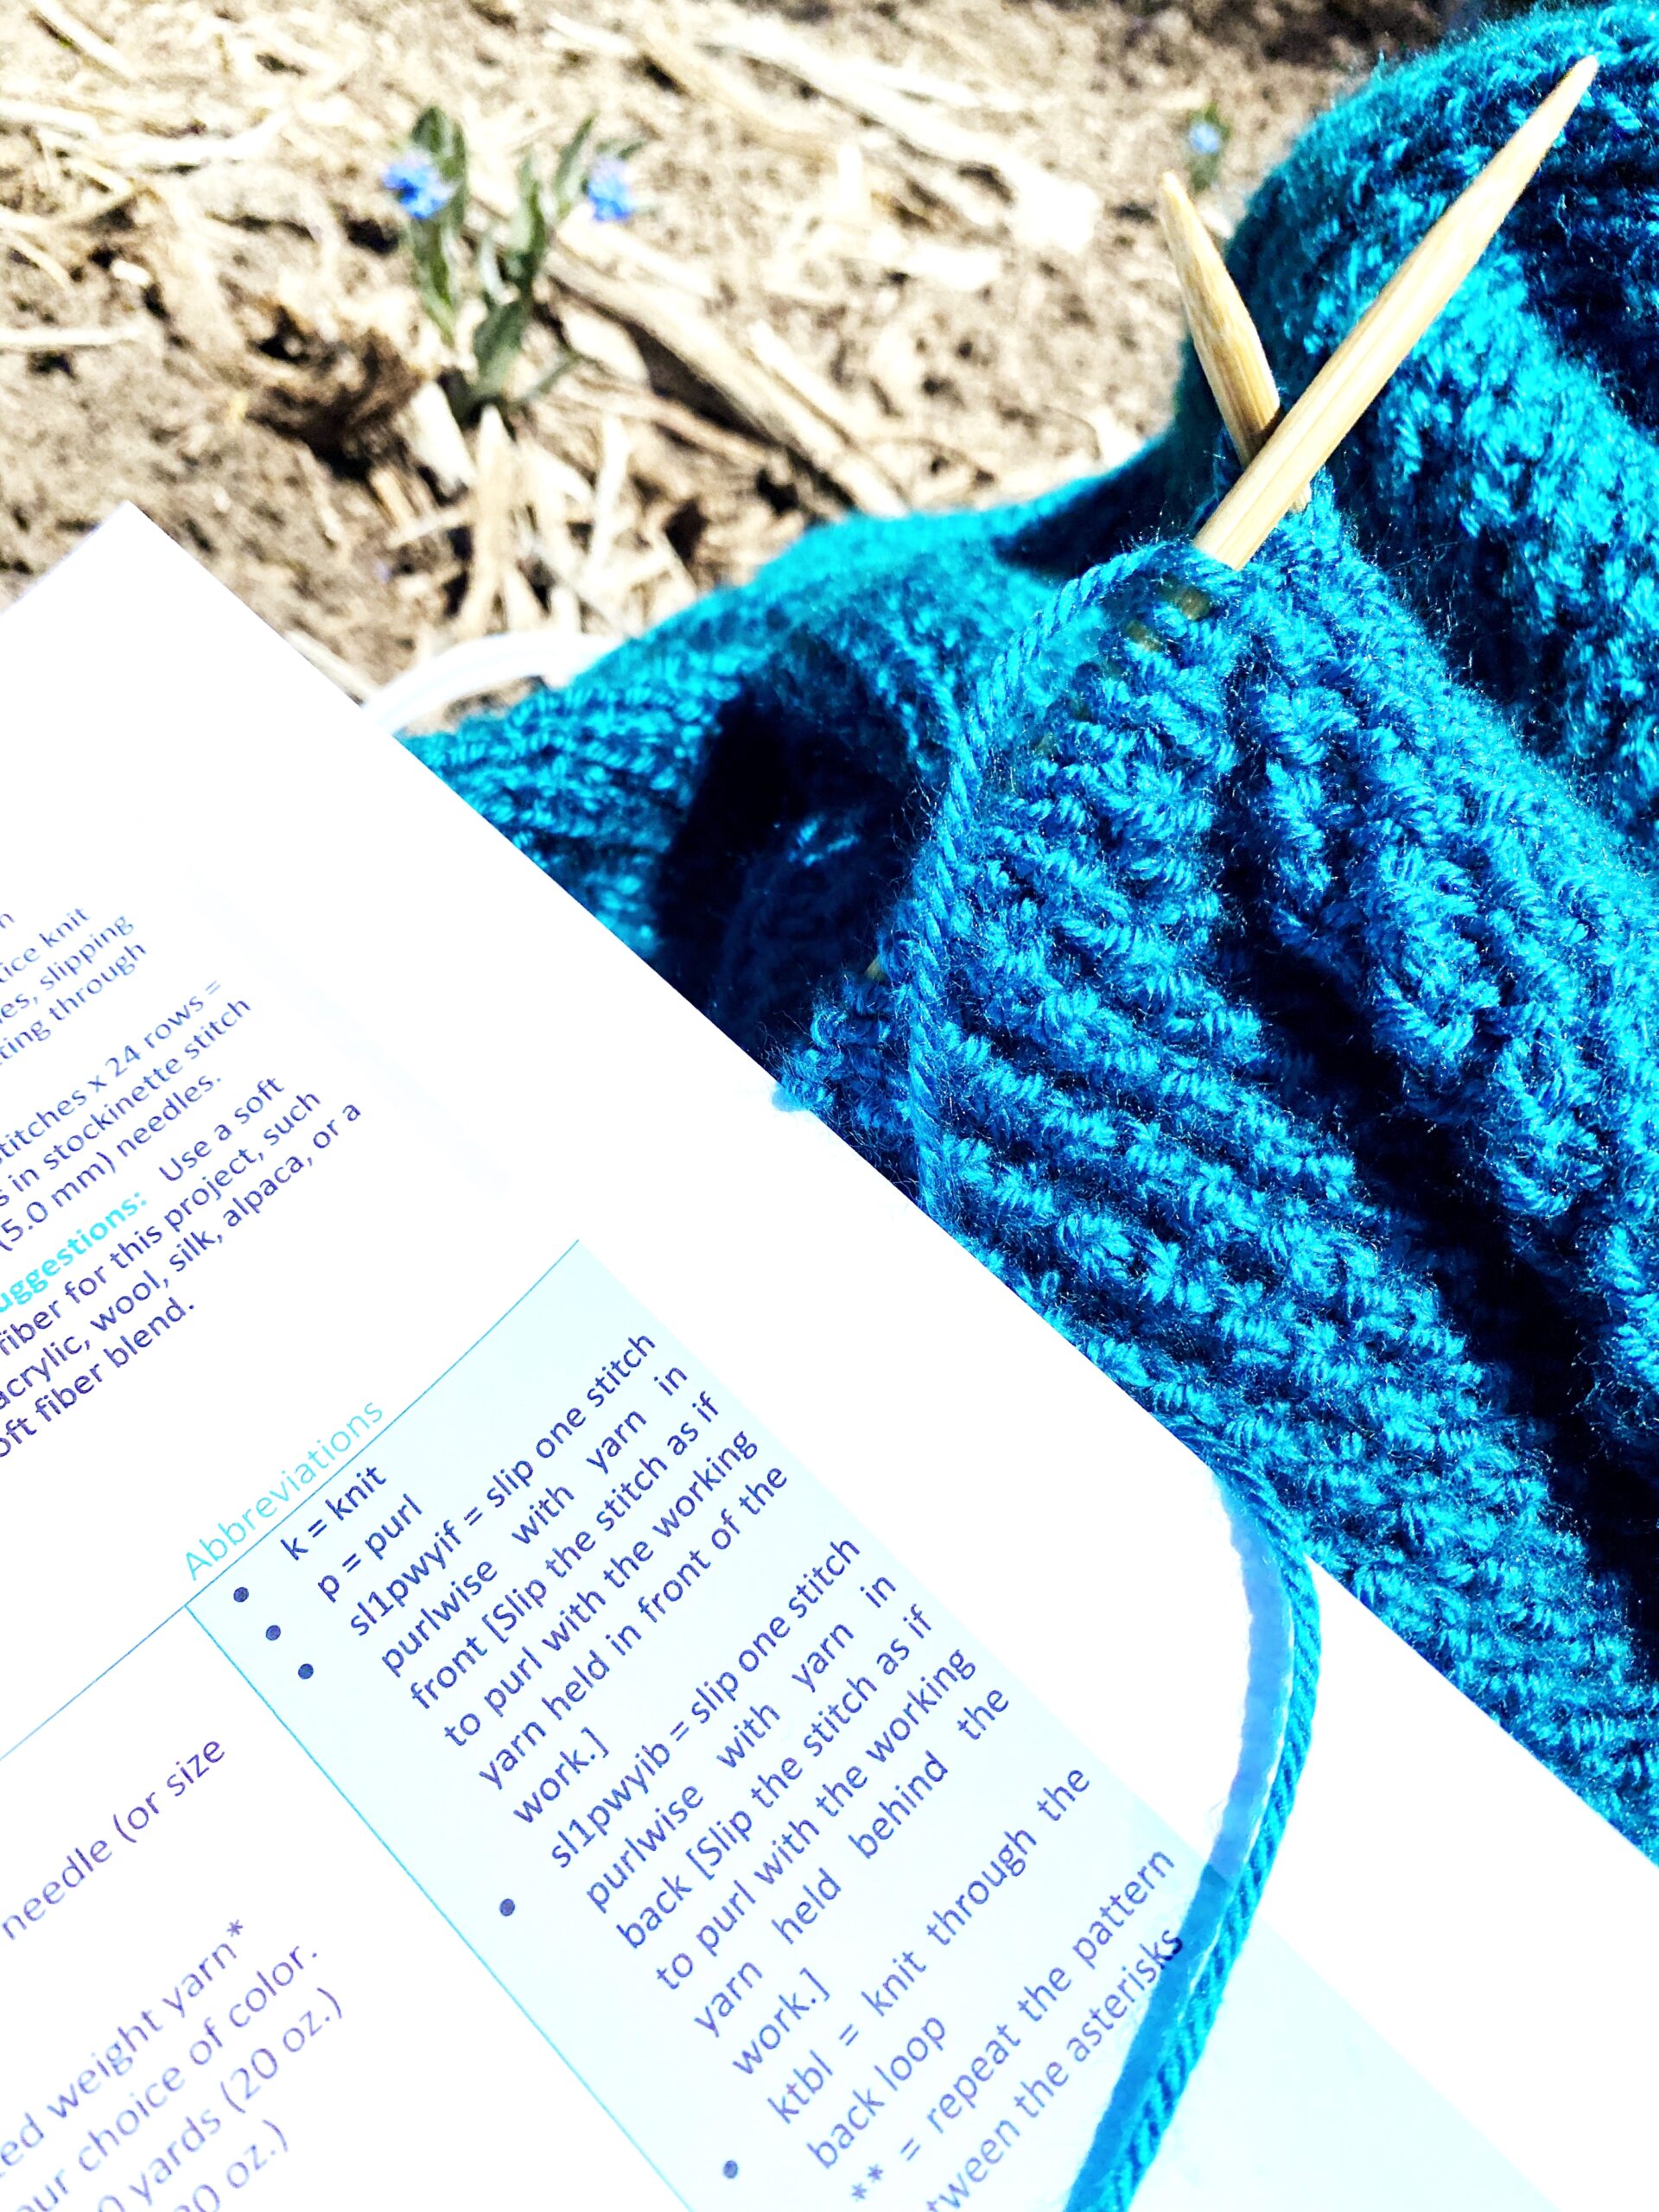
Knitting Abbreviations Used in My Learn to Knit Guide
sl1pwyif = slip one stitch purlwise with yarn in front
sl1pwyib = slip one stitch purlwise with yarn in back
sl = sl1pwyib = slip one stitch purlwise with yarn in back
sl marker = slip the stitch to which a marker is clipped purlwise with yarn in back [Slip the stitch as if to purl with the working yarn held behind the work.]
ktbl = knit through the back loop
k2tog = knit two together
ssk = slip, slip, knit
M1L = make one left [Pick up the strand between the stitch just worked and the next stitch from front to back with the left needle and knit into the back of it.]
M1R = make one right [Pick up the strand between the stitch just worked and the next stitch from back to front with the left needle and knit into the front of it.]
As your knitting becomes more complex, you will come across abbreviations for increasingly more advanced stitches. Many knitters follow the Crafty Yarn Council’s collection of knitting abbreviations as a standard way of shortening words in knitting patterns. If the pattern you are working does not come with a key, you can look online at the Crafty Yarn Council’s list of standard knitting abbreviations, which can be found at: https://www.craftyarncouncil.com/knit.html.