Super-Bulky Knit Hat – Free Knitting Pattern

Super bulky knit hats made with the free knitting pattern, laid on a table and modeled on a child and adult.

This super-bulky knit hat is intentionally designed as an early knitting-in-the-round project and has been used successfully by kids and adult beginners learning to knit. The pattern limits techniques to the knit stitch, uses simple circular construction, and works with thick yarn so stitches are easy to see and the motion stays consistent from start to finish. There is no purling, no stitch pattern changes, and no shaping decisions to make until the final section of the hat.

This article explains how to knit a super-bulky hat, with step-by-step instructions suitable for complete beginners. You will knit in the round using only the knit stitch, then finish the top of the hat to create a warm, wearable beanie that fits most heads, with a baby size included.

Super-bulky hats made with knit stitches on an adult and child outside in the snow.

On this page: About · Materials · Gauge · Skills used · Instructions · Care · Sharing

About This Super-Bulky Knit Hat

This hat is designed to make knitting in the round feel approachable. Once you join your stitches, you knit every round and watch the hat grow upward. There are no stitch changes and no pattern repeats to memorize.

The super-bulky yarn makes each stitch easy to see and hold, which helps kids understand how knitting in the round works. When finished, the hat is warm, soft, and sturdy enough for everyday winter wear.

Materials

Knitting Needles

Yarn

One 106-yard (6-ounce) skein of super-bulky (No. 6) yarn* (shown in Wool-Ease Thick and Quick by Lion Brand Yarn “Bluegrass”), in your choice of color).

  • Baby size uses approximately 21.2 yards (1.2 oz.)
  • One-Size-Fits-Most uses about 58.3 yards (3.3 ounces)

*Weights estimated with Wool Ease Thick & Quick by Lion Brand Yarn; other yarn weights may vary.

Notions

Gauge

10 stitches x 18 rows = 4 x 4 inches in garter stitch on No. 13 (9.0 mm) needles.
Gauge is typically measured in stockinette stitch, and because this hat is worked in the round using only the knit stitch, the finished fabric is stockinette. However, gauge is measured in garter stich here for consistency with the other kids’ knitting patterns. Exact gauge is not critical for this project.

Abbreviations

k = knit

Skills Used

This super-bulky knit hat is a great first project for knitting in the round because it is simple, repetitive, and easy to follow. To make the super-bulky knit hat, you’ll only need to know how to:

This hat is knit in the round using only the knit stitch. The brim curls naturally, so no fancy stitching is required. Repeating the same motion as the hat grows is a great way to build confidence and get comfortable knitting in the round.

Try to keep your stitches snug, but not tight. They should slide easily on the needle so you can insert your needle into each loop without forcing it. This pattern is a simple place to practice finding that balance.

Want to knit along with me? I’ve linked a video lesson on this page that shows the full hat from cast on to finishing. 🧣

Liz Chandler's Fast & Easy Chunky Knit Hat Free Knitting Pattern shown outside.

Prefer to knit offline?

This pattern is free to read below, but if you’d rather print it or save it for later, I’ve created a clean, ad-free PDF version for you.

  • Includes materials list and complete knitting instructions
  • Easy to print or use on your tablet
  • Supports my small business 💖
Cover of Super-Bulky Hat knitting pattern PDF by Liz Chandler

Instructions: Baby Size Super-Bulky Knit Hat

(10.5-inch to 16-inch [26.67-cm to 40.64-cm] head circumference)

Use the Long-Tail Cast On method. Knit in the round.

Row 1: Cast on 20 stitches.

Rows 2 – 21: k 20. (20 stitches) [Work should measure 6 inches at this point.]

Cut yarn, leaving an 8-inch tail. With a darning needle, draw yarn tightly through the remaining 20 stitches. Weave in ends.


Instructions: One-Size-Fits-Most Super-Bulky Knit Hat         

(16-inch to 25-inch [40.64-cm to 63.5-cm] head circumference)

Use the Long-Tail Cast On method. Knit in the round.

Row 1: Cast on 32 stitches.

Rows 2 – 33: k 32. (32 stitches) [Work should measure 11 inches at this point.]

Cut yarn, leaving an 8-inch tail. With a darning needle, draw yarn tightly through the remaining 32 stitches. Weave in ends.

Printable version of this free knitting pattern

Get the PDF version of this Super-Bulky Hat Knitting Pattern.

Care

If you use the materials listed above, your hat will be machine washable. For best results, hand wash or use a delicate cycle in cold water. Lay flat to dry or tumble dry low.

🛁 Read more Knitwear Care Tips

Liz Chandler wearing a super-bulky knit scarf and hat set made with Wool-Ease Thick and Quick yarn in the color Bluegrass.

Copyright, Sharing, and Selling Finished Items

©2024, Liz Chandler of PurlsAndPixels. Revised 2026.

This pattern is for personal use, gifting, and charitable donation of completed items. You may also sell handmade items created using this pattern. Do not copy this pattern and distribute it. If you’d like to share the pattern, refer your friends to my website, purlsandpixels.com so they may obtain a copy.

If you find any errors or have any questions, email purlsandpixels@gmail.com and I will do my best to help.

I’d love to see your finished work! Tag your photos with @PurlsAndPixels on Twitter or Instagram.

🧶 Next: Super-Bulky Candy Pillow Toy – Free Knitting Pattern

🧺 All Knitting Patterns

Don’t Miss a Stitch 💌

Love cozy knitting projects? Follow along on YouTube, Pinterest, and Instagram,
or join the newsletter for more free patterns and gentle knitting tips.

Knitting in the Sticks

Knitting in the sticks by Liz Chandler @PurlsAndPixels.

How Country Living Wove Its Way into My Practical Knitting Adventures

Life in the countryside isn’t just about picturesque landscapes; it’s also about how my knitting needles have adapted to thrive in the great outdoors. Let’s unravel the influence that knitting in the sticks (yes, pun intended 😉) has had on my own crafting adventures.

Spinning a Yarn: Just Me, the Mountains, and the Trees

Let me tell you the tale of how my knitting has evolved since I moved back to my small, Colorado hometown. With less than 2000 people in town and lots of State and National Forest to wander around, I meet more deer and turkeys than I do people. And, thank goodness for the space! Nature and country-living have, without a doubt, inspired my knits.

Wild turkey in the pinon forest photo by Liz Chandler @PurlsAnd Pixels. All Rights Reserved.

Yarn Adventures: Nature’s Color Palette

Living in the boonies means my yarn choices are a bit like picking berries – I go for the richest hues, found right outside my door. Whether it’s the muddy browns after a rainy day, the vibrant greens dancing in the trees, or the blue hues of the Rocky Mountain sky, my yarn basket mimics the countryside’s color spectrum.

Knitting in the sticks photo by Liz Chandler @PurlsAnd Pixels. All Rights Reserved.

Weather-Proof Knits: Seasons Got Style

Surviving the rural Colorado climate means knitting for all seasons. When winter hits, I’m like a knitting bear in hibernation, creating thick, cozy accessories that could keep a snowman toasty. Come spring, my knitting switches to “practical mode” with functional home goods, like hand towels and washcloths.

Knitting in the Sticks by Liz Chandler @PurlsAnd Pixels. All Rights Reserved.

Rural living also means limited choices. When the nearest mall is two hours away, fashion trends tend to fall behind. (We were still wearing those low-rise hip-hugging jeans well into the 2010s 🤫). That’s why I stick with classic, minimalist knitting designs that can survive changes in trends.

Farmyard Fiber Finds: Local Yarn Heroes

Let’s talk sheepish secrets! Living near farms means I’ve got access to some real woolly wonders. I snag local sheep’s fleece and alpaca wool fibers whenever I can. Craft fairs, art shows, and small-town festivals are filled with hidden fuzzy-gems. And trust me, these local fibers know how to keep you warm!

Fluffy Alpaca photo by Liz Chandler @PurlsAnd Pixels. All Rights Reserved.

Practical Patterns: Hardworking Hobbies

I’ve mastered rural traditions in knitting that are as practical as a good ol’ farmer’s handshake. Classic stitches and Fair Isle designs – they aren’t just pretty; they’re like the Swiss Army knives of knitting, ready for anything mountain life throws my way.

Tranquility: Peace Amidst the Pines and Purls

Here in my forest, a countryside symphony of chirping birds calm and entertain. As I weave together a new knitting project, songbirds whistle and hawks screech. Woodpeckers drum, while ravens provide a throaty chortle. Little Steller’s Jays mimic the other’s songs. The opus echoes down my little canyon when they awake. It’s the best sound therapy I can think of: simply soaking in the tranquility of the piñon forest.

Red Tailed Hawk Colorado Skies photo by Liz Chandler @PurlsAnd Pixels. All Rights Reserved.
Songbirds in the oak brush photo by Liz Chandler @PurlsAnd Pixels. All Rights Reserved.
Steller's Jay in front of a Full Moon photo by Liz Chandler @PurlsAnd Pixels. All Rights Reserved.

Knitting in the Sticks

Living in the sticks has added a practical twist to my knitting endeavors. From yarn hues inspired by nature’s whimsy to patterns that could handle a rural rodeo, my knitting journey is a playful dance with the practical, backwoods charm. So, here’s to needles clicking, sheep frolicking, and country living inspiring every purl and knit in my stash!

Knitting in the sticks photo by Liz Chandler @PurlsAnd Pixels. All Rights Reserved.
Knitting in the Sticks: Colorado Knitting inspiration, photo by Liz Chandler @PurlsAnd Pixels. All Rights Reserved.

Share this with Friends:

Knitting: A Timeless Resolution for the New Year

The perfect new year's resolution: learn to knit. Find free knitting lessons at PurlsAndPixels.com or learn with Liz Chandler's Knitting Guide, a complete beginners textbook.

As the calendar flips to a new year, many of us scribble down resolutions like “go to the gym” or “eat healthier.” But what if this year, you resolve to do something that doesn’t require spandex or saying goodbye to your favorite snacks? Enter knitting. It’s the New Year’s resolution that’s both productive and forgiving of your occasional snack attack. 🧶🥳

New Year, new knit. Learn a new hobby this year for a cozier more self-reliant lifestyle. Go to Liz Chandler's free online knitting lessons to start now at PurlsAndPixels.com.

Cozy and Good For You

In a world spinning faster than a knitter’s yarn, picking up those needles offers a relaxing break from life’s chaos. Picture this: you, cocooned in a comfy chair, needles clacking away like a tiny percussion section, while everyone else is stuck in traffic. It’s not just a hobby; it’s a magical retreat that says, “Sorry, I’m on ‘knit’ time.”

Apart from fashioning fabulous scarves and blankets, knitting is like a personal Zen garden. Studies rave about its stress-busting powers and ability to lower blood pressure. While others are in downward-facing dog at the yoga studio, you’ll be in your happy place, creating something utterly ‘knit-credible.’ Read more about knitting wellness here.

The perfect new year's resolution: learn to knit. Find free knitting lessons at PurlsAndPixels.com or learn with Liz Chandler's Knitting Guide, a complete beginners textbook.

And let’s not forget the knitting community – it’s basically a secret society disguised as a craft circle. Join one, and you’ll soon be swapping stories faster than a dropped stitch. It’s where rivalries over the best yarn blend turn into lifelong friendships.

The perfect new year's resolution: learn to knit. Find free knitting lessons at PurlsAndPixels.com or learn with Liz Chandler's Knitting Guide, a complete beginners textbook.

Plus, knitting isn’t just a way to avoid buying mass-produced stuff; it’s the ultimate flex of creativity. From a simple scarf to the Picasso of sweaters, every project you finish is a high-five to your inner artist.

This year, instead of sweating it out on the treadmill, why not create your own style while watching a marathon of your favorite shows? Pick up those needles, select some yarn that speaks to your soul, and knit your way to a year filled with cozy accomplishments and endless laughter.

Who knew that something as simple as two sticks and a ball of yarn could be the key to unlocking a year of creative fun? So, grab your needles, choose your colors, and let’s make this year ‘knit-tastic’! Cheers to a new year of loops, laughter, and knitted dreams coming true! 🥂

Learning to Knit

Try my free online knitting lessons, which teach you to knit from the absolute beginning. My YouTube Videos can also show you the basics of knitting. Or, order my book, “Liz Chandler’s Knitting Guide: Learn to Knit with Practical Patterns.” There you will find both lessons and timeless knitting patterns. You can make your knitting New Year’s resolution come true! 🎆

A Knitter’s Must-Haves

Explore the Knitting Supplies I Actually Use 🧶

Let’s chat real knitting. Not the curated basket‑on‑a‑white‑couch fantasy. Not the twelve‑hundred‑dollar set of heirloom needles your neighbor pretends she uses. This is the gear I actually knit with. These are the supplies that sit next to my coffee, the ones that get tossed in my tote bag, and the exact things I recommend to anyone learning or coming back to knitting.

Grab your yarn, your coffee, and zero perfection pressure. We knit here. We do not stress.

To make things easier to find, I’ve included Amazon affiliate links throughout this list. They’ll take you to the yarn and tools I usually order. Happy knitting!

Start Here: Your Beginner Knitting Kit

Brand new? Restarting after life took over? (Welcome back.💞 ) This simple setup will carry you through the first wins without overwhelm.

Choose your beginner knitting path:

  1. Fast + useful: Knit washcloths and face scrubbies (free pattern here)
  2. Cozy + wearable: Knit your first scarf (free pattern here)
  3. Fastest dopamine hit: Super‑bulky coaster (free pattern here)
Choose your first knitting project and grab knitting supplies to learn to knit. Will it be a face scrubby washcloth, a scarf, or a chunky coaster? Pick one and start your free knitting lessons with Liz Chandler @PurlsAndPixels.

Then grab:

I teach all the basics step‑by‑step here at PurlsAndPixels. Start learning here: Free Beginner Knitting Lessons.

Books and Learning

My Learn‑to‑Knit Book

Liz Chandler’s Knitting Guide: Learn to Knit with Practical Patterns

In addition to my free online lessons, you can learn to knit in my complete guide book. I wrote this book because nobody else had. My complete instruction manual for true beginners has full‑color photos for every single step and patterns you will keep using long after you learn.

My Practical Knitting Pattern Book

Liz Chandler’s Knitting The Simple Things: A Collection of Practical Patterns

Want all the patterns from my Knitting Guide without the knitting lessons? Grab Liz Chandler’s Knitting the Simple Things. My pattern-only book has 15 designs all in multiple sizes (65 total patterns are included). This high-gloss color-printed pattern book has all the classic knits you’ll want to knit over and over: washcloths, scarves, hats, gloves, and more!

Liz Chandler's knitting books will teach you to knit and give you patterns you'll want to make over and over again.

Yarn Staples

Buy what feels good in your hands. If you pick it up and your brain immediately goes, “ooooh, squishy!” that is your yarn.

Cotton

For dishcloths, towels, or anything you’ll wash often, Lily Sugar ’n Cream 100% cotton yarn is your best friend. It’s durable, absorbent, and feels amazing to work with.

Acrylic

If you want something smooth, washable, and easy to find, try Caron Simply Soft. It comes in every color imaginable and is perfect for scarves, blankets, and beginner projects.

Super Bulky

For instant-gratification knitting, you can’t beat Lion Brand Wool‑Ease Thick & Quick. It’s perfect for chunky scarves, cowls, or anything you want to finish fast and love forever.

Merino Wool

When you’re ready for something softer and more luxurious, try Malabrigo Merino Wool. It’s beautifully dyed, smooth as butter, and perfect for special gifts or long-lasting wearables.

What materials do I need to learn to knit or make a gift basket for a future knitter? Find out at PurlsAndPixels.

Knitting Needles

If you’ve ever wondered which knitting needles are best for beginners, here’s the short answer: it depends on what kind of knitter you are. Bamboo needles are warm to the touch, slightly grippy, and help keep your stitches from sliding off. They’re perfect for relaxed, meditative knitters or anyone just getting started. Metal needles, like Addi Turbo, are slick, fast, and great for those who love speed and precision.

Needles also come in many shapes. You’ll see straight, circular, and double point needles line the shelves. Each has its perks, so the best choice is whichever one makes your hands (and your mood) happiest. Circular needles are the most versatile of all; they can handle everything from scarves to hats and blankets without taking up much space. Here’s a quick guide that makes sense:

If you’re knitting washcloths or towels, use US No. 7 (4.5 mm) needles. For scarves and cozy basics, reach for US No. 8 (5 mm). And when you’re in the mood for fast, super‑bulky projects, go big with US No. 13 (9 mm).

If you’re only buying one kind of needle, circular needles around 16 inches long will handle most projects, from scarves to hats to washcloths.

Bamboo needles, like Clover Bamboo, are my go-to for calm, quiet knitting sessions. They have just the right grip to keep your stitches from slipping, and they feel warm and natural in your hands. Plus, they are much quieter to work with than metal needles that make a clinking noise when you work them.

Metal needles, like Addi Turbo, glide smoothly and are perfect for when you want to move quickly through a project. They’re strong, durable, and ideal for knitters who like speed with precision.

Bamboo Knitting Needles

Calm, cozy, gentle. Clover Takumi Bamboo when I want quiet knitting.

Metal Knitting Needles

Smooth and fast. Knit with ChiaoGoo Red Lace needles when caffeine meets ambition. I like the thick cable on this brand. And, they’re good for everything, not just lace. 😉

Interchangeable Circular Knitting Needles

I’ll be honest, these are an indulgence I have not yet tried. But, oh do I wish I could work with a set of interchangeable needles! They come with tons of needle tip sizes and cord lengths. It looks very handy to be able to mix and match! Here are some sets I’ve been drooling over. Have you tried them? Let me know how it went!

Finishing Tools

These little helpers make your finished pieces look tidy and professional. You’ll want tapestry needles for weaving in yarn ends, small scissors for trimming, stitch markers for tracking sections, and a row counter if you like to stay organized. Each tool makes your knitting just a little smoother.

If you want to see exactly how I use each one, check out my detailed post: Choosing Knitting Tools.

Keeping Notes

Always jot down what yarn you used and where you left off. You’ll thank yourself later. Whether you use a notebook or an app, keeping notes helps you remember what worked and what didn’t. It also saves you from trying to guess which shade of blue you used six months ago.

Smart Storage

Hear me out. Fancy baskets are lovely, but containers that stack, travel, and survive kids, dogs, and gravity make the best yarn holders. Practical wins.

Containers I unapologetically use:

Yarn Storage Ideas from Liz Chandler @PurlsAndPixels

Keep Learning

🧶 Learn to Knit with Liz Chandler’s Complete Free Lessons

Beginner’s Guide to Knitting and Free Skills Checklist

👋 Free Knitting Starter Kit

🧺 Choosing Knitting Tools for Beginners

🎁 Make a DIY Learn to Knit Set for a Loved One

🏡 Build a Cozy Lifestyle

Read More

Don’t Miss a Stitch! 🧶

Love cozy knitting projects? Join me on YouTube, Pinterest, and Instagram! And don’t forget to sign up for my newsletter to get more free patterns, helpful tips, and updates straight to your inbox. 💌

Beginner Knitting Patterns

Knitting patterns with only knits and purls by Liz Chandler @PurlsAndPixels.

Knitting Patterns with only Knit and Purl Stitches

Knitting patterns with only knits and purls by Liz Chandler @PurlsAndPixels.

Once you master knits and purls, you’ll be able to start making simple beginner knitting patterns. Beginning knitters can easily try making Garter Stitch, Stockinette Stitch, Seed Stitch, and Rib Stitch, because they are all made with only knit and purl stitches.

Garter Stitch

Knitting patterns with only knits and purls, garter stitch, by Liz Chandler @PurlsAndPixels.

Garter stitch is a knitting pattern that is composed of all knit stitches. When knitting a regular flat piece, you will knit all the stitches in one row, turn, then knit all the stitches in the next row, turn, and repeat. This creates a ribbed fabric that looks the same on both sides.

Garter stitch has a very simple abbreviation: “k” every row. 

Practice the garter stitch with my free Beginner Knit Scarf Pattern.

Stockinette Stitch

Knitting patterns with only knits and purls, stockinette stitch, by Liz Chandler @PurlsAndPixels.

Stockinette Stitch is one of the most widely used knitting patterns, which has smooth “knit side” and a bumpy “purl side.”

When knitting a flat piece in Stockinette Stitch, you cast on an even number of stitches, knit one row, turn your work, then purl one row and continue alternating knit and purl rows.

Stockinette is usually abbreviated in this way: c/o even number of stitches. *k 1 row,  p 1 row.*

Stockinette Stitch is used in the “Basic Washcloth and Face Scrubby” patterns, found in my Simple Washcloth Knitting Pattern Collection.

Knitting patterns with only knits and purls, stockinette stitch basic washcloths, by Liz Chandler @PurlsAndPixels.

Knit, Purl Rib Stitch

Knitting patterns with only knits and purls, rib stitch, by Liz Chandler @PurlsAndPixels.

Knit, purl rib is a frequently used stitch for ribbed borders on clothing like hats, mittens, and sweaters. To knit this type of ribbing, cast on an even number of stitches. *Knit, purl* repeat for one row. Turn, and repeat the same row. You will be knitting into the knit stitches and purling into the purl stitches of the row below.

Abbreviated, a rib pattern will often read: c/o even number of stitches. *k, p* every row. 

Try my free Ribbed Scarf pattern for practice on this stitch.

Learn to knit an easy Ribbed Scarf with this free knitting pattern by Liz Chandler @PurlsandPixels.
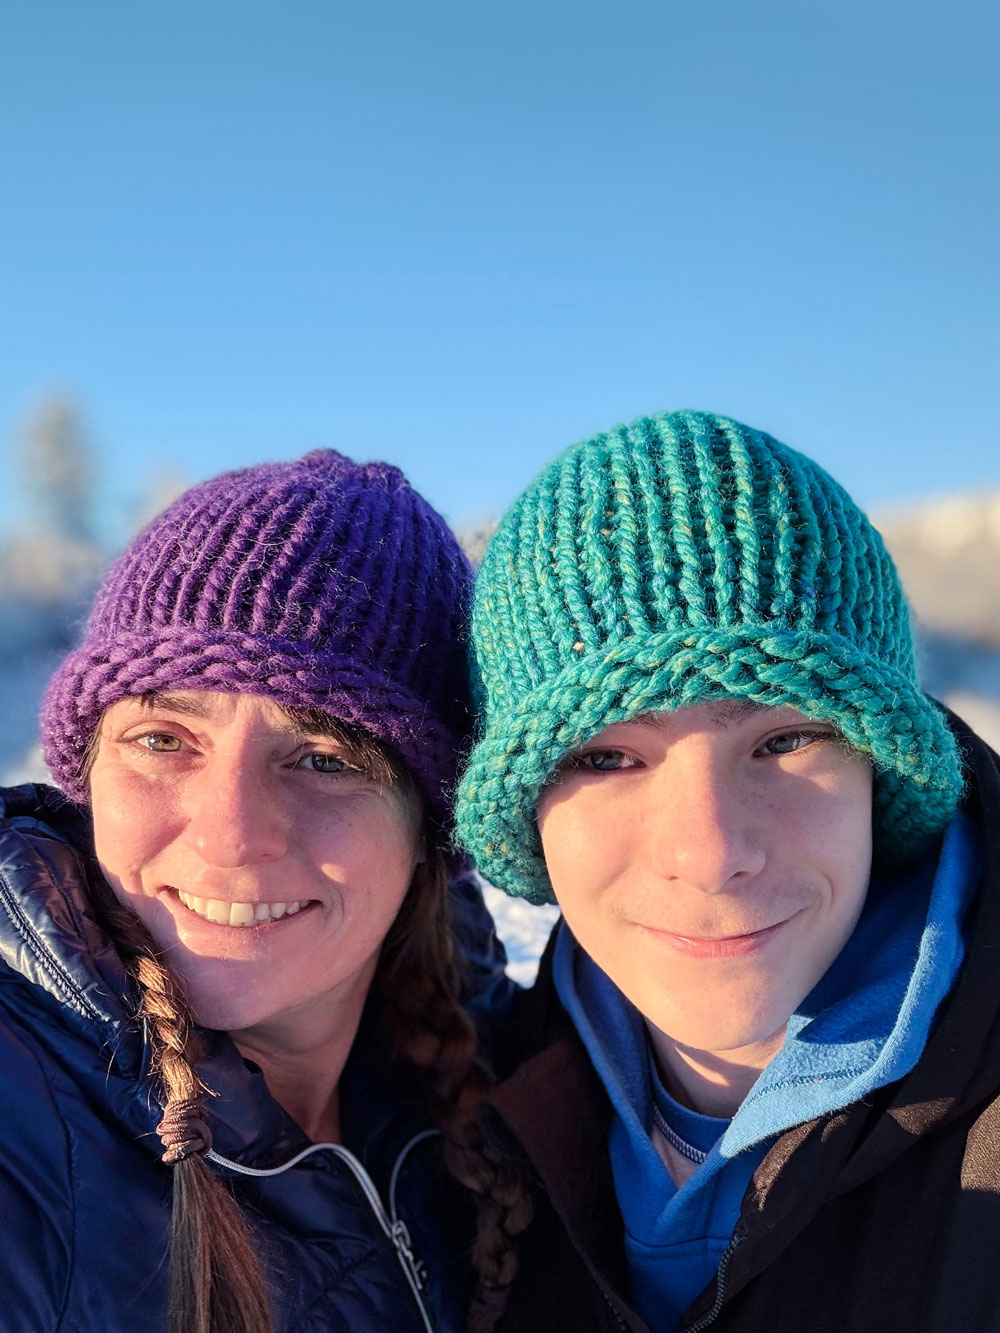
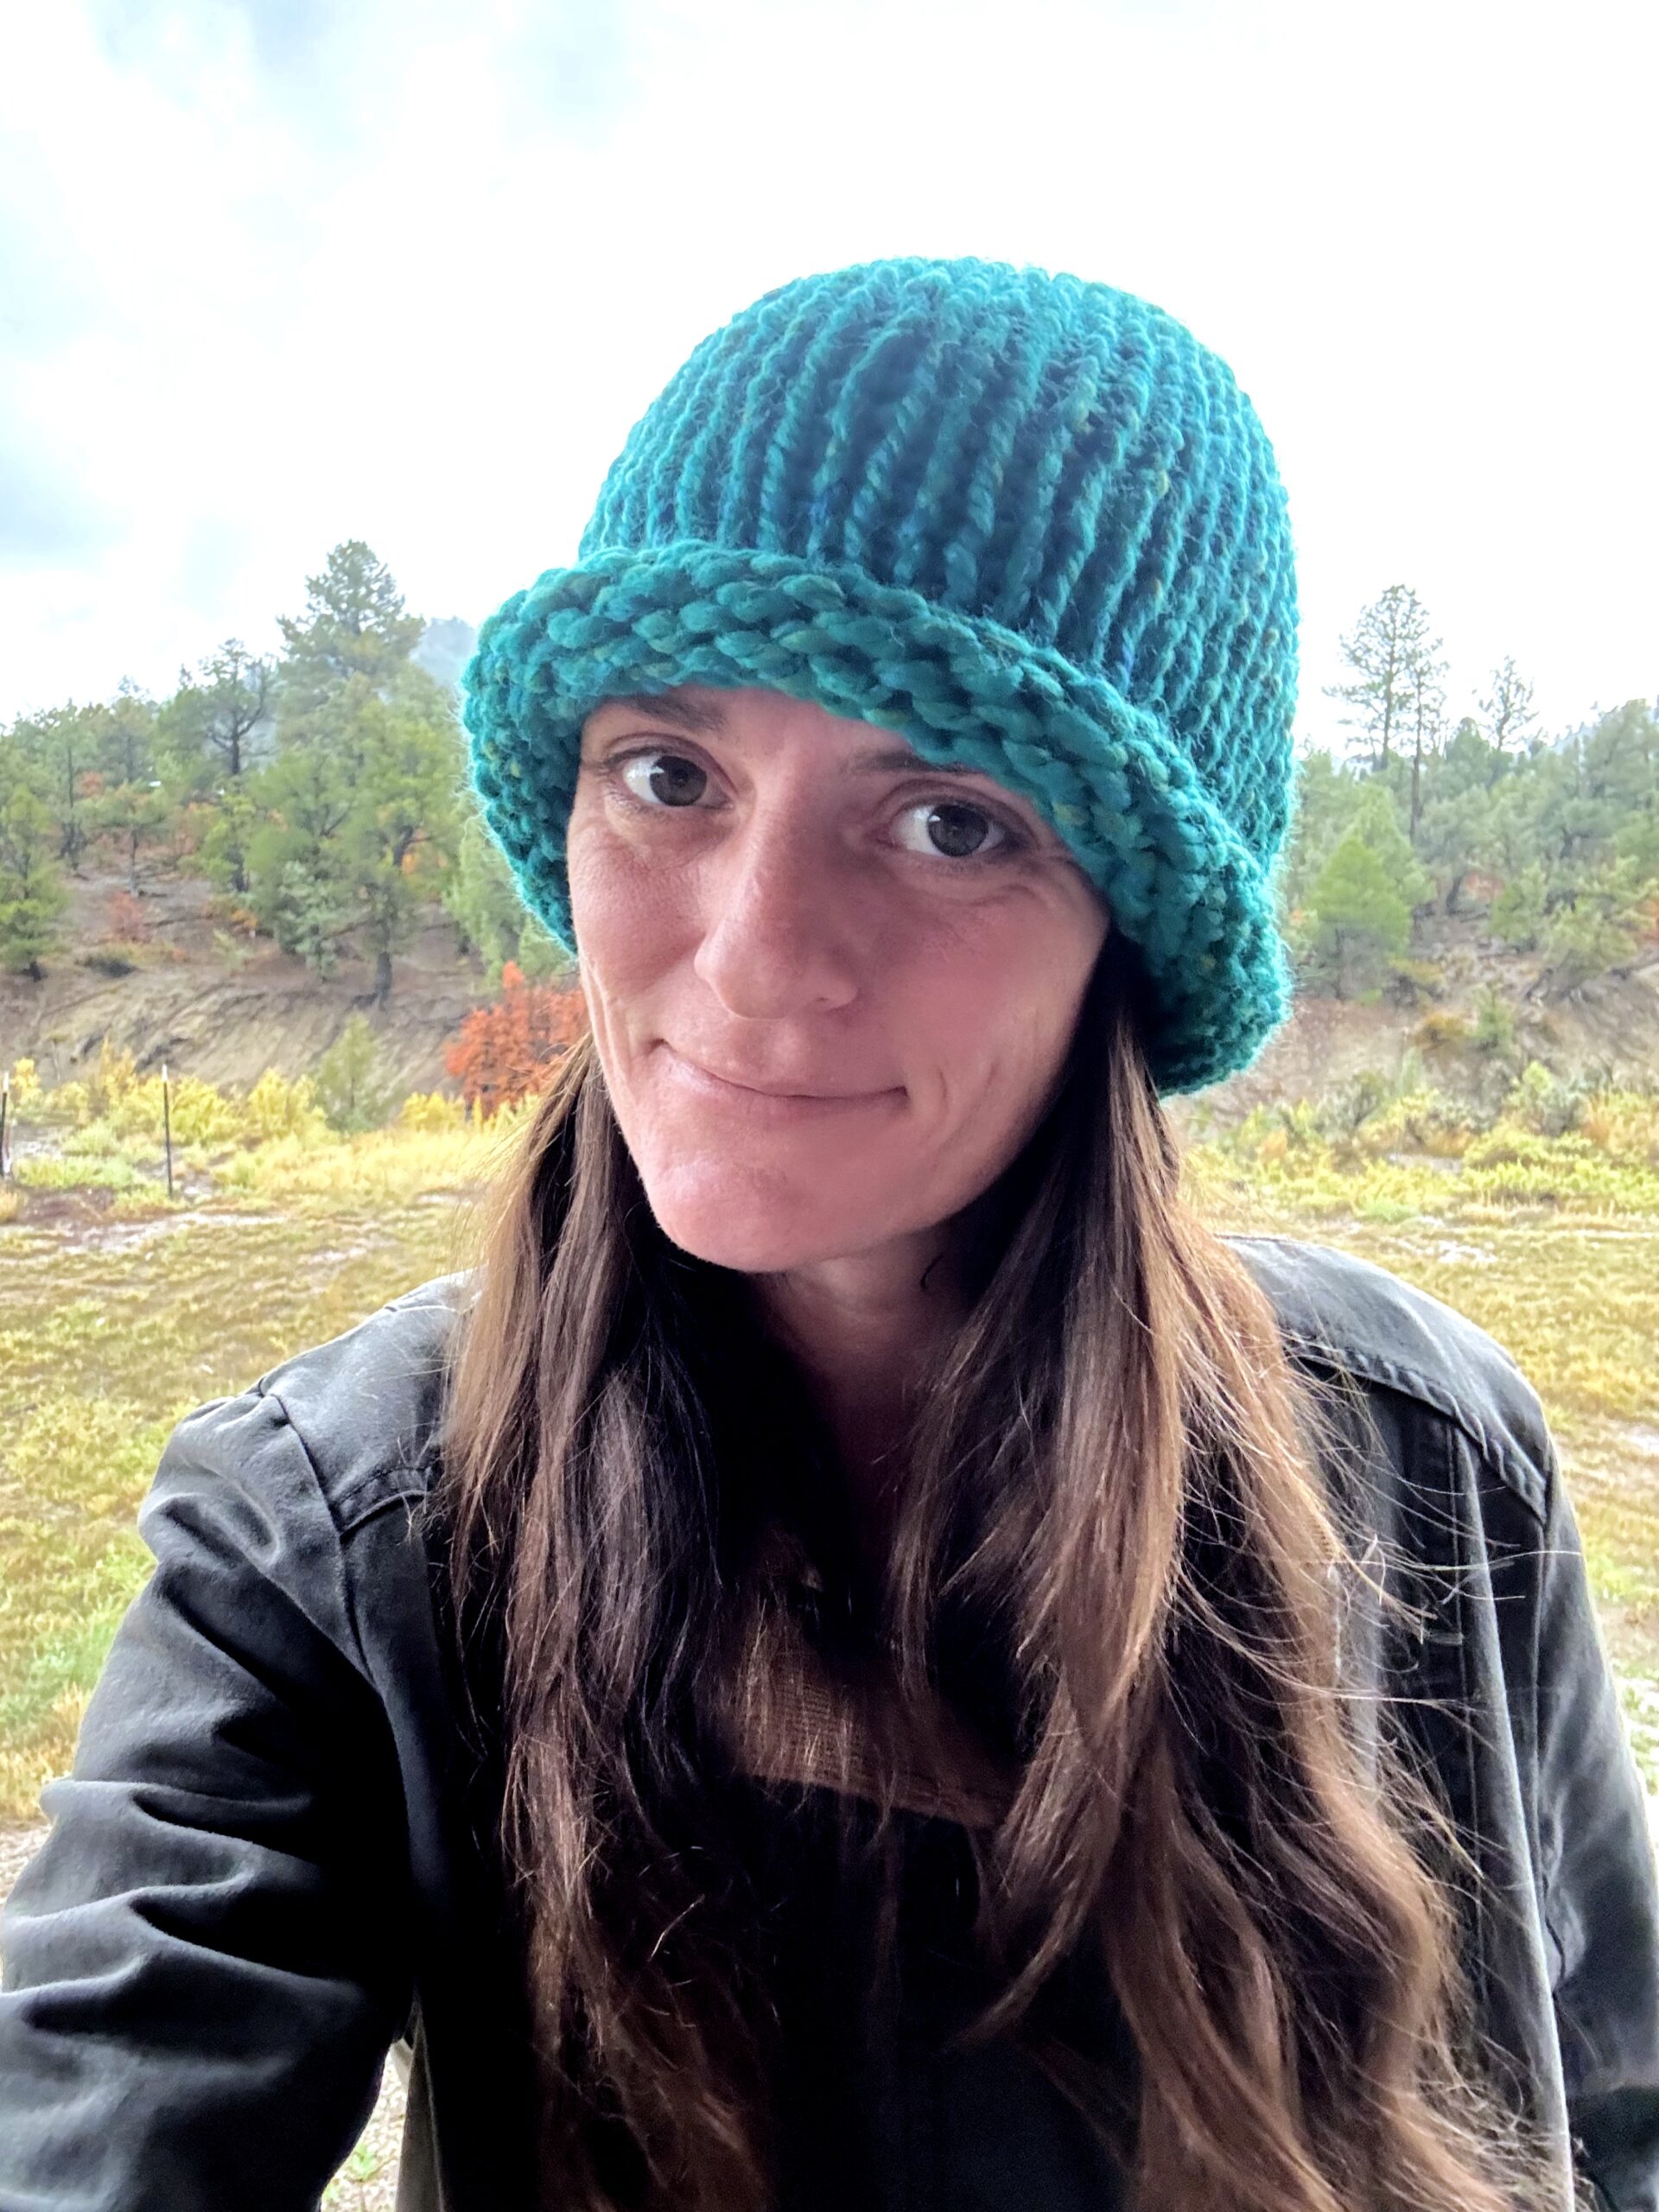
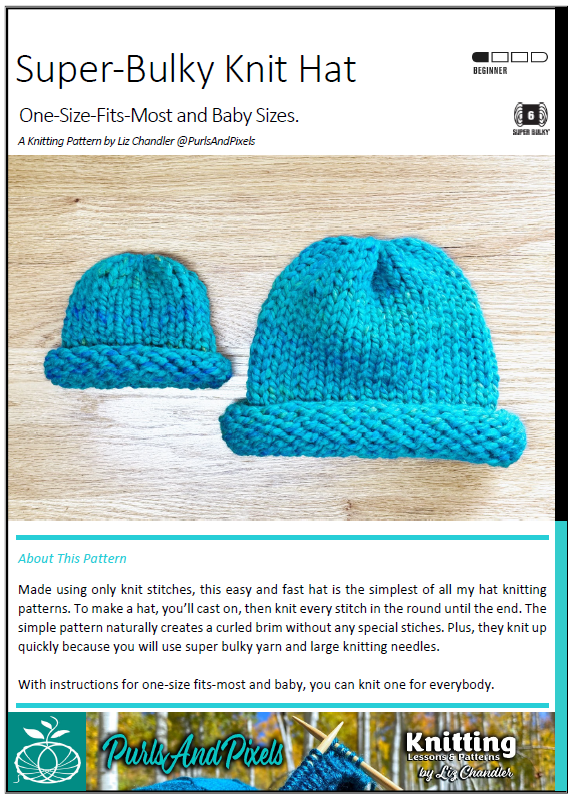
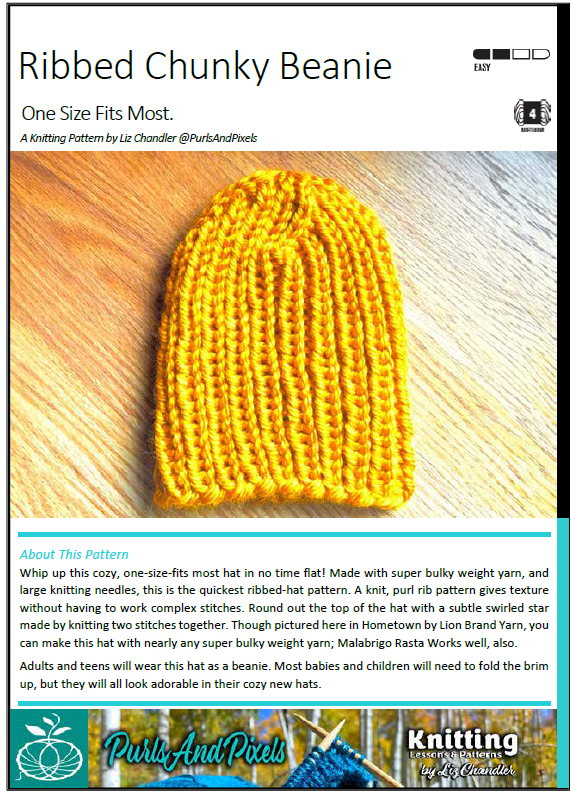
Seed Stitch

Knitting patterns with only knits and purls, seed stitch, by Liz Chandler @PurlsAndPixels.

You can knit a more elaborate texture using the Seed Stitch. Although it looks more difficult, simply alternate knit and purl stitches, much like a Knit, Purl Rib. Instead of stacking the knits and the purls in columns, however, in Seed Stitch you purl into the knit stitches and knit into the purl stitches. Both sides of the work will look the same.

To make the Seed Stitch, cast on an even number of stitches. Knit one stitch, purl one stitch, then repeat for one row or round. At the next row or round, purl one stitch, knit one stitch, then repeat until the end of the row or round. Repeat these two rows until you are finished.

The abbreviated version of this would read: c/o even number of stitches. *k, p* one row, turn, *p, k* one row. Repeat.

Try my free Seed Stitch Washcloth pattern for practice on this stitch.


After you understand these basic patterns, you can make lot of different fabrics with the same ball of yarn.

It is a great time to start exploring fun beginner patterns and learning new skills. My beginner knitting patterns use the stitches above to make your own cozy accessories.

Knitting Patterns using only Knits and Purls

More Knitting Patterns

See my entire pattern collection here.

I’ve also started a Pinterest collection of my favorite knitting patterns from my site and from other great knitting designers around the web. Look there for more great knitting ideas.

Knitting patterns with only knits and purls by Liz Chandler @PurlsAndPixels.

Up Next

The many sections and abbreviations in a knitting pattern can be intimidating. Learn how to read a knitting pattern in the next lesson.

Learn to read knitting patterns with Liz Chandler @PurlsAndPixels.

Go Back to the Learn to Knit Index

Customize Knits

Want to make your knits more unique? Learn to customize your knitwear by adding pom-poms, buttons, and other decorations in this knitting lesson from Liz Chandler @PurlsAndPixels.
Learn to customize your knitwear by adding pom-poms, buttons, and other decorations in this knitting lesson from Liz Chandler @PurlsAndPixels.

Minimalist knitting patterns are simple to knit and you can make them over and over again. But your plain knitwear does not have to stay plain. Try to customize knits to fit your personal style. You can take any simple pattern and spice it up by adding decorations or changing the yarn design.

Customize Your Knitting

Learn to customize your knitwear by adding pom-poms, buttons, and other decorations in this knitting lesson from Liz Chandler @PurlsAndPixels.

Once you have learned to knit the basic patterns, you may want to find a way to make simple designs a little more unique. Choosing a colorful, variegated yarn is a great way to spice things up. Try a new material, like wool, alpaca, or silk.

Add pom-poms, tassels, bows, or faux flowers. If you are familiar with embroidery, stitch embroidered embellishments onto your knitwear using your darning needle and yarn.

Substitute Yarn

You can alter the look of a knitted item dramatically just by changing the recommended yarn. Experiment with both color and yarn material to create your own, one-of-a-kind knit. The most important thing to keep in mind when substituting yarn, however, is to choose yarn that is the same weight as the recommended yarn. When working through my beginners’ lessons make sure you select a “worsted weight” yarn. 

You can also try working with different yarn materials. Each type of fiber that is spun into yarn has its own unique look and feel, so changing the yarn material can change the texture of your knit pieces. When substituting yarn, choose materials that are similar to your starting yarn. For example, wool and alpaca make excellent substitutes for acrylic yarn; they are soft, stretchy, and warm. Try a bamboo-based yarn instead of cotton, since it is absorbent and holds its shape.

Explore the wide array of colors and try a few of your favorites. Yarn-makers offer solid color yarns in every shade of the rainbow. Or, add pattern and depth to your knitting by working with a multicolored or ‘”variegated” yarn. Skeins of variegated yarn are dyed with different sections of coordinated colors; they allow you to knit in multiple colors without switching balls of yarn. Some variegated yarn is even made to be “self-striping;” it is dyed in sections that create the illusion of separately knit color stripes.

Learn to customize your knitwear by adding pom-poms, buttons, and other decorations in this knitting lesson from Liz Chandler @PurlsAndPixels.

Find my recommendations for substitute worsted weight yarn here.

Add Decorations and Embellishments

Let your imagination run wild when it comes to decorating your finished knits. Handmake or purchase fun accents to compliment your knitwear. To any simple knit, consider adding:

(Links above lead to Amazon.com associates shopping.)

Find Simple Patterns

Simple knitting patterns by Liz Chandler @PurlsAndPixels.

You can customize any of my simple knitting patterns using these ideas. Changing the yarn color, material, or decorating hats, gloves, headbands, and legwarmers makes these classic knits unique.

Find the patterns here.

Go Back to the Learn to Knit Index

Learn to customize your knitwear by adding pom-poms, buttons, and other decorations in this knitting lesson from Liz Chandler @PurlsAndPixels.

One-Size-Fits-Most Ribbed Hat Free Knitting Pattern

Knit a stretchy, unisex, one-size-fits-most ribbed knit hat with a foldable brim using this PDF printable knitting pattern from Liz Chandler @PurlsAndPixels.

Ribbed Hat

Knit a stretchy, one-size-fits-most ribbed hat with a foldable brim using this free knitting pattern from Liz Chandler @PurlsAndPixels.

To make this ribbed hat, you will work in a simple knit, purl pattern. This will create a stretchy ribbing, which allows the hat to fit most head sizes from children through adults. Working from the bottom of the hat, upward, you will knit a long tube before adding decreases to close the top of the hat. Folding the brim will not only help it fit most heads properly, but will also add an extra layer of warmth around the ears.

Prefer to knit offline?

This pattern is free to read below, but if you’d rather print it or save it for later, I’ve created a clean, ad-free PDF version for you.

  • Includes complete, row-by-row instructions
  • Easy to print or use on your tablet
  • Supports my small business 💖
Get Liz Chandler's Ribbed Hat Knitting Pattern PDF download at PurlsAndPixels.

Using the suggested acrylic yarn will give you a soft, solid-colored hat. Try experimenting with yarn colors, textures, and materials to make this hat more unique. Be sure you choose worsted weight yarn and check your gauge before substituting materials.

The purple hat pictured here was made by substituting Malabrigo Rios merino wool yarn in the color “Lotus.” (Amazon affiliate link.)

Knit a stretchy, one-size-fits-most ribbed hat with a foldable brim using this free knitting pattern from Liz Chandler @PurlsAndPixels.

About This Free Ribbed Hat Knitting Pattern

This simple ribbed hat is an easy-level knitting pattern. You will need to know how to make a long-tail cast on, knit, purl, decrease, and draw yarn thru the remaining stitches. If you are not familiar with these skills, find quick, free lessons in my Learn to Knit Guide.

Knit a stretchy, one-size-fits-most ribbed hat with a foldable brim using this free knitting pattern from Liz Chandler @PurlsAndPixels.

Materials

You will need the following materials, which you can purchase at your local yarn shop or on Amazon.com via the affiliate links below:

Knitting Needles:

Short Circular Needles (optional)

Double Point Needles (DPNs)

Or Long Circular Needles (optional)


Yarn:

One 315-yard (6 ounce) skein of worsted weight yarn* (shown in Caron Simply Soft Yarn), in your choice of color.

  • one hat uses about one hat uses about 157.5 yards (3 oz.)

*Shown in Caron Simply Soft Yarn in “Pagoda.” Weights estimated with Caron Simply Soft yarn; other yarn weights may vary. Weight does not include gauge swatch. A 4×4 inch gauge swatch with a 2 row by 3 stitch border uses an additional 21 yards (0.4 oz.).

Tools:

A stitch marker, a measuring tape and a darning needle.

Gauge

20 stitches x 28 rows = 4 x 4 inches in stockinette stitch on No. 5 (3.75 mm) needles. (Learn how to check your gauge here.)

Abbreviations

k = knit

p = purl

** = repeat the pattern between the asterisks

ssk = slip, slip, knit

Instructions: One-Size-Fits-Most Ribbed Hat

(Fits most children, teens, and adults or 18-inch to 25-inch head circumference)

Use the Long-Tail Cast On method. Knit in the round. For Double Point Needles, follow DPN instructions written in italics. For circular needles, follow instructions written in bold. On long circular needles, follow the Magic Loop instructions. Or, for this size, you can substitute short (16-inch) circular needles to knit in the round without the Magic Loop; you will need to switch to DPNs or the Magic Loop to complete the decreases at the top of the hat. If desired, use a stitch marker to keep track of the beginning/ends of your rows/rounds by placing it between the last and first stitch of each row/round.

[Using No. 5 DPNs or short circular needles] Row 1: Cast on 88 stitches. Divide onto 3 DPNs (30 on 1st, 28 on 2nd, and 30 on 3rd DPN). Or separate stitches on long circular needles for Magic Loop (44 on each side). Or place all cast on stitches onto short circular needles. (88 stitches)

Row 2: Join the round (taking care not to twist stitches) and *k, p* x 44. (88 stitches)

Rows 3 – 75: *k, p* x 44. (88 stitches) {Work should measure 11 inches at this point.}

{Begin decreases.}Row 76: ssk, (*k, p* x 4), k, ssk, (*p, k* x 4), p, ssk, (*k, p* x 4), k, ssk, (*p, k* x 4), p, ssk, (*k, p* x 4), k, ssk, (*p, k* x 4), p, ssk, (*k, p* x 4), k, ssk, (*p, k* x 4), p. (80 stitches)

Row 77: ssk, (*p, k* x 4), ssk, (*k, p* x 4), ssk, (*p, k* x 4), ssk, (*k, p* x 4), ssk, (*p, k* x 4), ssk, (*k, p* x 4), ssk, (*p, k* x 4), ssk, (*k, p* x 4). (72 stitches)

Row 78: ssk, (*k, p* x 3), k, ssk, (*p, k* x 3), p, ssk, (*k, p* x 3), k, ssk, (*p, k* x 3), p, ssk, (*k, p* x 3), k, ssk, (*p, k* x 3), p, ssk, (*k, p* x 3), k, ssk, (*p, k* x 3), p. (64 stitches)

Row 79: ssk, (*p, k* x 3), ssk, (*k, p* x 3), ssk, (*p, k* x 3), ssk, (*k, p* x 3), ssk, (*p, k* x 3), ssk, (*k, p* x 3), ssk, (*p, k* x 3), ssk, (*k, p* x 3). (56 stitches)

[Switch to No. 5 DPNs or long circular needles and the Magic Loop] Row 80: ssk, (*k, p* x 2), k, ssk, (*p, k* x 2), p, ssk, (*k, p* x 2), k, ssk, (*p, k* x 2), p, ssk, (*k, p* x 2), k, ssk, (*p, k* x 2), p, ssk, (*k, p* x 2), k, ssk, (*p, k* x 2), p. (48 stitches)

Row 81: ssk, (*p, k* x 2), ssk, (*k, p* x 2), ssk, (*p, k* x 2), ssk, (*k, p* x 2), ssk, (*p, k* x 2), ssk, (*k, p* x 2), ssk, (*p, k* x 2), ssk, (*k, p* x 2). (40 stitches)

Row 82: *ssk, k, p, k, ssk, p, k, p* x 4. (32 stitches)

Row 83: *ssk, p, k, ssk, k, p* x 4. (24 stitches)

Cut yarn, leaving an 8-inch tail. With darning needle, draw yarn tightly through remaining 24 stitches. Weave in ends. Block if desired.

Printable version of this free knitting pattern

Printable Ribbed Hat Pattern PDF by Liz @PurlsAndPixels


Find More Knitting Patterns

If you like this, check out the other knitting patterns I’ve written. They’re all gathered on one page, which you can find on my knitting pattern collection page.

Find all of the knitting patterns by Liz Chandler @PurlsAndPixels.

Knit a stretchy, one-size-fits-most ribbed hat with a foldable brim using this free knitting pattern from Liz Chandler @PurlsAndPixels.

©2022, Liz Chandler of PurlsAndPixels. Revised 2025.

This pattern is for personal use, gifting, and charitable donation of completed items. You may also sell handmade items created using this pattern. Do not copy this pattern and distribute it. If you’d like to share the pattern, refer your friends to my website, purlsandpixels.com so they may obtain a copy.

If you find any errors or have any questions, email purlsandpixels@gmail.com and I will do my best to help.

I’d love to see your finished work! Tag your photos with @PurlsAndPixels on Twitter or Instagram.

Basic Pillow Cover Free Knitting Pattern

Learn to knit a pillowcase with this free basic pillow cover knitting pattern from Liz Chandler @PurlsAndPixels.

Basic Pillow Covers

Learn to knit a pillowcase with this free basic pillow cover knitting pattern from Liz Chandler @PurlsAndPixels.

This pattern will show you how to make simple pillow covers by knitting in the round on circular needles. Using only the knit stitch creates a smooth, stockinette stitch pattern. The top and bottom edges of stockinette that has been knit in the round will naturally curl. When you sew the edges of the pillow together, the curl adds a decorative touch to these basic pillowcase.

You can sew the edges with a simple “running stitch” and a strand of yarn in the same color. Or try using a contrasting yarn color or a fancy ribbon to make your pillows more unique. Once you are finished, you can leave the pillows plain for a minimalist look. Or decorate your pillow cover with embroidery, faux flowers, or applique patches.

About This Free Pillow Cover Knitting Pattern

This simple pillow cover is an easy-level knitting pattern. You will need to know how to make a long-tail cast on, make a knit stitch, work in the round on circular needles, and bind off in the round. If you are not familiar with these skills, find quick, free lessons in my Learn to Knit Guide.

Learn to knit a pillowcase with this free basic pillow cover knitting pattern from Liz Chandler @PurlsAndPixels.

Knit Along with Me

In this video, I will show you how to make this knit pillow from start to finish. You can follow along using the knitting pattern below.

Basic Pillow Cover Knitting Pattern

Materials

You will need the following materials, which you can purchase at your local yarn shop or on Amazon.com via the affiliate links below:

Knitting Needles:

Extra-Short Circular Needles (for size mini)
12-inch (30 cm) long US No. 8 (5.0 mm) circular needle (or size needed to obtain gauge)

Short Circular Needles (for size small)
16-inch (41 cm) long US No. 8 (5.0 mm) circular needle (or size needed to obtain gauge)

Or Long Circular Needles (for sizes medium and large)
36-inch (91 cm) long US No. 8 (5.0 mm) circular needle (or size needed to obtain gauge)

Yarn:
One or two 315-yard (6 ounce) skeins of worsted weight yarn* (shown in Caron Simply Soft Yarn), in your choice of color.

  • Mini size uses about 52.5 yards (1 oz)
  • Small size uses about 204.75 yards (3.9 oz.)
  • Medium size uses about 315 yards (6 oz.)
  • Large size uses about 388.5 yards (7.4 oz.)

*Shown in Caron Simply Soft Yarn in “Pagoda,” “Robins Egg,” “Charcoal Heather,” and “Orchid.” Weights estimated with Caron Simply Soft yarn; other yarn weights may vary. Weight does not include gauge swatch. A 4×4 inch gauge swatch with a 2 row by 3 stitch border uses an additional 21 yards (0.4 oz.).

Pillow Insert:

One square pillow-insert in the correct size.

Tools:

A stitch marker, a measuring tape and a darning needle.

Gauge

18 stitches x 24 rows = 4 x 4 inches in stockinette stitch on No. 8 (5.0 mm) needles. (Learn how to check your gauge here.)

Abbreviations

k = knit

Instructions: Mini Size Pillow Cover

(Fits 5-inch x 5-inch pillows; measures 6 inches  x 10 inches when laid flat off the pillow)

Use the long-tail cast on method. Knit in the round. For this size, work with extra-short (12-inch) circular needles. If desired, use a stitch marker to keep track of the beginning/ends of your rows/rounds by placing it between the last and first stitch of each row/round.

Row 1: Cast on 40 stitches.

Row 2: Join the round (taking care not to twist stitches) and k 40. (40 stitches)

Rows 3 – 46: k 40. (40 stitches) {Work should measure 10 inches at this point.}

Row 47: Bind off loosely in knit stitch pattern. Cut yarn, leaving an 8-inch tail, and pull through. Weave in ends. Block if desired.

Insert a 5-inch by 5-inch pillow into the cover. Thread a strand of yarn about two feet long in the same or a contrasting color onto a darning needle. Count about seven rows up from the bottom of the pillow; use this as a starting point to begin sewing the first end of the pillow closed. Use the holes created by the knitting to line up both sides and a “running stitch” to sew the bottom edge together. Tie off the loose ends. Count about seven rows down from the top of the pillow and sew the top edge closed in the same manner.


Instructions: Small Size Pillow Cover

(Fits 12-inch x 12-inch pillows; measures 13 inches  x 17 inches when laid flat off the pillow)

Use the long-tail cast on method. Knit in the round. For this size, work with short (16-inch) circular needles. If desired, use a stitch marker to keep track of the beginning/ends of your rows/rounds by placing it between the last and first stitch of each row/round.

Row 1: Cast on 86 stitches.

Row 2: Join the round (taking care not to twist stitches) and k 86. (86 stitches)

Rows 3 – 79: k 86. (86 stitches) {Work should measure 17 inches at this point.}

Row 80: Bind off loosely in knit stitch pattern. Cut yarn, leaving an 8-inch tail, and pull through. Weave in ends. Block if desired.

Insert a 12-inch by 12-inch pillow into the cover. Thread a strand of yarn about four feet long in the same or a contrasting color onto a darning needle. Count about seven rows up from the bottom of the pillow; use this as a starting point to begin sewing the first end of the pillow closed. Use the holes created by the knitting to line up both sides and a “running stitch” to sew the bottom edge together. Tie off the loose ends. Count about seven rows down from the top of the pillow and sew the top edge closed in the same manner.


Instructions: Medium Size Pillow Cover

(Fits 16-inch x 16-inch pillows; measures 17 inches  x 21 inches when laid flat off the pillow)

Use the long-tail cast on method. Knit in the round. For this size, work with long (36-inch) circular needles. If desired, use a stitch marker to keep track of the beginning/ends of your rows/rounds by placing it between the last and first stitch of each row/round.

Row 1: Cast on 112 stitches.

Row 2: Join the round (taking care not to twist stitches) and k 112. (112 stitches)

Rows 3 – 97: k 112. (112 stitches) {Work should measure 21 inches at this point.}

Row 98: Bind off loosely in knit stitch pattern. Cut yarn, leaving an 8-inch tail, and pull through. Weave in ends. Block if desired.

Insert a 16-inch by 16-inch pillow into the cover. Thread a strand of yarn about four feet long in the same or a contrasting color onto a darning needle. Count about seven rows up from the bottom of the pillow; use this as a starting point to begin sewing the first end of the pillow closed. Use the holes created by the knitting to line up both sides and a “running stitch” to sew the bottom edge together. Tie off the loose ends. Count about seven rows down from the top of the pillow and sew the top edge closed in the same manner.


Instructions: Large Size Pillow Cover

(Fits 18-inch x 18-inch pillows; measures 19 inches  x 23 inches when laid flat off the pillow)

Use the long-tail cast on method. Knit in the round. For this size, work with long (36-inch) circular needles. If desired, use a stitch marker to keep track of the beginning/ends of your rows/rounds by placing it between the last and first stitch of each row/round.

Row 1: Cast on 126 stitches.

Row 2: Join the round (taking care not to twist stitches) and k 126. (126 stitches)

Rows 3 – 106: k 126. (126 stitches) {Work should measure 23 inches at this point.}

Row 107: Bind off loosely in knit stitch pattern. Cut yarn, leaving an 8-inch tail, and pull through. Weave in ends. Block if desired.

Insert an 18-inch by 18-inch pillow into the cover. Thread a strand of yarn about four feet long in the same or a contrasting color onto a darning needle. Count about seven rows up from the bottom of the pillow; use this as a starting point to begin sewing the first end of the pillow closed. Use the holes created by the knitting to line up both sides and a “running stitch” to sew the bottom edge together. Tie off the loose ends. Count about seven rows down from the top of the pillow and sew the top edge closed in the same manner.


Printable version of this free knitting pattern

Printable Basic Pillow Cover Knitting Pattern PDF by Liz @PurlsAndPixels


Find More Knitting Patterns

If you like this, check out the other knitting patterns I’ve written. They’re all gathered on one page, which you can find here.

Find all of the knitting patterns by Liz Chandler @PurlsAndPixels.

Learn to knit a pillowcase with this free basic pillow cover knitting pattern from Liz Chandler @PurlsAndPixels.

©2022, Liz Chandler of PurlsAndPixels.

This pattern is for personal use, gifting, and charitable donation of completed items. You may also sell handmade items created using this pattern. Do not copy this pattern and distribute it. If you’d like to share the pattern, refer your friends to my website, purlsandpixels.com so they may obtain a copy.

If you find any errors or have any questions, email purlsandpixels@gmail.com and I will do my best to help.

I’d love to see your finished work! Tag your photos with @PurlsAndPixels on Twitter or Instagram.