Stupid Smartphones

Someone please take my smart phone away. I'd like a digital detox and some real freedom. Read more from Liz Chandler @PurlsAndPixels.

The Tech Trap and My Mini-Digital Detox Tips 📵✨

Here is the truth: I hate my so-called “smart” phone. Everyone treats it like a lifeline, but to me, it feels more like a leash. It is supposed to connect me to the world, yet it mostly makes me slower. Instead of thinking for myself, I tap a screen and wait for the answers to appear. Instead of enjoying the quiet click of knitting needles, the smell of bread baking, or the calm of watering plants, I stack pressure I do not need. I take photos of every row, snap shots of every loaf, and churn out “content” for half a dozen platforms before the moment even cools in my hands.

Simple joys used to be my pause button. Now they feel like a book report. Someone please take my smart phone away from me.

Always On, Never Free

Some days it feels like I am on call for the internet. Miss a call? People think I have disappeared. Do not answer a text in five minutes? Someone is convinced I am gone. Meanwhile, my cousin tracks me like I am a tagged sea turtle (and while it is nice that someone cares I am alive, it also means I am never truly unattended). The “freedom” of being connected everywhere really just means I am never left alone.

I want to knit on my porch without guilt. I want to cook dinner without someone buzzing in my pocket. I want to just be. I want to hear silence instead of the constant ding of reminders telling me I am behind.

Sometimes I feel like a tracked sea turtle in a fish bowl. Why I hate my smartphone and how I'm trying to digitally detox responsibly. Photo and article by Liz Chandler @PurlsAndPixels.

The End of Wonder

I remember when I could look up at the sky and say, “I wonder what that star is called?” and then just… wonder. Now my instinct is to shove the question into a search bar. The mystery vanishes before it has time to become magical. Technology killed wonder. The internet gave me every answer, but in exchange it stole the fun of thinking about it first.

Colorado auroras would be so much more magical if we didn't know they were coming or feel required to share the moment with the entire world. But here is my aurora picutre... Look up at the sky and wonder about the stars. Get off the smart phone and get smart. Read more from Liz Chandler @PurlsAndPixels.

Even my brain feels slower. I type clumsily now, because autocorrect babysits my spelling and AI tries to predict what I will say. It is too easy to just select the prediction. The more I use it, the less sharp I feel. Technology is stealing not just my attention, but my skills.

What I Do (My Little Secret) 🤫

It is not enough, but here is what I do. I put my phone on sleep mode early and keep it there until late. That way, I get time without the constant buzzing and chirping. People think I am lazy or sleeping too much, but really I am sneaking in a bite of pre-smartphone freedom. Giving myself permission to step away has helped me feel calmer and sharper.

When the phone is asleep, I go analog. I keep a real pencil and a real notebook handy. I jot down ideas on paper before I ever hand them over to a screen. When I start uninfluenced, I stay in charge of my own voice. Then, if I decide to share later, it is truly mine (not something tech tried to write for me). Is it perfect that way? No. Is it me? Absolutely.

Who needs digital tech? Write for yourself unscripted by AI by using something revolutionary: a paper notebook and a pencil. Read more from Liz Chandler @PurlsAndPixels.

Choosing Joy, Not Chains

I do not want my joy filtered through a screen. I want it to come from wool running through my fingers, bread cooling on the counter, dirt under my nails after a day in the garden, or the satisfaction of “just one more row.” And, I want to enjoy these things because I love them, not because the algorithm demands proof of them this week.

Technology is here to stay, but that does not mean I have to let it own me. Some days, the bravest thing I can do is shut off the stupid smart phone, pick up the needles, knead the dough, or water the tomatoes. And sometimes the most radical act is choosing not to post proof that it happened.

Because freedom is not in the palm of my hand. It is in my hands (wrapped in yarn, covered in flour, or smudged with soil). And that is enough.

Slow down and get off the stupid "smart" phone. It doesn't make you happier or smarter. Learn more with Liz @PurlsAndPixels.

And maybe that is the good news: the choice is mine. I can keep my skills sharp, protect my wonder, and find real connection in the things I make with love. The phone will still be there when I need it. But my hands remind me who I am when I put it down.

And if you happen to call while my phone is off, you will need to leave me an old-school voicemail or send a text. Otherwise, I will not even know you tried. (Consider this your friendly reminder that my digital detox comes with caller ID amnesia.) 😉 ☎️

Want more cozy calm?

You can read my other posts or learn to knit with me here at PurlsAndPixels.com. Start small, grab a pattern, or just peek at my free beginner lessons. The yarn, the needles, and the quiet are waiting for you.

🧣 Learn to Knit: Free Knitting Lessons from Start to Finish

🧶 Knitting, Wellness, and the Science of Flow

🛁 How to Knit a Washcloth: A Beginner-Friendly Tutorial

🙏 Gratitude Blanket Pattern: Cozy Comfort for Every Home

🍂 5 Easy Fall Knits to Cast On Now

🐔 What is Yarn Chicken?

🥑 Avocado Cowboy

Don’t Miss a Stitch! 🧶

Love cozy projects? Sign up for my newsletter to get free patterns, helpful tips, and updates straight to your inbox. 💌

Cozy Coffee Nook

Learn to make your own cozy coffee nook with Liz Chandler @PurlsAndPixels. Happy Coffee Day!

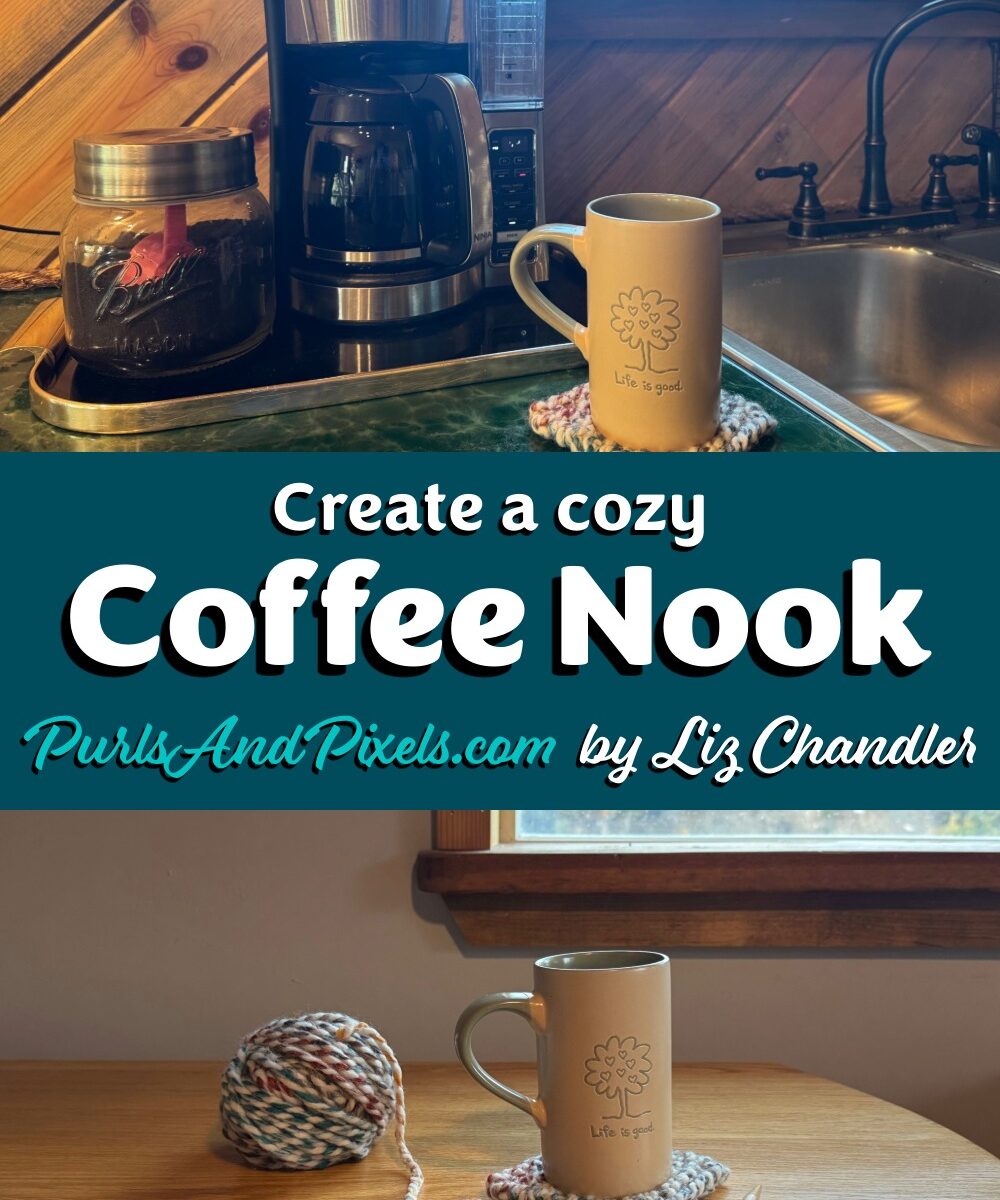
Warm Decor Ideas for National Coffee Day ☕

Happy National Coffee Day! 🎉 Today is the perfect excuse to pause, pour, and claim a corner of your home that feels like yours alone. A cozy coffee nook should not be just a place to caffeinate. It should feel like slipping on your favorite sweater: warm, familiar, and just a little indulgent.

Learn to make your own cozy coffee nook with Liz Chandler @PurlsAndPixels. Happy Coffee Day!

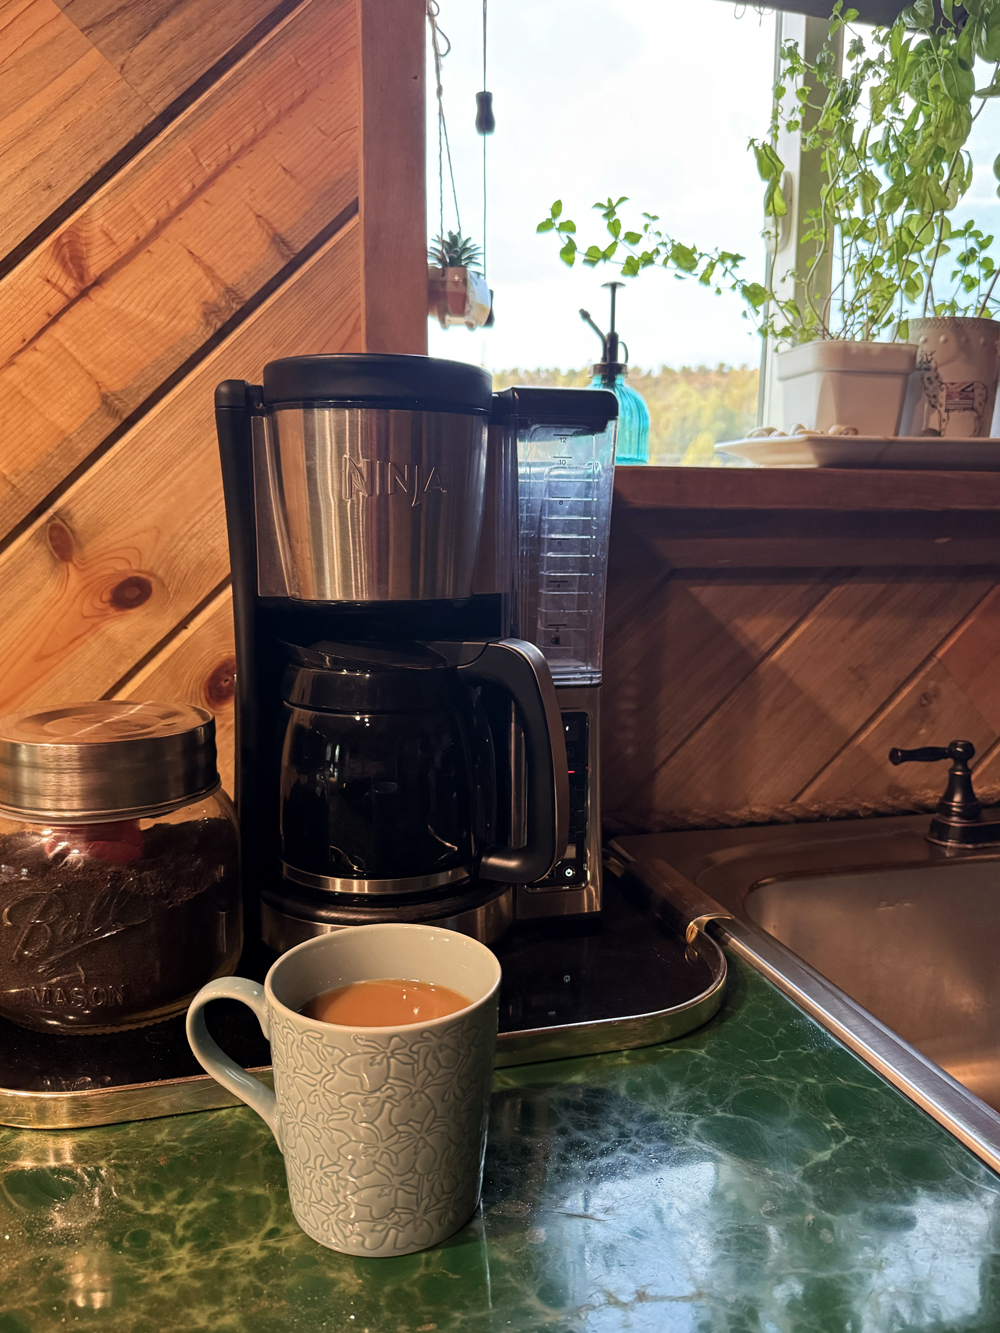
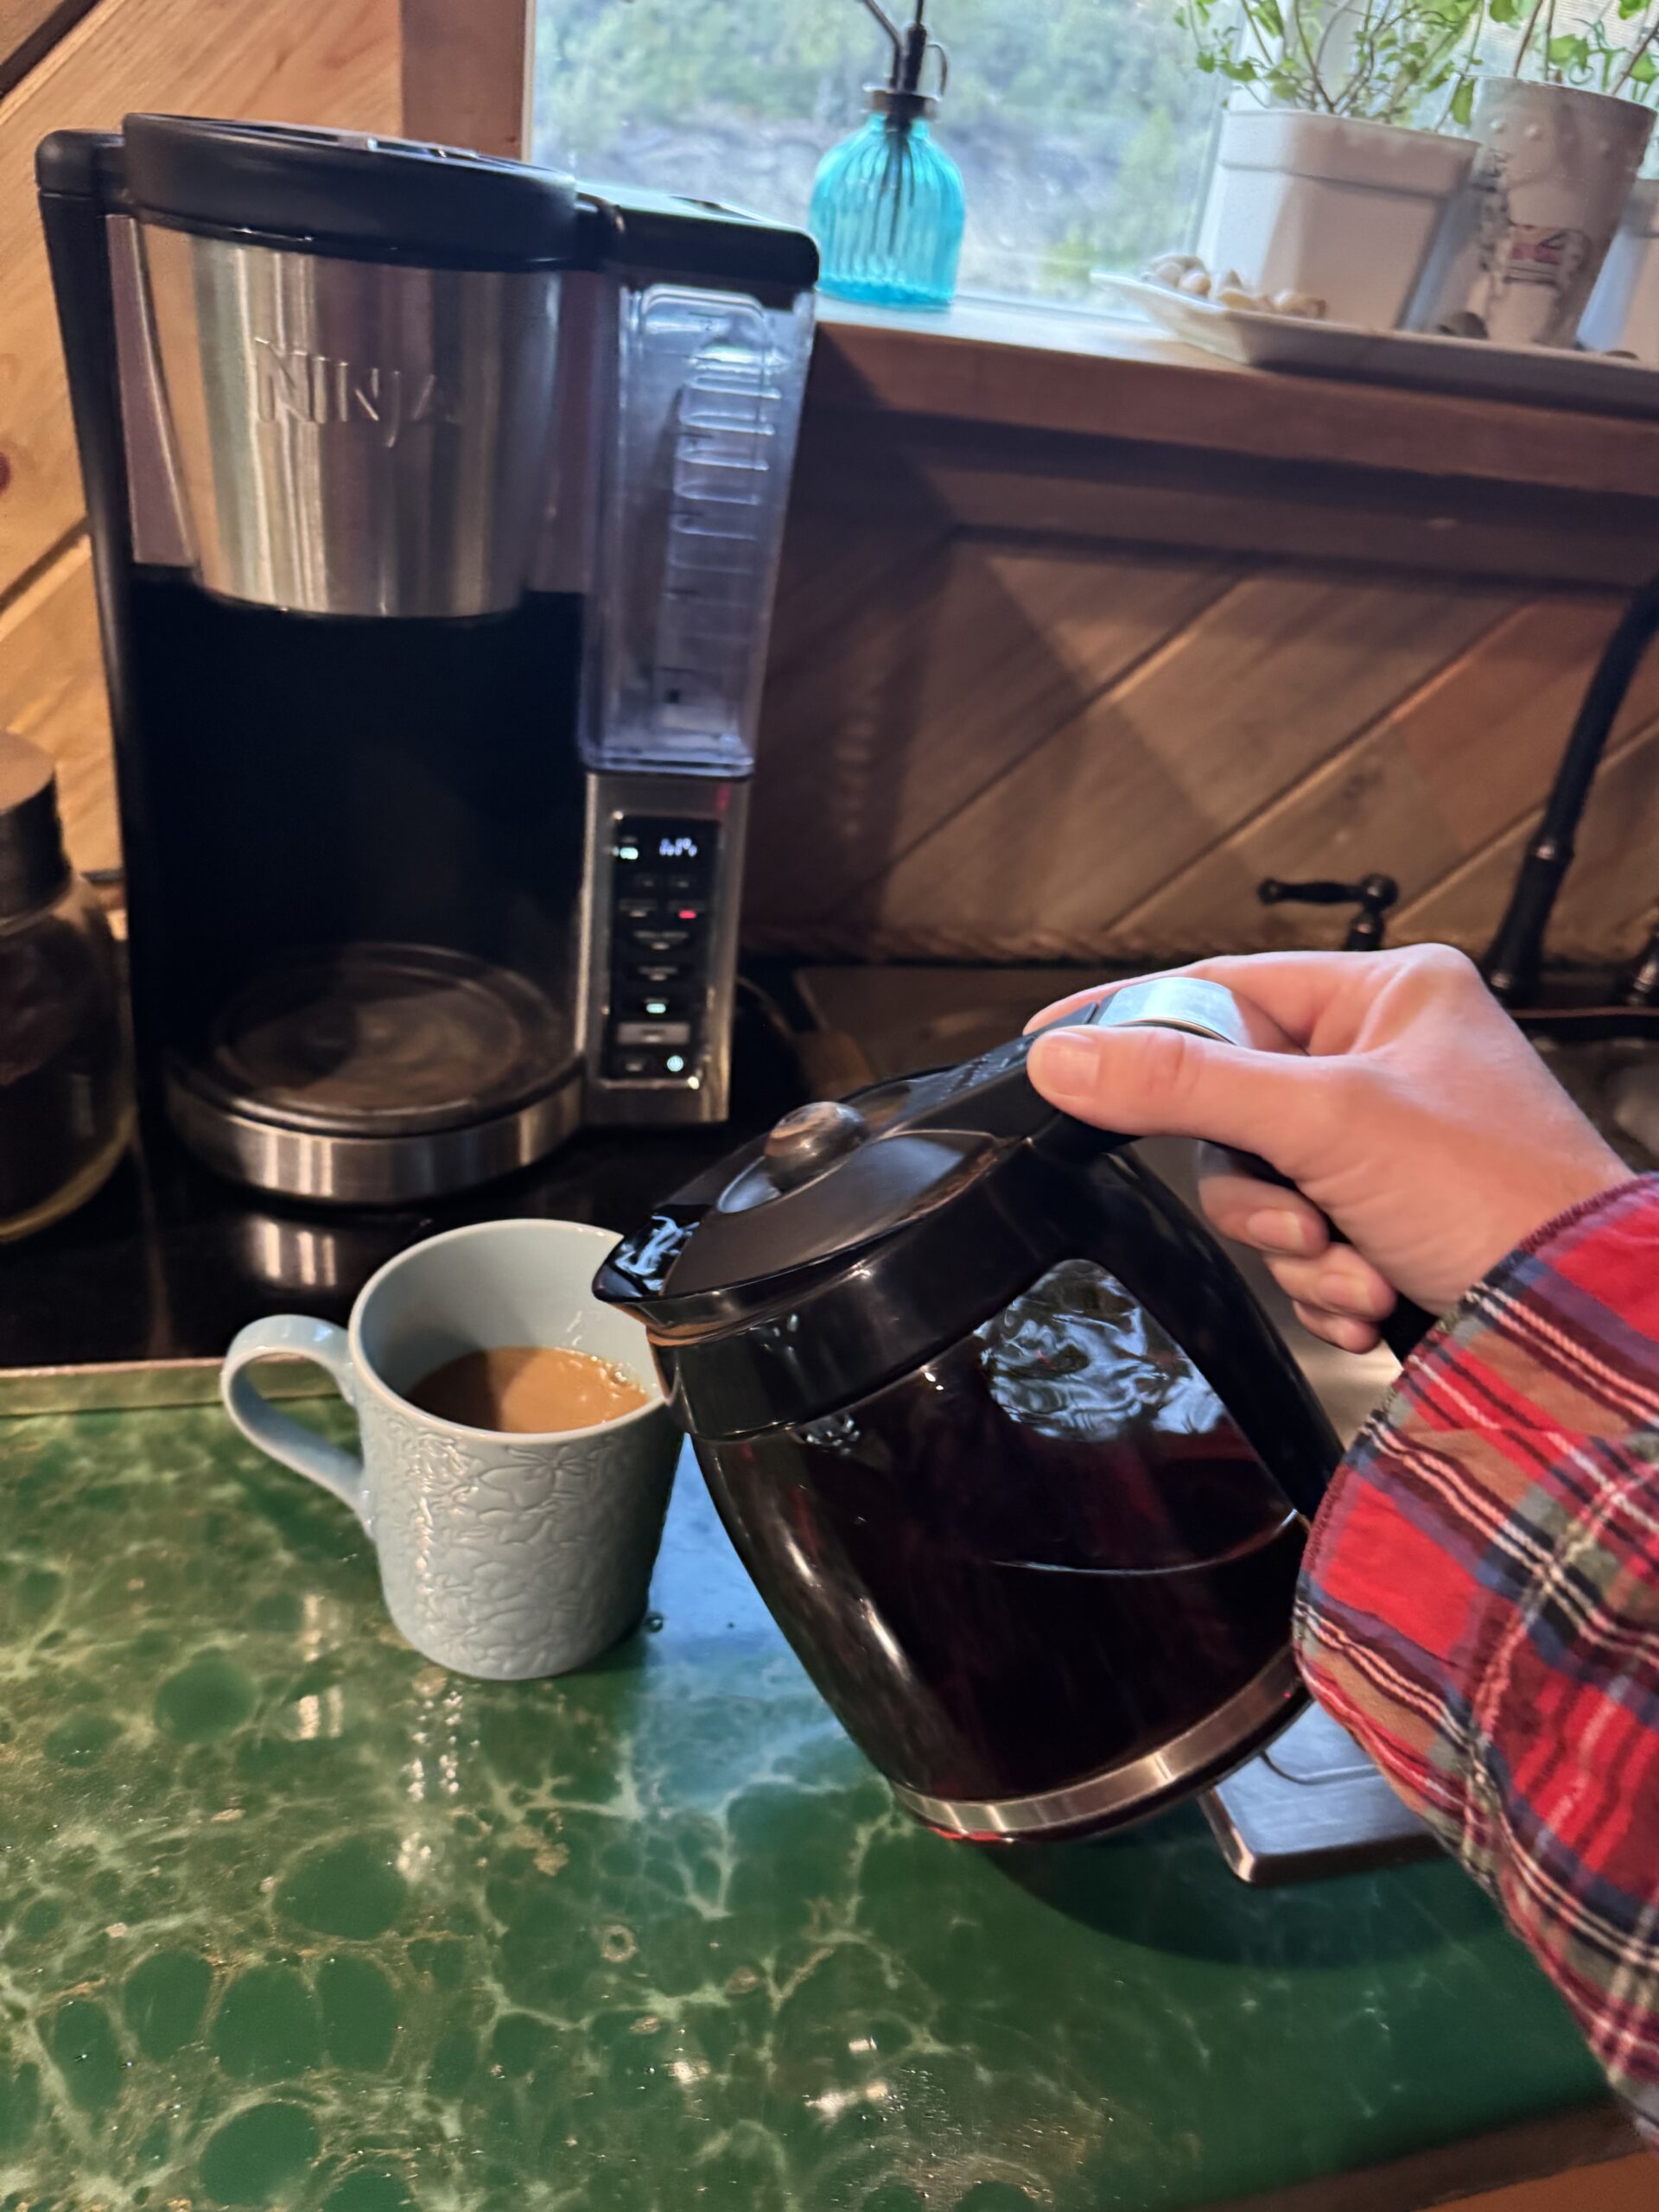
Forget those glossy catalog spreads with identical white mugs in perfect rows. Cozy does not mean sterile. Cozy is mismatched mugs, a countertop with coffee rings that refuse to wipe away, and brewing your morning cup while your messy hair insists on defying gravity. My own coffee nook is simple: a large Mason jar for storing coffee, a Ninja coffee maker (my most prized possession), and a thrifted serving tray. (Amazon a On the window sill I keep a few herbs, and nearby sit a couple of cute decorations that were gifted to me. Imperfect, practical, and full of heart. That is real rustic luxury.

Pick a Mug that Fits Your Mood

Coffee tastes better when you are drinking from a vessel that makes you smile. Retire the chipped mug from that fundraiser you never went to. This is Coffee Day, not Sad Tuesday.

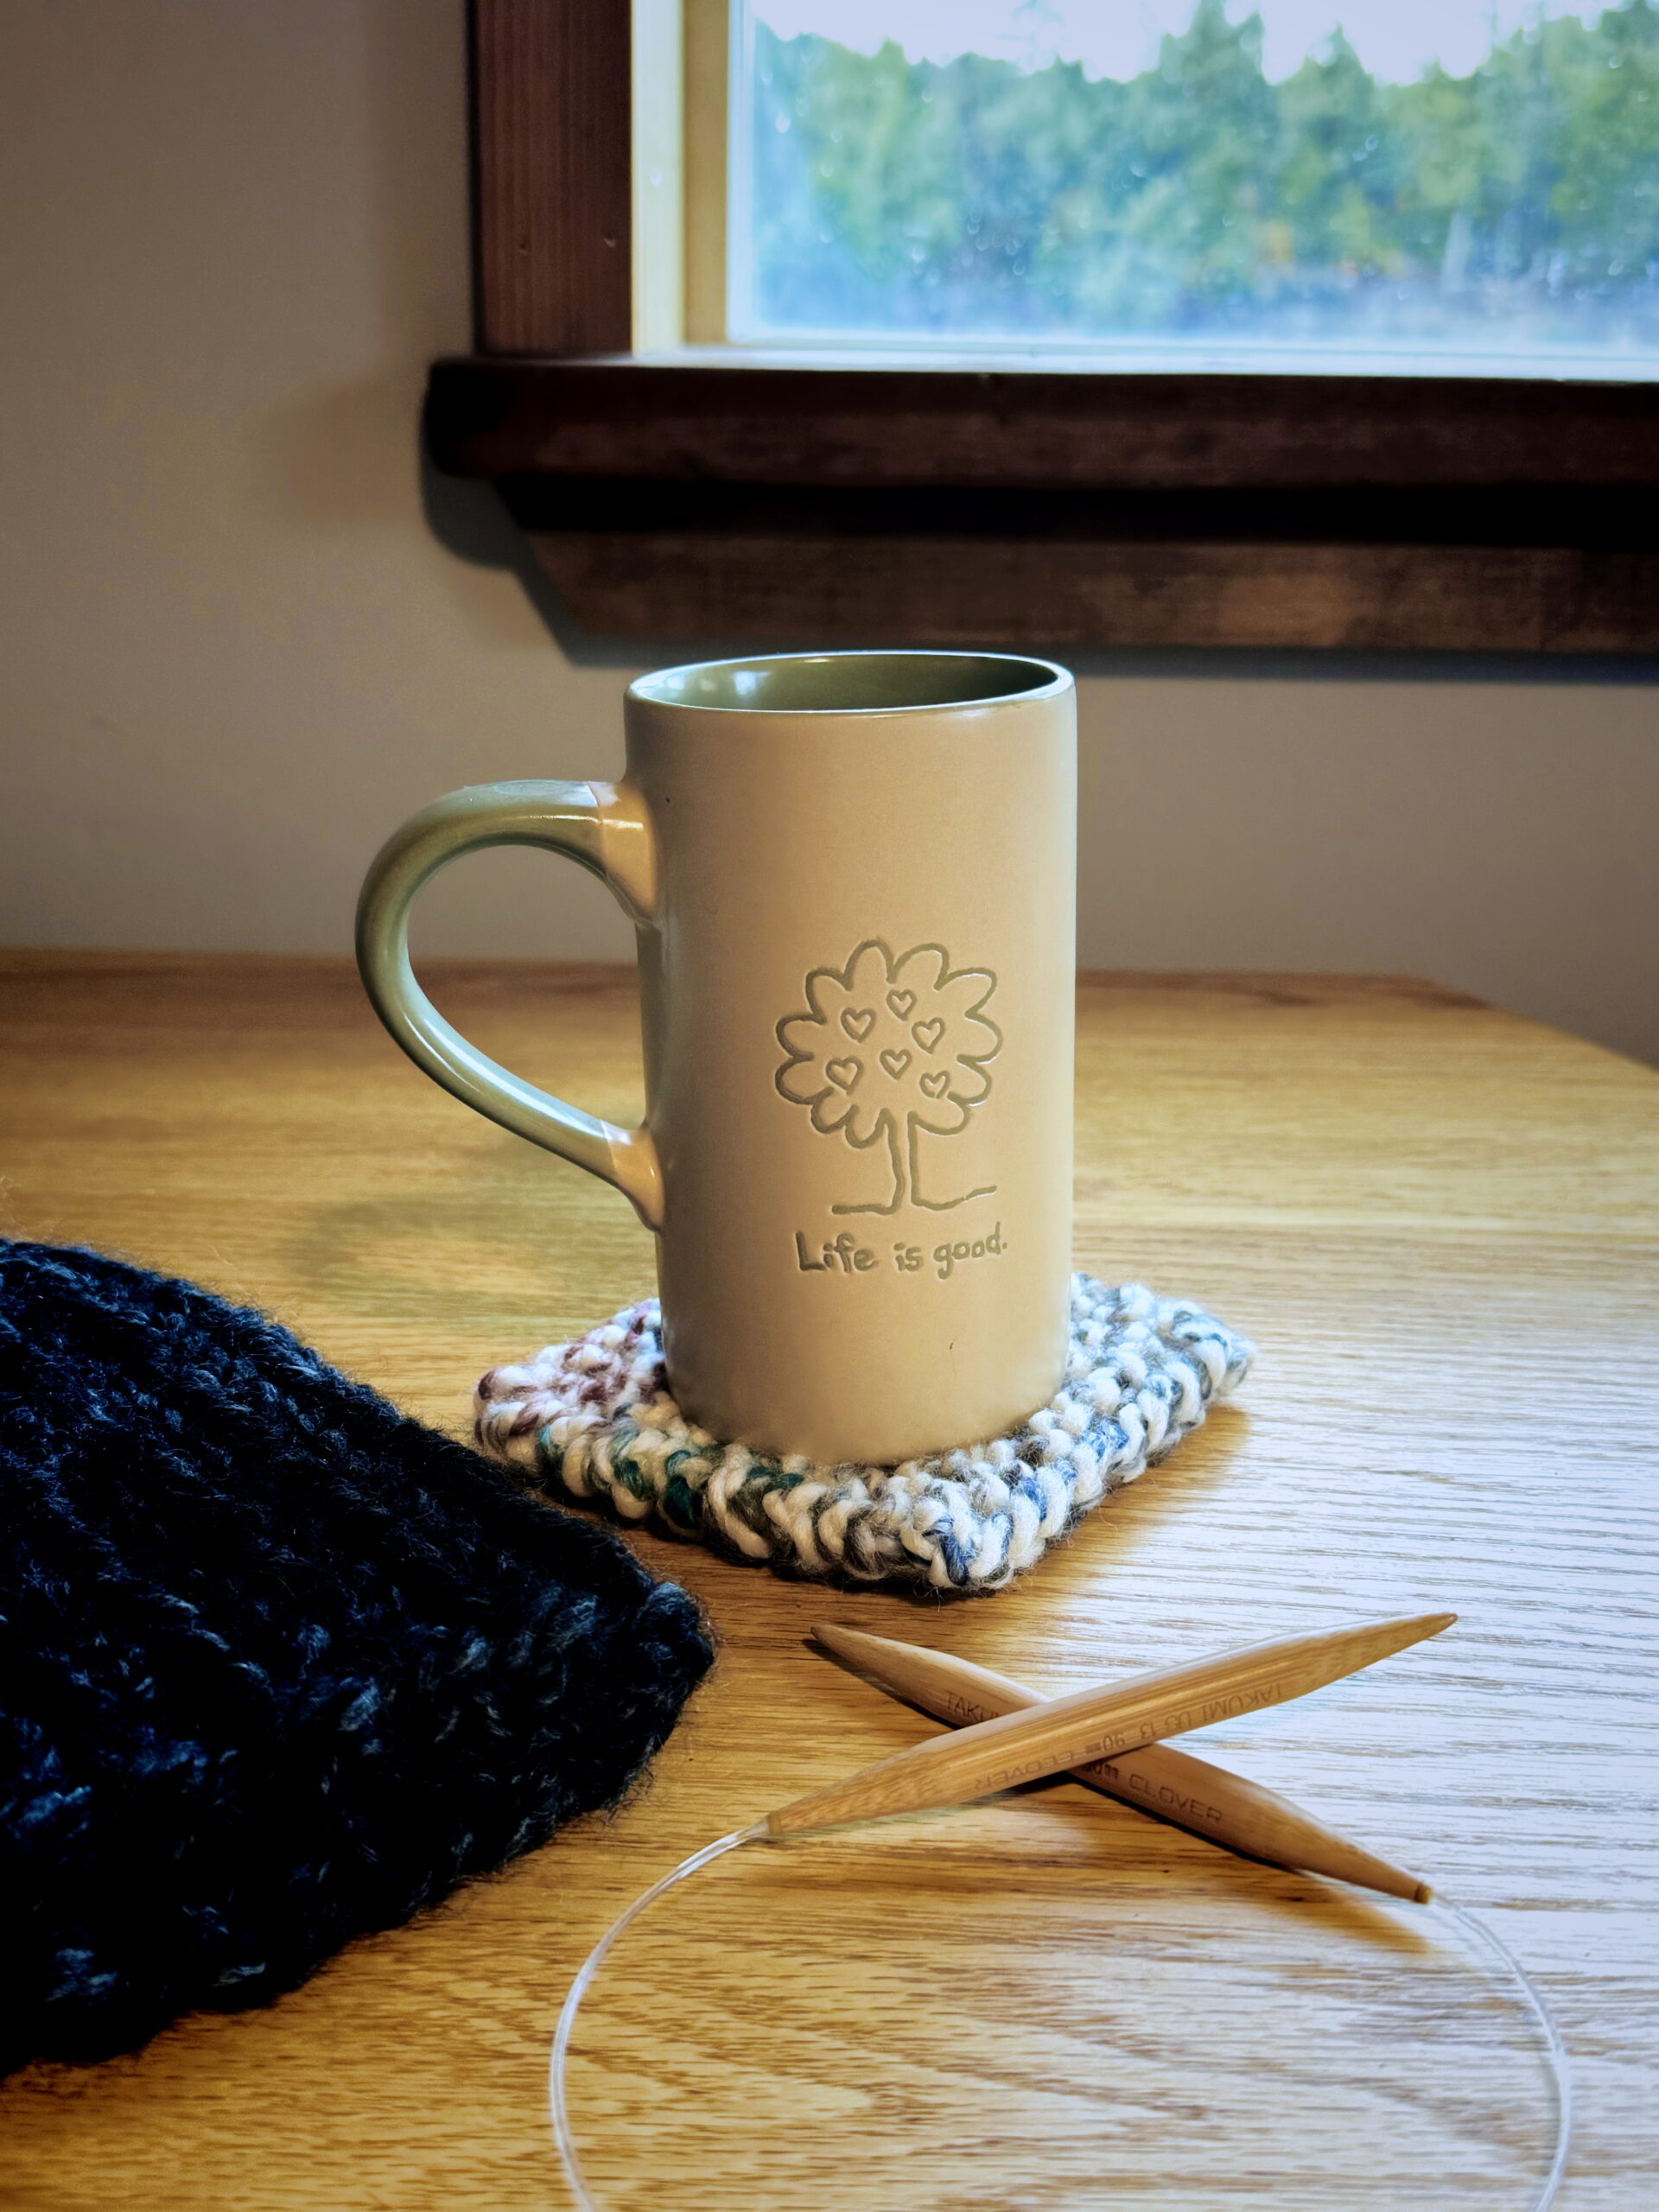
Switching mugs with the seasons? Even better. Pair each one with a hand-knit coaster. I just wrote a brand new chunky yarn coaster pattern for my upcoming kids’ book. It is available now and makes the perfect first knitting project. You can find it here: Chunky Coaster Free Knitting Pattern. Suddenly you are running your own boutique café.

Add Texture with Knits and Natural Materials

Knitting is not just about scarves. Handmade pieces can bring warmth and charm right into your coffee nook.

  • Knit a chunky placemat for your French press or pour over.
  • Use hand-knit coasters to catch those inevitable coffee rings.
  • Drape a cozy throw over the chair closest to your nook.
  • If you are feeling clever, even a handmade basket can corral beans and syrups.

Rule of thumb: if you think it’s cute and cozy, it is.

Design your cozy coffee nook with warm decor ideas for National Coffee Day from Liz Chandler @PurlsAndPixels. ☕Happy coffee day and happy knitting!

Organize Without Over-Organizing

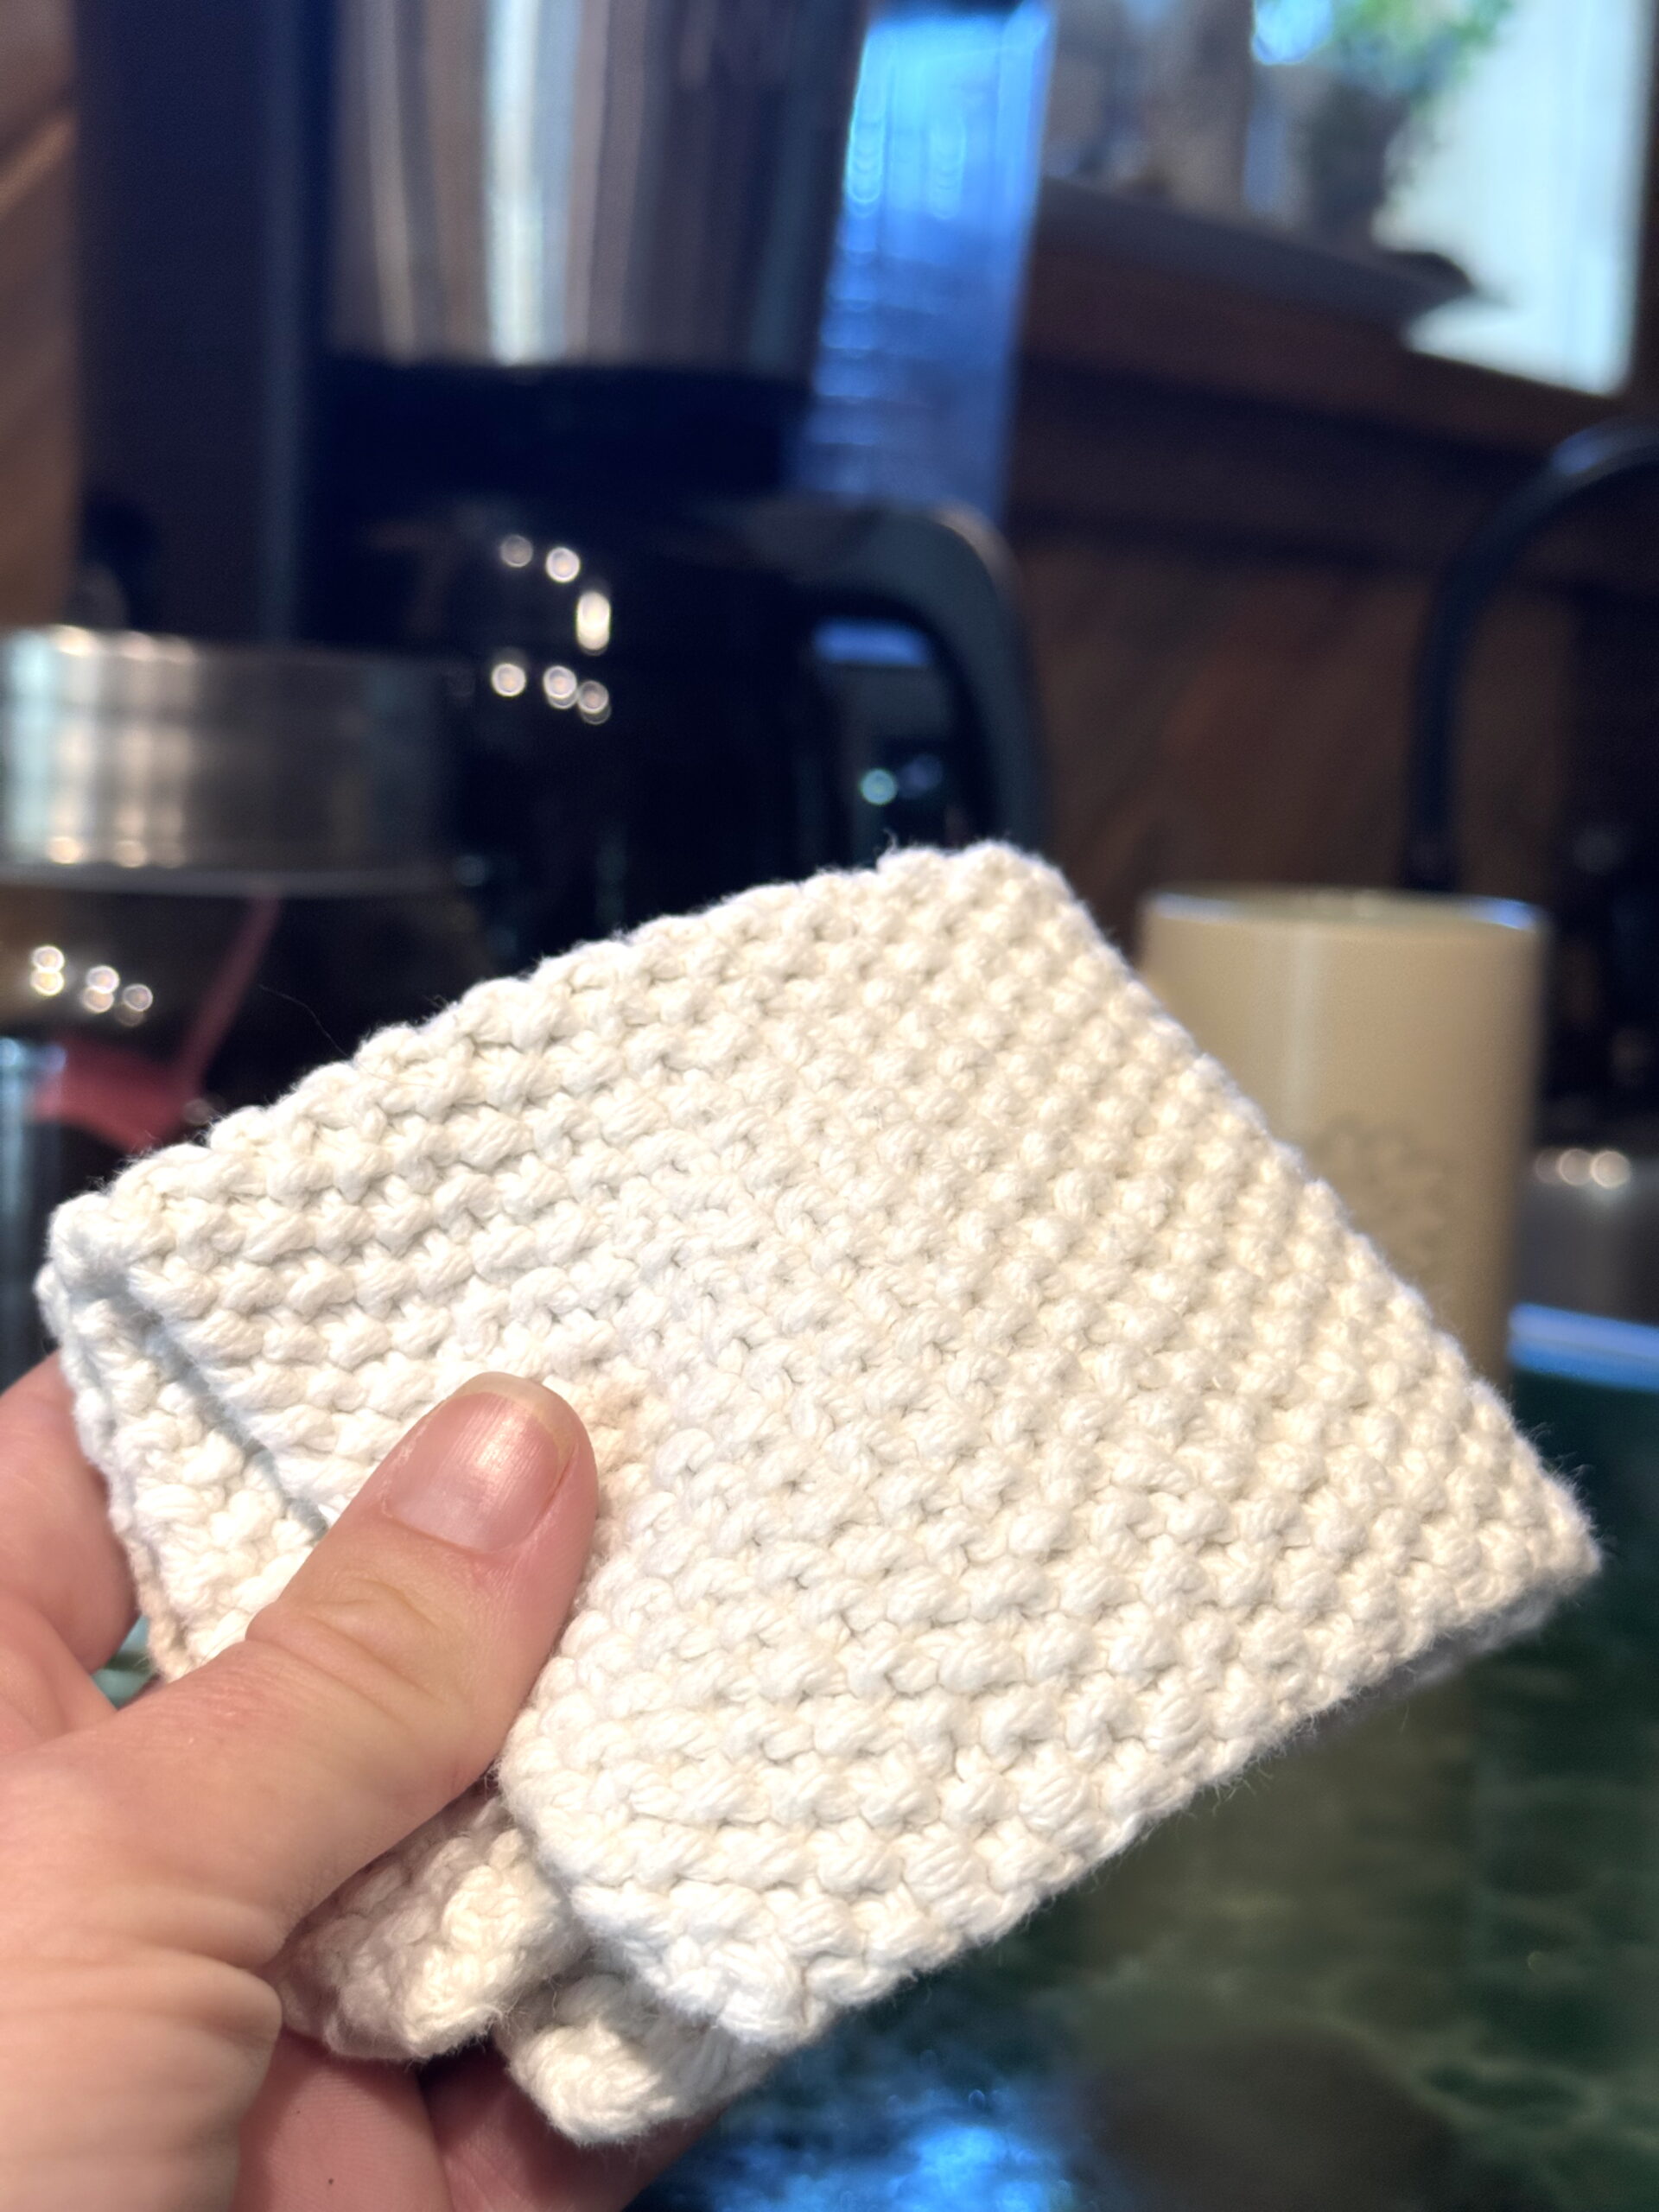
Your cozy coffee nook does not need to look staged for an Airbnb photoshoot. A little intentional mess feels real. Coffee rings on the counter? That just means the nook is being used. And a handmade washcloth will clean it right up. (Browse my free dishcloth knitting patterns here.)

Clean up coffee spills (and lots of other things) with the cutest handmade washcloths around get the free knitting pattern and ideas to create your own cozy coffee nook from Liz Chandler @PurlsAndPixels.

Dress Your Coffee Corner for the Seasons

Why should mugs have all the fun? Let the yarn set the tone.

  • Fall: Pumpkin orange mug cozies.
  • Winter: A wool runner under your kettle.
  • Spring: Light lacey coasters.
  • Summer: Cotton mats that laugh at iced coffee rings.

Scraps of yarn are not leftovers. They are décor.

Why a Cozy Coffee Nook Matters

Your cozy coffee nook is more than décor. It is a daily rebellion against rushing. It is a reminder that peace, coziness, and creativity are worth claiming. Hair unbrushed, mug slightly stained, counter imperfect. Still perfect in its own way. That is the heartbeat of PurlsAndPixels.

So today, skip the drive-thru latte. Brew slow. Sip slower. Let the ritual be the reward.

Design your cozy coffee nook with warm decor ideas for National Coffee Day from Liz Chandler @PurlsAndPixels. ☕

Keep the Cozy Going

Want more ways to knit coziness into your everyday?

Happy Coffee Day, and happy knitting. ☕🧶

Read More

Don’t Miss a Stitch!

Love cozy knitting projects? Join me on YouTube, Pinterest, and Instagram! And don’t forget to sign up for my newsletter to get more free patterns, helpful tips, and updates straight to your inbox. 💌

March’s Blood Moon 2025

Learn about the blood moon lunar eclipse with Liz Chandler @PurlsAndPixels.

A Lunar Eclipse You Should Stay Up For 🌒

Let me tell you how much I love the stars. There is something about looking up at a sky full of them that makes everything else feel small in the best way. I have always been a stargazer, watching meteor showers, learning constellations, and tracking the moon through its phases. When a Blood Moon comes around, you better believe I will be outside watching every second of it.

On the evening of March 13 & 14, a total lunar eclipse will turn the moon a deep red. If you have never seen one before, this is your chance. It is one of those rare moments when the night sky puts on a show you will not forget. Now, we just have to hope the storm clouds clear enough for us to actually see it.

Blood moon over Mesa Verde National Park in Colorado, USA 2015 taken by Liz Chandler @PurlsAndPixels.

What Is a Blood Moon?

A Blood Moon happens when the Earth moves directly between the sun and the moon, casting a shadow that filters out all but the deep red and orange wavelengths of light. The result? The moon turns a stunning shade of red, glowing eerily against the night sky.

Unlike solar eclipses, you do not need any special glasses or equipment to watch a lunar eclipse. All you need is your own two eyes and a clear sky.

When and Where to See the Blood Moon Eclipse 2025

I will be out there, bundled up in a blanket, watching the whole thing unfold. Here is when to look:

  • Date: Night of March 13 into the early morning of March 14
  • Eclipse Begins: 9:57 p.m. MST
  • Total Eclipse (Best Viewing Time): 12:26 a.m. MST
  • Eclipse Ends: 4:00 a.m. MST
  • Where You Can See It: North America (weather permitting)

How to Get the Best View of the Blood Moon Eclipse 2025

Lunar eclipses are completely safe to watch with the naked eye, but if you want to make the most of it, try the following:

  • Find a Dark Spot. The farther from city lights, the better. If you can get out to a rural area, you will see much more detail.
  • Use Binoculars or a Telescope. The moon looks incredible during an eclipse, and a little magnification makes it even better.
  • Be Patient. The moon does not just turn red in an instant. It slowly changes over a few hours, so settle in and enjoy the process.
  • Take Photos. A smartphone on a tripod with night mode can capture some amazing shots. Or, if you have one, this is a great time to practice your nighttime photography with your camera and zoom lens.

Why This Blood Moon Eclipse Matters

Total lunar eclipses do not happen all the time. This is the last total eclipse North America will see until 2026, so if you miss it, you will be waiting a while for the next one. There is also something special about looking up at the sky and realizing you are watching the same moon as people across the world at the exact same moment.

For me, stargazing has always been a way to feel connected to something bigger. Watching the moon shift to red, with stars sparkling all around it, reminds me why I love the night sky so much. It is peaceful, awe-inspiring, and, for a little while, makes you forget about everything else.

Dark Skies for Best Viewing

If you are lucky enough to live near Mesa Verde National Park or another one of the country’s official Dark Sky Parks, this eclipse will be even more incredible. Dark Sky Parks are designated areas with minimal light pollution, meaning you will get the clearest, most breathtaking view possible. Even if you are not near one, do not worry; just head to the darkest spot you can find, and you will still get a great show.

How to Keep Dark Skies on Your Homestead

If you live in a rural area or on a homestead, you have the power to help protect the night sky from unnecessary light pollution. Even small changes can make a big difference in keeping the stars visible.

  • Use Warm, Low-Intensity Lighting. Harsh white or blue-toned lights scatter more and create more glare. Warm, yellow-toned lights are softer on the eyes and the sky.
  • Install Motion Sensors. Instead of leaving lights on all night, use motion-activated security lights. This keeps your property safe while reducing unnecessary light pollution.
  • Shield Your Lights. Downward-facing lights prevent excess light from spilling into the sky. Simple covers or shades can help direct light where it is actually needed.
  • Turn Off What You Do Not Need. If you do not need the porch light on, turn it off. A simple habit like this can help keep your night sky clear.

These small steps will not only help you enjoy better stargazing but also keep the ecosystem around you healthier. Artificial light affects wildlife more than we realize, and cutting down on excess lighting can help nocturnal animals navigate the night as nature intended.

Love stargazing as much as I do? Don’t forget to look up at tonight’s blood moon eclipse…

2025 Blood Moon Eclipse: Do Not Sleep Through This One!

If you can, stay up late for this. Wrap yourself in a warm blanket, grab a hot drink, and take a few minutes to look up. The universe is putting on a show, and it is absolutely worth watching.

If you are lucky, you might even be wrapped in a blanket you made yourself. Nothing beats stargazing under something handcrafted, whether it is a cozy knit shawl or a thick wool blanket. If you have not started one yet, now might be the perfect time. A hand-knit blanket will keep you warm through every celestial event to come, and who knows? By the time the next Blood Moon rolls around in 2026, you might have a new favorite stargazing companion.

Let me know if you will be watching. If you snap any photos, I would love to see them! Here is hoping for clear skies. 🌕

Read More

🙏 Gratitude Blanket Pattern: Cozy Comfort for Every Home

🏡 Cozy Lifestyle Basics: Mountain Living Edition

🌱 Planning to Garden This Year?

🌿 Building Your Backyard Garden from Scratch

🪴 Seedling Repotting

🌻 My Knitting Garden

🍓 Planting Strawberries and Asparagus in Southwest Colorado

🌸 Defeating Bindweed: A Gardener’s Battle

🥕 Harvesting Carrots

Mountain Living Essentials

✨ Never Miss a Homestead Story 

Join my newsletter for exclusive patterns, homesteading tips, and wildlife updates! 💌

DIY No-Sew Cedar Sachets

Learn to make DIY Cedar shachets using sustainable materials to help repel moths and other critters in this quick no-sew tutorial from Liz Chandler @PurlsAndPixels.

Make Your Own Moth Repellent Using Cedar Chips and Cotton Cloth 🦋🌳

Living in an overgrown cedar forest has its perks: beautiful views, a rich natural scent, and an endless supply of cedar wood chips. But after discovering one too many moth holes in my favorite sweaters, I knew it was time to put those cedar chips to good use. Enter: DIY no-sew cedar sachets.

These quick, eco-friendly sachets are a chemical-free way to protect your clothes and keep your home smelling fresh. And the best part? With precut cotton cloth, cotton cord, and cedar chips, they’re so easy to make you’ll have a batch ready in no time. Plus, no sewing required.

Here’s how I made my sachets and how you can make yours, too!

Materials You’ll Need:

Order supplies for your DIY No-Sew Cedar Sachets thru my Amazon Affiliate links below, or find these supplies at your favorite local shops:

Use cotton cloth of your choosing to make no-sew diy cedar sachets. Liz Chandler @PurlsAndPixels used this cute set with a pastel cactus pattern.

Step 1: Gather Your Supplies

I started with a 5-piece fabric bundle in beautiful patterns and cut each piece into roughly 10×10-inch squares. These precut bundles are perfect for projects like this because they’re affordable, versatile, and save time on measuring.

Living near a cedar forest, I always have cedar chips handy from yard work. But if you don’t, don’t worry. Untreated cedar chips or shavings are widely available online, at garden centers, or even in pet stores (sold as bedding).

Cut your cotton cloth into squares to start making your DIY No-Sew Cedar Sachets with Liz Chandler @PurlsAndPixels

Step 2: Prep the Cedar Chips

Place your cedar chips in a bowl. If you’d like a stronger scent, add a few drops of cedar essential oil. For a more aromatic blend, mix in dried lavender or rosemary.

For me, the pure cedar scent is enough—it’s nostalgic, reminding me of crisp mornings in the woods. But lavender gives a calming touch that’s perfect for closets or drawers.

Place a small handful of cedar chips on top of your cotton cloth square. Add in lavender, mint, or cedar oil for extra scent if you like. Find the guide from Liz Chandler @PurlsAndPixels.

Step 3: Fill and Tie the Sachets

  1. Lay one of your 8×8-inch fabric squares flat on your art table.
  2. Place a small handful of cedar chips (about 2–3 tablespoons) in the center of the square.
  3. Gather the edges of the fabric to form a pouch.
  4. Use the cotton cable cord to tie the pouch closed tightly, securing it with a double knot.

This method creates rustic yet charming sachets that keep the cedar chips securely inside. Sitting at my art table, cutting fabric, and tying sachets was surprisingly meditative. Making these DIY No-Sew Cedar Sachets were both a creative and practical way to spend the afternoon!

Use cotton cord, twine, or yarn to tie a tight knot then a cute bow to close the cedar chips into your DIY sachets. Read the lesson from Liz Chandler @PurlsAndPixels.

Step 4: Place Your Sachets

Now that your DIY No-Sew Cedar Sachets are ready, it’s time to put them to use:

  • Tuck them into drawers to protect your clothes.
  • Tie them to hangers for extra closet protection.
  • Place them in storage bins or on shelves for long-term freshness.

My office smelled like a cedar forest by the time I was done, and I couldn’t help but feel proud of this simple, practical creation.

DIY No-Sew Cedar Sachets - chemical free Moth Repellent Using Cedar Chips and Cotton Cloth - make them with Liz Chandler @PurlsAndPixels.

Why Cedar Works

Cedar’s strong, natural aroma masks the smell of natural fibers like wool and cotton, making it harder for moths to find their food source. Unlike harsh chemical mothballs, cedar is completely natural, eco-friendly, and safe for your family.

Bonus Benefit: Cedar Repels Mice Too!

Did you know cedar sachets don’t just repel moths? They can also help deter mice! The oils in cedar emit a strong aroma that rodents find unpleasant, making cedar an excellent, chemical-free option for pest prevention.

Place cedar sachets in:

  • Closets
  • Storage bins
  • Attics
  • Basements
  • Along baseboards or near entry points

For extra effectiveness, add a few drops of cedar essential oil to the sachets or use a cedar oil spray for hard-to-reach areas.

Tips for Best Results:

  • Refresh the Scent: Cedar’s aroma will fade over time. Add a few drops of cedar essential oil directly to the chips every few months to revive the scent.
  • Replace Regularly: Swap out the cedar chips every 6–12 months for maximum effectiveness.
  • Use Multiple Sachets: Larger spaces like closets or storage bins may need several sachets to maintain coverage.

Bringing the Forest Indoors

When I first started making cedar sachets, it was a practical way to deal with an overabundance of wood chips. But it’s become more than that—a simple, satisfying project that connects me to the natural beauty of my cedar forest.

Now, my clothes are protected, my closet smells amazing, and I’ve discovered a thoughtful, handmade gift idea for friends and family.

Creating these sachets at my art table turned into a calming, meditative experience, which reminded me of the beauty in combining creativity and practicality.

Place your cedar sachets in with your woolen yarn, sweaters, or suits, to help repel moths. Read the lesson from Liz Chandler @PurlsAndPixels.

Moth Repellent Using Cedar Chips and Cotton Cloth

Ready to start your own DIY sachets? Whether you’re working with cedar from your yard or store-bought supplies, this project is as easy as it is rewarding.

Keep Your Knits Beautiful & Your Spirit Cozy 🧶

Love this natural approach to protecting your handmade treasures? Explore these related articles to enhance your knitting and cozy living journey:

How do you protect your precious knits? Share your favorite storage tips in the comments below, or pin this cedar sachet tutorial for your next crafting session! 📌

Love sustainable crafting and cozy living? Sign up for my newsletter to get free guides, seasonal tips, and updates straight to your inbox. 💌

How to Care for Hand Knits

Learn to care for your hand knits and knitwear with practical tips from Liz Chandler @PurlsAndPixels.

A Real-Life Guide from a Knitting Mom 🧶

Caring for hand knits can feel overwhelming, but after a decade of knitting (and plenty of mistakes), I’ve learned what actually works. As a solo parent and the creator behind PurlsAndPixels, I’ve found practical ways to keep handknits beautiful, even with a busy life and an active child. Let me share my best tips and a personal story that taught me one of my biggest lessons.

Learn about caring for knitwear with some practical tips from Liz Chandler @PurlsAndPixels.

Essential Knit Care: What Actually Works (A Recovering Perfectionist’s Guide) 🧶

Let me share a secret: I’m surprisingly reckless with my knits. And you know what? They’re doing just fine! Here’s my real-world, honest-to-goodness care method:

Basic Washing Steps (The Truth Edition)

Confession time – I use my washing machine! 🤫 Here is what I do to care for a handknit item:

  • Pop it in on the hand wash or delicate cycle.
  • Use tap cold water (this part’s non-negotiable).
  • Skip the fancy wool wash – I use Seventh Generation EasyDose Laundry Detergent. It’s gentle, simple, and works perfectly!
  • Let the machine do its thing

THE ONE ABSOLUTE RULE: Never. Ever. Ever. Put your knits in the dryer unless you’re planning to felt them or want a surprise doll sweater. Always lay flat to dry. This is the hill I’ll die on.

Fiber-Specific Care (The Reality Version):

  • Wool: Tougher than you think! Cold water, delicate or handwash cycle, no drama.
  • Cotton: Can handle a bit more, but why push it?
  • Acrylics: Fun fact – acrylic is literally plastic in fiber form. And you know what happens to plastic when it gets too hot? Yep, it melts. Hot water or dryer heat will turn your beautiful acrylic sweater into a sad, crackly mess. Stick to cold water and lay flat to dry.
  • Blends: When in doubt, treat it like your precious wool.
Learn how to care for hand knit items with tips from Liz Chandler @PurlsAndPixels.

Pro Tip: While others swear by specialty wool wash, I’ve found that simple, Seventh Generation EasyDose Laundry Detergent does the job perfectly. No need for fancy products – sometimes simpler is better!

Remember: Your handknits aren’t as delicate as the internet might have you believe. They can handle real life – just keep them away from that dryer and warm/hot water!

The Velcro Incident: A Knitting Care Lesson Learned

My first ‘perfect’ knit was a baby blanket for my son. I felt like every stitch was flawless, the tension perfect. It was my masterpiece. Then came the Velcro incident.

A harmless-looking toy snagged the blanket, pulling stitches and leaving snags everywhere. My heart sank. That first project, meant to be a keepsake, now carried imperfections.

But here’s the thing about knitting (and life) – perfection isn’t always the point. Those snags became part of our story, marking moments of real life with an active little one. Still, I learned some valuable lessons about protecting precious knits!

Sneaky Snag Culprits to Watch Out For:

  • Velcro: The knitwear destroyer! Check those baby toys, shoes, and jackets.
  • Zippers: They look innocent but can catch your stitches in a flash.
  • Jewelry: Those dainty rings and bracelets? Stitch snatchers in disguise.
  • Pet Claws: Our furry friends don’t mean to, but those little paws can pull.
  • Rough Surfaces: Beware of splintery wood and rough upholstery.

Pro Tip: When gifting baby knits, I now include a gentle note about Velcro awareness. It’s saved many a blanket from meeting the same fate!

Remember: While we can’t prevent every snag in life (or knitting), we can be mindful of these sneaky culprits. Your handknits deserve that much! 🌿

Cozy Knits Storage Solutions That Work 🧶

Living in a small space has taught me the art of storing precious handknits. Here’s what really works (and what I actually use!):

  • Fold with Love: Stack your sweaters like I do here – see how the teal sweater keeps its shape? Proper folding prevents shoulder distortion and maintains your knits’ natural structure.
  • Clear Storage Champions: Using transparent containers (like this one!) lets you easily spot your favorites while keeping them dust-free. Plus, you can see exactly what you have at a glance!
  • Layer with Care: Notice how these colorwork pieces are carefully stacked? This prevents any snagging between delicate patterns. That pink and orange fair isle beauty stays perfect!
  • Seasonal Organization: Sort by season and store similar items together – makes switching out your wardrobe so much easier

Remember: Your handknits are treasures that deserve thoughtful storage. With these simple solutions, they’ll stay beautiful for years of cozy wearing! ✨

Make sure to store your hand knits in a way that will preserve them for longer. Liz Chandler @PurlsAndPixels uses clear storage bins to keep folded sweaters and blankets.

Emergency Hand-Knit Care

Accidents happen, especially with kids or pets! Here’s how to handle them:

  1. Snags:
    • Don’t pull or cut the snagged string.
    • Use a crochet hook to gently pull the yarn back through.
    • Work from the wrong side if possible.
    • Gently stretch the piece to try to bring the yarn back into it’s original shape.
  2. Stains:
    • Blot (don’t rub).
    • Rinse with cool water immediately.
    • Test cleaning solutions on a hidden spot before applying.
  3. Holes:
    • Catch them early.
    • Use matching yarn to repair.
    • Seek professional help for large or intricate repairs.

Build an Essential Hand-Knit Care Kit

Keep these tools in mason jars for quick fixes (Amazon Affiliate Links):

Pro tip: Save yarn scraps from each project for future repairs by winding them into tiny balls (lesson here) or around old gift cards and storing them with these supplies!

Here’s a fun DIY project if you’re feeling crafty: learn to make your own cedar sachets in this guide.

Seasonal Hand-Knit Care Tips

Spring/Summer:

  • Wash knits before storing to remove oils and dirt.
  • Add cedar or lavender sachets for moth prevention.
  • Store in a cool, dry place.

Fall/Winter:

  • Check for moth damage before use.
  • Refresh cedar blocks or sachets.
  • Air out stored items before wearing.
Pack important hand knits - especially those made of wool - in a cedar chest to prevent moths from destroying your hard work. Find more tips from Liz Chandler @PurlsAndPixels.

Real-Life Knitting Care Routines

Life gets messy. Here’s how I balance precious handknits with reality:

  • Spot clean whenever possible to extend time between washes.
  • Air out knits after wear to freshen naturally.
  • Keep a basic care kit on hand for quick fixes.
  • Address issues promptly to avoid permanent damage.
  • Embrace imperfections—they tell the story of a loved, well-used knit.

Remember: Perfect Is Overrated

That baby blanket with Velcro snags? My son still treasures it. Every imperfection tells a story of love, learning, and real life. While caring for knits is important, the “oops” moments often become cherished memories.

Pro Care Tips From My Knitting Journey

  • Always check pockets before washing.
  • Keep spare buttons in a labeled jar.
  • When in doubt, air it out.

Share Your Stories

What’s your first “perfect” project? Any care disasters you’ve learned from? How do you balance real life with precious handknits? I’d love to hear your stories! Drop a comment or send me a message on social media. Find me @PurlsAndPixels on all platforms. 🧶

Beat the Winter Blues

Cozy cabin lifestyle tips to help beat the winter blues from Liz Chandler @PurlsAndPixels.

A Guide to Cozy Cabin Decor 2025 🌿🪵

Feeling the winter blues creeping in? Same here! This time of year can feel so gray and dreary. But as someone who spends a lot of time at home, I’ve discovered ways to make any space feel warm, inviting, and full of life. From houseplants and rustic touches to creative storage ideas, these budget-friendly tips will help you embrace the cozy cabin vibes we’re all craving in 2025. Let’s beat the winter blues together!

How do you beat the winter blues? I want to know your ideas, too! #warmthoughts

Natural Light, Houseplants, & Cozy Corners: A Winter Must

2025 is all about maximizing natural light and adding greenery to brighten your home. Here’s how to bring those cheerful cabin vibes into your space:

  • Maximize natural light: Position your favorite chair near a window to soak up daylight during the short winter days.
  • Add greenery: Incorporate low-maintenance houseplants like Christmas cactus, shamrocks, or peace lilies for a touch of life and color.
  • Layer lighting: Add a floor lamp for cloudy days and a soft twinkle light tree to create a cozy glow after sunset.
Rice Stitch Afghans make the best throw blanket for your cozy knitting nook.

Smart Storage Meets Rustic Charm

Combine function and style with storage that fits the rustic cabin aesthetic:

  • Use vintage or new mason jars to store everyday items like craft supplies, tea bags, or small tools. Both practical and pretty!
  • Display blankets or throws in a woven basket for easy access and a cozy vibe.
  • Install a wooden ladder shelf to showcase books, houseplants, or personal treasures: storage and decor in one!
A basket of colorful throw blankets makes the most gloomy days brighter. Bonus points if they're handmade! Learn how to beat the winter blues with cozy decor with Liz Chandler @PurlsAndPixels.

Cabin-inspired decor is all about warmth and layers. Here’s how to bring those elements into your home:

  • Pair soft, neutral throws with textured pillows for depth and comfort.
  • Add a soft glow with battery-operated candles or string lights.
  • Incorporate free decor like pinecones, seasonal branches, or dried flowers in vases or jars.
  • Mix textures: rustic wood furniture, chunky knits, soft wools, quirky quilts, and leafy greenery create a visually rich space.

Brighten Your Room with Happy Colors: Learn to Knit!

Feeling inspired to add more life and color to your space? Why not try knitting? It’s beginner-friendly, creative, and the perfect way to liven up your room with custom-made decor in your favorite hues.

Start with a simple project like a useful face scrubby, a cozy scarf, or a colorful throw. Not only will you create something unique, but you will also gain a relaxing hobby that adds warmth and personality to your home.

🧶 Check out my Beginner’s Knitting Guide for step-by-step instructions and a free pattern to get started today!

Free Gratitude Blanket Pattern: Start Your Mindful Making Journey ✨

Transform your cozy space while practicing gratitude with my free Gratitude Blanket pattern! This beginner-friendly project is more than just a beautiful addition to your home, it’s a mindful making journey for 2025.

Learn to knit a gratitude blanket to brighten up your home and beat the winter blues. Find the free knitting pattern from Liz Chandler at PurlsAndPixels.

Perfect for beginners, this pattern features:

  • Simple garter stitch (knit stitches only)
  • Three size options (Baby, Throw, or Queen)
  • Flexible color changes to match your decor
  • Mindful gratitude prompts

Whether you’re cozying up by the window or adding warmth to your reading nook, this blanket becomes both a beautiful decor piece and a tangible record of your grateful moments. Brightening your home with a Gratitude Blanket may be a perfect way to beat the winter blues.

Budget-Friendly Ways to Beat the Winter Blues

Transforming your space doesn’t have to break the bank! Try these simple, affordable ideas:

  • Group mason jars in odd numbers for visually appealing decor.
  • Collect natural elements like pinecones or winter greenery for cost-free accents.
  • Use thrifted baskets or crates for stylish storage.
  • Rearrange your furniture to create a fresh perspective without spending a dime.
Mason jars filled with your knitting tools, yarn balls or scraps, or even your favorite candy can brighten up any gloomy day. Get more cozy lifestyle tips from Liz Chandler @PurlsAnd Pixels

Light & Greenery: The Perfect Duo

Winter days can feel long and dark, but the right combination of lighting and greenery can make a world of difference:

  • Wrap twinkle lights around potted plants or display them in clear jars.
  • Add a rustic lantern for soft, ambient lighting.
  • Combine a bright window spot with a trailing houseplant to bring life to any room.

Practical Tips for Cozy Cabin Decor

The key to a welcoming home is blending comfort with practicality:

  • Keep blankets, books, and cozy essentials within reach in baskets or on shelves.
  • Use stylish trays or jars to organize small items like keys, coasters, or craft supplies.
  • Dedicate a space for your favorite hobbies, whether it’s knitting, journaling, or just sipping tea by the fire.
Make the most of the cold winter days by creating cozy corners in your home. Beat the winter blues with tips from Liz Chandler @PurlsAndPixels.

Quick Winter Blues Busters

Need a pick-me-up? Try these small changes to lift your spirits:

  • Rearrange your favorite corner for better light and flow.
  • Add pops of color with vibrant pillows, throws, or artwork.
  • Bring the outdoors in with a few fresh branches or potted plants.
  • Play with texture by layering knits, wools, and woven baskets.

Forget perfection! The coziest spaces are the ones that feel lived-in and loved. Embrace your personal style with:

  • Decor that reflects your favorite activities and hobbies.
  • Houseplants that thrive in your environment.
  • Creative, functional storage that makes everyday life easier.
  • Personal touches that make your home feel uniquely yours (like our golden bull ukulele holder paired with a covered wagon drawing).
Embrace the cozy cabin lifestyle by adding home decor accents that make you smile. Find ideas from Liz Chandler @PurlsAndPixels.

Stay Cozy, Friends!

This winter, let’s embrace the cozy cabin aesthetic to lift our spirits. Whether you’re enjoying a book by the fire, crafting in your favorite corner, or simply unwinding with a cup of tea, creating a space that’s warm, inviting, and full of personality can help you beat those winter blues.

Cabin life can be so comfy. Create your own cozy lifestyle with tips from Liz Chandler @PurlsAndPixels

Pro Tip: Start small! Even adding a potted plant and a string of lights can completely change the feel of a space. My cozy firsts? My llama in glasses painting print (I mean, who can’t help but laugh at that quirky face) and my ceramic paint drip lamp.🌿🪵

What Do You Think?

How do you make your home feel cozy during the winter months? I’d love to hear your tips!

#WinterBlues2025 #CozyCabinDecor #BudgetFriendlyLiving #RusticVibes #HyggeStyle

Read More

Simple 2-Ingredient Baked Salmon Recipe with Herb Butter

Learn to cook simple baked salmon with herb butter from frozen with this easy dinner recipe from Liz Chandler @PurlsAndPixels.

Transform a frozen salmon fillet into a delicious, nourishing meal in just 35 minutes with this simple recipe. As someone who juggles running PurlsAndPixels, solo parenting, and managing a homestead, I understand the need for practical recipes that still feel special. This simple baked salmon recipe with herb butter has become my go-to for quick, wholesome dinners without the fuss.

Jump to Recipe

Ingredients for Easy Baked Salmon with Herb Butter 🐟

For each person you are feeding, you’ll need:

  • 1 frozen salmon fillet (about 6 oz)
  • 2 tablespoons herb butter (like Kerrygold Garlic & Herb Butter)

That’s it! Simple and delicious.

How to Bake Frozen Salmon 🧑‍🍳

  1. Preheat your oven to 350°F.
  2. Line a baking sheet or glass baking dish with parchment paper.
  3. Place the frozen salmon fillet on the parchment paper.
  4. Top with herb butter (let it slowly melt into the fish as it bakes).
  5. Bake for 30-35 minutes, or until the internal temperature reaches 145°F.
  6. Serve and enjoy!

Tips for Baking Salmon from Frozen ✨

  • No thawing required! This recipe works perfectly with frozen salmon straight from the freezer.
  • 🧈 The butter creates a natural sauce as it melts, keeping the fish moist and flavorful.
  • 🌡️ Use a cooking thermometer to check doneness. (Grab one here on Amazon.)
  • 🍋 Add fresh lemon to your portion before eating for extra zest.

Cozy Serving Suggestions 🌿

Pair this baked salmon with:

  • Roasted vegetables like asparagus, broccoli, or Brussels sprouts.
  • A fresh garden salad for a light and wholesome side.
  • Steamed spinach or rice to soak up the buttery sauce.

For an extra treat, try a slice of crusty bread to scoop up the melted herb butter. It’s the ultimate comfort food for cozy evenings!

Variations to Try 🌟

  • Lemon-Pepper Butter: Swap the herb butter for a lemon-pepper version.
  • Sweet & Savory: Add a drizzle of honey during the last 5 minutes of baking.
  • Garden-Fresh: Sprinkle with your favorite fresh herbs like dill, parsley, or chives before serving.

Storage Tips for Leftovers 📦

Keep leftovers in an airtight container in the fridge for up to 2 days. They reheat beautifully for a quick lunch the next day!

Why Frozen Salmon?

Frozen salmon is budget-friendly, accessible year-round, and retains its nutritional value. This recipe lets you skip the hassle of thawing, so dinner is ready faster. Plus, the herb butter adds just the right amount of flavor.

Easy baked salmon from frozen, recipe from Liz Chandler @PurlsAndPixels.

Simple 2-Ingredient Baked Salmon Recipe with Herb Butter

Serving Size:
1 Fillet = 1 Serving
Time:
35 – 40 minutes
Difficulty:
Easy

Ingredients

  • Frozen Salmon Fillet
  • Herb Butter

Directions

  1. Preheat your oven to 350°F.
  2. Line a baking sheet or glass baking dish with parchment paper.
  3. Place the frozen salmon fillet on the parchment paper.
  4. Top with herb butter (let it slowly melt into the fish as it bakes).
  5. Bake for 30-35 minutes, or until the internal temperature reaches 145°F.
    Serve and enjoy!

Print this Recipe

Serving suggestion for Liz Chandler's quick baked salmon recipe (from frozen). Get the instructions at PurlsAndPixels.

Share Your Variations! 🧡

Do you have a favorite way to prepare salmon? Share your tips and variations in the comments or tag me on Instagram @PurlsAndPixels. I’d love to feature your ideas!

New Year’s Knitting Project Checklist

Organize your knitting projects with Liz Chandler's free Knitting Project Planner PDFs at PurlsAndPixels.

Plan Your Most Creative Year Yet 🧶

A new year brings a world of possibilities for knitters. Whether you’re dreaming of cozy sweaters, intricate colorwork, or mastering new techniques, a clear project plan can turn those creative dreams into reality. Organize your space and then plan your next knitting projects with the free Knitting Project Checklist and Knitting Planner at the end of this article. Let’s get intentional about making this your most inspired knitting year yet!

Organize your knitting projects with Liz Chandler's free Knitting Project Planner PDFs at PurlsAndPixels.

Essential Steps for Knitting Success

1. Stash Assessment

Before diving into new projects, take stock of your yarn:

  • Inventory your yarn by weight, yardage, and fiber content.
  • Find your favorites: Note which yarns spark joy or inspire ideas.
  • Fill in the gaps: Identify missing weights or colors.
  • De-stash thoughtfully: Plan projects to use yarn that’s been sitting idle.
This Knitting Project Checklist is a free Knitting Planner in PDF form from Liz Chandler @PurlsAndPixels.

2. Skill Development Goals

Set intentions for leveling up your knitting this year:

  • List techniques you want to learn, like brioche, entrelac, or colorwork.
  • Seek patterns that teach those skills in manageable steps.
  • Plan for progression—start simple, then tackle complex designs.
  • Schedule dedicated time for tutorials or classes.
Organize your knitting for the new year with tips and a free project planner from Liz Chandler @PurlsAndPixels

3. Project Timeline

Map out projects by season to stay on track:

  • Winter (Jan-Mar): Cozy accessories, temperature tracking projects, or indoor comfort items.
  • Spring (Apr-Jun): Lightweight garments, garden-inspired makes, or Mother’s Day gifts.
  • Summer (Jul-Sep): Portable projects, beach/travel knitting, or early holiday prep.
  • Fall (Oct-Dec): Gift knitting, warm layers, or festive decorations.
Plan the projects you will make in the new year by organizing your yarn stash by weight - lighter weight yarn for spring and summer, thicker yarns for fall and winter. Free tips and planner from Liz Chandler @PurlsAndPixels.

4. Supply Organization

An organized toolkit makes for smoother knitting:

  • Take inventory of needles, notions, and tools.
  • Review storage solutions to ensure everything is easy to find.
  • Maintain your tools—sharpen scissors, replace worn needles, and clean your knitting bag.
New Years knitting tip: organize your craft supplies so you don't have to hunt for what you need, or accidentally buy something you already have! Find more cozy craft ideas from Liz Chandler @PurlsAndPixels.

5. Pattern Library

Keep your patterns accessible and inspiring:

  • Organize your digital and printed patterns.
  • Create a Knitting Project Checklist
  • Get a knitting journal to keep track of all the patterns you will write.
  • Create a queue of projects you’re excited about.
  • Match patterns to your stash for immediate starts.
When crafting gets messy, its time to start organizing. First, get a knitting journal to organize all the patterns you will write this year. Available from Liz Chandler @PurlsAndPixels.

6. Comfort Zone Expansion

Stretch your creativity by trying something new:

  • Experiment with unfamiliar yarn weights or fibers.
  • Play with bold colorwork or gradients.
  • Try challenging techniques like double knitting or cables.
  • Join a knit-along (KAL) focused on skill-building.
Expand your knitting skills this year by learning new techniques and practicing with new fibers. Find free lessons from Liz Chandler @PurlsAndPixels.

Tips for Knitting Joy and Productivity

  1. Start Small: Kick off the year with quick wins like hats, mittens, or dishcloths to build momentum.
  2. Track Your Progress: Use photos or a notebook to document your projects, celebrate successes, and learn from mistakes.
  3. Stay Flexible: Allow space in your schedule for spontaneous inspiration or unexpected challenges.
  4. Build Community: Share your goals with fellow knitters for encouragement and accountability.

Download Your Free Knitting Planner PDF

Plan your year of knitting with these two printable PDFs. Print the knitting project checklists as many times as you need to keep track of all of your patterns this year.


Make 2025 Your Most Inspired Knitting Year!

This knitting project checklist isn’t about rigid rules—it’s a flexible guide to help you find joy and creativity in your knitting journey. Ready to get started? Download your free project planner and let’s make this your most organized and inspired year yet! ✨

Find out why knitting is a perfect New Year’s resolution in this article.

Need Some Knitting Inspiration?

🙏 Make a Gratitude Blanket this Year

📃 Browse Knitting Patterns

🧶 Learn Knitting Techniques

🧺 Explore Yarn & Supply Ideas