Customize Knits

Learn to customize your knitwear by adding pom-poms, buttons, and other decorations in this knitting lesson from Liz Chandler @PurlsAndPixels.

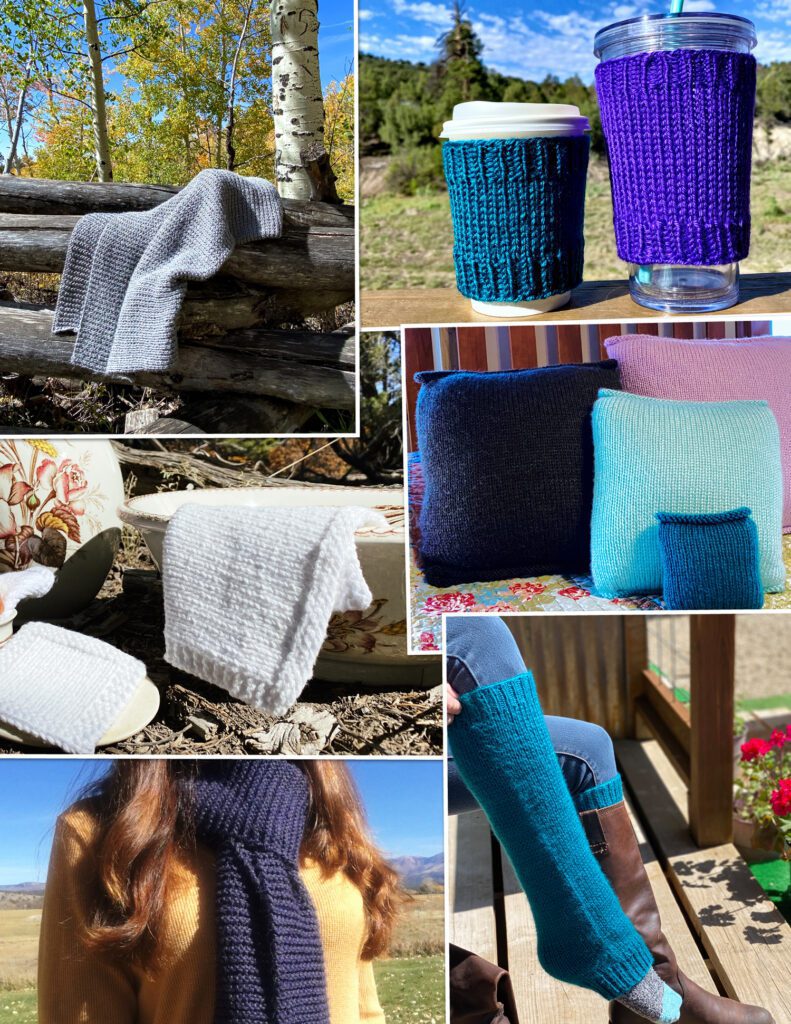
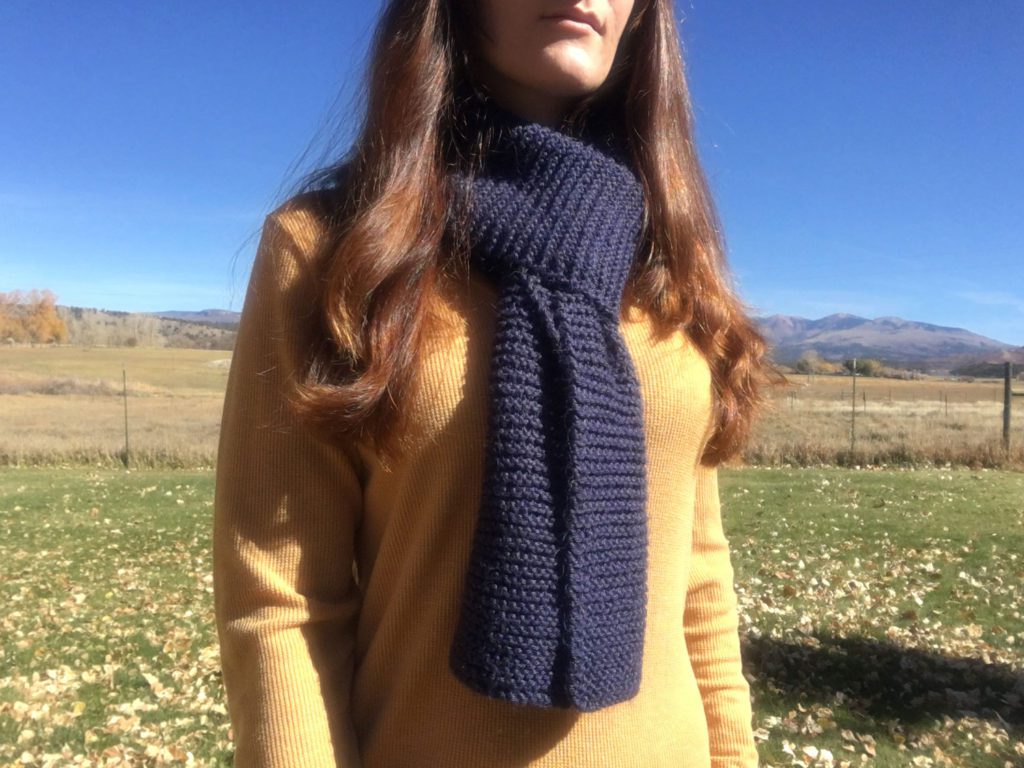
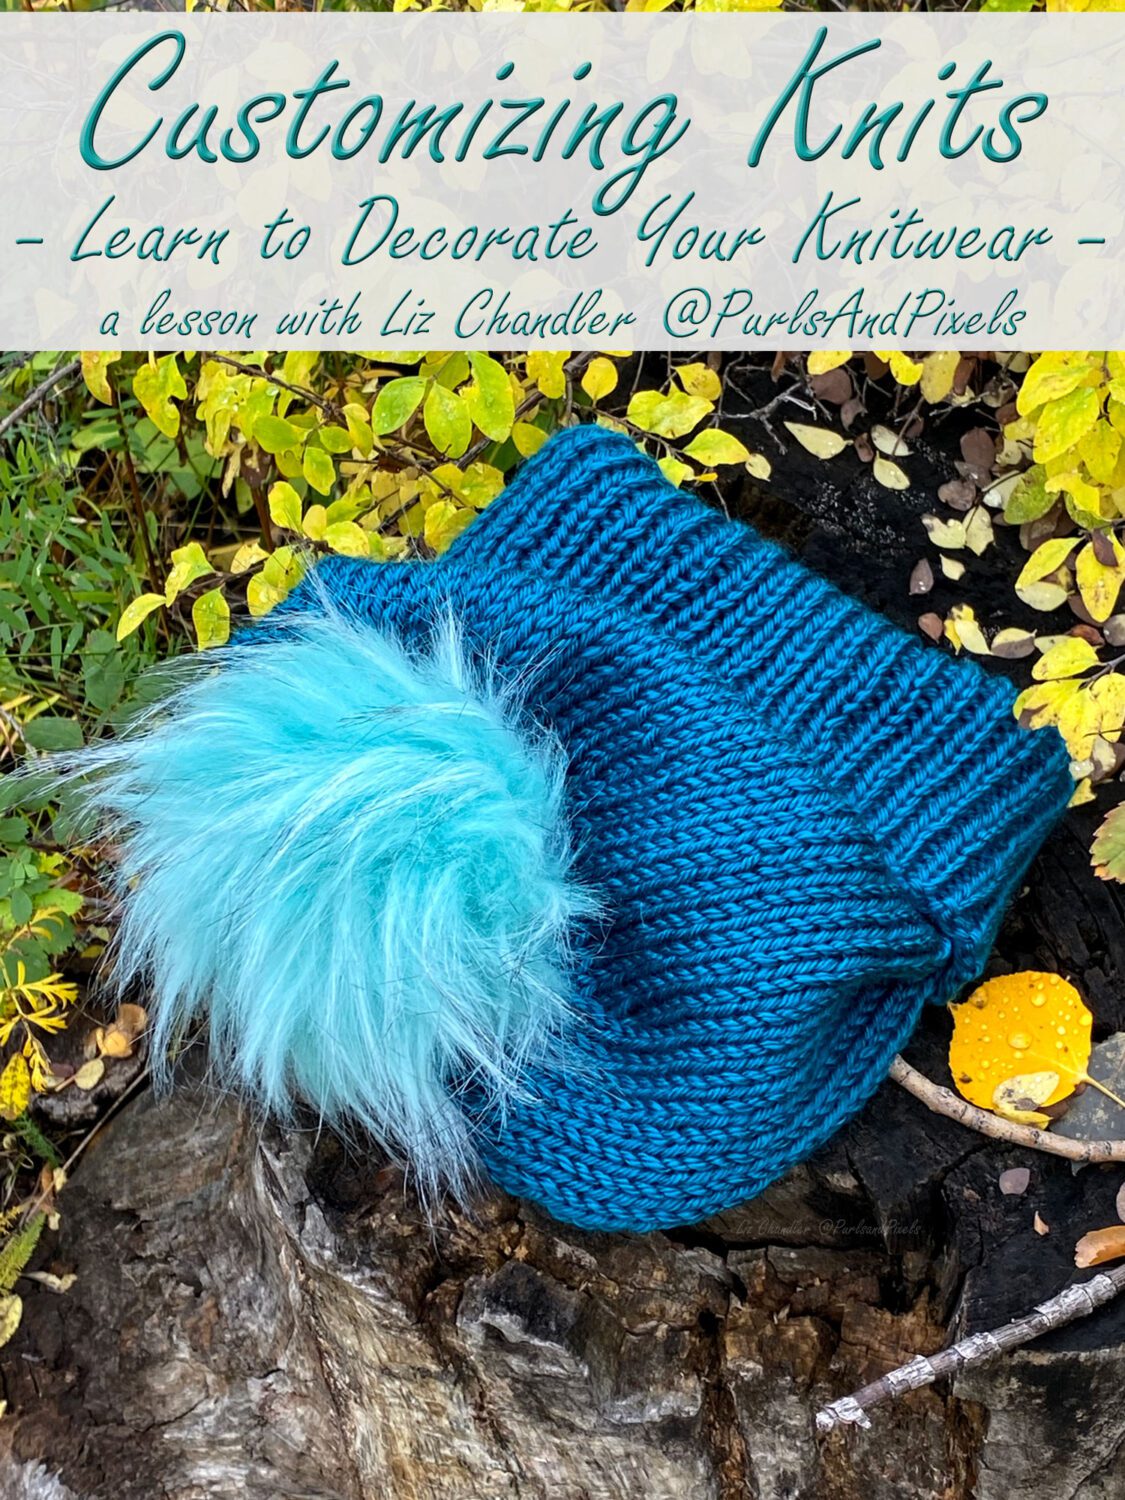
Minimalist knitting patterns are simple to knit and you can make them over and over again. But your plain knitwear does not have to stay plain. Try to customize knits to fit your personal style. You can take any simple pattern and spice it up by adding decorations or changing the yarn design.

Customize Your Knitting

Learn to customize your knitwear by adding pom-poms, buttons, and other decorations in this knitting lesson from Liz Chandler @PurlsAndPixels.

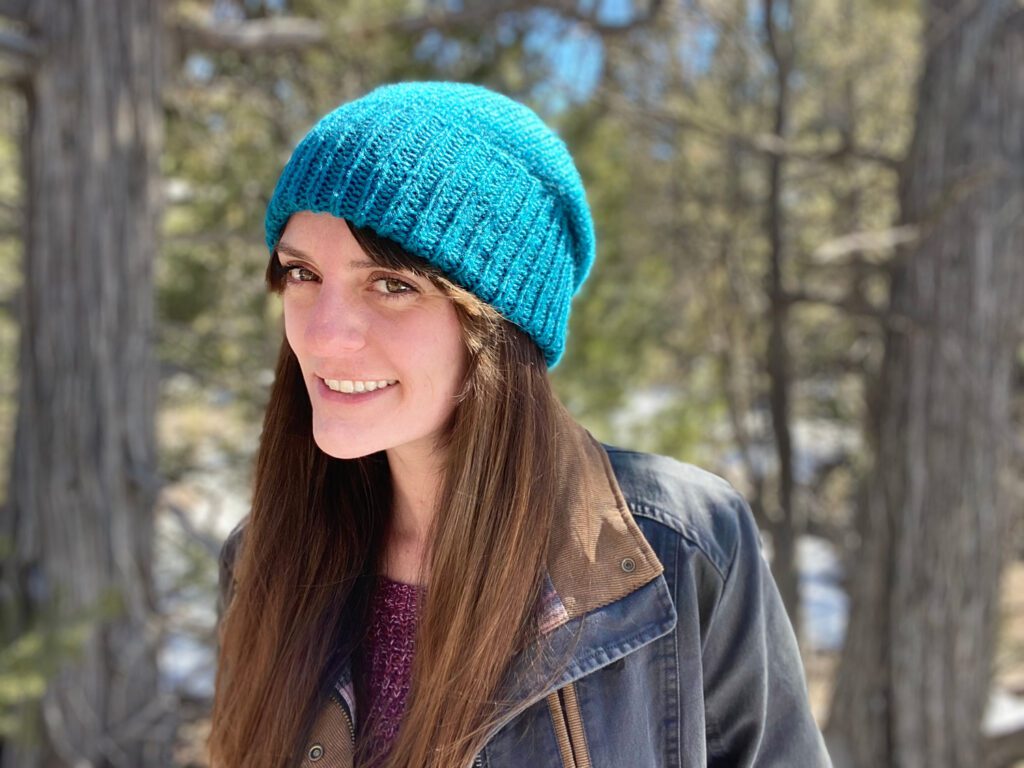
Once you have learned to knit the basic patterns, you may want to find a way to make simple designs a little more unique. Choosing a colorful, variegated yarn is a great way to spice things up. Try a new material, like wool, alpaca, or silk.

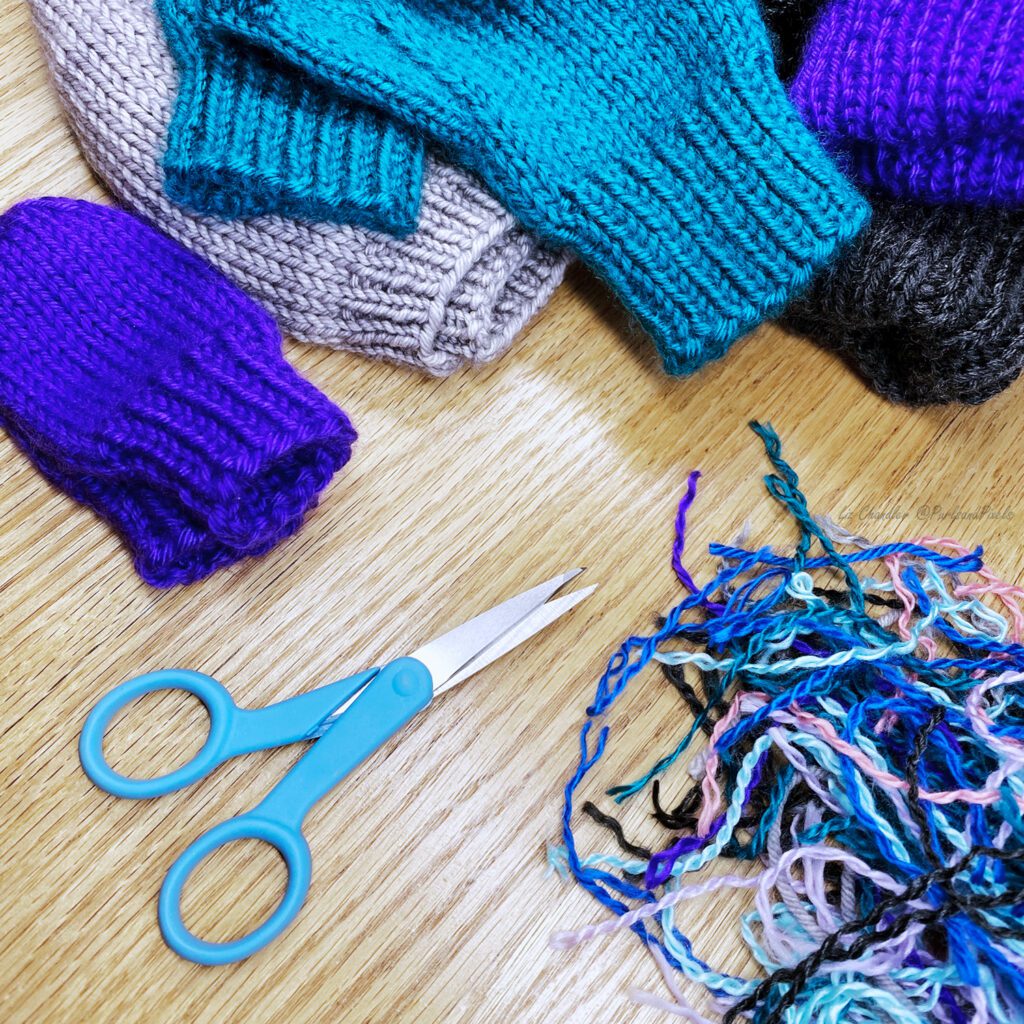
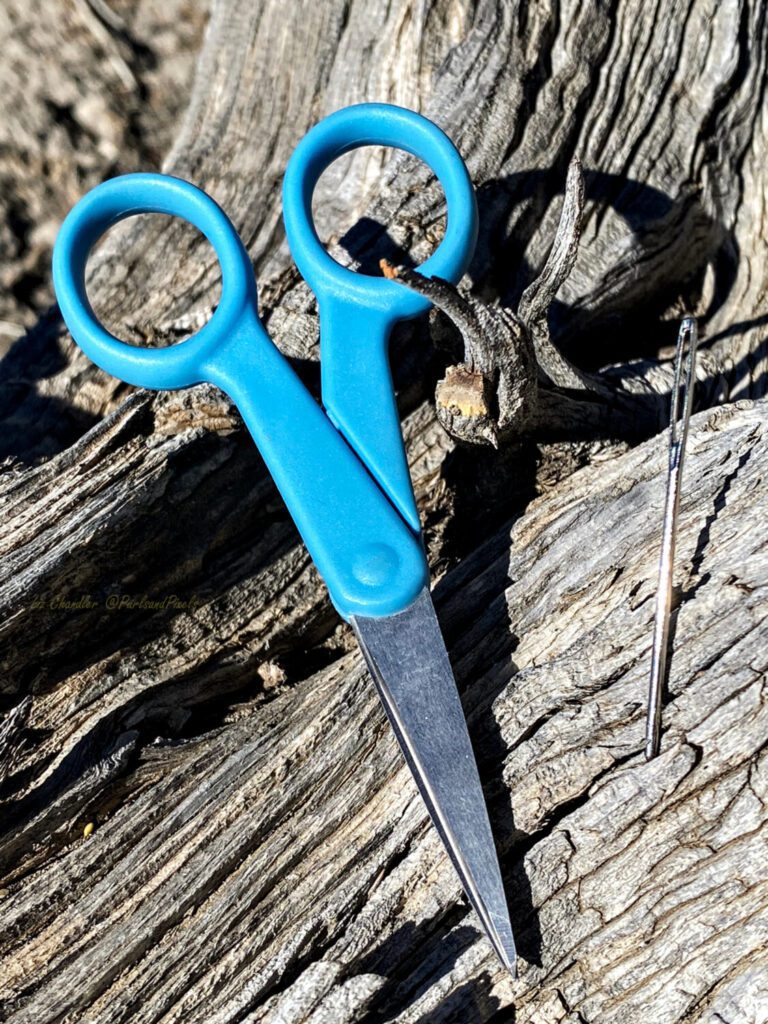
Add pom-poms, tassels, bows, or faux flowers. If you are familiar with embroidery, stitch embroidered embellishments onto your knitwear using your darning needle and yarn.

Substitute Yarn

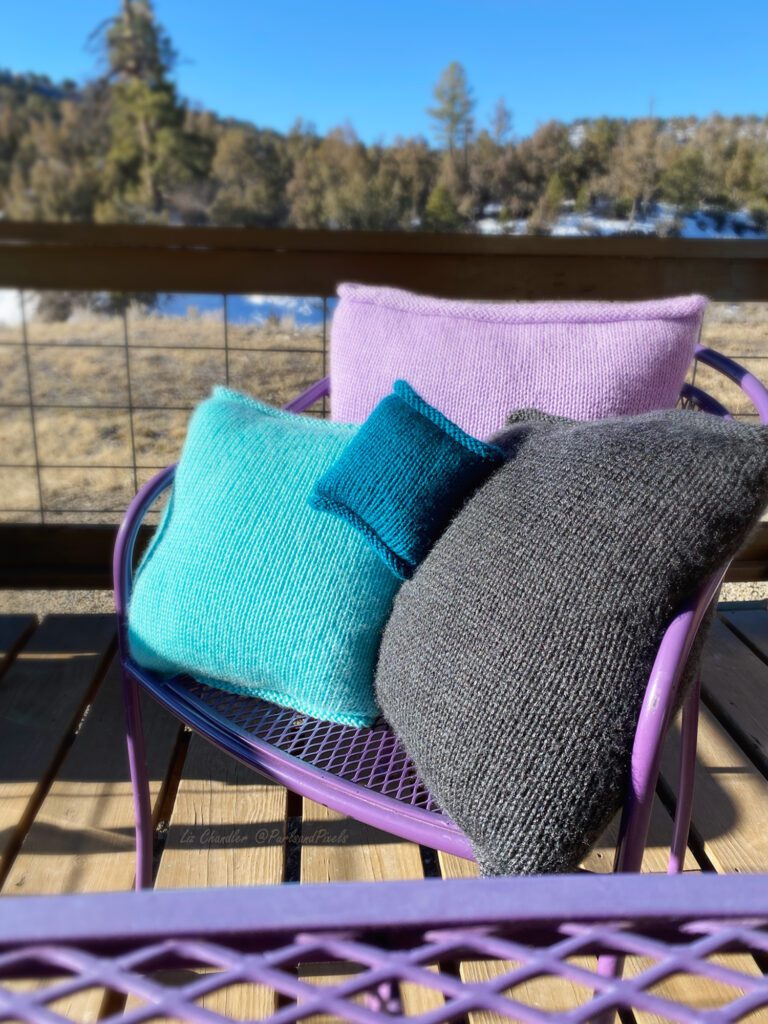
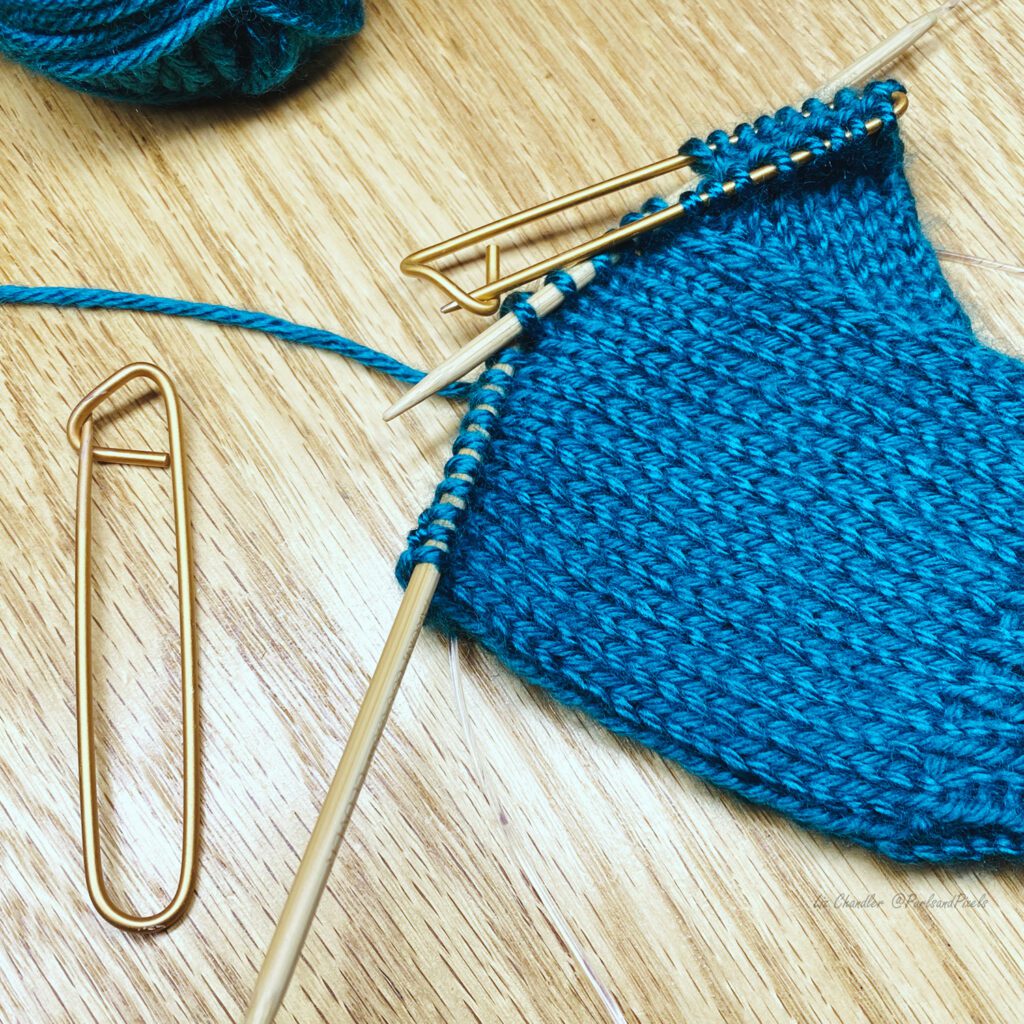
You can alter the look of a knitted item dramatically just by changing the recommended yarn. Experiment with both color and yarn material to create your own, one-of-a-kind knit. The most important thing to keep in mind when substituting yarn, however, is to choose yarn that is the same weight as the recommended yarn. When working through my beginners’ lessons make sure you select a “worsted weight” yarn. 

You can also try working with different yarn materials. Each type of fiber that is spun into yarn has its own unique look and feel, so changing the yarn material can change the texture of your knit pieces. When substituting yarn, choose materials that are similar to your starting yarn. For example, wool and alpaca make excellent substitutes for acrylic yarn; they are soft, stretchy, and warm. Try a bamboo-based yarn instead of cotton, since it is absorbent and holds its shape.

Explore the wide array of colors and try a few of your favorites. Yarn-makers offer solid color yarns in every shade of the rainbow. Or, add pattern and depth to your knitting by working with a multicolored or ‘”variegated” yarn. Skeins of variegated yarn are dyed with different sections of coordinated colors; they allow you to knit in multiple colors without switching balls of yarn. Some variegated yarn is even made to be “self-striping;” it is dyed in sections that create the illusion of separately knit color stripes.

Learn to customize your knitwear by adding pom-poms, buttons, and other decorations in this knitting lesson from Liz Chandler @PurlsAndPixels.

Find my recommendations for substitute worsted weight yarn here.

Add Decorations and Embellishments

Let your imagination run wild when it comes to decorating your finished knits. Handmake or purchase fun accents to compliment your knitwear. To any simple knit, consider adding:

(Links above lead to Amazon.com associates shopping.)

Find Simple Patterns

Simple knitting patterns by Liz Chandler @PurlsAndPixels.

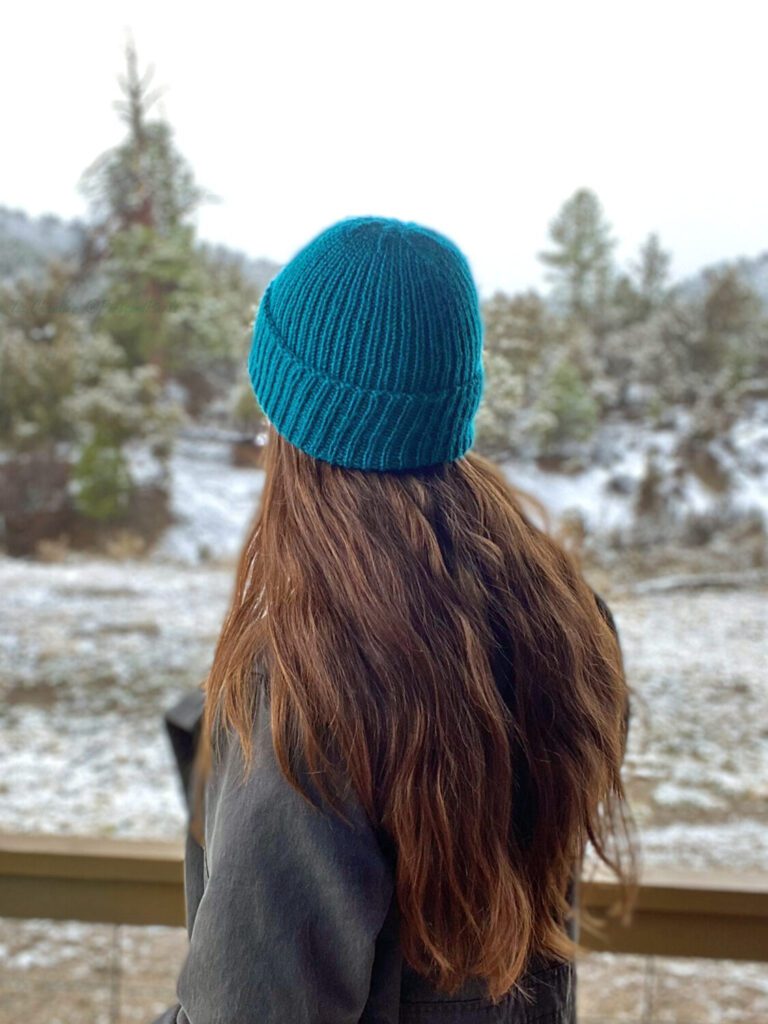
You can customize any of my simple knitting patterns using these ideas. Changing the yarn color, material, or decorating hats, gloves, headbands, and legwarmers makes these classic knits unique.

Find the patterns here.

Learn to customize your knitwear by adding pom-poms, buttons, and other decorations in this knitting lesson from Liz Chandler @PurlsAndPixels.

Go Back to the Learn to Knit Index

One-Size-Fits-Most Ribbed Hat Free Knitting Pattern

Knit a stretchy, unisex, one-size-fits-most ribbed knit hat with a foldable brim using this PDF printable knitting pattern from Liz Chandler @PurlsAndPixels.

Ribbed Hat

Knit a stretchy, one-size-fits-most ribbed hat with a foldable brim using this free knitting pattern from Liz Chandler @PurlsAndPixels.

To make this ribbed hat, you will work in a simple knit, purl pattern. This will create a stretchy ribbing, which allows the hat to fit most head sizes from children through adults. Working from the bottom of the hat, upward, you will knit a long tube before adding decreases to close the top of the hat. Folding the brim will not only help it fit most heads properly, but will also add an extra layer of warmth around the ears.

Prefer to knit offline?

This pattern is free to read below, but if you’d rather print it or save it for later, I’ve created a clean, ad-free PDF version for you.

  • Includes complete, row-by-row instructions
  • Easy to print or use on your tablet
  • Supports my small business 💖
Get Liz Chandler's Ribbed Hat Knitting Pattern PDF download at PurlsAndPixels.

Using the suggested acrylic yarn will give you a soft, solid-colored hat. Try experimenting with yarn colors, textures, and materials to make this hat more unique. Be sure you choose worsted weight yarn and check your gauge before substituting materials.

The purple hat pictured here was made by substituting Malabrigo Rios merino wool yarn in the color “Lotus.” (Amazon affiliate link.)

Knit a stretchy, one-size-fits-most ribbed hat with a foldable brim using this free knitting pattern from Liz Chandler @PurlsAndPixels.

About This Free Ribbed Hat Knitting Pattern

This simple ribbed hat is an easy-level knitting pattern. You will need to know how to make a long-tail cast on, knit, purl, decrease, and draw yarn thru the remaining stitches. If you are not familiar with these skills, find quick, free lessons in my Learn to Knit Guide.

Knit a stretchy, one-size-fits-most ribbed hat with a foldable brim using this free knitting pattern from Liz Chandler @PurlsAndPixels.

Materials

You will need the following materials, which you can purchase at your local yarn shop or on Amazon.com via the affiliate links below:

Knitting Needles:

Short Circular Needles (optional)

Double Point Needles (DPNs)

Or Long Circular Needles (optional)


Yarn:

One 315-yard (6 ounce) skein of worsted weight yarn* (shown in Caron Simply Soft Yarn), in your choice of color.

  • one hat uses about one hat uses about 157.5 yards (3 oz.)

*Shown in Caron Simply Soft Yarn in “Pagoda.” Weights estimated with Caron Simply Soft yarn; other yarn weights may vary. Weight does not include gauge swatch. A 4×4 inch gauge swatch with a 2 row by 3 stitch border uses an additional 21 yards (0.4 oz.).

Tools:

A stitch marker, a measuring tape and a darning needle.

Gauge

20 stitches x 28 rows = 4 x 4 inches in stockinette stitch on No. 5 (3.75 mm) needles. (Learn how to check your gauge here.)

Abbreviations

k = knit

p = purl

** = repeat the pattern between the asterisks

ssk = slip, slip, knit

Instructions: One-Size-Fits-Most Ribbed Hat

(Fits most children, teens, and adults or 18-inch to 25-inch head circumference)

Use the Long-Tail Cast On method. Knit in the round. For Double Point Needles, follow DPN instructions written in italics. For circular needles, follow instructions written in bold. On long circular needles, follow the Magic Loop instructions. Or, for this size, you can substitute short (16-inch) circular needles to knit in the round without the Magic Loop; you will need to switch to DPNs or the Magic Loop to complete the decreases at the top of the hat. If desired, use a stitch marker to keep track of the beginning/ends of your rows/rounds by placing it between the last and first stitch of each row/round.

[Using No. 5 DPNs or short circular needles] Row 1: Cast on 88 stitches. Divide onto 3 DPNs (30 on 1st, 28 on 2nd, and 30 on 3rd DPN). Or separate stitches on long circular needles for Magic Loop (44 on each side). Or place all cast on stitches onto short circular needles. (88 stitches)

Row 2: Join the round (taking care not to twist stitches) and *k, p* x 44. (88 stitches)

Rows 3 – 75: *k, p* x 44. (88 stitches) {Work should measure 11 inches at this point.}

{Begin decreases.}Row 76: ssk, (*k, p* x 4), k, ssk, (*p, k* x 4), p, ssk, (*k, p* x 4), k, ssk, (*p, k* x 4), p, ssk, (*k, p* x 4), k, ssk, (*p, k* x 4), p, ssk, (*k, p* x 4), k, ssk, (*p, k* x 4), p. (80 stitches)

Row 77: ssk, (*p, k* x 4), ssk, (*k, p* x 4), ssk, (*p, k* x 4), ssk, (*k, p* x 4), ssk, (*p, k* x 4), ssk, (*k, p* x 4), ssk, (*p, k* x 4), ssk, (*k, p* x 4). (72 stitches)

Row 78: ssk, (*k, p* x 3), k, ssk, (*p, k* x 3), p, ssk, (*k, p* x 3), k, ssk, (*p, k* x 3), p, ssk, (*k, p* x 3), k, ssk, (*p, k* x 3), p, ssk, (*k, p* x 3), k, ssk, (*p, k* x 3), p. (64 stitches)

Row 79: ssk, (*p, k* x 3), ssk, (*k, p* x 3), ssk, (*p, k* x 3), ssk, (*k, p* x 3), ssk, (*p, k* x 3), ssk, (*k, p* x 3), ssk, (*p, k* x 3), ssk, (*k, p* x 3). (56 stitches)

[Switch to No. 5 DPNs or long circular needles and the Magic Loop] Row 80: ssk, (*k, p* x 2), k, ssk, (*p, k* x 2), p, ssk, (*k, p* x 2), k, ssk, (*p, k* x 2), p, ssk, (*k, p* x 2), k, ssk, (*p, k* x 2), p, ssk, (*k, p* x 2), k, ssk, (*p, k* x 2), p. (48 stitches)

Row 81: ssk, (*p, k* x 2), ssk, (*k, p* x 2), ssk, (*p, k* x 2), ssk, (*k, p* x 2), ssk, (*p, k* x 2), ssk, (*k, p* x 2), ssk, (*p, k* x 2), ssk, (*k, p* x 2). (40 stitches)

Row 82: *ssk, k, p, k, ssk, p, k, p* x 4. (32 stitches)

Row 83: *ssk, p, k, ssk, k, p* x 4. (24 stitches)

Cut yarn, leaving an 8-inch tail. With darning needle, draw yarn tightly through remaining 24 stitches. Weave in ends. Block if desired.

Printable version of this free knitting pattern

Printable Ribbed Hat Pattern PDF by Liz @PurlsAndPixels


Find More Knitting Patterns

If you like this, check out the other knitting patterns I’ve written. They’re all gathered on one page, which you can find on my knitting pattern collection page.

Find all of the knitting patterns by Liz Chandler @PurlsAndPixels.

Knit a stretchy, one-size-fits-most ribbed hat with a foldable brim using this free knitting pattern from Liz Chandler @PurlsAndPixels.

©2022, Liz Chandler of PurlsAndPixels. Revised 2025.

This pattern is for personal use, gifting, and charitable donation of completed items. You may also sell handmade items created using this pattern. Do not copy this pattern and distribute it. If you’d like to share the pattern, refer your friends to my website, purlsandpixels.com so they may obtain a copy.

If you find any errors or have any questions, email purlsandpixels@gmail.com and I will do my best to help.

I’d love to see your finished work! Tag your photos with @PurlsAndPixels on Twitter or Instagram.

Basic Pillow Cover Free Knitting Pattern

Learn to knit a pillowcase with this free basic pillow cover knitting pattern from Liz Chandler @PurlsAndPixels.

Basic Pillow Covers

Learn to knit a pillowcase with this free basic pillow cover knitting pattern from Liz Chandler @PurlsAndPixels.

This pattern will show you how to make simple pillow covers by knitting in the round on circular needles. Using only the knit stitch creates a smooth, stockinette stitch pattern. The top and bottom edges of stockinette that has been knit in the round will naturally curl. When you sew the edges of the pillow together, the curl adds a decorative touch to these basic pillowcase.

You can sew the edges with a simple “running stitch” and a strand of yarn in the same color. Or try using a contrasting yarn color or a fancy ribbon to make your pillows more unique. Once you are finished, you can leave the pillows plain for a minimalist look. Or decorate your pillow cover with embroidery, faux flowers, or applique patches.

About This Free Pillow Cover Knitting Pattern

This simple pillow cover is an easy-level knitting pattern. You will need to know how to make a long-tail cast on, make a knit stitch, work in the round on circular needles, and bind off in the round. If you are not familiar with these skills, find quick, free lessons in my Learn to Knit Guide.

Learn to knit a pillowcase with this free basic pillow cover knitting pattern from Liz Chandler @PurlsAndPixels.

Knit Along with Me

In this video, I will show you how to make this knit pillow from start to finish. You can follow along using the knitting pattern below.

Basic Pillow Cover Knitting Pattern

Materials

You will need the following materials, which you can purchase at your local yarn shop or on Amazon.com via the affiliate links below:

Knitting Needles:

Extra-Short Circular Needles (for size mini)
12-inch (30 cm) long US No. 8 (5.0 mm) circular needle (or size needed to obtain gauge)

Short Circular Needles (for size small)
16-inch (41 cm) long US No. 8 (5.0 mm) circular needle (or size needed to obtain gauge)

Or Long Circular Needles (for sizes medium and large)
36-inch (91 cm) long US No. 8 (5.0 mm) circular needle (or size needed to obtain gauge)

Yarn:
One or two 315-yard (6 ounce) skeins of worsted weight yarn* (shown in Caron Simply Soft Yarn), in your choice of color.

  • Mini size uses about 52.5 yards (1 oz)
  • Small size uses about 204.75 yards (3.9 oz.)
  • Medium size uses about 315 yards (6 oz.)
  • Large size uses about 388.5 yards (7.4 oz.)

*Shown in Caron Simply Soft Yarn in “Pagoda,” “Robins Egg,” “Charcoal Heather,” and “Orchid.” Weights estimated with Caron Simply Soft yarn; other yarn weights may vary. Weight does not include gauge swatch. A 4×4 inch gauge swatch with a 2 row by 3 stitch border uses an additional 21 yards (0.4 oz.).

Pillow Insert:

One square pillow-insert in the correct size.

Tools:

A stitch marker, a measuring tape and a darning needle.

Gauge

18 stitches x 24 rows = 4 x 4 inches in stockinette stitch on No. 8 (5.0 mm) needles. (Learn how to check your gauge here.)

Abbreviations

k = knit

Instructions: Mini Size Pillow Cover

(Fits 5-inch x 5-inch pillows; measures 6 inches  x 10 inches when laid flat off the pillow)

Use the long-tail cast on method. Knit in the round. For this size, work with extra-short (12-inch) circular needles. If desired, use a stitch marker to keep track of the beginning/ends of your rows/rounds by placing it between the last and first stitch of each row/round.

Row 1: Cast on 40 stitches.

Row 2: Join the round (taking care not to twist stitches) and k 40. (40 stitches)

Rows 3 – 46: k 40. (40 stitches) {Work should measure 10 inches at this point.}

Row 47: Bind off loosely in knit stitch pattern. Cut yarn, leaving an 8-inch tail, and pull through. Weave in ends. Block if desired.

Insert a 5-inch by 5-inch pillow into the cover. Thread a strand of yarn about two feet long in the same or a contrasting color onto a darning needle. Count about seven rows up from the bottom of the pillow; use this as a starting point to begin sewing the first end of the pillow closed. Use the holes created by the knitting to line up both sides and a “running stitch” to sew the bottom edge together. Tie off the loose ends. Count about seven rows down from the top of the pillow and sew the top edge closed in the same manner.


Instructions: Small Size Pillow Cover

(Fits 12-inch x 12-inch pillows; measures 13 inches  x 17 inches when laid flat off the pillow)

Use the long-tail cast on method. Knit in the round. For this size, work with short (16-inch) circular needles. If desired, use a stitch marker to keep track of the beginning/ends of your rows/rounds by placing it between the last and first stitch of each row/round.

Row 1: Cast on 86 stitches.

Row 2: Join the round (taking care not to twist stitches) and k 86. (86 stitches)

Rows 3 – 79: k 86. (86 stitches) {Work should measure 17 inches at this point.}

Row 80: Bind off loosely in knit stitch pattern. Cut yarn, leaving an 8-inch tail, and pull through. Weave in ends. Block if desired.

Insert a 12-inch by 12-inch pillow into the cover. Thread a strand of yarn about four feet long in the same or a contrasting color onto a darning needle. Count about seven rows up from the bottom of the pillow; use this as a starting point to begin sewing the first end of the pillow closed. Use the holes created by the knitting to line up both sides and a “running stitch” to sew the bottom edge together. Tie off the loose ends. Count about seven rows down from the top of the pillow and sew the top edge closed in the same manner.


Instructions: Medium Size Pillow Cover

(Fits 16-inch x 16-inch pillows; measures 17 inches  x 21 inches when laid flat off the pillow)

Use the long-tail cast on method. Knit in the round. For this size, work with long (36-inch) circular needles. If desired, use a stitch marker to keep track of the beginning/ends of your rows/rounds by placing it between the last and first stitch of each row/round.

Row 1: Cast on 112 stitches.

Row 2: Join the round (taking care not to twist stitches) and k 112. (112 stitches)

Rows 3 – 97: k 112. (112 stitches) {Work should measure 21 inches at this point.}

Row 98: Bind off loosely in knit stitch pattern. Cut yarn, leaving an 8-inch tail, and pull through. Weave in ends. Block if desired.

Insert a 16-inch by 16-inch pillow into the cover. Thread a strand of yarn about four feet long in the same or a contrasting color onto a darning needle. Count about seven rows up from the bottom of the pillow; use this as a starting point to begin sewing the first end of the pillow closed. Use the holes created by the knitting to line up both sides and a “running stitch” to sew the bottom edge together. Tie off the loose ends. Count about seven rows down from the top of the pillow and sew the top edge closed in the same manner.


Instructions: Large Size Pillow Cover

(Fits 18-inch x 18-inch pillows; measures 19 inches  x 23 inches when laid flat off the pillow)

Use the long-tail cast on method. Knit in the round. For this size, work with long (36-inch) circular needles. If desired, use a stitch marker to keep track of the beginning/ends of your rows/rounds by placing it between the last and first stitch of each row/round.

Row 1: Cast on 126 stitches.

Row 2: Join the round (taking care not to twist stitches) and k 126. (126 stitches)

Rows 3 – 106: k 126. (126 stitches) {Work should measure 23 inches at this point.}

Row 107: Bind off loosely in knit stitch pattern. Cut yarn, leaving an 8-inch tail, and pull through. Weave in ends. Block if desired.

Insert an 18-inch by 18-inch pillow into the cover. Thread a strand of yarn about four feet long in the same or a contrasting color onto a darning needle. Count about seven rows up from the bottom of the pillow; use this as a starting point to begin sewing the first end of the pillow closed. Use the holes created by the knitting to line up both sides and a “running stitch” to sew the bottom edge together. Tie off the loose ends. Count about seven rows down from the top of the pillow and sew the top edge closed in the same manner.


Printable version of this free knitting pattern

Printable Basic Pillow Cover Knitting Pattern PDF by Liz @PurlsAndPixels


Find More Knitting Patterns

If you like this, check out the other knitting patterns I’ve written. They’re all gathered on one page, which you can find here.

Find all of the knitting patterns by Liz Chandler @PurlsAndPixels.

Learn to knit a pillowcase with this free basic pillow cover knitting pattern from Liz Chandler @PurlsAndPixels.

©2022, Liz Chandler of PurlsAndPixels.

This pattern is for personal use, gifting, and charitable donation of completed items. You may also sell handmade items created using this pattern. Do not copy this pattern and distribute it. If you’d like to share the pattern, refer your friends to my website, purlsandpixels.com so they may obtain a copy.

If you find any errors or have any questions, email purlsandpixels@gmail.com and I will do my best to help.

I’d love to see your finished work! Tag your photos with @PurlsAndPixels on Twitter or Instagram.

Ribbed Scarf Free Knitting Pattern

Learn to knit an easy Ribbed Scarf with this PDF knitting pattern by Liz Chandler @PurlsandPixels.

by Liz Chandler @PurlsAndPixels

Learn to knit an easy Ribbed Scarf with this free knitting pattern by Liz Chandler @PurlsandPixels.

With this pattern, you can create a cozy ribbed scarf. Alternate knits and purls to make thick and stretchy scarf. As you knit, you will see that the columns of knits and purls line up with one another to highlight the “V” or heart-shaped knit stitches.

Try customizing this pattern by choosing a different yarn color or material. While this scarf looks great in any solid color, you can spice it up with variegated (multicolored) yarn. Self-striping yarn is another way to add visual interest to this scarf. Experiment with different types of yarn material as well; merino wool and alpaca are soft and cozy choices. Just be sure to choose worsted weight yarn when making substitutions.

Prefer to knit offline?

This pattern is free to read below, but if you’d rather print it or save it for later, I’ve created a clean, ad-free PDF version for you.

  • Includes two scarf widths: standard and extra-wide
  • Easy to print or use on your tablet
  • Supports my small business 💖
Ribbed Scarves Knitting Pattern PDF by Liz Chandler @PurlsAndPixels.

About This Free Ribbed Scarf Knitting Pattern

This simple ribbed scarf is an easy-level knitting pattern. You will need to know how to make a long-tail cast on, knit, purl, and bind off. If you are not familiar with these skills, find quick, free lessons in my Learn to Knit Guide.

Learn to knit an easy knit, purl ribbed scarf with this free knitting pattern from Liz Chandler @PurlsAndPixels.

Materials

You will need the following materials, which you can purchase at your local yarn shop or on Amazon.com via the affiliate links below:

Knitting Needles:
Long Circular Needles
36-inch (91 cm) long US No. 8 (5.0 mm) circular needle (or size needed to obtain gauge)

Or Straight Needles
9-inch (23 cm) long US No. 8 (5.0 mm) straight needles (or size needed to obtain gauge)

Yarn:

Two 315-yard (6 ounce) skeins of worsted weight yarn* (shown in Caron Simply Soft Yarn), in your choice of color.

  • one standard scarf uses about 514.5 yards (9.8 oz.)
  • one extra-wide scarf uses about 624.75 yards (11.9 oz.)

*Shown in Caron Simply Soft Yarn in “Pagoda,” “Iris,” and “Black.” Weights estimated with Caron Simply Soft yarn; other yarn weights may vary. Weight does not include gauge swatch. A 4×4 inch gauge swatch with a 2 row by 3 stitch border uses an additional 21 yards (0.4 oz.).

Tools:

A measuring tape and a darning needle.

Gauge

18 stitches x 24 rows = 4 x 4 inches in stockinette stitch on No. 8 (5.0 mm) needles. (Learn how to check your gauge here.)

Abbreviations

k = knit

p = purl

** = repeat the pattern between the asterisks

Instructions: Standard Ribbed Scarf

(7 inches x 6 feet or desired length)

Use the long-tail cast on method. Knit flat, turning after each row.

Row 1: Cast on 50 stitches. Turn.

Row 2: *k 1, p 1* x 25. (50 stitches) Turn.

Repeat Row 2 until scarf measures 6 feet or your desired length.

Bind off loosely in *k, p* pattern. Cut yarn, leaving an 8-inch tail, and pull through. Weave in ends. Block if desired.

Instructions: Extra-Wide Ribbed Scarf

(9 inches x 6 feet or desired length)

Use the long-tail cast on method. Knit flat, turning after each row.

Row 1: Cast on 64 stitches. Turn.

Row 2: *k 1, p 1* x 32. (64 stitches) Turn.

Repeat Row 2 until scarf measures 6 feet or your desired length.

Bind off loosely in *k, p* pattern. Cut yarn, leaving an 8-inch tail, and pull through. Weave in ends. Block if desired.

Printable version of this free knitting pattern

Printable Ribbed Scarf Pattern PDF by Liz @PurlsAndPixels

Care

If you use the materials called for in the Ribbed Scarves Free Knitting Pattern, your final product will be machine washable. To keep your scarf looking its best, hand wash or machine wash separately on delicate cycle in cold water. You may tumble dry on low heat or lay flat to dry.

🛁 Read more Knitwear Care Tips

Learn to knit an easy Ribbed Scarf with this free knitting pattern by Liz Chandler @PurlsandPixels.

©2022, Liz Chandler of PurlsAndPixels.

This pattern is for personal use, gifting, and charitable donation of completed items. You may also sell handmade items created using this pattern. Do not copy this pattern and distribute it. If you’d like to share the pattern, refer your friends to my website, purlsandpixels.com so they may obtain a copy.

If you find any errors or have any questions, email purlsandpixels@gmail.com and I will do my best to help.

I’d love to see your finished work! Tag your photos with @PurlsAndPixels on Twitter or Instagram.

More Patterns You’ll Love

🧣 Single-Row Striped Ribbed Scarves Knitting Pattern: A Zippy Scarf with Color Stripes

🥳 Basic Slouch Hat Pattern: A Versatile Style Option

🔥 Basic Ear Warmer Pattern: Quick Gift-Ready Project

🧺 All Knitting Patterns from Liz @PurlsAndPixels: Learn to Knit All the Things

Read More

Don’t Miss a Stitch! 🧶

Love cozy knitting projects? Join me on YouTubePinterest, and Instagram! And don’t forget to sign up for my newsletter to get more free patterns, helpful tips, and updates straight to your inbox. 💌

Choosing Knitting Tools

Learn about choosing knitting tools for beginners learning to knit in this lesson from Liz Chandler @PurlsAndPixels.

After picking out your yarn and knitting needles, you will have one last task: choosing knitting tools. To complete a knitting project for beginners, you will need sharp scissors and a darning needle. Later, when you start making more complex knitting projects, you may also need stitch markers and stitch holders.

Scissors

Choose sharp sewing scissors (precision tip scissors) to clip yarn after knitting a project - a knitting lesson from Liz Chandler @PurlsAndPixels.

At the end of a knitting project, you will need to free your work from the ball by cutting the yarn. While there are several gadgets designed to clip yarn, scissors are the most versatile cutting tool to put in your knitting bag. “Sewing” or “precision tip” scissors work best to trim yarn, as they are small and easy to maneuver.

Be sure you choose very sharp scissors. Dull scissors tend to fray the yarn ends, making them difficult to thread through the eye of a darning needle. To help your scissors stay sharp for a long time, do not use them for anything other than snipping yarn and thread.

You can find my favorite precision tip scissors on Amazon.com at this affiliate link: Fiskars Scissor 5″ Micro Tip Fashion Berry.

Darning Needles

Darning needles help you weave in your loose ends after knitting a project - learn about tapestry and darning needles in this lesson from Liz Chandler @PurlsAndPixels.

After you have cut your project away from the ball, you will be left with dangling yarn tails. You will weave them into your project using a darning needle. These needles look just like a sewing needle but are much larger. They have blunted tips that will not snag your yarn. Sometimes, darning needles are sometimes referred to as “tapestry needles;” however, tapestry needles usually have bent tips. Whether the manufacturer calls it a “darning needle” or a “tapestry needle,” as a beginner, you will want to choose a straight, blunted needle with an eye large enough to thread your yarn through.

You can find a set of blunt-tipped darning needles on Amazon.com at this affiliate link: Hekisn Large-Eye Blunt Needles

Stitch Markers

Stitch markers help you keep track of your place in knitted rows. Learn more about stitch markers in this knitting lesson from Liz Chandler @PurlsAndPixels.

Many knitting patterns you read will recommend you use a “stitch marker.” This is a small clip, ring, or piece of string used to keep track of your place while knitting. Stitch markers can be slipped onto your needles to mark an endpoint, or they can be clipped onto a specific stitch to keep track of it. Common stitch markers look like plastic safety pins. You also can find a variety of decorative stitch markers, some looking like small rings, others like lever-back earrings. Try to find stitch markers that clip open and closed, as this type of marker can be removed from your work more easily.

You can find a set of stitch markers on Amazon.com at this affiliate link: Locking Stitch Markers

Stitch Holders

Stitch holders take stitches off your knitting needles and save them for later knitting. Learn about stitch holders in this knitting lesson with Liz Chandler @PurlsAndPixels.

Though they can be similarly shaped, stitch holders are much larger than stitch markers. Stitch holders are used to slide stitches off your knitting needles so that you can work them later. This technique is especially helpful in shaping thumbs on gloves and arms on sweaters.

When a stitch holder is not available, you can sometimes substitute a piece of yarn as a stitch holder. Using a darning needle, you can slip stitches onto a bit of leftover yarn, then tie the yarn ends together to secure the stitches in place temporarily.

You can find stitch holders on Amazon.com at this affiliate link: Stitch Holders Assorted Colors

Materials for Your First Knitting Project

In most knitting patterns, you will see a “materials” section, which lists the specific tools you will need to make each project. When in doubt about what yarn or tools to get, always check your pattern for a supply list.


Tools to Knit a Face Scrubby or Scarf

If you are following my Learn to Knit Guide, you will start with a small Face Scrubby or Beginner Scarf. Both projects require the same tools. You can find knitting tools at most craft stores or on Amazon by using the affiliate links below:

Face Scrubby Knitting Pattern

Free Beginner Face Scrubby knitting pattern by Liz @PurlsAndPixels.

Now that you have your tools, you can start knitting. Start with my Free Beginner Face Scrubby Pattern for a small first knitting project.

Scarf Knitting Pattern

Beginner knit scarf, free easy knitting pattern from PurlsAndPixels

Or, to start with something a little larger, you can make my free Beginner Knit Scarf Pattern. Find it here.


Learn about tools for knitting in this beginner lesson from Liz Chandler @PurlsAndPixels.

Up Next

Learn to make a slip knot then put it on a knitting needle, a knitting lesson from Liz @PurlsAndPixels.

Once you’ve picked up your knitting supplies you can start learning to knit! The first step is to make a “slipknot” in your yarn. The next lesson will show you how.

Go Back to the Learn to Knit Index

Choosing Knitting Needles

Learn about choosing knitting needles in this lesson with Liz Chandler @PurlsAndPixels.

Once you have chosen your yarn, you will have another big decision to make before you can start learning to knit: what kind of knitting needles will you use?

Choosing Knitting Needles

Pick out your first set of knitting needles with this lesson about choosing knitting needles for beginners from Liz Chandler @PurlsAndPixels.

There are a few kinds of knitting needles to choose from: straight needles, circular needles, and double point needles. Most knitting needles come in a variety of materials, including wood, bamboo, and metal. Try a few different types of needles to decide what feels the most comfortable to you.

Types of Knitting Needles

Straight Needles

Learn what straight knitting needles are and how they are used in this lesson from Liz Chandler @PurlsAndPixels.

When most people think of knitting needles, they think of straight needles. These are two matching rods, often pictured sticking out of a ball of yarn. One end of each needle has a sharpened tip. The other end has a knob, which keeps the yarn from slipping off. Straight needles come in varying lengths, which allow you to make larger or smaller items more comfortably, depending on the needs of your project. These needles are useful for making flat pieces of fabric. You can craft scarves, blankets, washcloths, and dishcloths with straight knitting needles. You can also knit flat pieces that can be sewn together to create a garment like a sweater.

Circular Needles

Learn what circular knitting needles are and how they are used in this lesson from Liz Chandler @PurlsAndPixels.

More unusual looking, but also more versatile, are circular knitting needles. Most circular needles have a flexible cord that connects the sharp working points of the needles. You can use circular needles to knit flat pieces of fabric like washcloths and scarves. You can also create seamless knitted tubes to make things like hats, sweaters, mittens, and socks. Circular knitting needles are made in different lengths; the longer the needles, the more stitches you can knit. Shorter circular needles are perfect for hats and smaller accessories. Longer knitting needles are useful for projects like knit sweaters and blankets.

Double Point Needles

Learn what double point knitting needles ("DPNs") are and how they are used in this lesson from Liz Chandler @PurlsAndPixels.

Double point needles (DPNs) are straight rods with sharpened points on either end. This allows you to knit with both sides of the needle. DPNs are mainly used for knitting smaller items that are tube-shaped, such as gloves, leg warmers, and baby hats. A package of DPNs typically comes with set of five identical needles. You will use at least three needles to hold your stitches and one needle to work into the yarn and make your next row. Often, especially in more simple patterns, the fifth needle is not used at all.

Metal or Wooden Knitting Needles

Should you choose metal, wood, or bamboo knitting needles? Learn how to decide in this knitting lesson with Liz Chandler @PurlsAndPixels.

You can buy your needles in several different materials, most notable of which are metal, wood, and bamboo. Metal needles maintain their sharpness longer and are less prone to breakage than wooden and bamboo needles. On the other hand, wooden and bamboo needles are slightly less slippery than metal knitting needles; this means your knit stitches will not fall off them as easily as they might with a set of metal needles. Wooden and bamboo needles also make less noise as you work, minimizing the “clink” sound made as the needles come together. Bamboo weighs the least of the three materials, making these needles noticeably lighter, especially in larger sizes.

Knitting Needle Size

Learn about knitting needle sizing in this knitting lesson from Liz Chandler @PurlsAndPixels.

Most knitting needles are assigned a United States Number (US No.) and a millimeter (mm) measurement. The abbreviations “US,” “No.” or “US No.” are used to refer to the “American” knitting needle system which assigns a number to each needle size.

The millimeter measurement refers to the “diameter” or distance across the center of the knitting needle. For example, a US No. 7 / 4.5 mm needle has a diameter of 4.5 mm.

Most yarn labels suggest a needle to match the yarn weight, so referring to the packaging is a great place to start when choosing a needle size. You will also see recommended needle sizes for each type of yarn on the Crafty Yarn Council’s Standard Yarn Weight System chart.

Starter Knitting Needles

When selecting your first knitting needles, think about what your current project needs and what will be useful in your future knitting.

Long circular needles made of bamboo are great for beginners. Learn why in this knitting lesson from Liz Chandler @PurlsAndPixels.

Metal needles, especially those of high quality, can last a lifetime and may never need to be replaced. Bamboo or wooden needles, on the other hand, can be easier for beginners to use, since they grip the yarn a bit better than a metal needle.

Circular needles are more versatile and can be used for many projects in the future since you can knit both flat and circular pieces with them.

Selecting a US No. 7 (4.5 mm) sized needle will allow you to make all the washcloth and face scrubby patterns in my Simple Washcloth Knitting Pattern Collection.

If all these choices have you muddled, my recommendation for a first set of knitting needles a 36-inch (91 cm) long US No. 7 (4.5 mm) bamboo circular knitting needle (Amazon affiliate link).

When you are following a pattern, remember to consult the materials list to find the correct knitting needles for the project.


Needles to Knit a Face Scrubby

If you are following my Learn to Knit Guide, you will start with a small Face Scrubby. Choose between straight needles or long circular needles, then select a US No 7 (4.5 MM) size. You can find knitting needles at most craft stores and on Amazon by using the affiliate links below:

Choose between straight knitting needles or long circular needles for beginner knitters.

*Bamboo or wooden needles may be easier than metal for beginners.

Face Scrubby Knitting Pattern

Free Beginner Face Scrubby knitting pattern by Liz @PurlsAndPixels.

You will also need a knitting pattern to get started. You can find my Free Beginner Face Scrubby Pattern. I suggest this for your very first knitting project because it is very small and simple; you’ll have a finished project quickly.


Needles to Knit a Scarf

To start learning to knit with a scarf instead, you will need to choose a US No. 8 (5.0 mm) sized needles. You can also choose between straight and long circular needles for the Beginner Knit Scarf project. You can find knitting needles at most craft stores and on Amazon by using the affiliate links below:

Choose between straight knitting needles or long circular needles for beginner knitters.

*Bamboo or wooden needles may be easier than metal for beginners.

Scarf Knitting Pattern

Beginner knit scarf, free easy knitting pattern from PurlsAndPixels

You will also need my free Beginner Knit Scarf Pattern. Find it here.


Learn about knitting needle types and how to pick out needles for beginners in this knitting lesson with Liz Chandler @PurlsAndPixels.

Up Next

Go Back to the Learn to Knit Index

Choosing Yarn for Knitting

Learn about choosing yarn for beginner knitting projects in this lesson with Liz Chandler @PurlsAndPixels.

When you start gathering your materials, choosing yarn for knitting will be one of your first and most exciting tasks.

First, a bit of vocabulary to help you get started: a ball of yarn is often called a “skein.” You will see that word come up a lot in knitting, so it’s best to know it from the beginning.

Choosing Yarn

Learn to choose yarn for beginner knitting projects in this lesson with Liz Chandler@PurlsAndPixels.

While picking out yarn can be one of the most exciting parts of knitting, it can also be intimidating. From basic wool to luxurious silk blends, there are countless types of yarn to choose from. Yarn strands can be thick, thin, and everywhere in between. And you can find yarn in almost every shade in the rainbow; some created in bulk by machines, and some handcrafted with natural and plant-based dyes. Learning about yarn sizing (“yarn weight”) and the materials from which yarn is made can help make choosing yarn much less overwhelming.   

Yarn Weight

Yarn weight refers to the thickness of each strand of yarn - learn more in this knitting lesson with Liz Chandler @PurlsAndPixels.

When you first hear the term “yarn weight” you may think of putting yarn on a scale and measuring it in ounces or grams. However, in knitting and other fiber arts, “yarn weight” is a term that refers to the thickness (or thinness) of each strand of yarn.

The Crafty Yarn Council has standardized yarn weights in a convenient chart called the “Standard Yarn Weight System.” This system organizes yarn into categories based on weight (strand thickness). This chart can help you determine what kind of yarn you will need for your project. You can find it at the Crafty Yarn Council’s website:  http://craftyarncouncil.com/weight.html.

Learn how to find out what weight yarn you have in this knitting lesson with Liz Chandler @PurlsAndPixels.

To find out the weight of your yarn, start with the yarn label. Almost every yarn label has the yarn’s weight listed. Many packages note the weight by displaying a “yarn weight symbol.” Those symbols look like little balls of yarn with numbers on them; the number represents the thickness of the yarn.

Yarn weight refers to the thickness of each strand of yarn - learn more in this knitting lesson with Liz Chandler @PurlsAndPixels.

Yarn weights range from 0 to 7. Yarns with a weight of 0 are thinnest, while yarns with a weight of 7 are the thickest. The weight symbol is often placed on the label of yarn you will purchase. Not only does the symbol indicate the thickness of the yarn you are looking at, but also can give you a guide on whether it is suitable for the project you wish to make.

Midweight Yarn

Choosing yarn for knitting - what is worsted weight yarn? Find out in this beginner knitting lesson with Liz Chandler @PurlsAndPixels.

One of the most commonly available yarn weights is Medium (4) Yarn; it is often called “worsted” weight yarn. Worsted weight (4) yarn is a mid-weight yarn that is suitable for a variety of craft projects. The thickness of this yarn makes it is nice for basic garments like hats, mittens, scarves, and blankets. The wide availability of worsted weight yarn can also be quite useful. You will frequently find basic worsted weight yarn in big box and bulk crafts stores. It is also often handmade by boutique yarn sellers in luxurious materials and a rainbow of colors. Because of its versatility, I recommend worsted weight yarn for beginners.

Thin Yarn

What to do with lightweight thin yarn - a knitting lesson for beginners from Liz Chandler @PurlsAndPixels.

Yarn weights smaller than 4 are thinner than worsted weight yarn. These yarns take longer to knit into clothing, since you will need to make more stitches to create the same sized garment. Your final product with a thinner weight yarn will also be thinner, making light (3), fine (2), superfine (1) and lace (0) yarns perfect for garments like socks, shawls, and lace. Finer yarns are often made of luxury fibers like silk, angora, or alpaca; because knitters spend more time on a pattern made with thin yarn, many prefer to work in higher quality materials for these projects.

Thick Yarn

What to do with heavyweight thick yarn - a knitting lesson for beginners from Liz Chandler @PurlsAndPixels.

Heavier weight yarns (5, 6, and 7) will knit into final projects much more quickly. Because each stitch will be larger, when made with a thicker yarn, fewer stitches are required to make a project with chunky and bulky yarn. A finished project in this type of yarn will also be much thicker than those made on thinner yarns. The larger the yarn weight number, the bulkier your item will be. People often craft chunky knitted clothing and accessories from bulky (5) and super bulky (6) yarn. Jumbo (7) is usually best suited for oversized blankets, rugs, and other home décor projects.

Yarn Material

When you start looking for your first ball or “skein” of yarn, you will find that there are numerous materials from which yarn is made. Acrylic, wool, and cotton are frequently used yarn materials and can be very cost effective. Fancier materials such as alpaca, silk, and bamboo are usually spun into beautiful luxury yarns. Often, yarn is created by combining different materials.

Choosing yarn for beginner knitters - wool yarn is biodegradable - learn more in this knitting lesson with Liz Chandler @PurlsAndPixels.

Yarn Cost

The price of yarn can vary greatly, even among yarn made of similar materials. Different factors impact yarn price. Some materials, like alpaca and angora, are more expensive because it is more difficult to acquire the extra-soft wool. Yarn that has been hand-spun or hand-dyed tends to be priced higher, since it requires much more labor and artistic ability.

Learn how to pick out yarn for beginner knitting projects in this lesson with Liz Chandler @PurlsAndPixels.

Yarn price can also be affected by the amount of yarn that a company can produce at once. Less expensive yarns are generally made by larger companies, which can produce larger quantities of yarn. Each batch of yarn that is colored at the same time is called a “dye-lot.” Because “cheaper” yarns are often made in bulk, they can have large or no “dye-lots.” A bulk yarn maker can create more skeins of yarn that are perfectly matched than a smaller craft yarn maker would be able to make. As a result, yarn made in bulk with large dye-lots is usually much less expensive.

Having yarn available in larger or no dye-lots is useful because it ensures better access to the correct color. For example, if you underestimate the amount of yarn you need for a specific project, you can get more of the exact color you need; this is not usually possible with yarn that is dyed in smaller batches. And while the materials used in less expensive yarn tend to be less unique, it does not necessarily mean they are always of lower quality. If “fancy” yarn is not in your budget, you can still find plenty of soft, beautiful, and economical yarn to work with.

Choosing Yarn for a Knitting Project

The yarn you choose should always depend on what you are making.

Hats, mittens, scarves, and other items of clothing turn out well when made in acrylic or wool yarns. Both acrylic and wool are stretchy, warm, and do not tend to hold water and moisture. Acrylic yarn is often softer, can last longer, and your finished piece will not be eaten by moths. However, acrylic is simply another name for plastic, so classic sheep’s wool is a more environmentally friendly option for a cost-effective clothing yarn.

Cotton yarn is biodegradable and absorbent, making it great for washcloths - learn more about choosing yarn for knitting projects in this Lesson with Liz Chandler @PurlsAndPixels.

If you plan to make washcloths, towels, or anything else that should be absorbent, choose a cotton-based yarn. Keep in mind that cotton does not stretch like wool and acrylic, so do not expect the things you knit with a cotton yarn to have a huge amount of give.

Starter Yarns

When you start learning to knit, you will probably have to throw out some yarn. The string will tangle. You will drop a stitch off the needles. You will make mistakes. That is ok! It is part of the learning process. With any luck, you will be able to salvage practice projects to reuse the yarn. But, in case your yarn becomes hopelessly tangled, you may want to save the fancy yarns for later. Starting with an economical ball of yarn may save you some heartache if your yarn gets damaged while you are learning.  


Yarn to Knit a Face Scrubby

If you are following my Learn to Knit Guide, you will start with a small Face Scrubby. Select a worsted weight yarn made of cotton in any color you like. You do not have to choose a solid color; multi-colored yarn looks nice, as well. You can find cotton yarn at most craft stores and on Amazon by using the affiliate link below:

Face Scrubby Knitting Pattern

Free Beginner Face Scrubby knitting pattern by Liz @PurlsAndPixels.

You will also need a knitting pattern to get started. You can find my Free Beginner Face Scrubby Pattern. I suggest this for your very first knitting project because it is very small and simple; you’ll have a finished project quickly.


Yarn to Knit a Scarf

If you want to invest a little more time in your first knitting project, a Beginner Knit Scarf is made in the same way as a Face scrubby, but it is larger. If you’d rather start learning to knit with a scarf, you will need the following yarn (Amazon affiliate links below):

Caron Simply Soft yarn is a great acrylic yarn for beginner knitters learning to make a scarf - knitting lessons from Liz Chandler @PurlsAndPixels.

Scarf Knitting Pattern

Beginner knit scarf, free easy knitting pattern from PurlsAndPixels

You will also need my free Beginner Knit Scarf Pattern. Find it here.


Learn how to pick out your first yarn for learning to knit in this lesson from Liz Chandler @PurlsAndPixels.

Up Next

Go Back to the Learn to Knit Index

Switch from Knitting on Circular Needles to Knitting in the Magic Loop – Hat Decreases

Learn to switch from circular needles to the magic loop in this knitting lesson from Liz Chandler @PurlsAndPixels.

When decreases make the top of a hat too small to work on your circular needles, you will need to switch to a different knitting method to finish your project. As you saw in the last lesson, you can move from circular to double point needles (DPNs). Or, you can use the Magic Loop to finish out the top of a hat that you’ve been knitting from the bottom-up. You will need a long circular needle; I prefer a 36-inch cord (which you can find on Amazon with this affiliate link). The Magic Loop will allow you to keep making decreases, reducing the length of each round; this rounds off and closes the top of your hat.

Below you will find both video and written guides to help you learn how to transition from working on Circular Needles to working in the Magic Loop.

Video Guide: How to Switch from Knitting in the Round on Circular Needles to Knitting in the Magic Loop

Written Guide: How to Switch from Knitting in the Round on Circular Needles to Knitting in the Magic Loop

Before you begin this knitting method switch, you will need to know how many live stitches are on your needles. Check the pattern you are following to see how many stitches are on your needles, or count them. In the example here, I have 48 total live stitches on my shorter circular needle.

Step 1: Learn to switch from knitting in the round on circular needles to knitting in the Magic Loop in this lesson with Liz Chandler @PurlsAndPixels.

Switch from Circular to Magic Loop, Step 1:

Work up to the point where you’d like to switch knitting methods (usually the end/beginning of a row/round is the best place to start). Set the needle in your right hand aside.

Divide the total number of live stitches on your circular needles by the number of needles to which you will be moving. Here, I will divide 48 stitches onto two needles, so my math is:

48 ÷ 2 = 24

This means you’ll need to place roughly 24 stitches on each double point needle. Because decreases are involved, this is an estimate not an exact number of stitches to be placed each needle.

Step 2: Learn to switch from knitting in the round on circular needles to knitting in the Magic Loop in this lesson with Liz Chandler @PurlsAndPixels.

Switch from Circular to Magic Loop, Step 2:

Pick up one tip of a long circular needle with your right hand.  

Step 3: Learn to switch from knitting in the round on circular needles to knitting in the Magic Loop in this lesson with Liz Chandler @PurlsAndPixels.

Switch from Circular to Magic Loop, Step 3:

Begin working the live stitches off the short circular needle and onto the long circular needle tip.

Step 4: Learn to switch from knitting in the round on circular needles to knitting in the Magic Loop in this lesson with Liz Chandler @PurlsAndPixels.

Switch from Circular to Magic Loop, Step 4:

Work roughly the number of stitches you calculated in Step 1 onto the long circular needle, except stop at a decrease. When the current row/round contains decreases, remember to count the live stitches coming from the left needle separately.

Step 5: Learn to switch from knitting in the round on circular needles to knitting in the Magic Loop in this lesson with Liz Chandler @PurlsAndPixels.

Switch from Circular to Magic Loop, Step 5:

Pull the long circular needle tip in your right hand toward your left, allowing the live stitches to slide from the needle onto the cord.

Step 6: Learn to switch from knitting in the round on circular needles to knitting in the Magic Loop in this lesson with Liz Chandler @PurlsAndPixels.

Switch from Circular to Magic Loop, Step 6:

While continuing to hold the same long circular needle tip in your right hand, rotate your work so that you can continue working off the short circular needle and onto the long circular needle tip.

Step 7: Learn to switch from knitting in the round on circular needles to knitting in the Magic Loop in this lesson with Liz Chandler @PurlsAndPixels.

Switch from Circular to Magic Loop, Step 7:

Work the remaining stitches from the short circular needle onto the long circular needle tip that is held in your right hand.

Step 8: Learn to switch from knitting in the round on circular needles to knitting in the Magic Loop in this lesson with Liz Chandler @PurlsAndPixels.

Switch from Circular to Magic Loop, Step 8:

The short circular needle will now be free of the work; set it aside.

Step 9: Learn to switch from knitting in the round on circular needles to knitting in the Magic Loop in this lesson with Liz Chandler @PurlsAndPixels.

Switch from Circular to Magic Loop, Step 9:

At this point, roughly half of your total stitches should be on one tip of the circular needle and the other half should be held by the cord.

Step 10: Learn to switch from knitting in the round on circular needles to knitting in the Magic Loop in this lesson with Liz Chandler @PurlsAndPixels.

Switch from Circular to Magic Loop, Step 10:

Turn your work, placing the live stitches in your left hand. Slide the empty circular needle tip into the live stitches and prepare to start knitting in the Magic Loop. (See this lesson on Knitting in the Magic Loop if you aren’t sure how this method works.)

Learn to switch from knitting in the round on circular needles to knitting in the Magic Loop in this lesson with Liz Chandler @PurlsAndPixels.

Practice With My Knitting Patterns

Boy in unisex simple knit beanie, hat knitting pattern in all sizes by Liz @PurlsAndPixels

Want to follow along?

Here, I am knitting a Simple Beanie Hat. Find the pattern here.

Basic Slouch Hat knitting pattern by Liz Chandler @PurlsAndPixels.

Or, try making a Basic Slouch Hat, which is also knit from the bottom up, adding decreases at the top. Find the pattern here.

Learn to transfer a knitting project from circular needles to the magic loop - closing a hat top - a knitting lesson with Liz Chandler @PurlsAndPixels.

Now that you can decrease, you can make a hat. Next, I’ll show you how to take that hat off your needles and weave in your loose ends. This guide will help you end mitten tips, as well.

Go Back to the Learn to Knit Index