Gratitude Blanket Pattern

Learn to make a Gratitude Blanket with this free knitting pattern. Knit along and stitch a striped blanket while you enjoy mindful moments with Liz Chandler @PurlsAndPixels.

Knit Your Moments of Thankfulness into a Cozy Blanket 🌟

A Free Knitting Pattern by Liz Chandler @PurlsAndPixels.

Friends, let’s be honest: 2024 brought its share of challenges. Between solo parenting, running PurlsAndPixels, and navigating life’s daily surprises, I sometimes forgot to pause and appreciate the small moments. That’s why I’m starting 2025 with intention, and I’d love for you to join me in a mindful knitting project. At the break of the new year, I’ll be starting a Gratitude Blanket as a way to track all the joy this year will bring.🧶

Some of the coziest home decor is handmade, like my chunky Gratitude Blanket. Knit along with the free knitting pattern from Liz Chandler @PurlsAndPixels
Here is an idea of what your Gratitude Blanket might look like.

Tiny Bumps in the Plan are OK!

Living far from a major city leaves me without yarn on demand. I’ve ordered the fluffy wool blend online, but it’s delayed until January 10th. This means I can’t get started as planned, but that’s just fine! I’m still going to share the pattern with you, so you can start at your leisure. But remember, this blanket is meant to be a reflection of a year’s worth of happiness – don’t let setbacks (like delayed yarn) steal your joy. Have fun and take your time!

The Magic of a Gratitude Blanket

For this blanket, you will work in very simple garter stitch (knit stitches only). Instead of worrying over stitch count, the Gratitude Blanket pattern is meant to let your mind wander away from the project and reflect on the joy each stitch represents.

This isn’t just another knitting project, it’s a chance to weave mindfulness into every day. Each stripe tells a story. Choose colors that make you feel happy and inspired. For me, its:

  • Peaceful blue rows for quiet cabin moments with my son and our pets.
  • Sunny yellow stripes for unexpected joys (like perfect knitting weather!).
  • Growth-inspired green sections for personal victories, big and small.

Daily Practice Guide

  1. Find a Quiet Moment: Mine is usually early morning with coffee.
  2. Reflect: Think about one thing you’re grateful for.
  3. Choose a Color Based on the Feeling:
    • Blue: Peace and calm (like snowy mountain views).
    • Yellow: Joy and happiness (like my son’s laughter).
    • Green: Growth and achievement (like mastering a new pattern).
  4. Knit Your Row: Hold that thought as you knit—it’s like stitching the memory into the blanket.

Gratitude Prompts

Need inspiration? Here are some moments I’m thankful for:

  • Morning coffee watching the sunrise over the mountains.
  • A kind comment from our knitting community.
  • Finally working out that tricky cable pattern.
  • Cozy cabin moments by the fire.
  • The peace of knitting while snow falls.
  • Small victories in parenting or business.
Find a cozy corner and knit your own gratitude blanket. It's a fuzzy, cozy record of all the amazing things that happen. Get the free knitting pattern from Liz Chandler @PurlsAndPixels.

Making this Gratitude Blanket Free Knitting Pattern

With such a simple stitch pattern, even beginners can knit this blanket. Get free knitting lessons that walk you through every step along the way at my Learn to Knit Index. You will need to know:

Materials

Knitting Needles

Yarn

Three to six 129-yard (8 ounce) skeins of super bulky weight (No. 6) yarn* in your three favorite colors (shown in “Air Force,” “Mustard,” and “Succulent” Hometown Super Bulky Yarn by Lion Brand).

  • Baby size uses about 9 skeins of super bulky yarn
  • Throw size uses about 15 skeins of super bulky yarn
  • Queen size uses about 18 skeins of super bulky yarn

*Weights estimated with Hometown Super Bulky Yarn by Lion Brand; other yarn weights may vary.

Notions:

Gauge

12 stitches x 15 rows = 4 x 4 inches in Stockinette Stitch on No. 13 (9.0 mm) needles.

Abbreviations

  • k = knit
To knit your own gratitude blanket chose happy colors of super bulky yarn. I used Wool Ease Thick and Quick by Lion Brand Yarn to write this pattern, but you can substitute your favorite chunky yarn. Get the free knitting pattern from Liz Chandler @PurlsAndPixels.

Instructions: Baby Size Gratitude Blanket

(40 inches x 40 inches or desired length)

Instructions: Use the long tail cast on. Knit flat, turning after each row. Make color changes as your joyful memories change. You can start a new row or just start knitting mid-row with a new, happy color for each knitting session.

Row 1: Cast on 146 stitches. (146 stitches) Turn.

Rows 2 – 159: k 146. (146 stitches). Turn. [Work should measure 39.75 inches at this point]

Row 160: Bind off loosely.

Cut yarn, leaving an 8-inch (20.32-cm) tail, and pull through. Weave in ends. Block if desired.


Instructions: Throw Size Gratitude Blanket

(50 inches x 60 inches or desired length)

Instructions: Use the long tail cast on. Knit flat, turning after each row. Make color changes as your joyful memories change. You can start a new row or just start knitting mid-row with a new, happy color for each knitting session.

Row 1: Cast on 182 stitches. (182 stitches) Turn.

Rows 2 – 239: k 182. (182 stitches). Turn. [Work should measure 59.75 inches at this point]

Row 240: Bind off loosely.

Cut yarn, leaving an 8-inch (20.32-cm) tail, and pull through. Weave in ends. Block if desired.


Instructions: Queen Size Gratitude Blanket

(90 inches x 90 inches or desired length)

Instructions: Use the long tail cast on. Knit flat, turning after each row. Make color changes as your joyful memories change. You can start a new row or just start knitting mid-row with a new, happy color for each knitting session.

Row 1: Cast on 328 stitches. (328 stitches) Turn.

Rows 2 – 359: k 328. (328 stitches). Turn. [Work should measure 89.75 inches at this point]

Row 360: Bind off loosely.

Cut yarn, leaving an 8-inch (20.32-cm) tail, and pull through. Weave in ends. Block if desired.


Print the Gratitude Blanket Free Knitting Pattern

Printable version of this free knitting pattern

Printable Gratitude Blanket Pattern PDF by Liz @PurlsAndPixels

Tips for Success

  • Keep it Visible: Mine will live by my favorite knitting chair.
  • No Pressure: Catch up during quiet weekends if needed.
  • Track Your Progress: Take photos to share your journey (great for Instagram!).
  • Date Your Gratitude Entries in a Journal: Each date becomes part of your story.
  • Make it easy on yourself: Use the magic knot to join new colors and save time weaving loose ends.

Why This Project Works

  • Mindful: Each row helps us pause and reflect.
  • Achievable: Simple enough for even the busiest days.
  • Meaningful: Creates a physical reminder of our journey.
  • Cozy: The end result? A warm hug of memories.

Start Your Journey

I’m casting on for the new year, and I’d love for you to join me! I’ll be sharing my progress with the Gratitude Blanket pattern here and on Instagram @PurlsAndPixels, along with the moments that inspired each color choice.

Ready to cast on your gratitude journey? Whether you start on New Year’s Day or jump in mid-year, each row adds to your story of thankfulness. Share your progress with #GratitudeKnitAlong. I can’t wait to see your blankets grow alongside mine! And I’m excited to see what colors you choose! What will your first grateful row represent? 🌿

Let’s make 2025 a year of mindful making, one stitch at a time. 💞

Cast on your gratitude blanket today. Use super bulky yarn and make a new color change every time you make a new happy memory. Get the free pattern from Liz Chandler @purlsandpixels

©2024, Liz Chandler of PurlsAndPixels.

This pattern is for personal use, gifting, and charitable donation of completed items. You may also sell handmade items created using this pattern. Do not copy this pattern and distribute it. If you’d like to share the pattern, refer your friends to my website, purlsandpixels.com so they may obtain a copy.

If you find any errors or have any questions, email purlsandpixels@gmail.com and I will do my best to help.

I’d love to see your finished work! Tag your photos with @PurlsAndPixels on Twitter or Instagram.

Looking for Cozy More New Year’s Inspiration?

📃 Organize this Year’s Knitting Projects with a Free Planner Download

🥳 2025 New Year’s Traditions: Crafting & Cozy Living

🧶 Knitting: A timeless Resolution for the New Year

Easy & Quick Chunky Knit Coffee Cozy: Perfect for Beginners

🌱 Starting Seedlings on New Years Day

👐 Simple DIY Handmade Crafts

Don’t Miss a Stitch

💌 Sign up for my weekly email below. You’ll get a free printable starter kit plus new knitting patterns and cozy tips each week.

Mini Santa Hat Ornament

Learn to knit Tiny Santa Hat mini ornaments with this free knitting pattern from Liz Chandler @PurlsAndPixels.

A Free Knitting Pattern by Liz Chandler @PurlsAndPixels.

Merry Christmas and Happy Holidays, Friends! Today, I was trying to spruce up the cabin for our Christmas festivities, when I noticed that this grumpy llama needed some handmade holiday joy. So I decided to whip up a quick Santa hat to cheer him up. While I was at it, I wrote down the Christmas knitting pattern to share with you here as a little gift. I think this mini Santa hat ornament will add cozy magic to any tree, garland, wreath, or gift box. Or use a mini-holiday hat to make your everyday home decor just a bit more festive, like I did with our grinchy llama. 🦙

About this Mini Santa Hat Ornament Pattern

This little mitten ornament pattern is great for beginner to intermediate level knitters who have an understanding of knitting in the round with double point needles or knitting in the magic loop (directions are included for both methods). You’ll also need to know how to knit, purl,  decrease with knit two together, and draw the yarn thru the remaining stitches to remove it from the needles. You will craft it by knitting from the bottom up in a simple rib and stockinette pattern.

Tiny Christmas ornament knitting pattern, little Santa hats free from Liz Chandler @PurlsAndPixels

Making this Mini Santa Hat Ornament Free Knitting Pattern

Materials

Knitting Needles:

     Double Point Needles (DPNs)

  • 7-inch (18 cm) long US No. 5 (3.75 mm) DPNs (or three sizes smaller than needles used to obtain gauge)
  • 7-inch (18 cm) long US No. 8 (5.0 mm) DPNs (or size needed to obtain gauge)

     Or Long Circular Needles

36-inch (91 cm) long US No. 8 (5.0 mm) circular needle (or size needed to obtain gauge)

36-inch (91 cm) long US No. 5 (3.75 mm) circular needle (or three sizes smaller than needles used to obtain gauge)

Yarn:

One 315-yard (6 ounce) skein each of worsted weight yarn* in your choice of colors. (Shown in Caron Simply Soft Yarn in “White” [Color 1] and “Red” [Color 2]).

  • Ornament size uses about 15.75 yards (0.3 oz.) of Color 1 (including 1-inch pom-pom) and 15.75 yards (0.3 oz.) of Color 2

*Weights estimated with Caron Simply Soft yarn; other yarn weights may vary. Weight does not include gauge swatch. A 4×4 inch gauge swatch with a 2 row by 3 stitch border uses an additional 21 yards (0.4 oz.).

Other Tools:

One stitch marker, a measuring tape, and a darning needle.

Gauge

18 stitches x 24 rows = 4 x 4 inches in stockinette stitch on No. 8 (5.0 mm) needles.

Abbreviations

  • k = knit
  • p = purl
  • ** = repeat the pattern between the asterisks
  • k2tog = knit two together
Learn to knit a tiny santa hat with this ornament knitting pattern, free from Liz Chandler @PurlsAndPixels.

Instructions: Mini Santa Hat Ornament

(3.5 inches (8.89 cm) by 5 inches (12.7 cm) tall, without pom-pom)

Use the Long-Tail Cast On method. Knit in the round. For Double Point Needles, follow DPN instructions written in italics. For circular needles, follow Magic Loop instructions in bold. If desired, use a stitch marker to keep track of the beginning/ends of your rows/rounds by placing it between the last and first stitch of each row/round.

[Using No. 5 DPNs or long circular needles] [With Color 1/White] Row 1: Cast on 32 stitches. Divide onto 3 DPNs (12 on 1st, 8 on 2nd, and 12 on 3rd DPN). Or separate stitches on long circular needles for Magic Loop (16 on each side). (32 stitches)

Row 2: Join the round (taking care not to twist stitches) and *k, p* x 16. (32 stitches)

Rows 3 – 5: *k, p* x 16. (32 stitches)

[Switch to No. 8 DPNs or long circular needles] [With Color 2/Red] Rows 6 – 18: k 56. (56 stitches) {Work should measure 6 inches at this point.}

{Begin decreases.} Row 19: *k 2, k2tog* x 8. (24 stitches)

Row 20 – 22: k 24. (24 stitches)

Row 23: *k, k2tog* x 8. (16 stitches)

Rows 24 – 26: k 16. (16 stitches)

Row 27: k2tog x 8. (8 stitches)

Cut yarn, leaving an 8-inch tail. With darning needle, draw yarn tightly through remaining 8 stitches. Weave in ends. Block if desired.

Attach a tiny (about 1 inch [2.54 cm] in diameter) white pom-pom to the closed end of the hat.

Optional Mitten Holiday Ornament Hanger

Choose a pretty ribbon and tie it in a loop with a bow to the cuff of the mitten. Alternatively, using the same yarn or a contrasting color, you can use a size F/3.75 MM crochet hook to chain a 6-inch cord by following these instructions:

Ensuring you leave a 4-inch tail before your slip knot, chain 35. Cut yarn and pull through, leaving a 4-inch tail. Pull one end of the chain through an open knitted loop on your Ornament Sized Santa Hat. Tie a bow using the two loose yarn tails of the chain.

Print the Mitten Holiday Ornament Free Knitting Pattern

Printable version of this free knitting pattern

Printable Mini Santa Hat Ornament pattern PDF by Liz @PurlsAndPixels

Make Full Size Santa Hats with Matching Gloves

If you like these tiny Santa hats, you can make them for your whole family to wear, as well! My knit Santa Hat & Glove pattern in all sizes is available for download here on my PurlsAndPixels.

More Holiday Craft Ideas

Love DIY Christmas and holiday projects? Find more handmade holiday craft ideas at my Holiday Pattern Roundup Post.

Make anything festive by adding a tiny Santa Hat ornament. Free knitting pattern from Liz Chandler @PurlsAndPixels

©2024, Liz Chandler of PurlsAndPixels.

This pattern is for personal use, gifting, and charitable donation of completed items. You may also sell handmade items created using this pattern. Do not copy this pattern and distribute it. If you’d like to share the pattern, refer your friends to my website, purlsandpixels.com so they may obtain a copy.

If you find any errors or have any questions, email purlsandpixels@gmail.com and I will do my best to help.

See purlsandpixels.com for more great patterns or to order this item handmade by me. I’d love to see your finished work! Tag your photos with @PurlsAndPixels on Twitter or Instagram.

Read More

Ribbed Chunky Hat Free Knitting Pattern

Knit an easy, unisex, one-size-fits-most, chunky ribbed knit hat using this printable PDF knitting pattern from Liz Chandler @PurlsAndPixels.

by Liz Chandler @PurlsandPixels

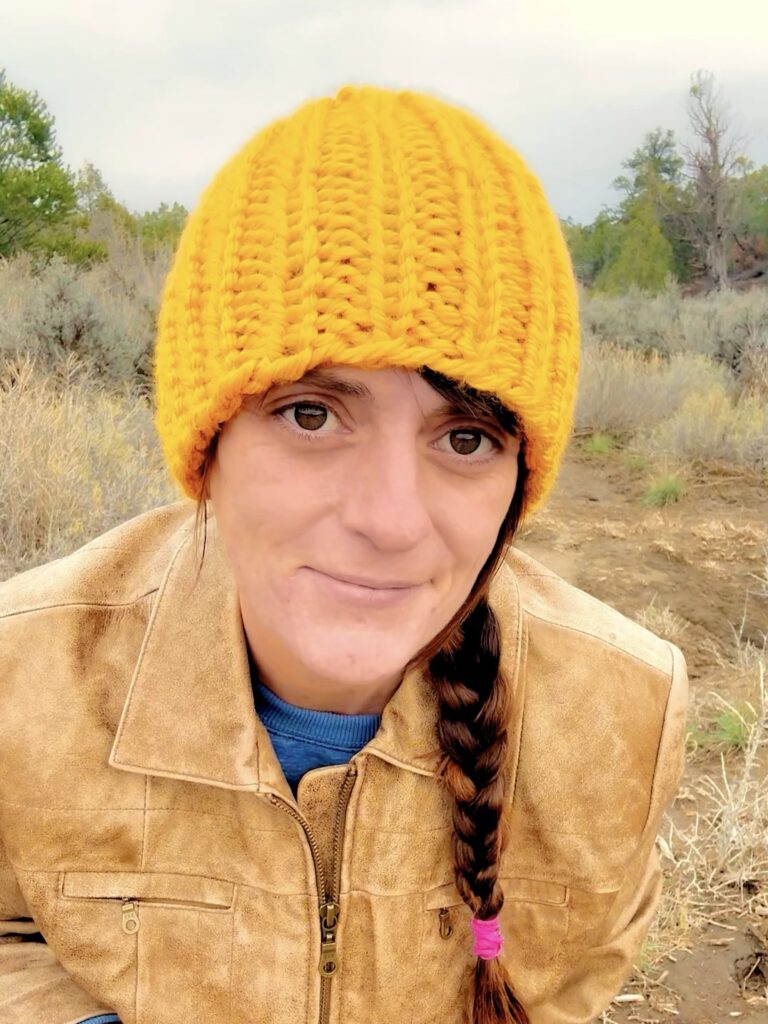
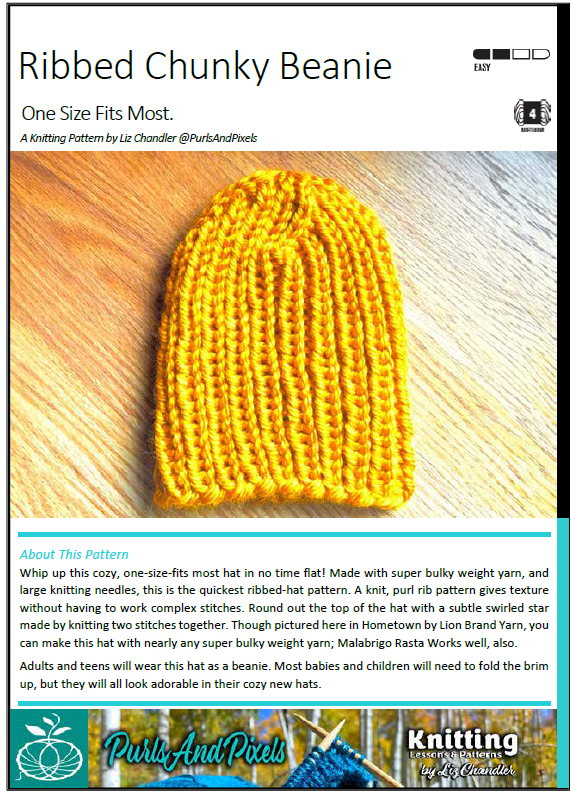
Use this Ribbed Chunky Hat Free Knitting Pattern to make warm hats for everyone! Whip up this cozy, one-size-fits most hat in no time flat! Made with super bulky weight yarn, and large knitting needles, this is the quickest ribbed-hat pattern. A knit, purl rib pattern gives texture without having to work complex stitches. Round out the top of the hat with a subtle swirled star made by knitting two stitches together. Though pictured here in Hometown by Lion Brand Yarn, you can make this hat with nearly any super bulky weight yarn; Malabrigo Rasta and Wool Ease Thick & Quick by Lion Brand work well, also.

Easy Chunky Ribbed Hat PDF Knitting Pattern by Liz Chandler @PurlsAndPixels.

Adults and teens will wear this hat as a beanie. Most babies and children will need to fold the brim up, but they will all look adorable in their cozy new hats.

Prefer to knit offline?

This pattern is free to read below, but if you’d rather print it or save it for later, I’ve created a clean, ad-free PDF version for you.

  • Includes complete, row-by-row instructions
  • Easy to print or use on your tablet
  • Supports my small business 💖
Get Liz Chandler's Easy Chunky Ribbed Hat Knitting Pattern PDF download at PurlsAndPixels.

How this Ribbed Chunky Hat Free Knitting Pattern is Made

This hat is knit seamlessly in the round.

You will need to know how to:

Materials

Yarn

One 81-yard (5 ounce) skein of worsted super bulky weight yarn* in your choice of color (shown in Hometown by Lion Brand Yarn “Madison Mustard”).

  • One hat uses approximately 48.6 yards (3 oz.)

*Weights estimated with Hometown by Lion Brand yarn; other yarn weights may vary. Weight does not include gauge swatch.

Needles

Short Circular Needles
16-inch (41cm) long US No. 13 (9.0 mm) circular needle (or size needed to obtain gauge)


And Double Point Needles (DPNs)
7-inch (18 cm) long US No. 13 (9.0 mm) DPNs (or size needed to obtain gauge)
Or Long Circular Needles
36-inch (91 cm) long US No. 13 (9.0 mm) circular needle (or size needed to obtain gauge)

Notions

Darning needle (for weaving in loose ends)

Ribbed Chunky Hat Free Knitting Pattern Instructions

(One Size Fits Most)

Use the Long-Tail Cast On method. Knit in the round. For Double Point Needles, follow DPN instructions written in italics. For circular needles, follow instructions written in bold. On long circular needles, follow the Magic Loop instructions. Or, for this size, you can substitute short (16-inch) circular needles to knit in the round without the Magic Loop; you will need to switch to DPNs or the Magic Loop to complete the decreases at the top of the hat. If desired, use a stitch marker to keep track of the beginning/ends of your rows/rounds by placing it between the last and first stitch of each row/round.

[Using No. 13 DPNs or long circular needles or short circular needles] Row 1: Cast on 40 stitches. Divide onto 3 DPNs (14 on 1st, 12 on 2nd, and 14 on 3rd DPN). Or separate stitches on long circular needles for Magic Loop (20 on each side). Or place all cast on stitches onto short circular needles. (40 stitches)

Row 2: Join the round (taking care not to twist stitches) and *k, p* x 20. (40 stitches)

Rows 3 – 21: *k, p* x 20. (40 stitches) {Work should measure 6.5 inches (14 cm) at this point.}

[Begin decreases.] Row 22: *(*k, p* x 3), k2tog* x 5 (35 stitches).

[Switch to No. 13 DPNs or long circular needles] Row 23: *(*k, p* x 2), k 1, k2tog* x 5 (30 stitches).

Row 24: *(*k, p* x 2), k2tog* x 5 (25 stitches).

Row 25: *k, p, k, k2tog* x 5 (20 stitches).

Row 26: *k, p, k2tog* x 5 (15 stitches).

Row 27: *k, k2tog* x 5 (10 stitches).

Cut yarn, leaving an 8-inch (20.32-cm) tail. With a darning needle, draw yarn tightly through remaining 10 stitches. Weave in ends. Block if desired.

Printable version of this free knitting pattern

Printable Easy Ribbed Chunky Hat Knitting Pattern PDF by Liz @PurlsAndPixels


A free chunky ribbed hat pattern that is so simple and fast you’ll want to knit one for everyone. 🧶

Size Notes

This Ribbed Chunky Hat Knitting Pattern will create a one-size fits most beanie hat. If it is too big, fold the brim up and it should fit nicely.

Care

If you use the materials called for in the Ribbed Chunky Hat Free Knitting Pattern, your final product will be machine washable. To keep your hat looking its best, hand wash or machine wash separately on delicate cycle in cold water. You may tumble dry on low heat or lay flat to dry.

Use the free Ribbed Chunky Hat Free Knitting Pattern and substitute Wool Ease Thick & Quick by Lion Brand Yarn in the color “Carousel” (affliate link) to make this pastel hat.

©2024, Liz Chandler of PurlsAndPixels.

This pattern is for personal use, gifting, and charitable donation of completed items. You may also sell handmade items created using this pattern. Do not copy this pattern and distribute it. If you’d like to share the pattern, refer your friends to my website, purlsandpixels.com so they may obtain a copy.

If you find any errors or have any questions, email purlsandpixels@gmail.com and I will do my best to help.

I’d love to see your finished work! Tag your photos with @PurlsAndPixels on Twitter or Instagram.

More Patterns You’ll Love

🧣 Easy Chunky Knit Scarf Pattern: Perfect Matching Set Piece

🙏 Gratitude Blanket Pattern: For When You Need Extra-Cozy Knitting Joy

🥳 Basic Slouch Hat Pattern: A Versatile Style Option

🔥 Basic Ear Warmer Pattern: Quick Gift-Ready Project

🧺 All Knitting Patterns from Liz @PurlsAndPixels: Learn to Knit All the Things

Read More

Don’t Miss a Stitch! 🧶

Love cozy knitting projects? Join me on YouTube, Pinterest, and Instagram! And don’t forget to sign up for my newsletter to get more free patterns, helpful tips, and updates straight to your inbox. 💌

School Colors Scarf Free Knitting Pattern

Learn to knit chunky School Colors Scarves with this free knitting pattern from Liz Chandler @PurlsAndPixels. Join the knit-along and make your own Harry Potter Wizard inspired Halloween costume scarf today.

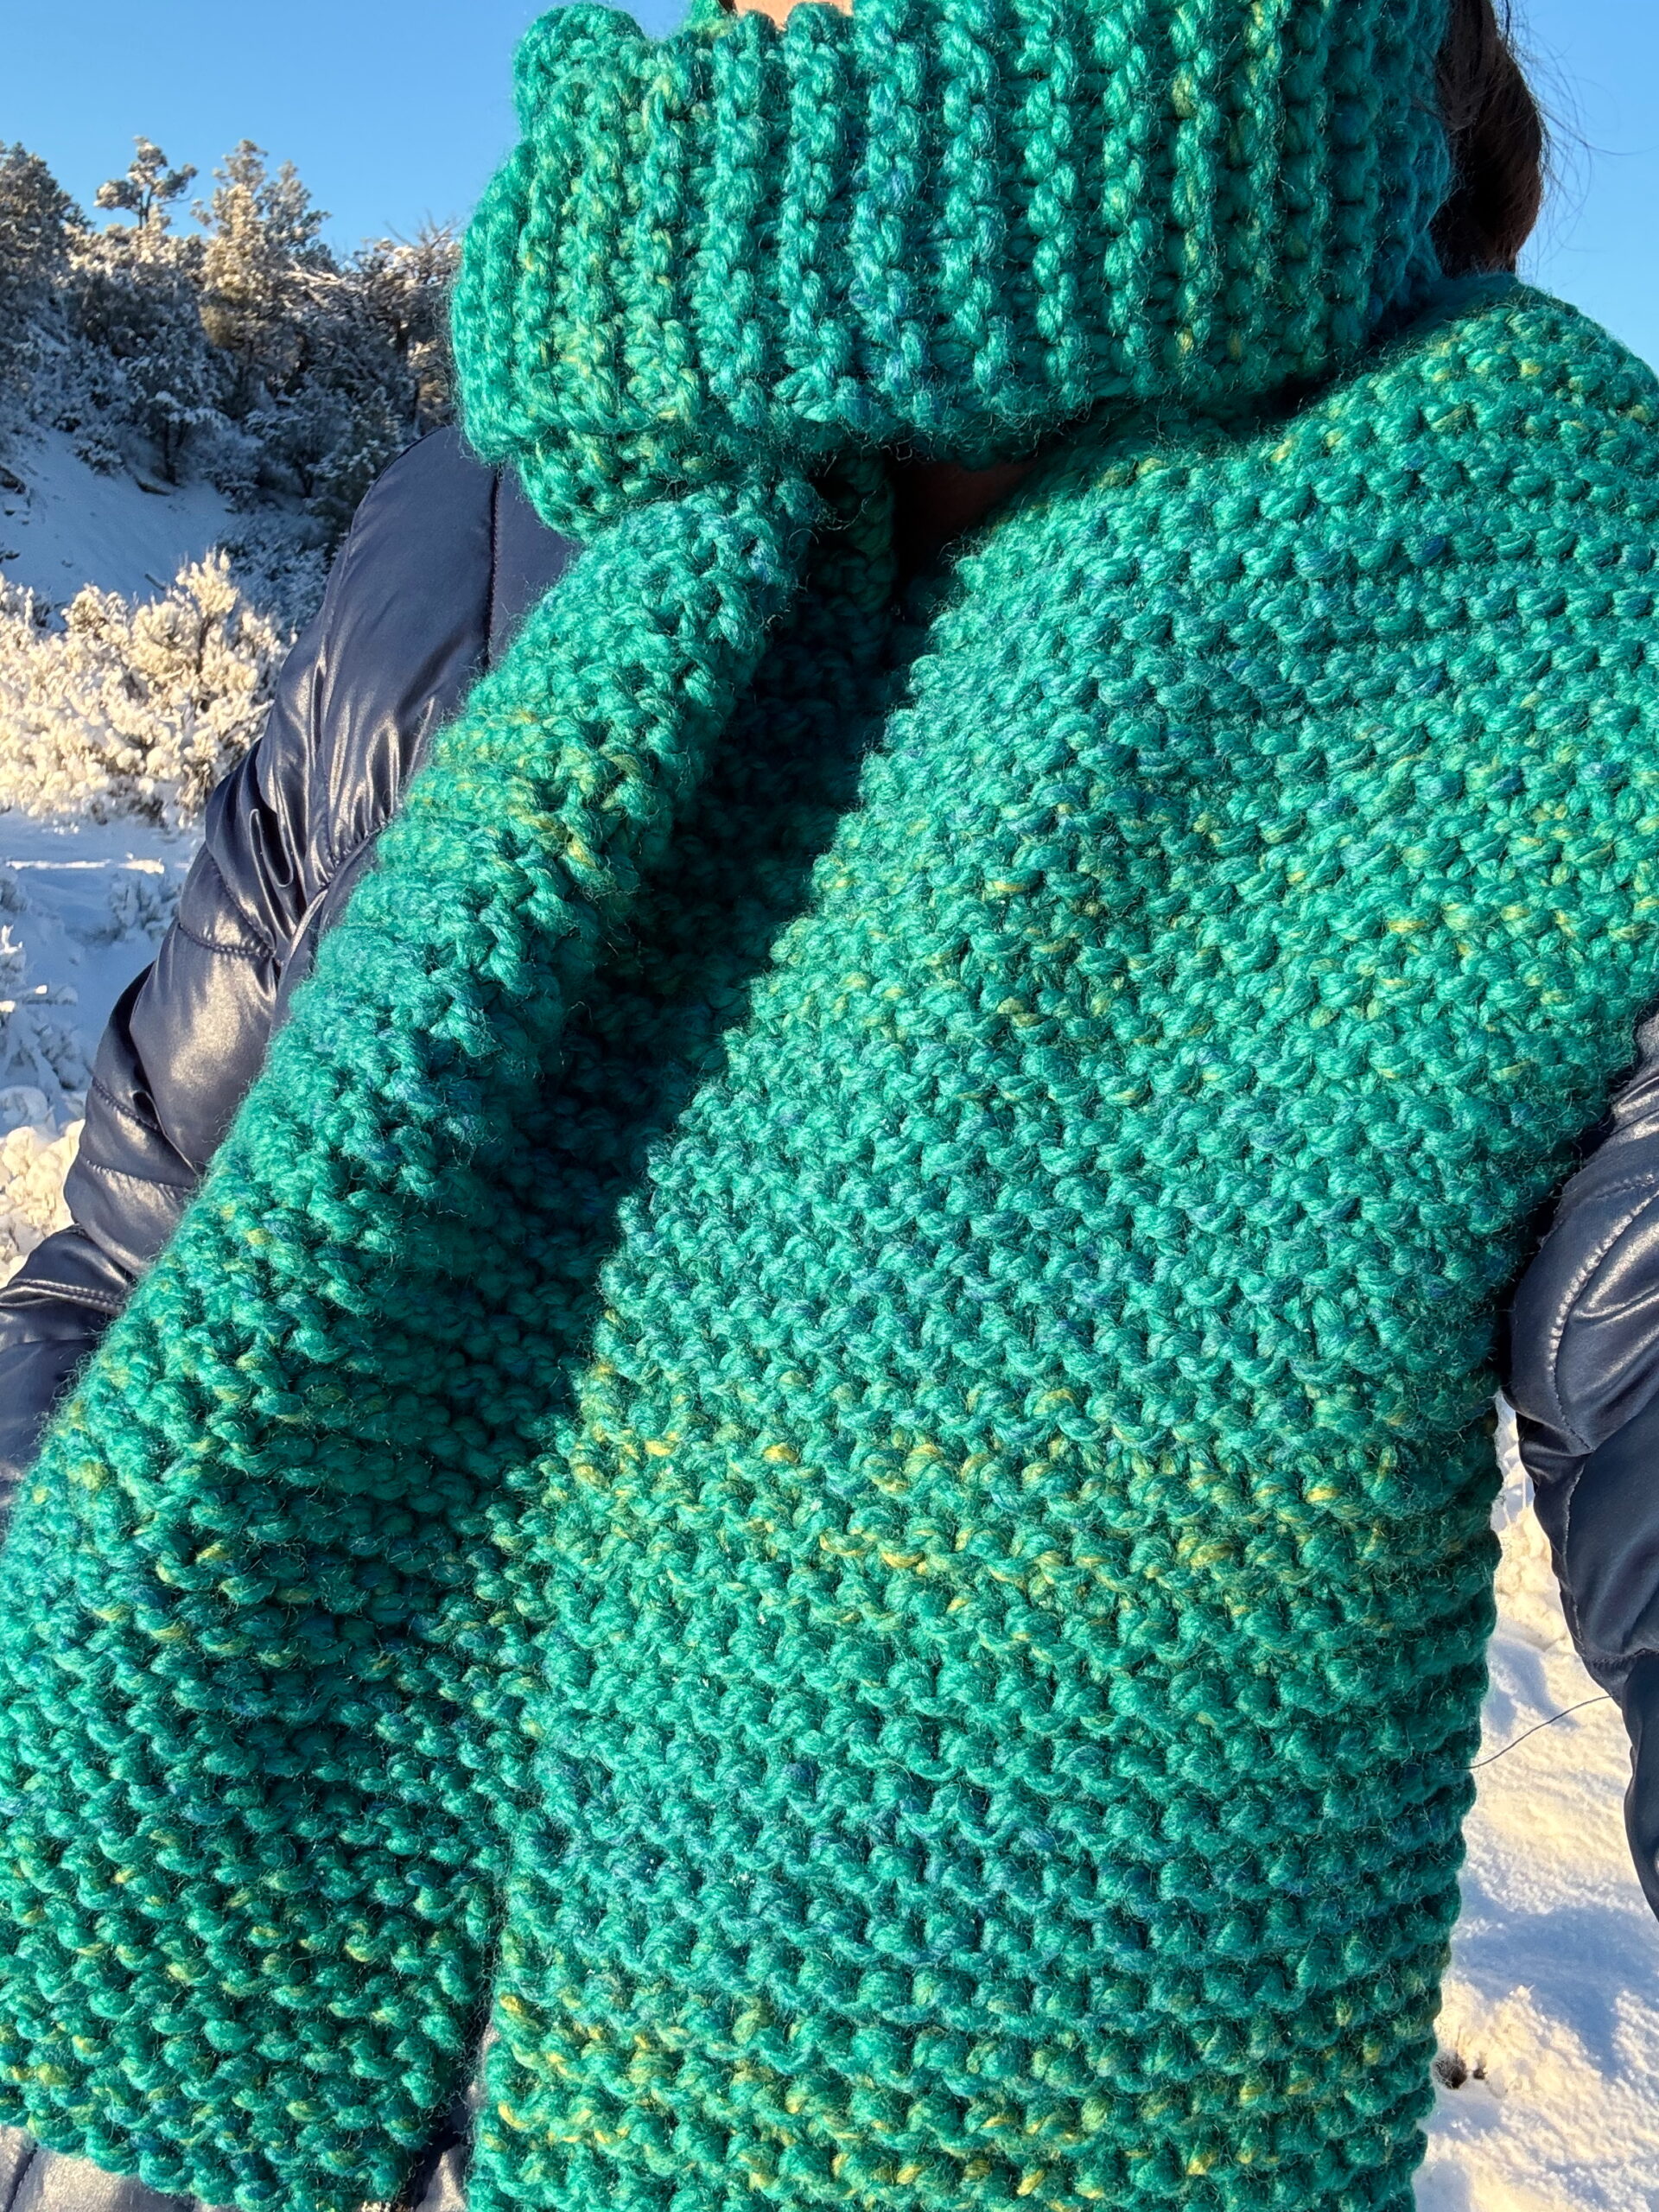
Hello, friends! Halloween is right around the corner (this week!), and my son has just decided on his costume: he’s going as Harry Potter! Since we’re short on time, I won’t be able to knit the traditional Hogwarts house scarf without adding a bit of creative flair. Instead of the typical scarf, I’ll be making one inspired by my old college colors, maroon and gold. Fun fact: I had a similar school colors scarf back in the day!

This version will still fit his costume perfectly, and the pattern works great with any color combination. If you’d like, choose your favorite house colors and knit along with me as I race to finish this fluffy, chunky scarf before the Halloween deadline. (Better photos to come once it’s done!)

Knit along with me as I try to recreate my School Colors Scarf for my son to wear with his Harry Potter Halloween Costume. Free Knitting Pattern at PurlsAndPixels.

Post-Halloween Update

Halloween costume scarf free knitting pattern from Liz Chandler @PurlsAndPixels.

I did it! It came right down to the wire, as far as time goes. I was tying up loose ends at 5 o’clock on Halloween evening, but I got it done! My son’s scarf turned out amazing. He got lots of compliments and everyone knew who he was trying to parody. Here is a little video of the trick-or-treat fun:

How this Chunky Striped School Colors Scarf is Made

This scarf is knit flat, turning after each row.

You will need to know how to:

Materials

Two 129-yard (8 ounce) skeins of super bulky weight (No. 6) yarn* for your main color and (shown in “Tampa Spice” Hometown Super Bulky Yarn by Lion Brand)

One 129-yard (8 ounce) skein of super bulky weight (No. 6) yarn* for your secondary color (shown in “Madison Mustard” Hometown Super Bulky Yarn by Lion Brand)

  • A 6-foot scarf uses about 258 yards (16 oz.) of Color 1 and 129 yards (8 oz.) of Color 2
Make your own School Colors Scarf with this free knitting pattern from Liz Chandler that uses Hometown Super Bulky Yarn by Lion Brand Yarn. Get the pattern at PurlsAndPixels.

Needles

US No. 13/9.0 mm straight knitting needles or 16-inch circular needles

Notions

Darning needle (for weaving in loose ends)

Gauge

12 stitches x 15 rows = 4 x 4 inches in Stockinette Stitch on No. 13 (9.0 mm) needles

School Colors Scarf Free Knitting Pattern

Instructions: Use the long tail cast on. Knit flat, turning after each row.

[With Color 1] Row 1: Cast on 22 stitches. (22 stitches) Turn.

Rows 2 – 24: k 22. (22 stitches). Turn.

[With Color 2] Rows 25 – 28: k 22. (22 stitches). Turn.

[With Color 1] Rows 29 – 34: k 22. (22 stitches). Turn.

[With Color 2] Rows 35 – 38: k 22. (22 stitches). Turn.

[With Color 1] Rows 39 – 58: k 22. (22 stitches). Turn.

Rows 59 – 264: Repeat Rows 25 – 58 x 8 or until scarf measures approximately 5 inches shorter than your desired length.

[With Color 1] 265 – 287: k 22. (22 stitches). Turn.

Row 289: Bind off loosely.

Cut yarn, leaving an 8-inch (20.32-cm) tail, and pull through. Weave in ends. Block if desired.

Printable version of this free knitting pattern

Printable School Colors Scarf knitting pattern PDF by Liz @PurlsAndPixels


Chunky school colors scarf free knitting pattern from Liz Chandler @PurlsAndPixels

Size Notes

This School Colors Scarf will be a 9-inch by 72-inch rectangle. You can make it shorter or longer if you wish; just add or remove repeats in rows 59-264.

Care

If you use the materials called for in the School Colors Scarf Free Knitting Pattern, your final product will be machine washable. To keep your scarf looking its best, hand wash or machine wash separately on delicate cycle in cold water. You may tumble dry on low heat or lay flat to dry.

©2024, Liz Chandler of PurlsAndPixels.

This pattern is for personal use, gifting, and charitable donation of completed items. You may also sell handmade items created using this pattern. Do not copy this pattern and distribute it. If you’d like to share the pattern, refer your friends to my website, purlsandpixels.com so they may obtain a copy.

If you find any errors or have any questions, email purlsandpixels@gmail.com and I will do my best to help.

I’d love to see your finished work! Tag your photos with @PurlsAndPixels on Twitter or Instagram.

Rice Stitch Afghan Free Knitting Pattern

Liz Chandler's Rice Stitch Afghan Throw Blanket Knitting Pattern @PurlsAndPixels.
Free Rice Stitch Baby Blanket Knitting Pattern by Liz Chandler @PurlsAndPixels.

Rice Stitch Afghan

A Free Knitting Pattern from Liz @PurlsAndPixels

Make a cozy Rice Stitch Afghan with this free knitting pattern. Choose your favorite yarn and color in worsted weight and you’ll be on your way to having your own custom, handmade throw blanket to decorate your cozy home.

The knitting pattern here will help you create an Afghan/throw blanket. If you’d like to make the smaller Rice Stitch Baby Blanket, you can find that free pattern on its own page.

Prefer to knit offline?

This pattern is free to read below, but if you’d rather print it or save it for later, I’ve created a clean, ad-free PDF version for you.

  • Includes two blanket sizes and two ways to make each size
  • Easy to print or use on your tablet
  • Supports my small business 💖

How this Rice Stitch Afghan Free Knitting Pattern is Made

Here, I’ll show you two ways to make the same blanket. Beginners might prefer using the Broken Rib Stitch, as it requires only basic knit and purl stitches. Or, you can knit it in the Rice Stitch, which introduces knitting through the back loop (ktbl). This is a great way to practice intentional stitch twisting. As you work through ktbl techniques, you’ll become better at recognizing twisted stitches, making it easier to catch and fix errors in future projects.

The Rice Stitch creates a fabric with a bit more twist. It also curls slightly less than the Broken Rib Stitch, though the difference is minimal. Whichever pattern you choose will yield almost the same blanket, so go with the one that suits you best.

Neaten knitted edges with slipped stitches

To tidy up the edges of your blanket, slip the first stitch off the needle as if to purl, without working it. On knit rows, keep the yarn at the back of your work when slipping the stitch, which I’ll abbreviate as “sl1pwyib.” On purl rows, hold the yarn in front when you slip the first stitch; this will be noted as “sl1pwyif.” For a detailed tutorial with a video demonstrating how to use slipped stitches for cleaner edges, follow this link.

Liz Chandler's Rice Stitch Afghan Throw Blanket Knitting Pattern @PurlsAndPixels

The trickiest part of this blanket is staying on track with the pattern. It’s easy to accidentally knit two stitches and throw off the knit and purl sequence. Keep an eye on your stitch rows and columns, and refer to the pictures to ensure your pattern is coming together correctly. If you catch a mistake, you can always go back and fix it as needed.

Rice Stitch Afghan Free Knitting Pattern

Rice Stitch Afghans make the best throw blanket for your cozy knitting nook.

Materials

Abbreviations

Gauge

18 stitches and 24 rows in stockinette stitch = 4 inches by 4 inches square

Instructions: Rice Stitch Afghan

(50 inches x 65 inches [127 cm x 165.1 cm])

Use the Long-Tail Cast On method. Knit flat, turning after each row.

Row 1: Cast on 203 stitches. Turn.

Row 2: sl1pwyif, *k1tbl, p* x 101 (203 stitches). Turn.

Row 3: sl1pwyib, k 202 (203 stitches). Turn.

Rows 4 – 364: Repeat Rows 2 and 3.

Row 365: sl1pwyif, *k1tbl, p* x 101. (203 stitches) Turn.

Row 366: Bind off in pattern of Row 3 with the same tension as the rest of the piece (do not bind off loosely like most other patterns instruct). Cut yarn, leaving an 8-inch (20.32-cm) tail, and pull through. Weave in ends. Block if desired.

Instructions: Broken Rib Stitch Afghan

(50 inches x 65 inches [127 cm x 165.1 cm])

Use the Long-Tail Cast On method. Knit flat, turning after each row.

Row 1: Cast on 203 stitches. Turn.

Row 2: sl1pwyif, *k, p* x 101 (203 stitches). Turn.

Row 3: sl1pwyib, k 203 (203 stitches). Turn.

Rows 4 – 364: Repeat Rows 2 and 3.

Row 365: sl1pwyif, *k, p* x 101 (203 stitches). Turn.

Row 366: Bind off in pattern of Row 3 with the same tension as the rest of the piece (do not bind off loosely like most other patterns instruct). Cut yarn, leaving an 8-inch (20.32-cm) tail, and pull through. Weave in ends. Block if desired.

Printable version of this free knitting pattern

Get the PDF version of this Blanket Knitting Pattern.


Rice Stitch Afghan Free Knitting Pattern Size Notes

This blanket will be a 50-inch by 65-inch rectangle.

Care

If you use the materials called for in the Rice Stitch Afghan Free Knitting Pattern, your final product will be machine washable. To keep your blanket looking its best, hand wash or machine wash separately on delicate cycle in cold water. You may tumble dry on low heat or lay flat to dry.

Tip:

Keep this away from Velcro! Yarn and Velcro are never friends. Your blanket will absolutely snag if you lay it on a Velcro jacket or a toy with a Velcro seam. Other than that, these little blankets last for years if you make sure to wash them gently.

🛁 Read more Knitwear Care Tips

Liz Chandler's Rice Stitch Afghan Throw Blanket Knitting Pattern @PurlsAndPixels

©2023, Liz Chandler of PurlsAndPixels.

This pattern is for personal use, gifting, and charitable donation of completed items. You may also sell handmade items created using this pattern. Do not copy this pattern and distribute it. If you’d like to share the pattern, refer your friends to my website, purlsandpixels.com so they may obtain a copy.

If you find any errors or have any questions, email purlsandpixels@gmail.com and I will do my best to help.

I’d love to see your finished work! Tag your photos with @PurlsAndPixels on Twitter or Instagram.

Free throw blanket knitting pattern is available now!

Knitting Pattern Keepsake Book

Love this free blanket knitting pattern? You can find it in both of my books, Liz Chandler’s Knitting Guide (lessons and patterns) and Liz Chandler’s Knitting the Simple Things (patterns only). Add one to your knitting pattern book collection today. Shop Books at PurlsAndPixels.

Don’t Miss a Stitch! 🧶

Love cozy knitting projects? Join me on YouTube, Pinterest, and Instagram! And don’t forget to sign up for my newsletter to get more free patterns, helpful tips, and updates straight to your inbox. 💌
Fast and Easy Knit Hat

Make your own Fast and Easy Knit Hats with this free knitting pattern from Liz Chandler @PurlsAndPixels.

A Free Knitting Pattern by Liz Chandler @PurlsAndPixels

Make your own Fast and Easy Knit hats with this free knitting pattern from Liz Chandler @PurlsAndPixels.

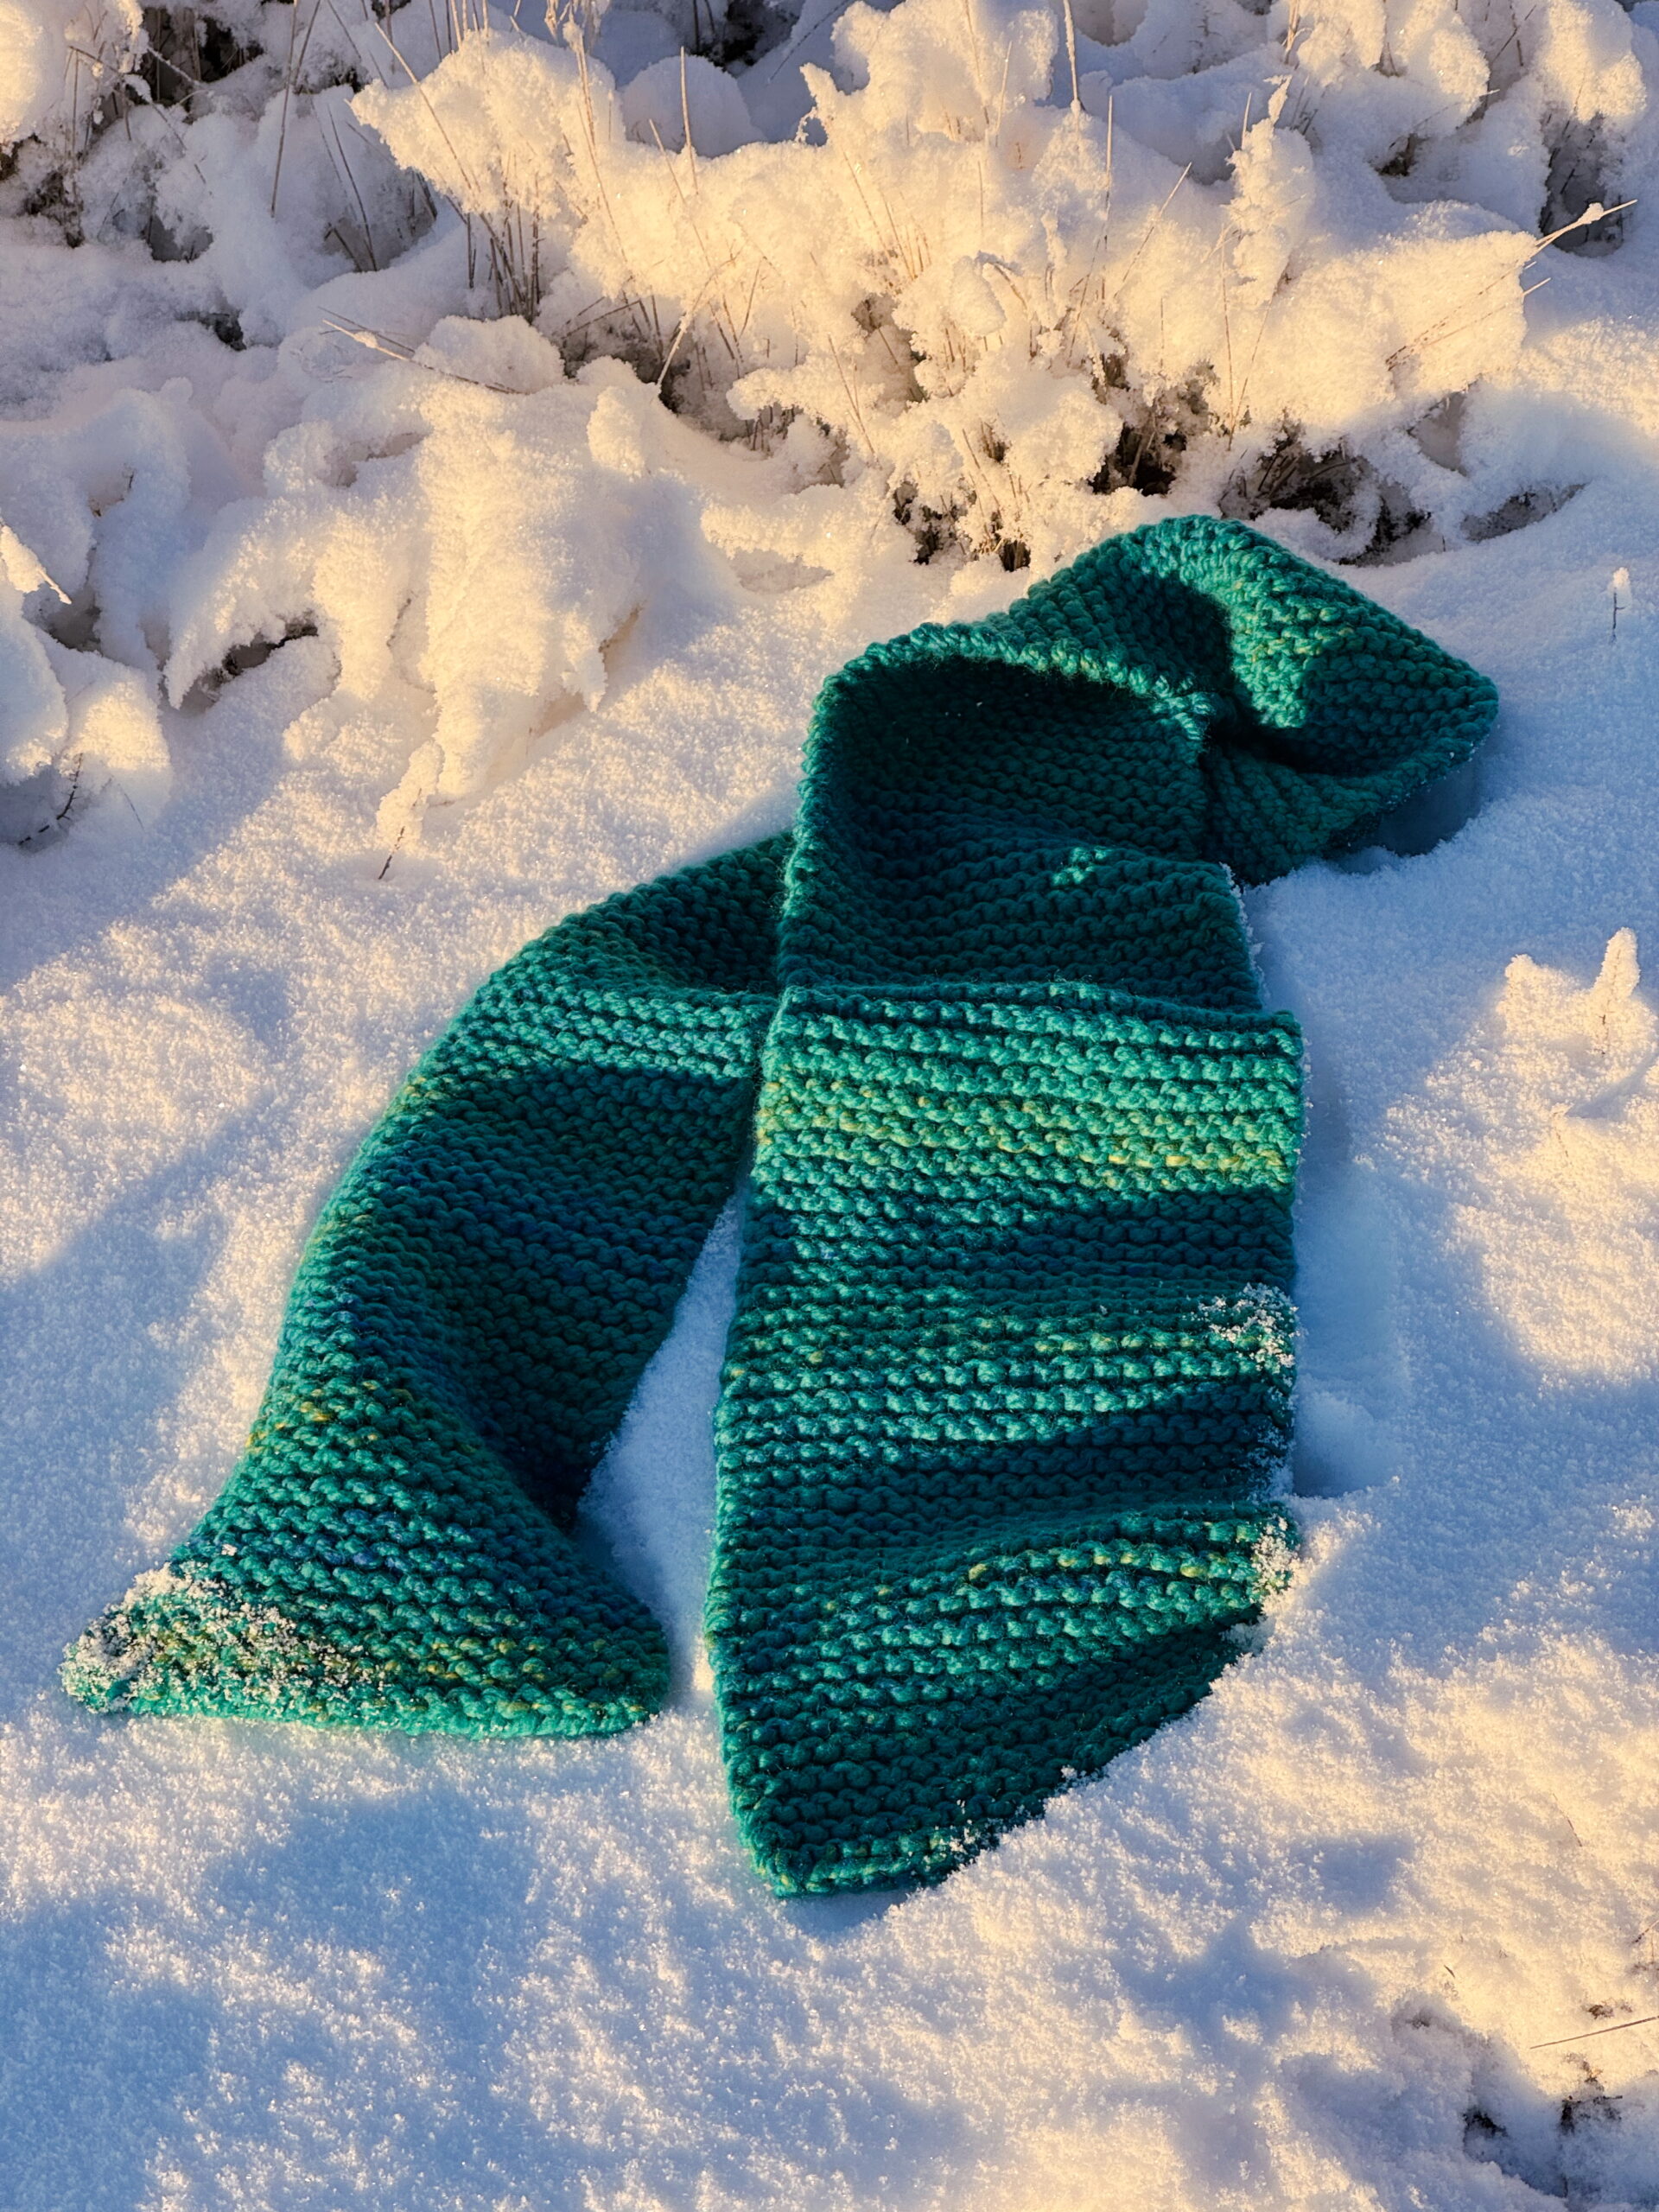
Made using only knit stitches, this easy and fast hat is the simplest of all my hat knitting patterns. It knits up quickly because you will use super bulky yarn and large knitting needles.

Knit these hats with wool (as pictured) or substitute your favorite yarn material. Just be sure to choose “super bulky” weight yarn. Try any solid color you like or mix it up with a multi-colored yarn. (Amazon affiliate link.)

About This Free Fast and Easy Knit Hat Knitting Pattern

This simple knit hat is a beginner-level knitting pattern. You will need to know how to make a long-tail cast on, knit, and draw yarn thru the remaining stitches. If you are not familiar with these skills, find quick, free lessons in my Learn to Knit Guide.

Learn to knit the most simple hat in the round even if your are a complete beginner with this free knitting pattern from Liz Chandler @PurlsAndPixels.

Materials

You will need the following materials, which you can purchase at your local yarn shop or on Amazon.com via the affiliate links below:

Knitting Needles:

Short Circular Needles


Yarn:

One 44-yard (100 gram) skein of super bulky weight yarn* (shown in KnitPicks Tuff Puff), in your choice of color.

  • Baby size uses about 22 yards (50 grams)
  • One-Size-Fits-Most uses about 44 yards (100 grams)

*Weights estimated with Knit Picks Tuff Puff yarn; other yarn weights may vary. Weight does not include gauge swatch. A 4×4 inch gauge swatch with a 2 row by 3 stitch border uses an additional 22 yards (50 grams.).

Tools:

A stitch marker, a measuring tape and a darning needle.

Gauge

20 stitches x 28 rows = 4 x 4 inches in stockinette stitch on No. 5 (3.75 mm) needles. (Learn how to check your gauge here.)

Abbreviations

k = knit


Instructions: Baby Size Fast & Easy Knit Hat

(10.5-inch to 16-inch [26.67-cm to 40.64-cm] head circumference)

Use the Long-Tail Cast On method. Knit in the round.

Row 1: Cast on 20 stitches.

Rows 2 – 21: k 20. (20 stitches) [Work should measure 6 inches at this point.]

Cut yarn, leaving an 8-inch tail. With a darning needle, draw yarn tightly through the remaining 20 stitches. Weave in ends.


Instructions: One-Size-Fits-Most Fast & Easy Knit Hat         

(16-inch to 25-inch [40.64-cm to 63.5-cm] head circumference)

Use the Long-Tail Cast On method. Knit in the round.

Row 1: Cast on 32 stitches.

Rows 2 – 33: k 32. (32 stitches) [Work should measure 11 inches at this point.]

Cut yarn, leaving an 8-inch tail. With a darning needle, draw yarn tightly through the remaining 20 stitches. Weave in ends.


Printable version of this free knitting pattern

Printable Fast and Easy Knit Hat Pattern PDF by Liz @PurlsAndPixels


Find More Knitting Patterns

©2024, Liz Chandler of PurlsAndPixels.

This pattern is for personal use, gifting, and charitable donation of completed items. You may also sell handmade items created using this pattern. Do not copy this pattern and distribute it. If you’d like to share the pattern, refer your friends to my website, purlsandpixels.com so they may obtain a copy.

If you find any errors or have any questions, email purlsandpixels@gmail.com and I will do my best to help.

I’d love to see your finished work! Tag your photos with @PurlsAndPixels on Twitter or Instagram.

One-Size-Fits-Most Ribbed Hat Free Knitting Pattern

Knit a stretchy, unisex, one-size-fits-most ribbed knit hat with a foldable brim using this PDF printable knitting pattern from Liz Chandler @PurlsAndPixels.

Ribbed Hat

Knit a stretchy, one-size-fits-most ribbed hat with a foldable brim using this free knitting pattern from Liz Chandler @PurlsAndPixels.

To make this ribbed hat, you will work in a simple knit, purl pattern. This will create a stretchy ribbing, which allows the hat to fit most head sizes from children through adults. Working from the bottom of the hat, upward, you will knit a long tube before adding decreases to close the top of the hat. Folding the brim will not only help it fit most heads properly, but will also add an extra layer of warmth around the ears.

Prefer to knit offline?

This pattern is free to read below, but if you’d rather print it or save it for later, I’ve created a clean, ad-free PDF version for you.

  • Includes complete, row-by-row instructions
  • Easy to print or use on your tablet
  • Supports my small business 💖
Get Liz Chandler's Ribbed Hat Knitting Pattern PDF download at PurlsAndPixels.

Using the suggested acrylic yarn will give you a soft, solid-colored hat. Try experimenting with yarn colors, textures, and materials to make this hat more unique. Be sure you choose worsted weight yarn and check your gauge before substituting materials.

The purple hat pictured here was made by substituting Malabrigo Rios merino wool yarn in the color “Lotus.” (Amazon affiliate link.)

Knit a stretchy, one-size-fits-most ribbed hat with a foldable brim using this free knitting pattern from Liz Chandler @PurlsAndPixels.

About This Free Ribbed Hat Knitting Pattern

This simple ribbed hat is an easy-level knitting pattern. You will need to know how to make a long-tail cast on, knit, purl, decrease, and draw yarn thru the remaining stitches. If you are not familiar with these skills, find quick, free lessons in my Learn to Knit Guide.

Knit a stretchy, one-size-fits-most ribbed hat with a foldable brim using this free knitting pattern from Liz Chandler @PurlsAndPixels.

Materials

You will need the following materials, which you can purchase at your local yarn shop or on Amazon.com via the affiliate links below:

Knitting Needles:

Short Circular Needles (optional)

Double Point Needles (DPNs)

Or Long Circular Needles (optional)


Yarn:

One 315-yard (6 ounce) skein of worsted weight yarn* (shown in Caron Simply Soft Yarn), in your choice of color.

  • one hat uses about one hat uses about 157.5 yards (3 oz.)

*Shown in Caron Simply Soft Yarn in “Pagoda.” Weights estimated with Caron Simply Soft yarn; other yarn weights may vary. Weight does not include gauge swatch. A 4×4 inch gauge swatch with a 2 row by 3 stitch border uses an additional 21 yards (0.4 oz.).

Tools:

A stitch marker, a measuring tape and a darning needle.

Gauge

20 stitches x 28 rows = 4 x 4 inches in stockinette stitch on No. 5 (3.75 mm) needles. (Learn how to check your gauge here.)

Abbreviations

k = knit

p = purl

** = repeat the pattern between the asterisks

ssk = slip, slip, knit

Instructions: One-Size-Fits-Most Ribbed Hat

(Fits most children, teens, and adults or 18-inch to 25-inch head circumference)

Use the Long-Tail Cast On method. Knit in the round. For Double Point Needles, follow DPN instructions written in italics. For circular needles, follow instructions written in bold. On long circular needles, follow the Magic Loop instructions. Or, for this size, you can substitute short (16-inch) circular needles to knit in the round without the Magic Loop; you will need to switch to DPNs or the Magic Loop to complete the decreases at the top of the hat. If desired, use a stitch marker to keep track of the beginning/ends of your rows/rounds by placing it between the last and first stitch of each row/round.

[Using No. 5 DPNs or short circular needles] Row 1: Cast on 88 stitches. Divide onto 3 DPNs (30 on 1st, 28 on 2nd, and 30 on 3rd DPN). Or separate stitches on long circular needles for Magic Loop (44 on each side). Or place all cast on stitches onto short circular needles. (88 stitches)

Row 2: Join the round (taking care not to twist stitches) and *k, p* x 44. (88 stitches)

Rows 3 – 75: *k, p* x 44. (88 stitches) {Work should measure 11 inches at this point.}

{Begin decreases.}Row 76: ssk, (*k, p* x 4), k, ssk, (*p, k* x 4), p, ssk, (*k, p* x 4), k, ssk, (*p, k* x 4), p, ssk, (*k, p* x 4), k, ssk, (*p, k* x 4), p, ssk, (*k, p* x 4), k, ssk, (*p, k* x 4), p. (80 stitches)

Row 77: ssk, (*p, k* x 4), ssk, (*k, p* x 4), ssk, (*p, k* x 4), ssk, (*k, p* x 4), ssk, (*p, k* x 4), ssk, (*k, p* x 4), ssk, (*p, k* x 4), ssk, (*k, p* x 4). (72 stitches)

Row 78: ssk, (*k, p* x 3), k, ssk, (*p, k* x 3), p, ssk, (*k, p* x 3), k, ssk, (*p, k* x 3), p, ssk, (*k, p* x 3), k, ssk, (*p, k* x 3), p, ssk, (*k, p* x 3), k, ssk, (*p, k* x 3), p. (64 stitches)

Row 79: ssk, (*p, k* x 3), ssk, (*k, p* x 3), ssk, (*p, k* x 3), ssk, (*k, p* x 3), ssk, (*p, k* x 3), ssk, (*k, p* x 3), ssk, (*p, k* x 3), ssk, (*k, p* x 3). (56 stitches)

[Switch to No. 5 DPNs or long circular needles and the Magic Loop] Row 80: ssk, (*k, p* x 2), k, ssk, (*p, k* x 2), p, ssk, (*k, p* x 2), k, ssk, (*p, k* x 2), p, ssk, (*k, p* x 2), k, ssk, (*p, k* x 2), p, ssk, (*k, p* x 2), k, ssk, (*p, k* x 2), p. (48 stitches)

Row 81: ssk, (*p, k* x 2), ssk, (*k, p* x 2), ssk, (*p, k* x 2), ssk, (*k, p* x 2), ssk, (*p, k* x 2), ssk, (*k, p* x 2), ssk, (*p, k* x 2), ssk, (*k, p* x 2). (40 stitches)

Row 82: *ssk, k, p, k, ssk, p, k, p* x 4. (32 stitches)

Row 83: *ssk, p, k, ssk, k, p* x 4. (24 stitches)

Cut yarn, leaving an 8-inch tail. With darning needle, draw yarn tightly through remaining 24 stitches. Weave in ends. Block if desired.

Printable version of this free knitting pattern

Printable Ribbed Hat Pattern PDF by Liz @PurlsAndPixels


Find More Knitting Patterns

If you like this, check out the other knitting patterns I’ve written. They’re all gathered on one page, which you can find on my knitting pattern collection page.

Find all of the knitting patterns by Liz Chandler @PurlsAndPixels.

Knit a stretchy, one-size-fits-most ribbed hat with a foldable brim using this free knitting pattern from Liz Chandler @PurlsAndPixels.

©2022, Liz Chandler of PurlsAndPixels. Revised 2025.

This pattern is for personal use, gifting, and charitable donation of completed items. You may also sell handmade items created using this pattern. Do not copy this pattern and distribute it. If you’d like to share the pattern, refer your friends to my website, purlsandpixels.com so they may obtain a copy.

If you find any errors or have any questions, email purlsandpixels@gmail.com and I will do my best to help.

I’d love to see your finished work! Tag your photos with @PurlsAndPixels on Twitter or Instagram.

Basic Pillow Cover Free Knitting Pattern

Learn to knit a pillowcase with this free basic pillow cover knitting pattern from Liz Chandler @PurlsAndPixels.

Basic Pillow Covers

Learn to knit a pillowcase with this free basic pillow cover knitting pattern from Liz Chandler @PurlsAndPixels.

This pattern will show you how to make simple pillow covers by knitting in the round on circular needles. Using only the knit stitch creates a smooth, stockinette stitch pattern. The top and bottom edges of stockinette that has been knit in the round will naturally curl. When you sew the edges of the pillow together, the curl adds a decorative touch to these basic pillowcase.

You can sew the edges with a simple “running stitch” and a strand of yarn in the same color. Or try using a contrasting yarn color or a fancy ribbon to make your pillows more unique. Once you are finished, you can leave the pillows plain for a minimalist look. Or decorate your pillow cover with embroidery, faux flowers, or applique patches.

About This Free Pillow Cover Knitting Pattern

This simple pillow cover is an easy-level knitting pattern. You will need to know how to make a long-tail cast on, make a knit stitch, work in the round on circular needles, and bind off in the round. If you are not familiar with these skills, find quick, free lessons in my Learn to Knit Guide.

Learn to knit a pillowcase with this free basic pillow cover knitting pattern from Liz Chandler @PurlsAndPixels.

Knit Along with Me

In this video, I will show you how to make this knit pillow from start to finish. You can follow along using the knitting pattern below.

Basic Pillow Cover Knitting Pattern

Materials

You will need the following materials, which you can purchase at your local yarn shop or on Amazon.com via the affiliate links below:

Knitting Needles:

Extra-Short Circular Needles (for size mini)
12-inch (30 cm) long US No. 8 (5.0 mm) circular needle (or size needed to obtain gauge)

Short Circular Needles (for size small)
16-inch (41 cm) long US No. 8 (5.0 mm) circular needle (or size needed to obtain gauge)

Or Long Circular Needles (for sizes medium and large)
36-inch (91 cm) long US No. 8 (5.0 mm) circular needle (or size needed to obtain gauge)

Yarn:
One or two 315-yard (6 ounce) skeins of worsted weight yarn* (shown in Caron Simply Soft Yarn), in your choice of color.

  • Mini size uses about 52.5 yards (1 oz)
  • Small size uses about 204.75 yards (3.9 oz.)
  • Medium size uses about 315 yards (6 oz.)
  • Large size uses about 388.5 yards (7.4 oz.)

*Shown in Caron Simply Soft Yarn in “Pagoda,” “Robins Egg,” “Charcoal Heather,” and “Orchid.” Weights estimated with Caron Simply Soft yarn; other yarn weights may vary. Weight does not include gauge swatch. A 4×4 inch gauge swatch with a 2 row by 3 stitch border uses an additional 21 yards (0.4 oz.).

Pillow Insert:

One square pillow-insert in the correct size.

Tools:

A stitch marker, a measuring tape and a darning needle.

Gauge

18 stitches x 24 rows = 4 x 4 inches in stockinette stitch on No. 8 (5.0 mm) needles. (Learn how to check your gauge here.)

Abbreviations

k = knit

Instructions: Mini Size Pillow Cover

(Fits 5-inch x 5-inch pillows; measures 6 inches  x 10 inches when laid flat off the pillow)

Use the long-tail cast on method. Knit in the round. For this size, work with extra-short (12-inch) circular needles. If desired, use a stitch marker to keep track of the beginning/ends of your rows/rounds by placing it between the last and first stitch of each row/round.

Row 1: Cast on 40 stitches.

Row 2: Join the round (taking care not to twist stitches) and k 40. (40 stitches)

Rows 3 – 46: k 40. (40 stitches) {Work should measure 10 inches at this point.}

Row 47: Bind off loosely in knit stitch pattern. Cut yarn, leaving an 8-inch tail, and pull through. Weave in ends. Block if desired.

Insert a 5-inch by 5-inch pillow into the cover. Thread a strand of yarn about two feet long in the same or a contrasting color onto a darning needle. Count about seven rows up from the bottom of the pillow; use this as a starting point to begin sewing the first end of the pillow closed. Use the holes created by the knitting to line up both sides and a “running stitch” to sew the bottom edge together. Tie off the loose ends. Count about seven rows down from the top of the pillow and sew the top edge closed in the same manner.


Instructions: Small Size Pillow Cover

(Fits 12-inch x 12-inch pillows; measures 13 inches  x 17 inches when laid flat off the pillow)

Use the long-tail cast on method. Knit in the round. For this size, work with short (16-inch) circular needles. If desired, use a stitch marker to keep track of the beginning/ends of your rows/rounds by placing it between the last and first stitch of each row/round.

Row 1: Cast on 86 stitches.

Row 2: Join the round (taking care not to twist stitches) and k 86. (86 stitches)

Rows 3 – 79: k 86. (86 stitches) {Work should measure 17 inches at this point.}

Row 80: Bind off loosely in knit stitch pattern. Cut yarn, leaving an 8-inch tail, and pull through. Weave in ends. Block if desired.

Insert a 12-inch by 12-inch pillow into the cover. Thread a strand of yarn about four feet long in the same or a contrasting color onto a darning needle. Count about seven rows up from the bottom of the pillow; use this as a starting point to begin sewing the first end of the pillow closed. Use the holes created by the knitting to line up both sides and a “running stitch” to sew the bottom edge together. Tie off the loose ends. Count about seven rows down from the top of the pillow and sew the top edge closed in the same manner.


Instructions: Medium Size Pillow Cover

(Fits 16-inch x 16-inch pillows; measures 17 inches  x 21 inches when laid flat off the pillow)

Use the long-tail cast on method. Knit in the round. For this size, work with long (36-inch) circular needles. If desired, use a stitch marker to keep track of the beginning/ends of your rows/rounds by placing it between the last and first stitch of each row/round.

Row 1: Cast on 112 stitches.

Row 2: Join the round (taking care not to twist stitches) and k 112. (112 stitches)

Rows 3 – 97: k 112. (112 stitches) {Work should measure 21 inches at this point.}

Row 98: Bind off loosely in knit stitch pattern. Cut yarn, leaving an 8-inch tail, and pull through. Weave in ends. Block if desired.

Insert a 16-inch by 16-inch pillow into the cover. Thread a strand of yarn about four feet long in the same or a contrasting color onto a darning needle. Count about seven rows up from the bottom of the pillow; use this as a starting point to begin sewing the first end of the pillow closed. Use the holes created by the knitting to line up both sides and a “running stitch” to sew the bottom edge together. Tie off the loose ends. Count about seven rows down from the top of the pillow and sew the top edge closed in the same manner.


Instructions: Large Size Pillow Cover

(Fits 18-inch x 18-inch pillows; measures 19 inches  x 23 inches when laid flat off the pillow)

Use the long-tail cast on method. Knit in the round. For this size, work with long (36-inch) circular needles. If desired, use a stitch marker to keep track of the beginning/ends of your rows/rounds by placing it between the last and first stitch of each row/round.

Row 1: Cast on 126 stitches.

Row 2: Join the round (taking care not to twist stitches) and k 126. (126 stitches)

Rows 3 – 106: k 126. (126 stitches) {Work should measure 23 inches at this point.}

Row 107: Bind off loosely in knit stitch pattern. Cut yarn, leaving an 8-inch tail, and pull through. Weave in ends. Block if desired.

Insert an 18-inch by 18-inch pillow into the cover. Thread a strand of yarn about four feet long in the same or a contrasting color onto a darning needle. Count about seven rows up from the bottom of the pillow; use this as a starting point to begin sewing the first end of the pillow closed. Use the holes created by the knitting to line up both sides and a “running stitch” to sew the bottom edge together. Tie off the loose ends. Count about seven rows down from the top of the pillow and sew the top edge closed in the same manner.


Printable version of this free knitting pattern

Printable Basic Pillow Cover Knitting Pattern PDF by Liz @PurlsAndPixels


Find More Knitting Patterns

If you like this, check out the other knitting patterns I’ve written. They’re all gathered on one page, which you can find here.

Find all of the knitting patterns by Liz Chandler @PurlsAndPixels.

Learn to knit a pillowcase with this free basic pillow cover knitting pattern from Liz Chandler @PurlsAndPixels.

©2022, Liz Chandler of PurlsAndPixels.

This pattern is for personal use, gifting, and charitable donation of completed items. You may also sell handmade items created using this pattern. Do not copy this pattern and distribute it. If you’d like to share the pattern, refer your friends to my website, purlsandpixels.com so they may obtain a copy.

If you find any errors or have any questions, email purlsandpixels@gmail.com and I will do my best to help.

I’d love to see your finished work! Tag your photos with @PurlsAndPixels on Twitter or Instagram.