Fast and Easy Knit Hat

Make your own Fast and Easy Knit Hats with this free knitting pattern from Liz Chandler @PurlsAndPixels.
Make your own Fast and Easy Knit hats with this free knitting pattern from Liz Chandler @PurlsAndPixels.

Made using only knit stitches, this easy and fast hat is the simplest of all my hat knitting patterns. It knits up quickly because you will use super bulky yarn and large knitting needles.

Knit these hats with wool (as pictured) or substitute your favorite yarn material. Just be sure to choose “super bulky” weight yarn. Try any solid color you like or mix it up with a multi-colored yarn. (Amazon affiliate link.)

About This Free Fast and Easy Knit Hat Knitting Pattern

This simple ribbed hat is an easy-level knitting pattern. You will need to know how to make a long-tail cast on, knit, and draw yarn thru the remaining stitches. If you are not familiar with these skills, find quick, free lessons in my Learn to Knit Guide.

Make your own Easy  and Fast Knit hats with this free knitting pattern from Liz Chandler @PurlsAndPixels.

Materials

You will need the following materials, which you can purchase at your local yarn shop or on Amazon.com via the affiliate links below:

Knitting Needles:

Short Circular Needles


Yarn:

One 44-yard (100 gram) skein of super bulky weight yarn* (shown in KnitPicks Tuff Puff), in your choice of color.

  • Baby size uses about 22 yards (50 grams)
  • One-Size-Fits-Most uses about 44 yards (100 grams)

*Weights estimated with Knit Picks Tuff Puff yarn; other yarn weights may vary. Weight does not include gauge swatch. A 4×4 inch gauge swatch with a 2 row by 3 stitch border uses an additional 22 yards (50 grams.).

Tools:

A stitch marker, a measuring tape and a darning needle.

Gauge

20 stitches x 28 rows = 4 x 4 inches in stockinette stitch on No. 5 (3.75 mm) needles. (Learn how to check your gauge here.)

Abbreviations

k = knit


Instructions: Baby Size Fast & Easy Knit Hat

(10.5-inch to 16-inch [26.67-cm to 40.64-cm] head circumference)

Use the Long-Tail Cast On method. Knit in the round.

Row 1: Cast on 20 stitches.

Rows 2 – 21: k 20. (20 stitches) [Work should measure 6 inches at this point.]

Cut yarn, leaving an 8-inch tail. With a darning needle, draw yarn tightly through the remaining 20 stitches. Weave in ends.


Instructions: One-Size-Fits-Most Fast & Easy Knit Hat         

(16-inch to 25-inch [40.64-cm to 63.5-cm] head circumference)

Use the Long-Tail Cast On method. Knit in the round.

Row 1: Cast on 32 stitches.

Rows 2 – 33: k 32. (32 stitches) [Work should measure 11 inches at this point.]

Cut yarn, leaving an 8-inch tail. With a darning needle, draw yarn tightly through the remaining 20 stitches. Weave in ends.


Printable version of this free knitting pattern

Printable Fast and Easy Knit Hat Pattern PDF by Liz @PurlsAndPixels


Find More Knitting Patterns

©2024, Liz Chandler of PurlsAndPixels.

This pattern is for personal use, gifting, and charitable donation of completed items. You may also sell handmade items created using this pattern. Do not copy this pattern and distribute it. If you’d like to share the pattern, refer your friends to my website, purlsandpixels.com so they may obtain a copy.

If you find any errors or have any questions, email purlsandpixels@gmail.com and I will do my best to help.

I’d love to see your finished work! Tag your photos with @PurlsAndPixels on Twitter or Instagram.

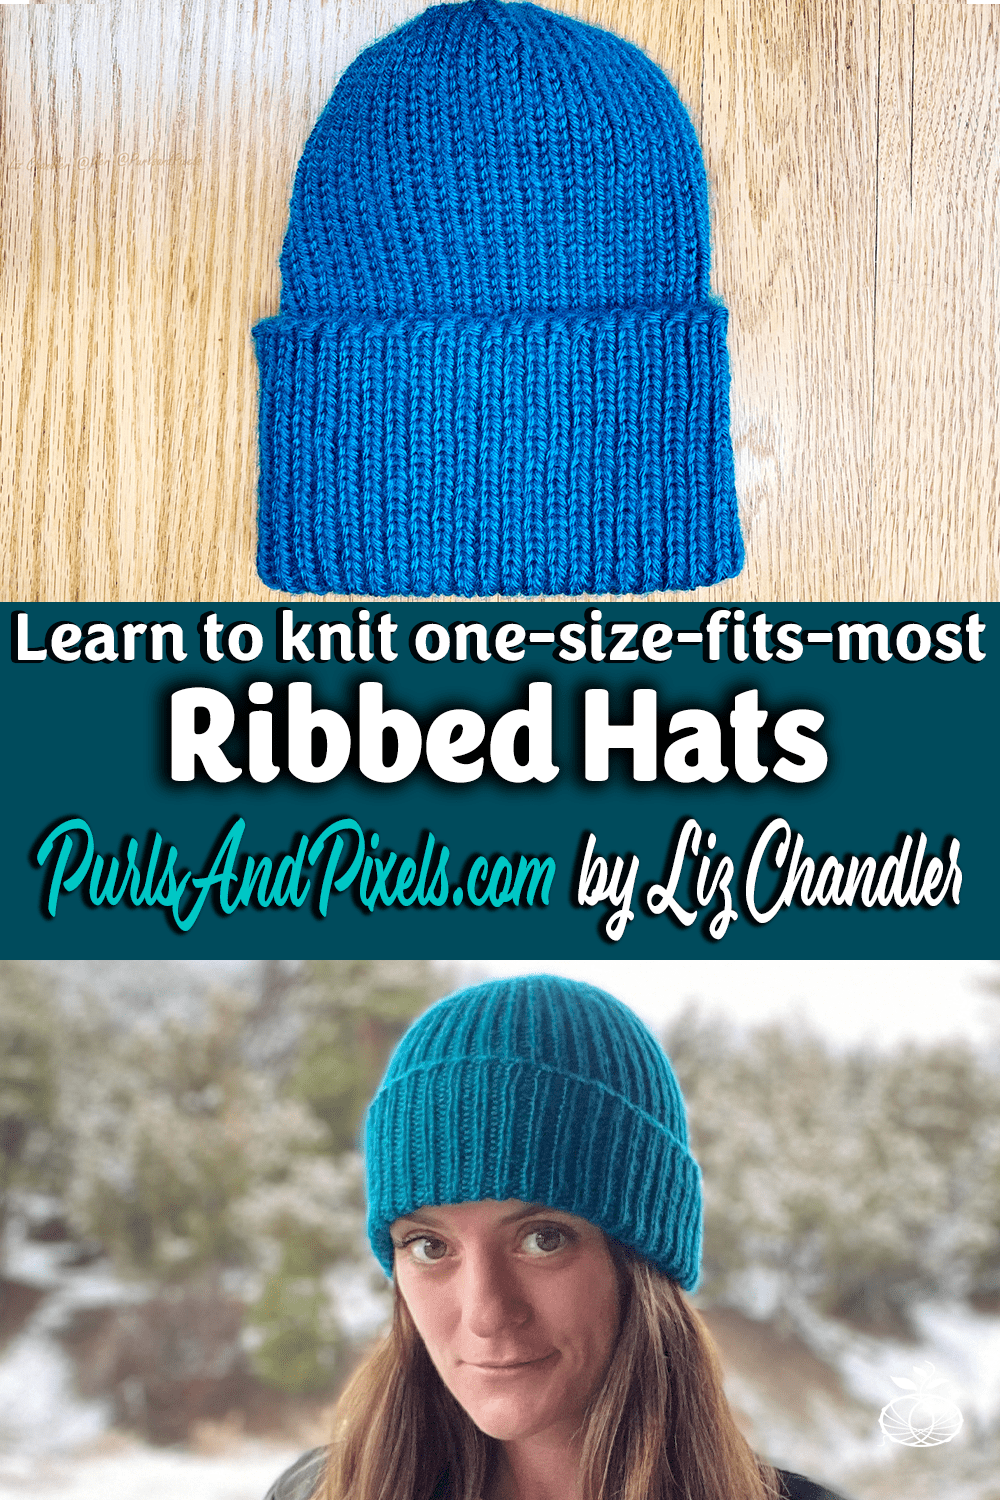
One-Size-Fits-Most Ribbed Hat Free Knitting Pattern

Knit a stretchy, one-size-fits-most ribbed hat with a foldable brim using this free knitting pattern from Liz Chandler @PurlsAndPixels.

Ribbed Hat

Knit a stretchy, one-size-fits-most ribbed hat with a foldable brim using this free knitting pattern from Liz Chandler @PurlsAndPixels.

To make this ribbed hat, you will work in a simple knit, purl pattern. This will create a stretchy ribbing, which allows the hat to fit most head sizes from children through adults. Working from the bottom of the hat, upward, you will knit a long tube before adding decreases to close the top of the hat. Folding the brim will not only help it fit most heads properly, but will also add an extra layer of warmth around the ears.

Using the suggested acrylic yarn will give you a soft, solid-colored hat. Try experimenting with yarn colors, textures, and materials to make this hat more unique. Be sure you choose worsted weight yarn and check your gauge before substituting materials.

The purple hat pictured here was made by substituting Malabrigo Rios merino wool yarn in the color “Lotus.” (Amazon affiliate link.)

Knit a stretchy, one-size-fits-most ribbed hat with a foldable brim using this free knitting pattern from Liz Chandler @PurlsAndPixels.

About This Free Ribbed Hat Knitting Pattern

This simple ribbed hat is an easy-level knitting pattern. You will need to know how to make a long-tail cast on, knit, purl, decrease, and draw yarn thru the remaining stitches. If you are not familiar with these skills, find quick, free lessons in my Learn to Knit Guide.

Knit a stretchy, one-size-fits-most ribbed hat with a foldable brim using this free knitting pattern from Liz Chandler @PurlsAndPixels.

Materials

You will need the following materials, which you can purchase at your local yarn shop or on Amazon.com via the affiliate links below:

Knitting Needles:
Double Point Needles (DPNs)
7-inch (18 cm) long US No. 5 (3.75 mm) DPNs (or size needed to obtain gauge)

And Circular Needles (optional)
16-inch (41 cm) long US No. 5 (3.75 mm) circular needle (or size needed to obtain gauge)

Yarn:

One 315-yard (6 ounce) skein of worsted weight yarn* (shown in Caron Simply Soft Yarn), in your choice of color.

  • one hat uses about one hat uses about 157.5 yards (3 oz.)

*Shown in Caron Simply Soft Yarn in “Pagoda.” Weights estimated with Caron Simply Soft yarn; other yarn weights may vary. Weight does not include gauge swatch. A 4×4 inch gauge swatch with a 2 row by 3 stitch border uses an additional 21 yards (0.4 oz.).

Tools:

A stitch marker, a measuring tape and a darning needle.

Gauge

20 stitches x 28 rows = 4 x 4 inches in stockinette stitch on No. 5 (3.75 mm) needles. (Learn how to check your gauge here.)

Abbreviations

k = knit

p = purl

** = repeat the pattern between the asterisks

ssk = slip, slip, knit

Instructions: One-Size-Fits-Most Ribbed Hat

(Fits most children, teens, and adults or 18-inch to 25-inch head circumference)

Use the long-tail cast on method. Knit in the round.For Double Point Needles, follow DPNinstructions written in italics. For circular needles, follow instructions written in bold. If desired, use a stitch marker to keep track of the beginning/ends of your rows/rounds by placing it between the last and first stitch of each row/round.

[Using No. 5 DPNs or circular needles] Row 1: Cast on 88 stitches. Divide onto 3 DPNs (30 on 1st, 28 on 2nd, and 30 on 3rd DPN). Or place all cast on stitches onto circular needles. (88 stitches)

Row 2: Join the round (taking care not to twist stitches) and *k, p* x 44. (88 stitches)

Rows 3 – 75: *k, p* x 44. (88 stitches) {Work should measure 11 inches at this point.}

{Begin decreases.} Row 76: ssk, (*k, p* x 4), k, ssk, (*p, k* x 4), p, ssk, (*k, p* x 4), k, ssk, (*p, k* x 4), p, ssk, (*k, p* x 4), k, ssk, (*p, k* x 4), p, ssk, (*k, p* x 4), k, ssk, (*p, k* x 4), p. (80 stitches)

Row 77: ssk, (*p, k* x 4), ssk, (*k, p* x 4), ssk, (*p, k* x 4), ssk, (*k, p* x 4), ssk, (*p, k* x 4), ssk, (*k, p* x 4), ssk, (*p, k* x 4), ssk, (*k, p* x 4). (72 stitches)

Row 78: ssk, (*k, p* x 3), k, ssk, (*p, k* x 3), p, ssk, (*k, p* x 3), k, ssk, (*p, k* x 3), p, ssk, (*k, p* x 3), k, ssk, (*p, k* x 3), p, ssk, (*k, p* x 3), k, ssk, (*p, k* x 3), p. (64 stitches)

Row 79: ssk, (*p, k* x 3), ssk, (*k, p* x 3), ssk, (*p, k* x 3), ssk, (*k, p* x 3), ssk, (*p, k* x 3), ssk, (*k, p* x 3), ssk, (*p, k* x 3), ssk, (*k, p* x 3). (56 stitches)

[Switch to No. 5 DPNs] Row 80: ssk, (*k, p* x 2), k, ssk, (*p, k* x 2), p, ssk, (*k, p* x 2), k, ssk, (*p, k* x 2), p, ssk, (*k, p* x 2), k, ssk, (*p, k* x 2), p, ssk, (*k, p* x 2), k, ssk, (*p, k* x 2), p. (48 stitches)

Row 81: ssk, (*p, k* x 2), ssk, (*k, p* x 2), ssk, (*p, k* x 2), ssk, (*k, p* x 2), ssk, (*p, k* x 2), ssk, (*k, p* x 2), ssk, (*p, k* x 2), ssk, (*k, p* x 2). (40 stitches)

Row 82: *ssk, k, p, k, ssk, p, k, p* x 4. (32 stitches)

Row 83: *ssk, p, k, ssk, k, p* x 4. (24 stitches)

Cut yarn, leaving an 8-inch tail. With darning needle, draw yarn tightly through remaining 24 stitches. Weave in ends. Block if desired.

Printable version of this free knitting pattern

Printable Ribbed Hat Pattern PDF by Liz @PurlsAndPixels


Find More Knitting Patterns

If you like this, check out the other knitting patterns I’ve written. They’re all gathered on one page, which you can find here.

Find all of the knitting patterns by Liz Chandler @PurlsAndPixels.

Knit a stretchy, one-size-fits-most ribbed hat with a foldable brim using this free knitting pattern from Liz Chandler @PurlsAndPixels.

©2022, Liz Chandler of PurlsAndPixels.

This pattern is for personal use, gifting, and charitable donation of completed items. You may also sell handmade items created using this pattern. Do not copy this pattern and distribute it. If you’d like to share the pattern, refer your friends to my website, purlsandpixels.com so they may obtain a copy.

If you find any errors or have any questions, email purlsandpixels@gmail.com and I will do my best to help.

I’d love to see your finished work! Tag your photos with @PurlsAndPixels on Twitter or Instagram.

Basic Pillow Cover Free Knitting Pattern

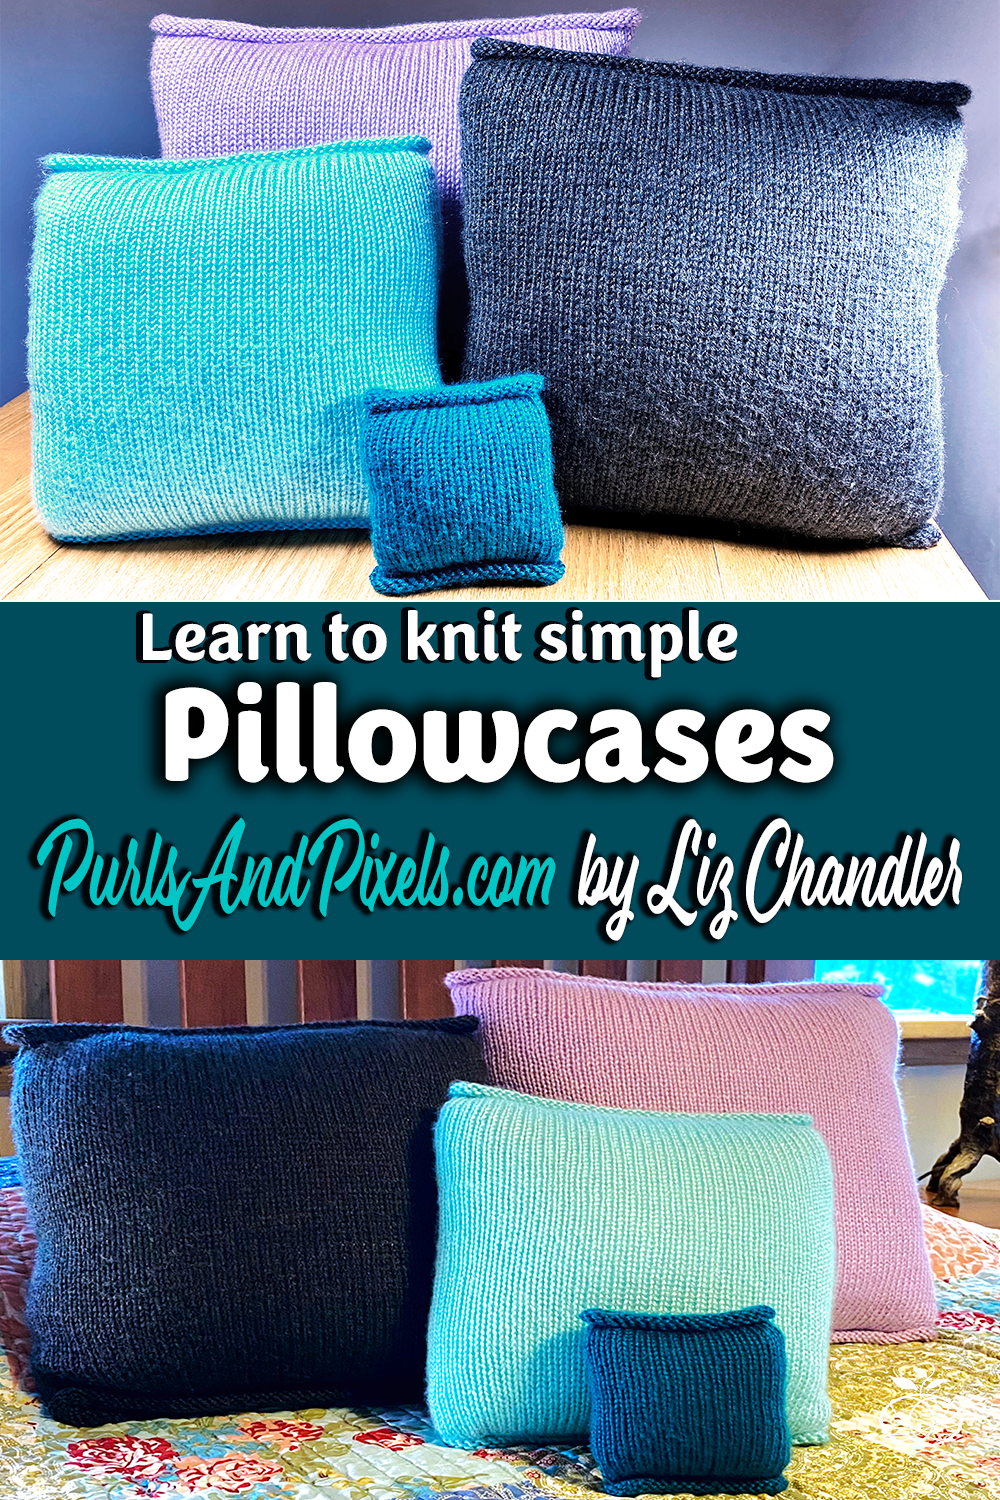
Learn to knit a pillowcase with this free basic pillow cover knitting pattern from Liz Chandler @PurlsAndPixels.

Basic Pillow Covers

Learn to knit a pillowcase with this free basic pillow cover knitting pattern from Liz Chandler @PurlsAndPixels.

This pattern will show you how to make simple pillow covers by knitting in the round on circular needles. Using only the knit stitch creates a smooth, stockinette stitch pattern. The top and bottom edges of stockinette that has been knit in the round will naturally curl. When you sew the edges of the pillow together, the curl adds a decorative touch to these basic pillowcase.

You can sew the edges with a simple “running stitch” and a strand of yarn in the same color. Or try using a contrasting yarn color or a fancy ribbon to make your pillows more unique. Once you are finished, you can leave the pillows plain for a minimalist look. Or decorate your pillow cover with embroidery, faux flowers, or applique patches.

About This Free Pillow Cover Knitting Pattern

This simple pillow cover is an easy-level knitting pattern. You will need to know how to make a long-tail cast on, make a knit stitch, work in the round on circular needles, and bind off in the round. If you are not familiar with these skills, find quick, free lessons in my Learn to Knit Guide.

Learn to knit a pillowcase with this free basic pillow cover knitting pattern from Liz Chandler @PurlsAndPixels.

Knit Along with Me

In this video, I will show you how to make this knit pillow from start to finish. You can follow along using the knitting pattern below.

Basic Pillow Cover Knitting Pattern

Materials

You will need the following materials, which you can purchase at your local yarn shop or on Amazon.com via the affiliate links below:

Knitting Needles:

Extra-Short Circular Needles (for size mini)
12-inch (30 cm) long US No. 8 (5.0 mm) circular needle (or size needed to obtain gauge)

Short Circular Needles (for size small)
16-inch (41 cm) long US No. 8 (5.0 mm) circular needle (or size needed to obtain gauge)

Or Long Circular Needles (for sizes medium and large)
36-inch (91 cm) long US No. 8 (5.0 mm) circular needle (or size needed to obtain gauge)

Yarn:
One or two 315-yard (6 ounce) skeins of worsted weight yarn* (shown in Caron Simply Soft Yarn), in your choice of color.

  • Mini size uses about 52.5 yards (1 oz)
  • Small size uses about 204.75 yards (3.9 oz.)
  • Medium size uses about 315 yards (6 oz.)
  • Large size uses about 388.5 yards (7.4 oz.)

*Shown in Caron Simply Soft Yarn in “Pagoda,” “Robins Egg,” “Charcoal Heather,” and “Orchid.” Weights estimated with Caron Simply Soft yarn; other yarn weights may vary. Weight does not include gauge swatch. A 4×4 inch gauge swatch with a 2 row by 3 stitch border uses an additional 21 yards (0.4 oz.).

Pillow Insert:

One square pillow-insert in the correct size.

Tools:

A stitch marker, a measuring tape and a darning needle.

Gauge

18 stitches x 24 rows = 4 x 4 inches in stockinette stitch on No. 8 (5.0 mm) needles. (Learn how to check your gauge here.)

Abbreviations

k = knit

Instructions: Mini Size Pillow Cover

(Fits 5-inch x 5-inch pillows; measures 6 inches  x 10 inches when laid flat off the pillow)

Use the long-tail cast on method. Knit in the round. For this size, work with extra-short (12-inch) circular needles. If desired, use a stitch marker to keep track of the beginning/ends of your rows/rounds by placing it between the last and first stitch of each row/round.

Row 1: Cast on 40 stitches.

Row 2: Join the round (taking care not to twist stitches) and k 40. (40 stitches)

Rows 3 – 46: k 40. (40 stitches) {Work should measure 10 inches at this point.}

Row 47: Bind off loosely in knit stitch pattern. Cut yarn, leaving an 8-inch tail, and pull through. Weave in ends. Block if desired.

Insert a 5-inch by 5-inch pillow into the cover. Thread a strand of yarn about two feet long in the same or a contrasting color onto a darning needle. Count about seven rows up from the bottom of the pillow; use this as a starting point to begin sewing the first end of the pillow closed. Use the holes created by the knitting to line up both sides and a “running stitch” to sew the bottom edge together. Tie off the loose ends. Count about seven rows down from the top of the pillow and sew the top edge closed in the same manner.


Instructions: Small Size Pillow Cover

(Fits 12-inch x 12-inch pillows; measures 13 inches  x 17 inches when laid flat off the pillow)

Use the long-tail cast on method. Knit in the round. For this size, work with short (16-inch) circular needles. If desired, use a stitch marker to keep track of the beginning/ends of your rows/rounds by placing it between the last and first stitch of each row/round.

Row 1: Cast on 86 stitches.

Row 2: Join the round (taking care not to twist stitches) and k 86. (86 stitches)

Rows 3 – 79: k 86. (86 stitches) {Work should measure 17 inches at this point.}

Row 80: Bind off loosely in knit stitch pattern. Cut yarn, leaving an 8-inch tail, and pull through. Weave in ends. Block if desired.

Insert a 12-inch by 12-inch pillow into the cover. Thread a strand of yarn about four feet long in the same or a contrasting color onto a darning needle. Count about seven rows up from the bottom of the pillow; use this as a starting point to begin sewing the first end of the pillow closed. Use the holes created by the knitting to line up both sides and a “running stitch” to sew the bottom edge together. Tie off the loose ends. Count about seven rows down from the top of the pillow and sew the top edge closed in the same manner.


Instructions: Medium Size Pillow Cover

(Fits 16-inch x 16-inch pillows; measures 17 inches  x 21 inches when laid flat off the pillow)

Use the long-tail cast on method. Knit in the round. For this size, work with long (36-inch) circular needles. If desired, use a stitch marker to keep track of the beginning/ends of your rows/rounds by placing it between the last and first stitch of each row/round.

Row 1: Cast on 112 stitches.

Row 2: Join the round (taking care not to twist stitches) and k 112. (112 stitches)

Rows 3 – 97: k 112. (112 stitches) {Work should measure 21 inches at this point.}

Row 98: Bind off loosely in knit stitch pattern. Cut yarn, leaving an 8-inch tail, and pull through. Weave in ends. Block if desired.

Insert a 16-inch by 16-inch pillow into the cover. Thread a strand of yarn about four feet long in the same or a contrasting color onto a darning needle. Count about seven rows up from the bottom of the pillow; use this as a starting point to begin sewing the first end of the pillow closed. Use the holes created by the knitting to line up both sides and a “running stitch” to sew the bottom edge together. Tie off the loose ends. Count about seven rows down from the top of the pillow and sew the top edge closed in the same manner.


Instructions: Large Size Pillow Cover

(Fits 18-inch x 18-inch pillows; measures 19 inches  x 23 inches when laid flat off the pillow)

Use the long-tail cast on method. Knit in the round. For this size, work with long (36-inch) circular needles. If desired, use a stitch marker to keep track of the beginning/ends of your rows/rounds by placing it between the last and first stitch of each row/round.

Row 1: Cast on 126 stitches.

Row 2: Join the round (taking care not to twist stitches) and k 126. (126 stitches)

Rows 3 – 106: k 126. (126 stitches) {Work should measure 23 inches at this point.}

Row 107: Bind off loosely in knit stitch pattern. Cut yarn, leaving an 8-inch tail, and pull through. Weave in ends. Block if desired.

Insert an 18-inch by 18-inch pillow into the cover. Thread a strand of yarn about four feet long in the same or a contrasting color onto a darning needle. Count about seven rows up from the bottom of the pillow; use this as a starting point to begin sewing the first end of the pillow closed. Use the holes created by the knitting to line up both sides and a “running stitch” to sew the bottom edge together. Tie off the loose ends. Count about seven rows down from the top of the pillow and sew the top edge closed in the same manner.


Printable version of this free knitting pattern

Printable Basic Pillow Cover Knitting Pattern PDF by Liz @PurlsAndPixels


Find More Knitting Patterns

If you like this, check out the other knitting patterns I’ve written. They’re all gathered on one page, which you can find here.

Find all of the knitting patterns by Liz Chandler @PurlsAndPixels.

Learn to knit a pillowcase with this free basic pillow cover knitting pattern from Liz Chandler @PurlsAndPixels.

©2022, Liz Chandler of PurlsAndPixels.

This pattern is for personal use, gifting, and charitable donation of completed items. You may also sell handmade items created using this pattern. Do not copy this pattern and distribute it. If you’d like to share the pattern, refer your friends to my website, purlsandpixels.com so they may obtain a copy.

If you find any errors or have any questions, email purlsandpixels@gmail.com and I will do my best to help.

I’d love to see your finished work! Tag your photos with @PurlsAndPixels on Twitter or Instagram.

Ribbed Scarf Free Knitting Pattern

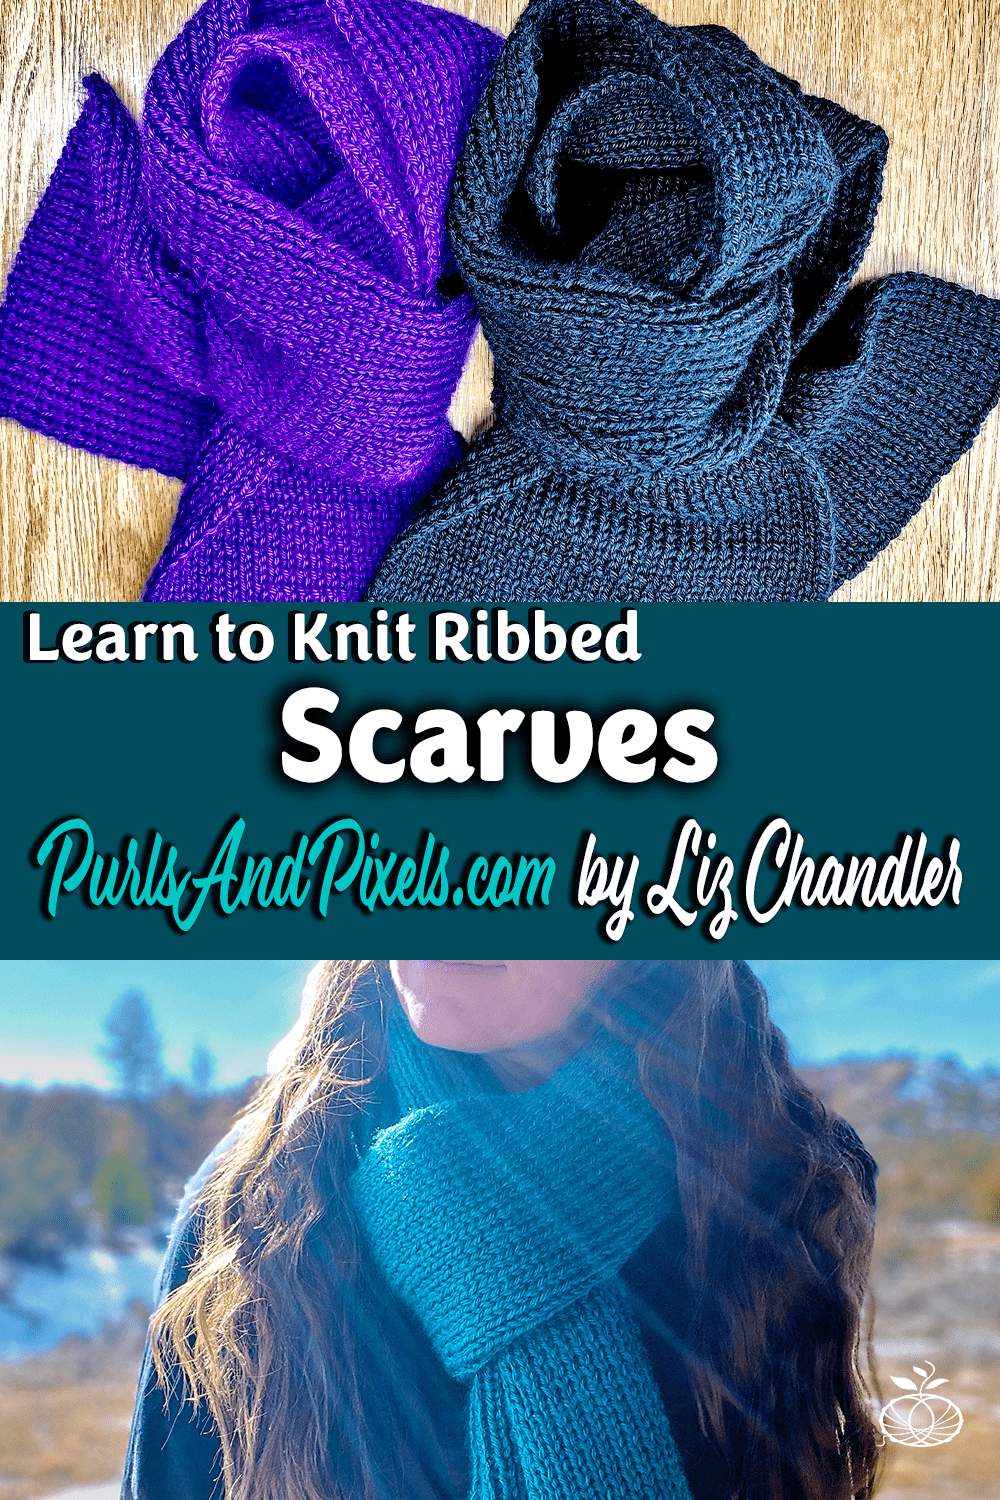
Learn to knit an easy Ribbed Scarf with this free knitting pattern by Liz Chandler @PurlsandPixels.

Ribbed Scarf

Learn to knit an easy Ribbed Scarf with this free knitting pattern by Liz Chandler @PurlsandPixels.

With this pattern, you can create a cozy ribbed scarf. Alternate knits and purls to make thick and stretchy scarf. As you knit, you will see that the columns of knits and purls line up with one another to highlight the “V” or heart-shaped knit stitches.

Try customizing this pattern by choosing a different yarn color or material. While this scarf looks great in any solid color, you can spice it up with variegated (multicolored) yarn. Self-striping yarn is another way to add visual interest to this scarf. Experiment with different types of yarn material as well; merino wool and alpaca are soft and cozy choices. Just be sure to choose worsted weight yarn when making substitutions.

About This Free Ribbed Scarf Knitting Pattern

This simple ribbed scarf is an easy-level knitting pattern. You will need to know how to make a long-tail cast on, knit, purl, and bind off. If you are not familiar with these skills, find quick, free lessons in my Learn to Knit Guide.

Learn to knit an easy knit, purl ribbed scarf with this free knitting pattern from Liz Chandler @PurlsAndPixels.

Materials

You will need the following materials, which you can purchase at your local yarn shop or on Amazon.com via the affiliate links below:

Knitting Needles:
Long Circular Needles
36-inch (91 cm) long US No. 8 (5.0 mm) circular needle (or size needed to obtain gauge)

Or Straight Needles
9-inch (23 cm) long US No. 8 (5.0 mm) straight needles (or size needed to obtain gauge)

Yarn:

Two 315-yard (6 ounce) skeins of worsted weight yarn* (shown in Caron Simply Soft Yarn), in your choice of color.

  • one standard scarf uses about 514.5 yards (9.8 oz.)
  • one extra-wide scarf uses about 624.75 yards (11.9 oz.)

*Shown in Caron Simply Soft Yarn in “Pagoda,” “Iris,” and “Black.” Weights estimated with Caron Simply Soft yarn; other yarn weights may vary. Weight does not include gauge swatch. A 4×4 inch gauge swatch with a 2 row by 3 stitch border uses an additional 21 yards (0.4 oz.).

Tools:

A measuring tape and a darning needle.

Gauge

18 stitches x 24 rows = 4 x 4 inches in stockinette stitch on No. 8 (5.0 mm) needles. (Learn how to check your gauge here.)

Abbreviations

k = knit

p = purl

** = repeat the pattern between the asterisks

Instructions: Standard Ribbed Scarf

(7 inches x 6 feet or desired length)

Use the long-tail cast on method. Knit flat, turning after each row.

Row 1: Cast on 50 stitches. Turn.

Row 2: *k 1, p 1* x 25. (50 stitches) Turn.

Repeat Row 2 until scarf measures 6 feet or your desired length.

Bind off loosely in *k, p* pattern. Cut yarn, leaving an 8-inch tail, and pull through. Weave in ends. Block if desired.

Instructions: Extra-Wide Ribbed Scarf

(9 inches x 6 feet or desired length)

Use the long-tail cast on method. Knit flat, turning after each row.

Row 1: Cast on 64 stitches. Turn.

Row 2: *k 1, p 1* x 32. (64 stitches) Turn.

Repeat Row 2 until scarf measures 6 feet or your desired length.

Bind off loosely in *k, p* pattern. Cut yarn, leaving an 8-inch tail, and pull through. Weave in ends. Block if desired.

Printable version of this free knitting pattern

Printable Ribbed Scarf Pattern PDF by Liz @PurlsAndPixels


Find More Knitting Patterns

If you like this, check out the other knitting patterns I’ve written. They’re all gathered on one page, which you can find here.

Find all of the knitting patterns by Liz Chandler @PurlsAndPixels.

Learn to knit an easy Ribbed Scarf with this free knitting pattern by Liz Chandler @PurlsandPixels.

©2022, Liz Chandler of PurlsAndPixels.

This pattern is for personal use, gifting, and charitable donation of completed items. You may also sell handmade items created using this pattern. Do not copy this pattern and distribute it. If you’d like to share the pattern, refer your friends to my website, purlsandpixels.com so they may obtain a copy.

If you find any errors or have any questions, email purlsandpixels@gmail.com and I will do my best to help.

I’d love to see your finished work! Tag your photos with @PurlsAndPixels on Twitter or Instagram.

Basic Cup Cozy Knitting Pattern

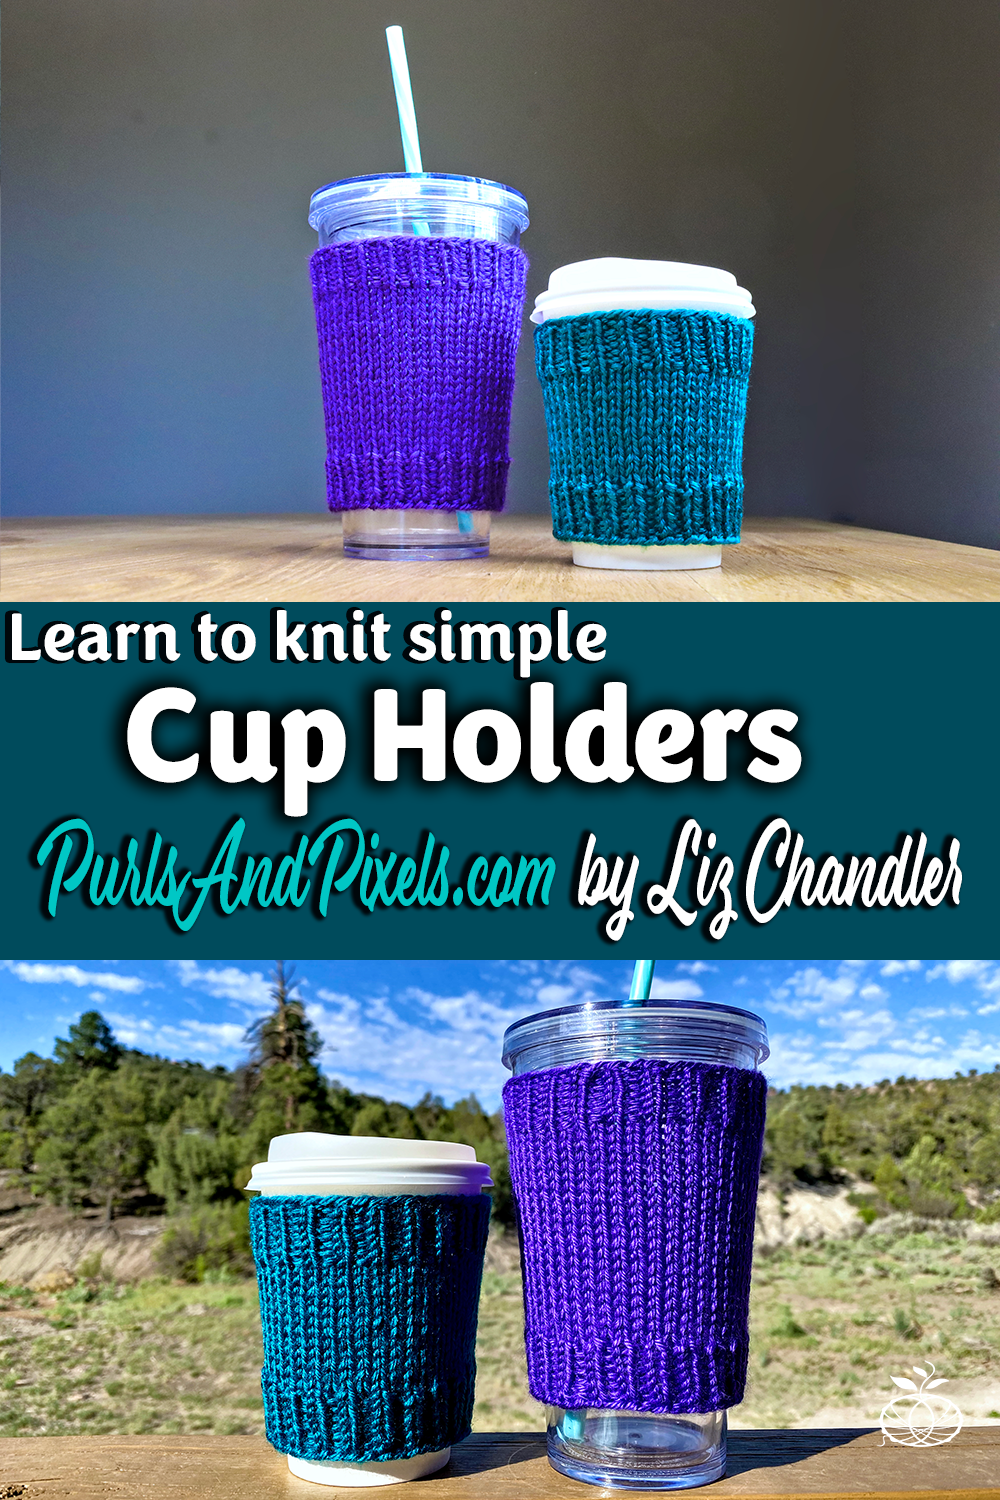
Learn to knit your own basic cup cozy with this free knitting pattern by Liz Chandler @PurlsAndPixels, now with DPN and Magic Loop instructions.

Basic Cup Cozy Free Knitting Pattern

You can make your own basic cup cozy with this free knitting pattern. These knitted cup cozies are meant to fit around cups with no handles. The small size is great for coffeehouse-style paper cups and the large size works well for reusable hot and cold cups.

How these Cup Cozies are Made

I have now included directions below for both Double Point Needles and the Magic Loop, so you can knit in the round with your favorite method.

This cozy pattern begins and ends with knit purl rib. In the middle, you will make a stockinette stitch pattern in the round. Unlike flat knitting, stockinette stitch in the round is made by knitting all the stitches in every row/round. You will also switch needle sizes while working the pattern. Knit, purl ribbing tends to make larger stitches than stockinette; switching needle sizes between the two parts helps the individual stitches stay roughly the same size.

This is a quick and easy project that is also perfect for scrap yarn that has been left over from another project. If you need help figuring out how much scrap yarn you have left, my post on yarn math might be useful.

I used Caron Simply Soft yarn to design the pattern, which is a basic, acrylic, worsted-weight yarn. Try any solid color you like, or mix it up with a variegated or patterned yarn.

You can substitute worsted weight yarns in this pattern. Almost any yarn fiber is suitable for this project; try acrylic, wool, alpaca, cotton, or bamboo. Avoid silk and silk blends.

Be careful with hot cups; your finished object may not be heat resistant.

Learn to knit your own basic cup cozy with this free knitting pattern by Liz Chandler @PurlsAndPixels, now with DPN and Magic Loop instructions.

Materials

Abbreviations

k = Knit.

p = Purl.

** = Repeat the pattern between the asterisks.

Gauge

20 stitches and 28 rows in stockinette = 4 inches on No. 5/3.75 MM needles

Instructions: Small Cup Cozy

(Cups 9 inches to 11 inches around; measures 4 inches top to bottom)

Use the long-tail cast on method. Knit in the round. For Double Point Needles, follow DPN instructions written in italics. For circular needles, follow magic loop instructions in bold. If desired, use a stitch marker to keep track of the beginning/ends of your rows/rounds by placing it between the last and first stitch of each row/round.

[Using No. 3 DPNs or long circular needle] Row 1: Cast on 46 stitches. Divide onto 3 DPNs (15 on 1st, 16 on 2nd, and 15 on 3rd DPN). Or separate stitches on long circular needles for magic loop (23 on each side). (46 stitches)

Row 2: Join the round (taking care not to twist stitches) and *k, p* x 23. (46 stitches)

Rows 3 – 8: *k, p* x 23. (46 stitches)

[Switch to No. 5 DPNs or circular needles] Rows 9 – 20: k 46. (46 stitches)

[Switch to No. 3 DPNs or circular needles] Row 21: k 46. (46 stitches)

Rows 22 – 27: *k, p* x 23. (46 stitches)

[Switch to a No. 5 DPN or circular needle] Row 28: Bind off in *k, p* pattern. Cut yarn, leaving an 8-inch tail, and pull through. Weave in ends. Block if desired.

Instructions: Large Cup Cozy

(Cups 9 inches to 11 inches around; measures 5 inches top to bottom)

Use the long-tail cast on method. Knit in the round. For Double Point Needles, follow DPN instructions written in italics. For circular needles, follow magic loop instructions in bold. If desired, use a stitch marker to keep track of the beginning/ends of your rows/rounds by placing it between the last and first stitch of each row/round.

[Using No. 3 DPNs or long circular needle] Row 1: Cast on 46 stitches. Divide onto 3 DPNs (15 on 1st, 16 on 2nd, and 15 on 3rd DPN). Or separate stitches on long circular needles for magic loop (23 on each side). (46 stitches)

Row 2: Join the round (taking care not to twist stitches) and *k, p* x 23. (46 stitches)

Rows 3 – 8: *k, p* x 23. (46 stitches)

[Switch to No. 5 DPNs or circular needles] Rows 9 – 28: k 46. (46 stitches)

[Switch to No. 3 DPNs or circular needles] Row 29: k 46. (46 stitches)

Rows 30 – 35: *k, p* x 23. (46 stitches)

[Switch to a No. 5 DPN or circular needle] Row 36: Bind off in *k, p* pattern. Cut yarn, leaving an 8-inch tail, and pull through. Weave in ends. Block if desired.

Printable version of this free knitting pattern

Printable Basic Cup Cozy Knitting Pattern PDF by Liz @PurlsAndPixels

OLD VERSION

This pattern was revised in December 2021 to include instructions for a smaller size and for knitting in the magic loop. If you prefer the original, double point only, version, you can find those instructions at the following link: Old Version, DPN only, Printable simple coffee cozy knitting pattern PDF by Liz @PurlsAndPixels

Size Notes

This is a one-size-fits-most pattern; it should fit most hot and hold coffee cups that don’t have handles. The small size is great for coffeehouse-style paper cups and the large size works well for reusable hot and cold cups.

Care

If you use the materials called for in the pattern, your final product will be machine washable. To keep your coffee cozy looking its best, hand wash or machine wash separately on delicate cycle in cold water. You may tumble dry on low heat or lay flat to dry.

Learn to knit your own basic cup cozy with this free knitting pattern by Liz Chandler @PurlsAndPixels, now with DPN and Magic Loop instructions.

©2017, Liz Chandler of PurlsAndPixels. Revised 2021.

This basic cup cozy knitting pattern is for personal use, gifting, and charitable donation of completed items. You may also sell handmade items created using this pattern. Do not copy this pattern and distribute it. If you’d like to share the pattern, refer your friends to my website, purlsandpixels.com so they may obtain a copy.

If you find any errors or have any questions, email purlsandpixels@gmail.com and I will do my best to help.

I’d love to see your finished work! Tag your photos with @PurlsAndPixels on Twitter or Instagram.

Slipped Stitches Scarf

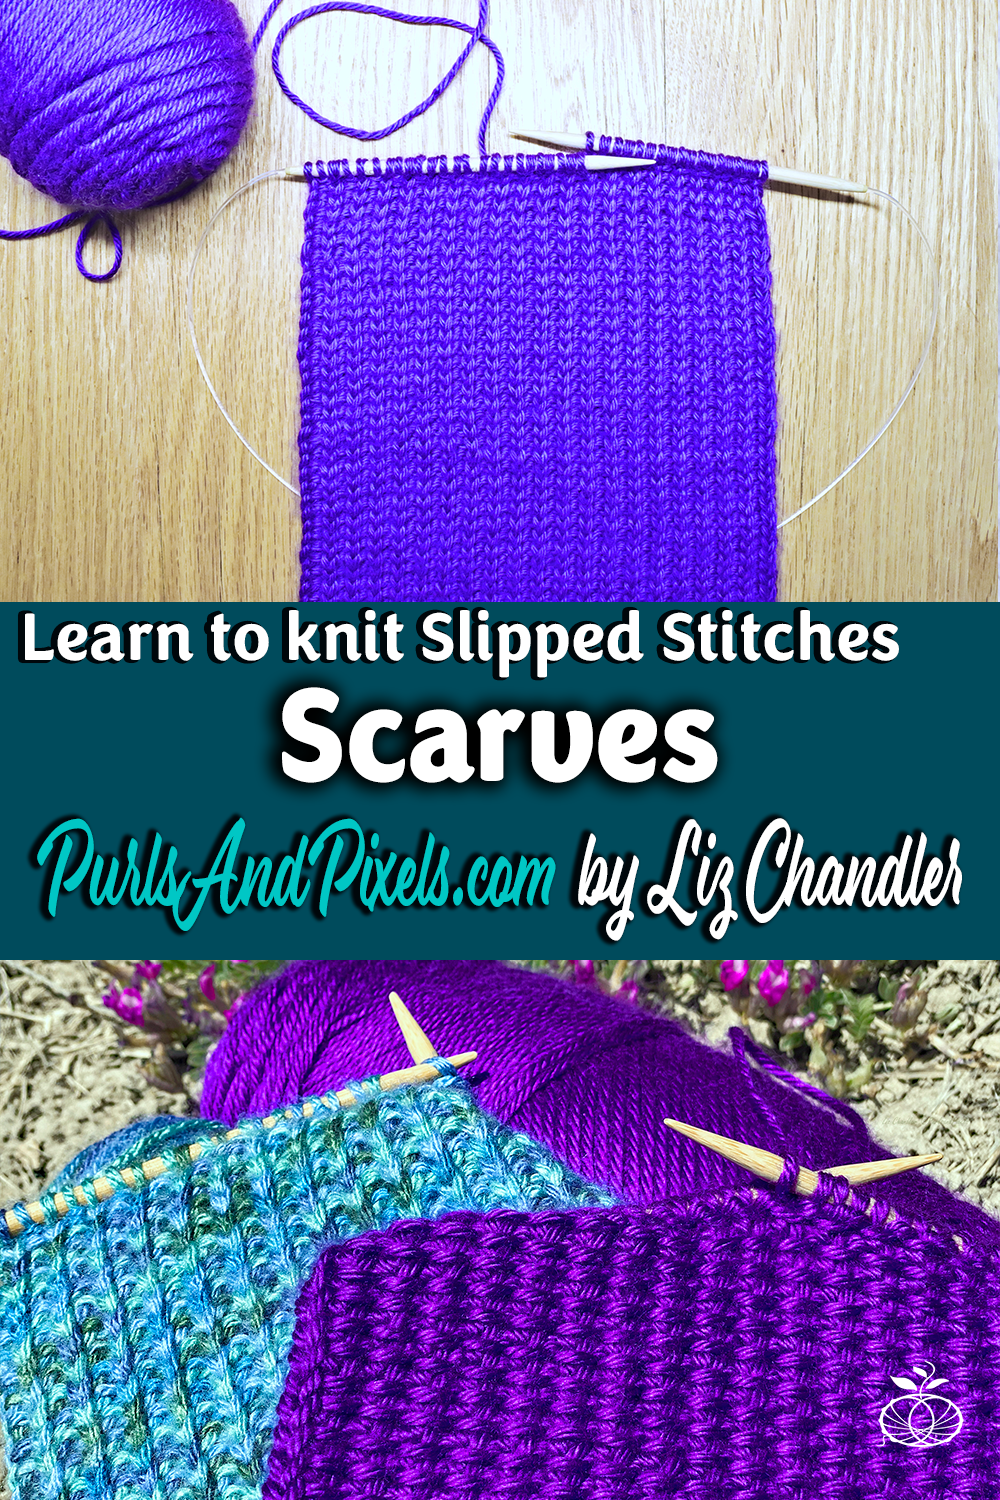
Slipped Stitches Scarf - a free knitting pattern from Liz Chandler @PurlsAndPixels.
Slipped Stitches Scarf - a free textured scarf knitting pattern from Liz Chandler @PurlsAndPixels.

The Slipped Stitches Scarf Free Knitting Pattern

I don’t usually share my knitting patterns until I have tried them a few times myself. This time, I am so excited I just can’t wait that long. So, I am releasing the pattern for my Slipped Stitches Scarf before I have finished knitting it myself. Let’s call this a free test knitting pattern for now? Please email purlsandpixels@gmail.com if you find any errors. Happy knitting!

Use this scarf to practice slipping stitches to add texture to your knitting. You will also slip the first stitch of every row to smooth the edges.

In this pattern, you will need two needle sizes. The smaller needle will be used to cast on the first row of stitches. Then, you will knit the second row with a larger needle held in your right hand. Once you have knit all the stitches off the smaller needle, set the small needles aside. Make the remainder of the scarf with the larger (US No. 8 / 5 mm) needles. (Find a full tutorial about switching needle sizes here.)

After you have switched to the larger needles, remember not to knit too tightly or you will have difficulty working the next row. Because of all the slipped stitches in this design, the fabric of this scarf is more tightly woven and slightly thicker than a scarf made in Garter Stitch.

About This Free Slipped Stitches Scarf Knitting Pattern

This is an easy-level scarf pattern, but it does require following a pattern that includes slipped stitches. You will need to know how to make a long-tail cast on, knit, slip stitches purlwise, slip stitches knitwise, and bind off in pattern. Visit my Learn to Knit Guide if you need to learn any of these skills before you start.

Yarn Suggestions:   Use a soft yarn fiber for this project, such as acrylic, wool, silk, alpaca, or a soft fiber blend. This scarf is particularly attractive in variegated (multicolored) yarn.

Slipped Stitches Scarf - a free knitting pattern from Liz Chandler @PurlsAndPixels.

Materials

Knitting Needles:
Long Circular Needles
36-inch (91 cm) long US No. 5 (3.75 mm) circular needle (or three sizes smaller than needles used to obtain gauge)
36-inch (91 cm) long US No. 8 (5.0 mm) circular needle (or size needed to obtain gauge)

Or Straight Needles
9-inch (23 cm) long US 5 (3.75 mm) straight needles (or three sizes smaller than needles used to obtain gauge)
9-inch (23 cm) long US No. 8 (5.0 mm) straight needles (or size needed to obtain gauge)


Yarn:
Two 315-yard (6 ounce) skeins of worsted weight yarn, in your choice of color.*
– one standard scarf uses about 420 yards (8 oz.)

*Shown in Caron Simply Soft Yarn “Iris” and “Spring Brook” (#AffiliateLinks). Weights estimated with Caron Simply Soft yarn; other yarn weights may vary. Weight does not include gauge swatch. A 4×4 inch gauge swatch with a 2 row by 3 stitch border uses an additional 21 yards (0.4 oz.).

Tools:

A measuring tape and a darning needle.

Gauge

18 stitches x 24 rows = 4 x 4 inches in stockinette stitch on No. 8 (5.0 mm) needles. (Learn how to check your gauge here.)

Abbreviations

k = knit

sl1pwyif = slip one stitch purlwise with yarn in front

sl1kwyib = slip one stitch knitwise with yarn in back

sl1kwyif = slip one stitch knitwise with yarn in front

** = repeat the pattern between the asterisks

Instructions: Slipped Stitches Scarf

(7 inches x 5 feet or desired length)

Use the long-tail cast on method. Knit flat, turning after each row.

[Using No. 5 needles] Row 1: Cast on 42 stitches. Turn.

[Switch to No. 8 needles] Row 2: sl1pwyif, *k 1, sl1kwyif* x 20, k 1. (42 stitches) Turn.

Row 3: sl1pwyif, *k 1, sl1kwyib* x 20, k 1. (42 stitches) Turn.

Repeat Rows 2 and 3 until scarf measures 5 feet or your desired length.

Bind off loosely in pattern of Row 2. Cut yarn, leaving an 8-inch tail, and pull through. Weave in ends. Block if desired.

Print the Free Slipped Stitches Scarf Knitting Pattern

Printable version of this free knitting pattern

Printable Slipped Stitches Scarf pattern PDF by Liz @PurlsAndPixels

Slipped Stitches Scarf - a free textured scarf knitting pattern from Liz Chandler @PurlsAndPixels.

©2021, Liz Chandler of PurlsAndPixels.

This pattern is for personal use, gifting, and charitable donation of completed items. You may also sell handmade items created using this pattern. Do not copy this pattern and distribute it. If you’d like to share the pattern, refer your friends to my website, purlsandpixels.com so they may obtain a copy.

If you find any errors or have any questions, email purlsandpixels@gmail.com and I will do my best to help.

I’d love to see your finished work! Tag your photos with @PurlsAndPixels on Twitter or Instagram.

Beginner Face Scrubby Free Knitting Pattern

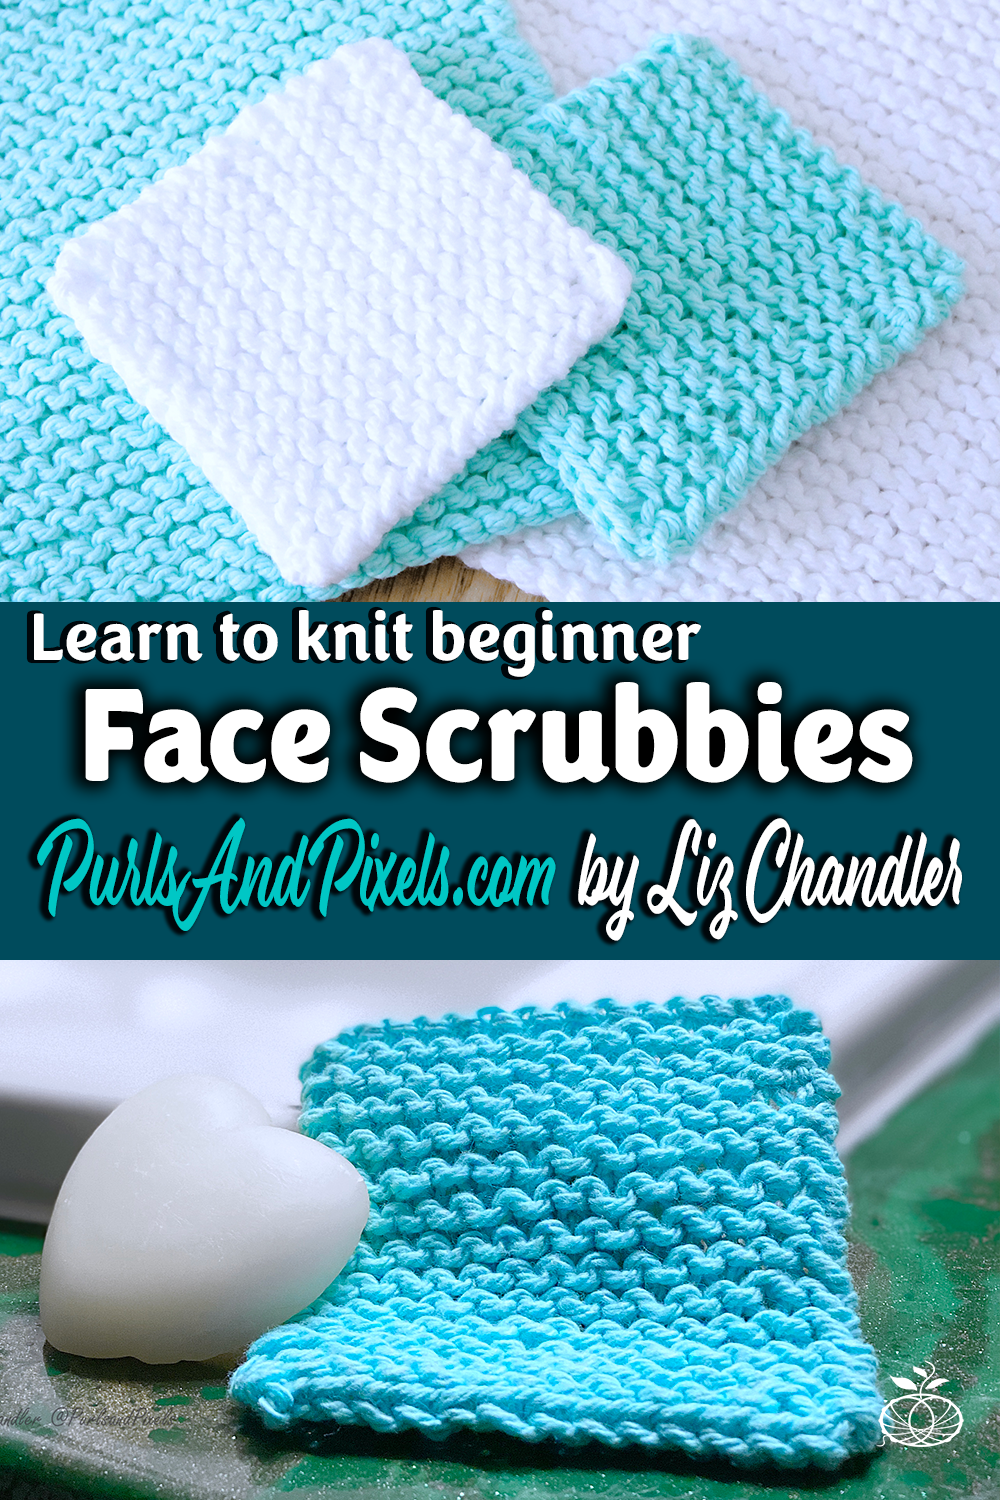
Free Beginner Face Scrubby knitting pattern by Liz @PurlsAndPixels.

Beginner Face Scrubby

Free Beginner Face Scrubby knitting pattern by Liz @PurlsAndPixels.

To learn the knit stitch, start with this simple Beginner Face Scrubby pattern. Practice your long-tail cast on, then use just knit stitches to make the entire scrubby. Take your work off your needles with a standard bind off, and you have made a practical and useful item. Because these 3-inch squares are small, they are a satisfying way to learn to knit; you will get a finished object much more quickly than larger projects.

Aside from being a wonderful way to practice the knit stitch, these scrubbies are especially functional. Face scrubbies are perfect for use as reusable makeup removing pads.

About This Free Beginner Face Scrubby Knitting Pattern

This face scrubby is one of the easiest patterns you can make, so it is suitable for beginners. You will need to know how to make a long-tail cast on, knit, and bind off. Use this pattern if you are following along with my Learn to Knit Guide.

Free Beginner Face Scrubby knitting pattern by Liz @PurlsAndPixels.

Materials

Knitting Needles:
Long Circular Needles
36-inch (91 cm) long US No. 7 (4.5 mm) circular needle (or size needed to obtain gauge)

Or Straight Needles
9-inch (23 cm) long US No. 7 (4.5 mm) straight needles (or size needed to obtain gauge)

Yarn:
One 95-yard (2 ounce) skein of cotton worsted weight yarn* (shown in), in your choice of color
– one face scrubby uses about 19 yards (.4 oz)

*Shown in Lily Sugar ‘n Cream 100% Cotton Yarn in “Robins Egg” and “White” (#AffiliateLinks). Weights estimated with Lily Sugar n’ Cream yarn; other yarn weights may vary. Weight does not include gauge swatch. A 4×4 inch gauge swatch with a 2 row by 3 stitch border uses an additional 19 yards (0.4 oz.).

Tools:

A measuring tape and a darning needle.

Gauge

19 stitches x 26 rows = 4 x 4 inches in stockinette stitch on No. 7 (4.5 mm) needles. (Learn how to check your gauge here.)

Abbreviations

k = knit

Instructions: Beginner Face Scrubby in Garter Stitch

(measures 3 inches x 3 inches after washing in cold water; 3.5 inches x 3.25 inches before washing)

Use the long-tail cast on method. Knit flat, turning after each row.

Row 1: Cast on 14 stitches. Turn.

Rows 2 – 27: k 14. (14 stitches) Turn.

Row 28: Bind off loosely in knit stitch pattern. Cut yarn, leaving an 8-inch tail, and pull through. Weave in ends.

In cold water, hand wash or machine wash on delicate. Block while still wet, ensuring cloths are roughly 3 inches square, then allow to air dry.

Printable version of this free knitting pattern

Printable Beginner Face Scrubby pattern PDF by Liz @PurlsAndPixels

Make Full Size Washcloths

If you like these tiny face scrubbies, you may also like my Simple Washcloth Collection. It includes this pattern, a full-size garter stitch washcloth, a stockinette stitch washcloth & scrubby, and a seed stitch washcloth & scrubby.

Simple Washcloth Knitting Pattern Collection from Liz @PurlsAndPixels

Free Beginner Face Scrubby knitting pattern by Liz @PurlsAndPixels.

©2021, Liz Chandler of PurlsAndPixels.

This pattern is for personal use, gifting, and charitable donation of completed items. You may also sell handmade items created using this pattern. Do not copy this pattern and distribute it. If you’d like to share the pattern, refer your friends to my website, purlsandpixels.com so they may obtain a copy.

If you find any errors or have any questions, email purlsandpixels@gmail.com and I will do my best to help.

I’d love to see your finished work! Tag your photos with @PurlsAndPixels on Twitter or Instagram.

Heart Face Scrubby Free Knitting Pattern

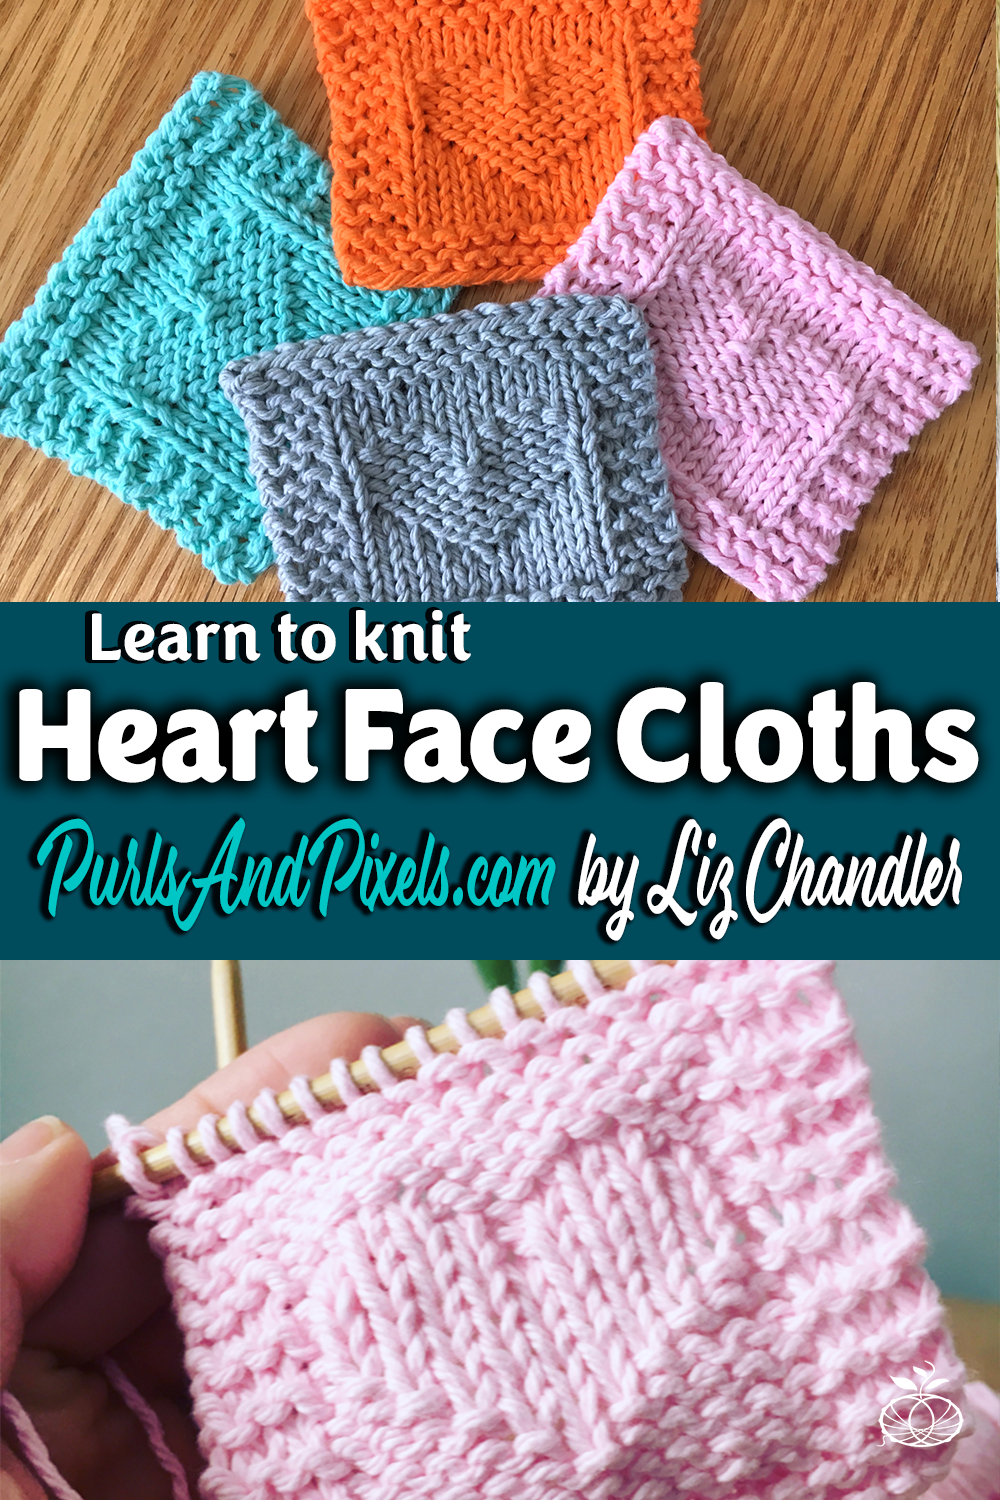
Heart face scrubby free knitting pattern from Liz @PurlsAndPixels

Heart Face Scrubby Free Knitting Pattern

A Free Knitting Pattern from Liz @PurlsandPixels
Heart face scrubby free knitting pattern from Liz @PurlsAndPixels

I’d like to give you all a little gift this Valentines day, so I have written up a quick heart face scrubby free knitting pattern. Enjoy! (P.S. I’m supposed to tell you that the links to Amazon on this site are affiliate links; if you use them to make a purchase, Amazon sends me a commission, at no cost to you.)

I love to use little handmade cotton squares to use with makeup remover and micellar water. Rather repeatedly throwing away disposable cotton pads, I make my own little face scrubbies with cotton yarn. After I use one, I put it in a Mason Jar, then when my collection is dirty I wash them up. A little OxyClean in the wash really helps to get them clean of makeup residue and then they’re ready to use again.

Heart face scrubby handmade gift basket free knitting pattern from Liz @PurlsAndPixels

These little heart scrubbies are super quick to make. The simple pattern also makes them easy to knit. They don’t use much yarn either, so they’re great for using up leftover scrap yarn.

Make a bunch for your own facial care routine. Or create a little gift basket for Valentines Day or other holidays. Add several scrubbies, a wide-mouth mason jar (for storing used scrubbies that need to be washed), and makeup remover or micellar water to a cute basket and you’ve got a beautiful handmade spa basket. You could even throw in some nice soap and a few full-sized washcloths to make it extra-special (find my seed stitch washcloth pattern here).

About this Knitting Pattern

Heart face scrubby free knitting pattern from Liz @PurlsAndPixels

This heart face scrubby pattern is a beginner to easy level knitting pattern and is great for knitters who have an understanding of knits and purls.

Materials

One 95-yard (2 ounce) skein of cotton worsted weight yarn (shown in Lily Sugar ‘n Cream 100% Cotton Yarn), in your choice of color

  • one heart face scrubby uses about 9.5 yards (0.2 oz.)*

*Weight estimated with Lily Sugar n’ Cream yarn; other yarn weights may vary.

36-inch (91 cm) long US No. 7 (4.5 mm) circular needle or 9-inch (23 cm) long US No. 7 (4.55 mm) straight needles (or size needed to obtain gauge)

Measuring tape

Tapestry needle

Gauge

19 stitches x 26 rows = 4 x 4 inches in stockinette stitch on No. 7 (4.5 mm) needles. (Learn how to check your gauge here.)

Abbreviations

k = knit

p = purl

Instructions: Heart Face Scrubby

(3 inches x 3.5 inches (unwashed) & shrinks to 3 inches x 3 inches after machine washing in cold water )

Knit flat, turning after each row.

Row 1: Cast on 17 stitches. Turn.

Rows 2 – 5: k 17. (17 stitches) Turn.

Row 6: k 3, p 11, k 3. (17stitches) Turn.

Row 7: k 17. (17 stitches) Turn.

Row 8: k 3, p 5, k 1, p 5, k 3. (17 stitches) Turn.

Row 9: k 7, p 3, k 7. (17 stitches) Turn.

Row 10: k 3, p 3, k 5, p 3, k 3. (17 stitches) Turn.

Row 11: k 5, p 7, k 5. (17 stitches) Turn.

Row 12: k 3, p 1, k 9, p 1, k 3. (17 stitches) Turn.

Row 13: k 4, p 9, k 4. (17 stitches) Turn.

Row 14: k 3, p 1, k 4, p 1, k 4, p1, k 3. (17 stitches) Turn.

Row 15: k 4, p 4, k 1, p 4, k 4. (17 stitches) Turn.

Row 16: k 3, p 2, k 2, p 3, k 2, p 2, k 3. (17 stitches) Turn.

 Row 17: k 17. (17 stitches) Turn.

Row 18: k 3, p 11, k 3. (17 stitches) Turn.

Rows 19 – 22: k 17. (17 stitches) Turn.

Row 23: Bind off in knit stitches. Cut yarn, leaving an 8-inch tail, and pull through.

Weave in ends. Block if desired.

Knitting Chart

For this simple pattern you may or may not find a chart helpful. It’s included in case you’d like it.

Heart face scrubby free knitting pattern chart from Liz @PurlsAndPixels

Print the Heart Face Scrubby Free Knitting Pattern

Printable version of this free knitting pattern

Printable Heart Face Scrubby Free Knitting Pattern PDF by Liz @PurlsAndPixels

Care

If you use the materials called for in the pattern, your final product will be machine washable. To keep your heart face scrubbies looking their best, hand wash or machine wash separately on delicate cycle in cold water. A scoop of OxiClean can be added to the wash to help remove makeup residue. You may tumble dry on low heat or lay flat to dry.

Note: these scrubbies will shrink from 3 x 3.5 inches to 3 x 3 inches after washing as directed above.

Heart face scrubby free knitting pattern from Liz @PurlsAndPixels

©2019, Liz Chandler of PurlsAndPixels.

This pattern is for personal use, gifting, and charitable donation of completed items. You may also sell handmade items created using this pattern. Do not copy this pattern and distribute it. If you’d like to share the pattern, refer your friends to my website, purlsandpixels.com so they may obtain a copy.

If you find any errors or have any questions, email purlsandpixels@gmail.com and I will do my best to help.

I’d love to see your finished work! Tag your photos with @PurlsAndPixels on Twitter or Instagram.