DIY projects on PurlsAndPixels focus on practical, hands-on making for everyday life. These posts cover simple projects, decorations, and creative builds that are meant to be approachable, repeatable, and useful, not perfect or performative.
This category includes projects that use common materials, clear steps, and realistic expectations. DIY here is about making things that work, learning as you go, and enjoying the process.
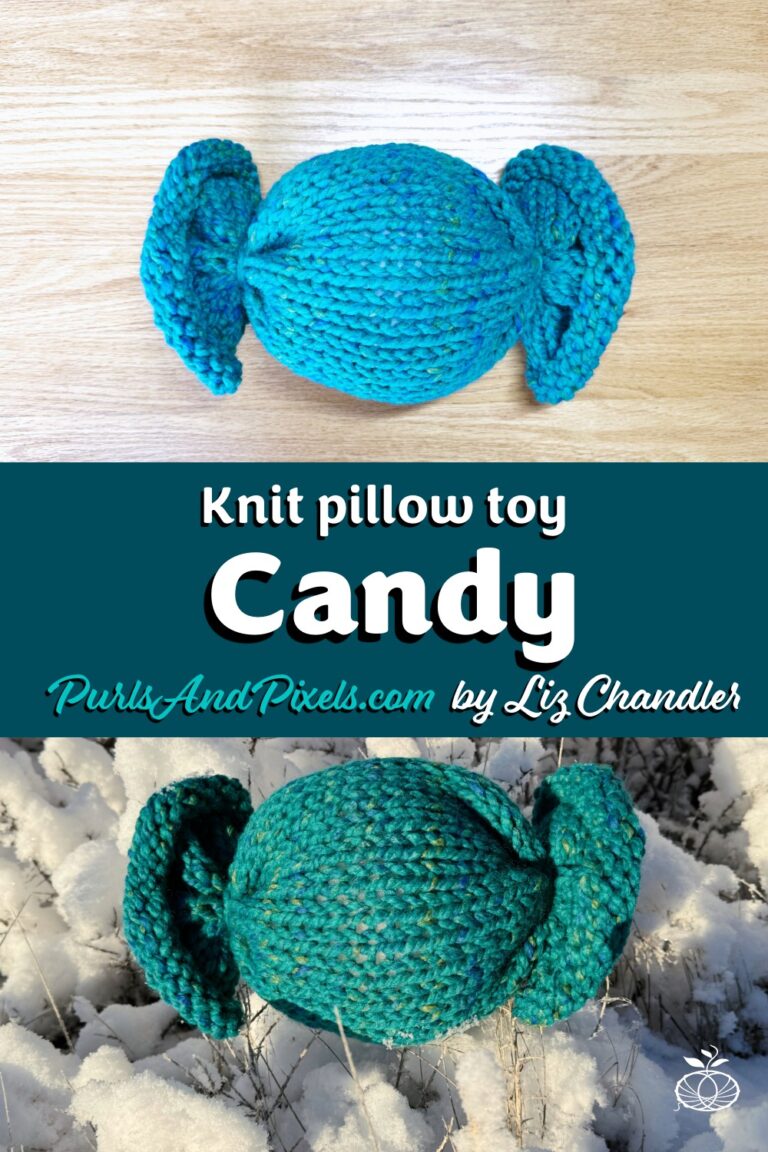
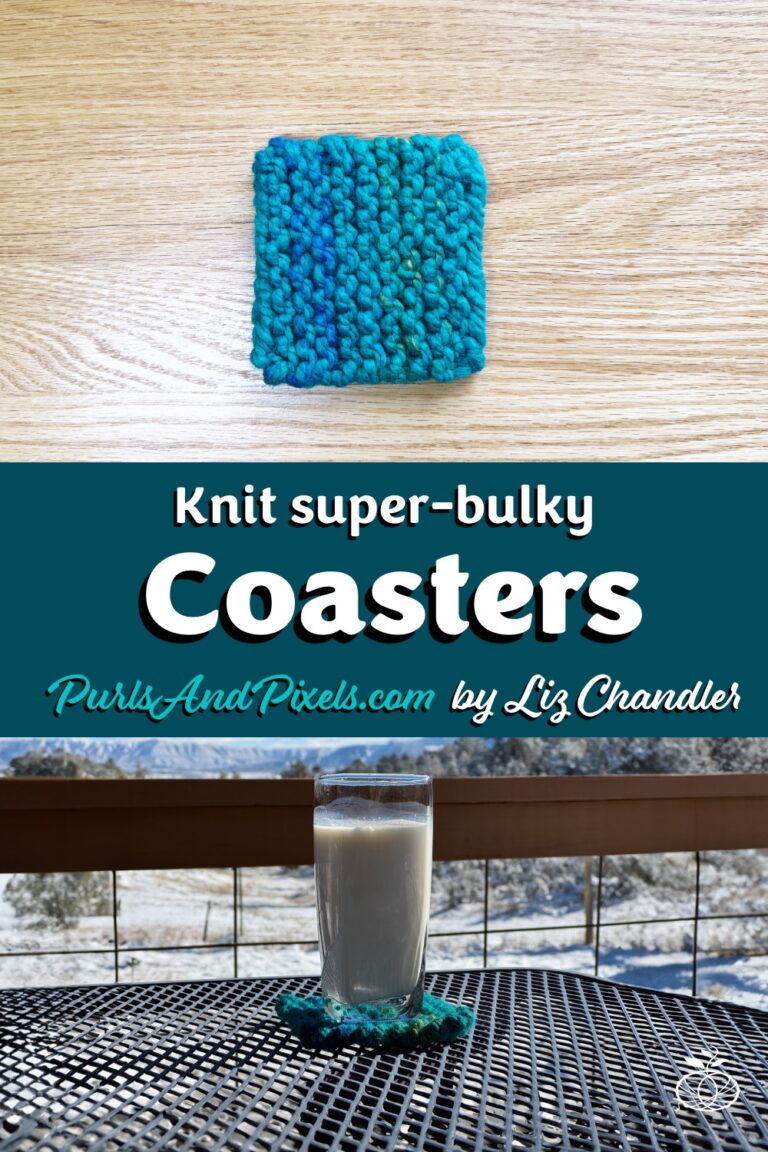
Your cozy lifestyle is about more than just comfort; it’s about creativity too. Check out these creative cozy projects and DIY tutorials to keep your hands busy and your home beautiful.
Creative, Cozy Knitting Projects
Knitting is the coziest of crafts. Discover a world of stitches and patterns with my collection of knitting books! Whether you’re a beginner or a seasoned pro, my guides offer clear instructions and practical patterns that make every project feel doable. From cozy scarves to charming home decor, there are creative cozy projects for every knitter to love. Ready to start your next project? Order now to get your hands on a guide that’ll have you knitting in no time!
Beyond knitting, you can fill your life with creative cozy projects. Learn to handmake gifts for friends and family, craft adorable home accents, and add unique touches to holiday gatherings with the DIY guides on PurlsAndPixels.
If you prefer visual learning, check out my step-by-step video tutorials. From knitting your first scarf to creating cozy home accessories, these videos guide you through every step. Grab your yarn, settle in, and let’s make something together!
How to Start Your Knitting – The Long-Tail Cast On for Beginners
When life feels hectic, there’s nothing like coming home to a cozy, welcoming space. Whether you live in a cabin in the woods, a quaint farmhouse, or a modern apartment, there are endless ways to add cozy lifestyle basics with simple, comforting touches. Here are some inspiring ideas to enhance your home and create a warm, inviting environment.
Introduce Natural Textures and Elements
Bringing the outdoors inside can instantly make your home feel more serene and connected to nature. Incorporate natural materials like wood, stone, wool, and cotton into your decor. Try adding a wooden coffee table, woven baskets for storage, or linen throw pillows to add warmth and texture. For a touch of greenery, place potted plants around your living space to purify the air and boost your mood.
The links on this page are Amazon Affiliate Links.
Lighting plays an important role in creating a cozy atmosphere. Instead of relying solely on overhead lights, mix and match different types of lighting to set the mood. Use soft-glow string lights, lanterns, or candles to add a warm, inviting ambiance. Table and floor lamps with adjustable settings can provide the perfect amount of light for any activity, from reading to relaxing.
Finding a place to add cozy lifestyle basics can be as simple as inspecting the floor under your feet. Fluffy rugs not only add color and style to your rooms, but they also provide an extra layer of warmth underfoot. Choose thick, soft rugs for areas where you and your family spend the most time, like the living room, bedroom, or play area. Look for patterns and colors that reflect your personal style, and consider layering rugs of different sizes and textures for a cozy, collected look.
Imagine curling up with a good book in a cozy corner that’s all your own. Set up a small reading nook with a comfortable chair, soft blankets, and a side table for your tea or coffee. Add a few plush pillows and a reading lamp with warm lighting to create a peaceful retreat. This little sanctuary can become a cherished spot for relaxation, whether you’re diving into a new novel or enjoying some quiet time.
The links on this page are Amazon Affiliate Links.
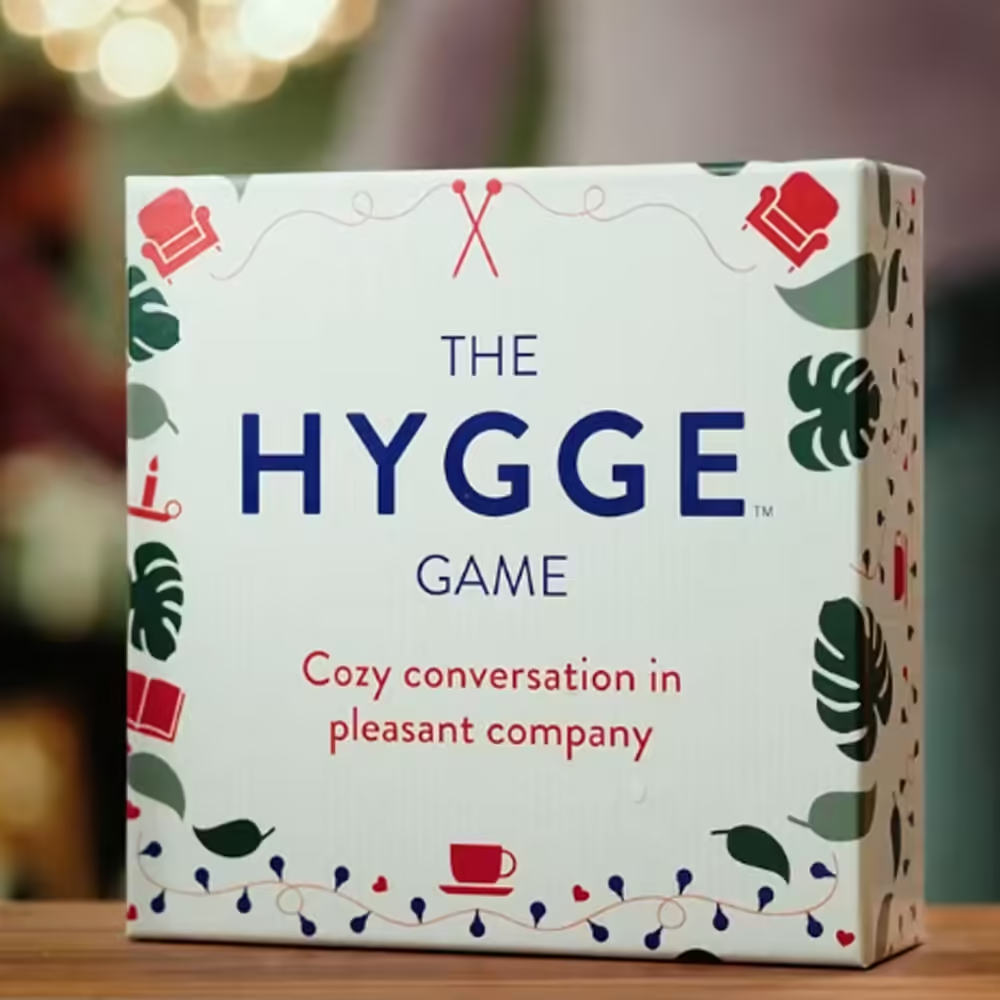
Turn a corner of your home into a space for fun and creativity. Whether it’s a puzzle table, a crafting station, or a game shelf stocked with family favorites, this area can encourage bonding and laughter. Add comfortable seating, a table, and storage for supplies to keep everything organized. This special spot will be perfect for rainy day activities or family game nights.
Farmhouse Storage Cabinet with Barn Doors, Organizer, Drawer and Adjustable Shelves
Keep your pantry and fridge filled with the ingredients for comfort food classics. Soup, stew, pasta, and casseroles are easy to prepare and perfect for cozy dinners at home. A well-stocked kitchen makes it easy to whip up something comforting whenever the mood strikes, whether it’s a hearty meal or a quick snack.
Soft blankets, throws, and cushions can instantly transform your space into a haven of comfort. Drape a knitted blanket over your sofa, add fluffy cushions to your chairs, and keep a basket of throws nearby for chilly evenings. Textiles add warmth, color, and personality to your home, making it feel more lived-in and loved.
Creating a tranquil home doesn’t require a major overhaul. Just adding a few thoughtful cozy lifestyle basics can make your home feel more inviting and comfortable. So go ahead, light a candle, grab a soft throw, and enjoy the warmth and tranquility of your cozy space. Your home should be your sanctuary: a place where you and your loved ones can relax, unwind, and truly feel at peace.
Discover some amazing ways to enhance your cozy lifestyle. These ideas can help you make your family and your home even more comfy!
Must-Have Cozy Products for the Ultimate Cozy Connoisseur
As a master of all things cozy, your home is a warm, inviting retreat where every detail has been carefully curated for comfort and relaxation. Whether it’s the softness of your blankets, the glow of your candles, or the aroma of your favorite brew, you’ve perfected the art of coziness.
But why stop now? There’s always room for a little more luxury in your cozy sanctuary. Check out these carefully selected essentials that will take your comfy home to the next level. From indulgent reads to must-have home accessories, find some new ideas enhance your cozy lifestyle.
Scented Candles That Set the Mood
The right scent can instantly transform the ambiance of your space. Scented candles with notes of vanilla, lavender, or cedarwood can create a soothing environment perfect for unwinding after a long day. Look for candles made from natural waxes, like soy or beeswax, with cotton wicks for a cleaner, longer burn. Display them in clusters on trays or shelves for an extra touch of elegance.
The links on this page are Amazon Affiliate Links.
There’s something incredibly comforting about sipping a warm drink from a beautiful mug. Upgrade your tea or coffee ritual with a luxury teapot and a set of mugs that make every sip feel special. Choose designs that reflect your style, whether that’s rustic stoneware, sleek ceramics, or whimsical patterns. Display them proudly on open shelves to add a touch of personality to your kitchen.
Layering is key when it comes to creating a cozy space, and chunky knit throws are the perfect addition. These oversized blankets are both functional and stylish, adding texture and warmth to any room. Drape one over your sofa, armchair, or the foot of your bed for a relaxed, inviting look that’s hard to resist. Bonus: they’re perfect for impromptu naps!
Ambient lighting is essential for setting the mood in your cozy home. Opt for string lights, dimmable lamps, or lanterns that cast a warm, soft glow. Himalayan salt lamps are a popular choice for their unique look and the calming pink light they emit. The gentle lighting creates a serene atmosphere that encourages relaxation and mindfulness.
Small touches can make a big impact when it comes to creating a truly cozy home. Thoughtful home accents like soft, textured pillows, decorative trays, and vintage-inspired clocks can add character and warmth to any room. Consider adding framed art prints or photographs that evoke a sense of nostalgia and comfort, or display collections of your favorite items, such as old books, pottery, or keepsakes, to infuse your space with personal charm. Woven baskets are perfect for stylish storage, while handmade ceramics and pottery add a rustic, artisanal touch. Don’t forget about rugs—they not only warm up your room but also make it feel more cozy and inviting. These little details help create an inviting atmosphere where you and your family can relax and enjoy every moment.
Embracing the cozy lifestyle is all about indulging in the little things that bring comfort and joy. By adding these must-have items to your home, you can enhance your cozy sanctuary and make every day feel like a special, comforting retreat. So light your favorite candle, pour yourself a hot drink, and settle into the ultimate cozy experience—you’ve earned it.
Whether you have unraveled a project or just have some leftover yarn, by now you probably have some scraps that are in need of organization. Winding yarn into neat balls keeps your strings from becoming a hopeless tangled mess. While there are many ways to coil yarn for storage, center-pull yarn balls are the most versatile; they allow you to work directly from either end of the string.
(In the article below, I have linked to items on Amazon.com, so you can see examples of the equipment I reference. Please know all links to Amazon are affiliate links, and if you make a purchase through them, I will earn a small commission at no cost to you. Now, on to the important information.)
Center-Pull Yarn
Each ball of yarn is made of one long strand with two ends. There are a number of ways to coil the yarn so that it does not tangle. Some yarn is pre-wound into center pull balls or skeins (tube-shaped balls) by the manufacturer. When you see a string coming from the center of the ball or skein, you can probably work directly from either end.
Working from the center of a ball is often more convenient. When you work with the end on the outside of the ball, the yarn will likely roll and flop around. Yarn bowls and containers can help keep your yarn from escaping. But center-pull balls can be even more effective at reducing the movement of your ball of yarn. Pulling from outside of the ball forces it to roll. But when you pull from the center, the yarn uncoils without turning the ball.
Many yarn-makers, however, wind their yarn into “hanks” instead of center-pull balls or skeins. To make a hank, the manufacturer makes one large circle of yarn then twists it together for storage and shipping. Hanks are incredibly difficult to work from directly, so to use yarn that comes in a hank, you will need to wind it into a ball.
Machines like “yarn swifts” and “yarn winders” are available to assist you in turning yarn into a usable form. A yarn swift holds the yarn from a hank in place while you wind your ball. Then, you can use a yarn winder to turn that yarn into a “cake” which is much like a center pull ball. Or, instead of investing in fancy machines, you can use just your hands and wind hanks, leftovers, and frogged yarn into center-pull balls.
Video Guide: How to Wind a Center-Pull Yarn Ball
Written Guide: How to Wind a Center-Pull Yarn Ball
Below I’ll show you how to wind a center pull yarn ball step-by-step. I am winding the ball from a larger center-pull skein so that I can knit two items at once from the same yarn. I also wind partially used skeins into new balls for tidier storage.
Wind Yarn into a Ball, Step 1:
Drape the yarn end between your left pointer finger and thumb, laying it across your palm.
Wind Yarn into a Ball, Step 2:
Clasp the end of the yarn with your left ring and pinkie fingers, then, with your right hand, pick up the other end of the yarn just above your left pointer finger. With the strand in your right hand, begin to wrap the yarn over the top of your left pointer finger.
Wind Yarn into a Ball, Step 3:
Bring the yarn down between your pointer and middle fingers, then between your thumb and pointer finger, forming a loop around your left pointer finger.
Wind Yarn into a Ball, Step 4:
Wrap the yarn around your left thumb in a counterclockwise motion.
Wind Yarn into a Ball, Step 5:
Wind the yarn up between your left thumb and pointer finger to form a figure-eight (8) shape.
Wind Yarn into a Ball, Step 6:
Continue wrapping the yarn around your pointer finger and thumb in figure eight shapes (as in steps two thru five).
Wind Yarn into a Ball, Step 7:
When you have wrapped the yarn around your fingers in figure eights at least 20 times, you can stop and move to the next step. To make a larger ball of yarn, wrap more figure eights; when the yarn wraps reach your left thumb knuckle, move to step eight.
Wind Yarn into a Ball, Step 8:
With your right thumb and pointer finger, pinch all the strands at the center of the figure-eight shape (just between your left thumb and pointer finger).
Wind Yarn into a Ball, Step 9:
While continuing to pinch the center of the yarn figure-eight with your right hand, gently remove your left hand from the yarn loops.
Wind Yarn into a Ball, Step 10:
Continue to pinch the center of the figure-eight with your right hand.
Wind Yarn into a Ball, Step 11:
With your left hand, fold the two loops of the figure eight up, toward each other, pinching them together over your right thumb.
Wind Yarn into a Ball, Step 12:
While continuing to pinch the loops with your left hand, gently remove your right thumb. Pick up the yarn strand you have been winding with your right hand.
Wind Yarn into a Ball, Step 13:
Gently wind the strand in your right hand around the yarn you have pinched in your left hand. Be sure you do not wrap the tail end of the yarn into the ball, or you will lose your center-pull. Also, try not to wind too tightly; this can make yarn lose its stretch.
Wind Yarn into a Ball, Step 14:
Continue winding your yarn around until you have formed a ball in your desired size. Always ensure you do not wrap the center-pull end into the ball. When you are finished wrapping, clip the yarn with scissors (if necessary). Carefully tuck the end that you held with your right hand into the ball to secure it in place.
Practice With My Knitting Patterns
If you’ve been following my lessons, you now have enough information to knit all of the washcloths and face scrubbies in my Simple Washcloth Knitting Pattern Collection. Happy knitting!
Up Next
Next up, a lesson about gauge. Learn what gauge means in knitting and you to check your gauge to make sure your knits end up the right size.
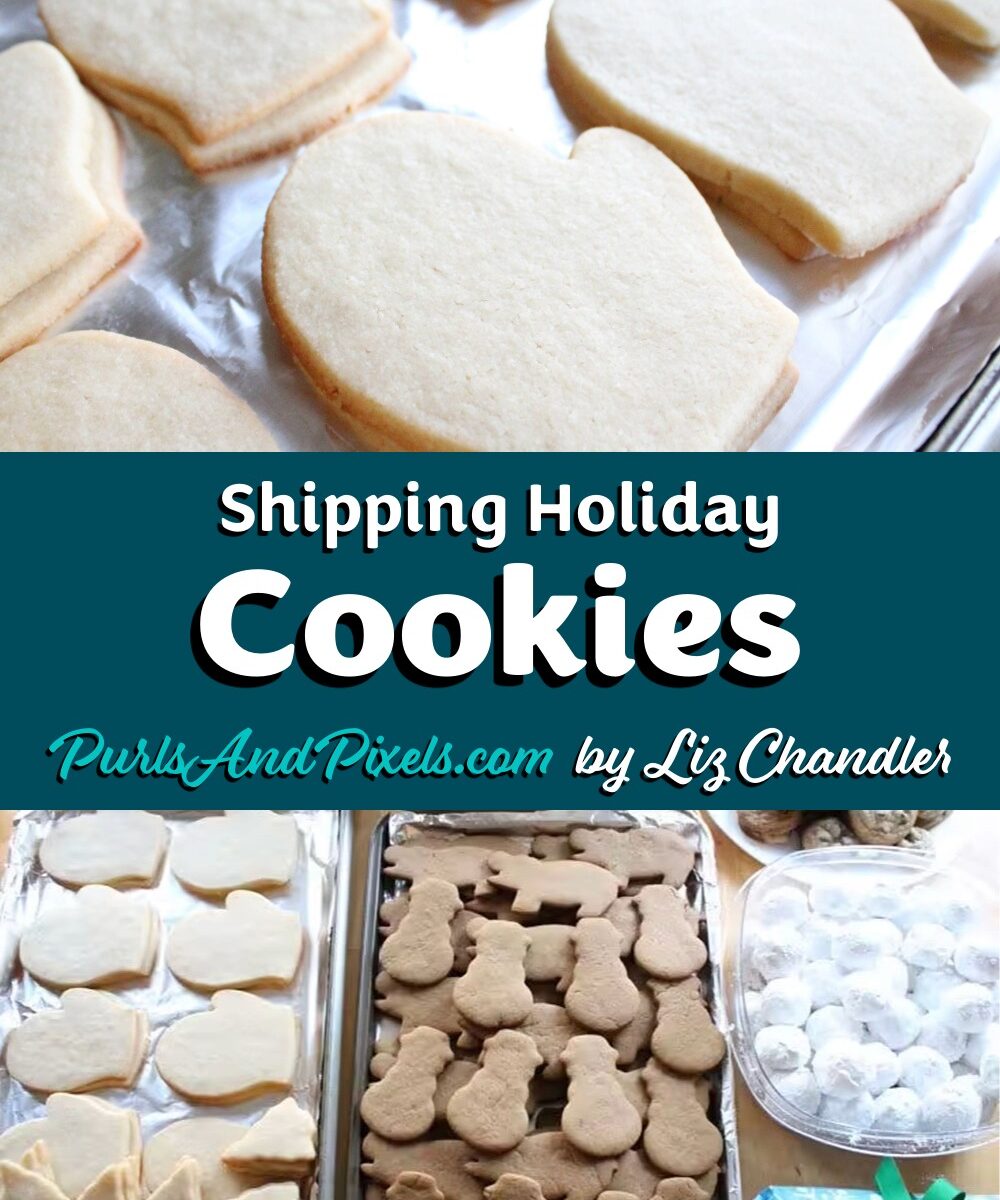
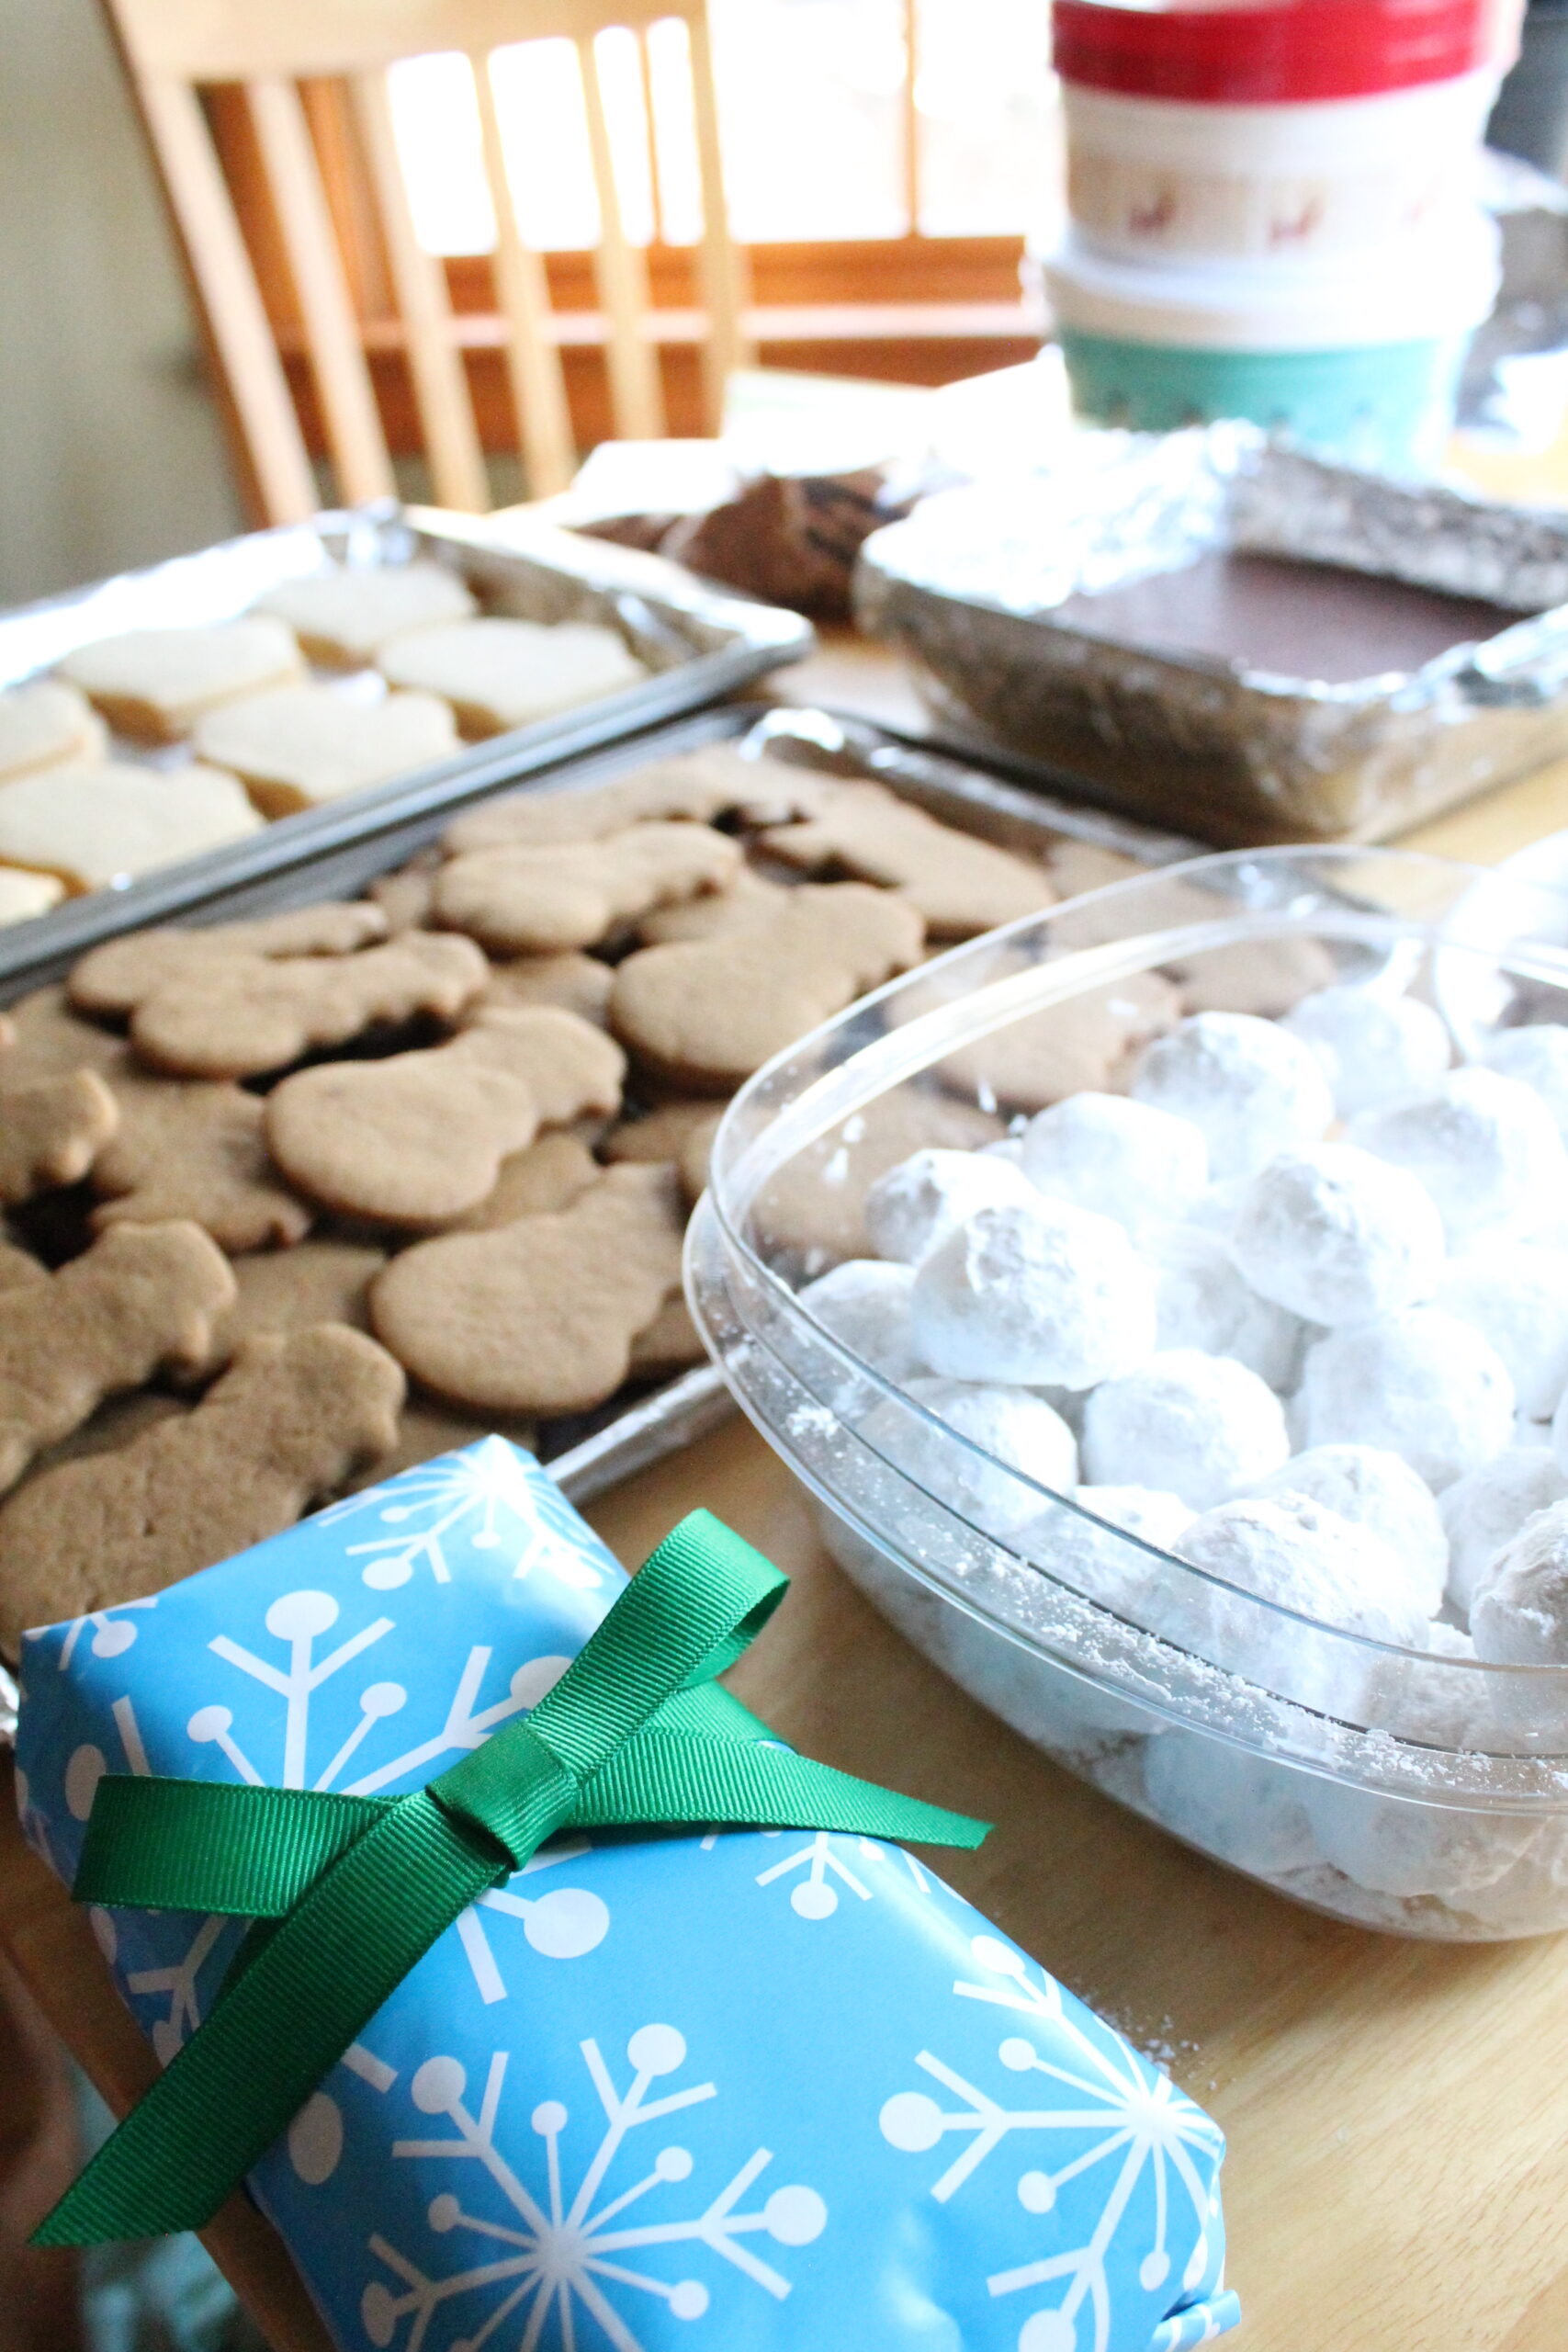
This year the holiday budget was a little tight, so I decided to make everyone cookie baskets for Christmas. For our nearby friends and family I picked up some round, decorative plastic boxes. I used cupcake papers and aluminum foil to separate the different types of cookies and arrange them nicely. But, for our loved-ones that live far away? I had to figure out how to ship homemade holiday cookies across the country.
It took a bit of creative packaging, but I was successful at shipping cookie gifts cross-country. Let me show you how I did it so you can ship your on cookie gifts for holidays and care packages.
*If you plan to ship your cookies in the mail, choose cookies that are on the denser and thicker side. Treats that are especially thin or fragile can be tasty, but probably wont make it thru the mail. The cookies pictured held up well in shipping.
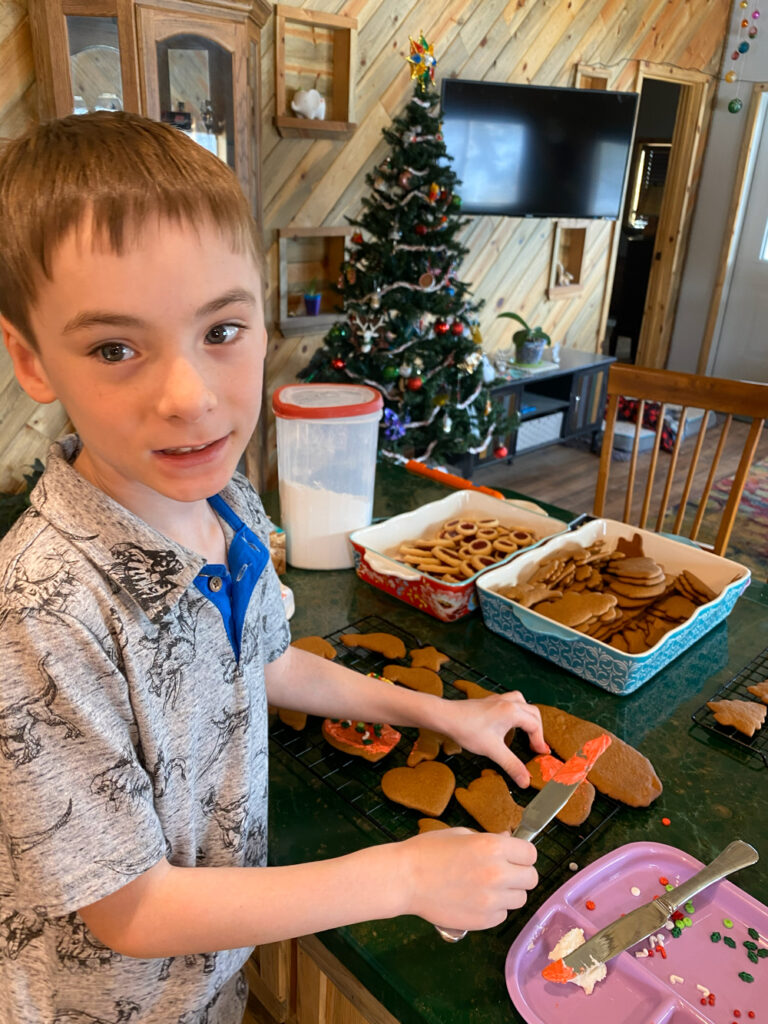
For my gift baskets this year, I made gingerbread cookies, snowball cookies, chocolate chip cookies, fudge, and peanut brittle. I’ve pinned all of the recipes for my favorite treats here, so check out and follow my cookie, candy, and crafty eats boards for ideas on home-cooked gifts.
Packaging materials
If you are mailing your cookies, you are going to need a few supplies. You’ll need:
Carefully wrap between 6 and 12 of each type of cookie in cellophane. Next, wrap that bundle of cookies again, this time loosely with in aluminum foil. Gently mold the foil around the cookies to make a block and keep the cookies from sliding around inside the bundle. Place this double-wrapped cookie bundle in a Ziploc bag. Repeat this process with the rest of the cookies that you want to ship. Place them in the shipping box, filling any empty spaces in the box with cellophane or other packing filler to make sure the cookie bundles don’t slide around in the box. I added a gift wrapped pair of handmade mittens to the box, as well. Tape up the box and you’re ready to get a shipping label and mail your cookies.
After packing up all the cookies and treats in the box, I taped it shut and wrote FRAGILE in large capital letters with a big red marker on two sides of the box.
After shipping these cookies over 2000 miles from Virginia to Colorado, I expected to loose a few cookies to breakage along the way. Trucks and airplanes are bouncy, so I thought at least a few would be lost. Lucky for me, all of the cookies this year arrived in good shape. I know using the aluminum foil as a protective cushion for shipping the cookies really helped. But, I think a major part of the success of this gift project was because I was lucky with my postal carrier for USPS. The boxes had been treated very carefully. I hope your postal worker is as kind and careful as ours.
Did you try it? Let me know how your luck was with shipping cookie gifts. What kind of cookies did you send in your gift or care package? Did they get there in good shape? Let me know in the comments below.
More Holiday Craft Ideas
Love DIY Christmas and holiday projects? Find more handmade holiday craft ideas at my Holiday Pattern Roundup Post.
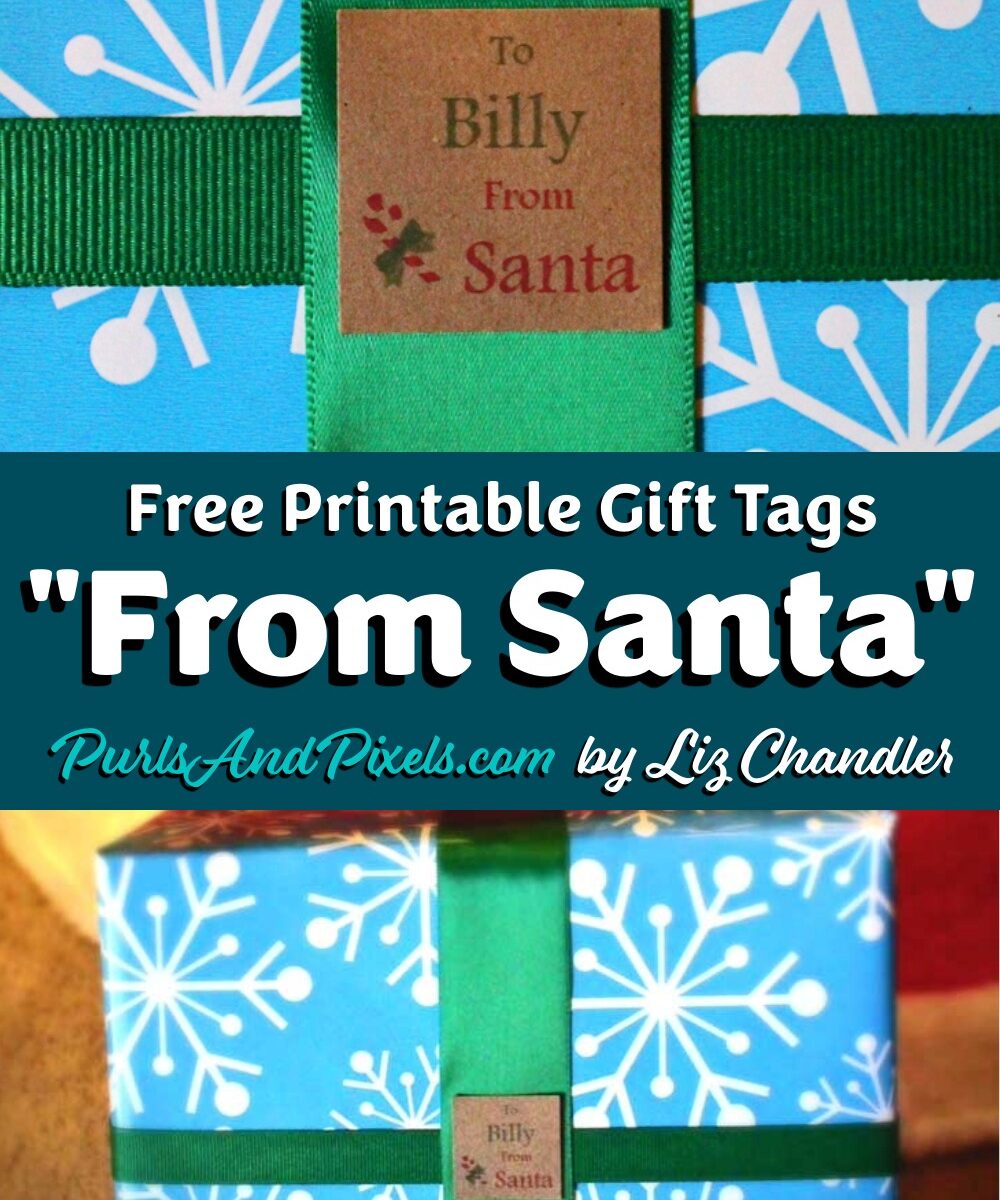
It turns out that Santa doesn’t always remember to put tags on the presents he brings. I needed some gift tags for my presents this year, so I made up this sheet of printable “from Santa” gift tags for Christmas. If you need some gift tags for your little one’s presents, you are welcome to use mine. Below is a link to my Word document file of printable “from Santa” gift tags. Download it, add your child’s name, print, and cut out for a quick and free DIY project.
Type “Name” in the “Find what” field. Type your child’s name in the “Replace with” field.
Click “Replace all.”
Print your From Santa Gift Tags
Print on the best quality setting your printer allows. Try printing on different kinds of paper to mix up the look. If you use basic white printer paper, try cutting out a slightly larger square of colored paper or gift wrap and place it behind the label. These labels look so festive and bright.
These labels are smaller and will print so that you can cut them into 1.25 inch squares. Try using a paper cutter or a square paper punch to help make sure the labels come out perfectly square. Attach the labels to your gifts with a small bit of tape, and you are all done!
More Holiday Craft Ideas
Love DIY Christmas and holiday projects? Find more handmade holiday craft ideas at my Holiday Pattern Roundup Post.
If you like these printable “From Santa” Gift Tags for Christmas, I’d love hear about it. Comment below or share your photos with Liz @PurlsAndPixels on Twitter, Instagram, or Facebook.
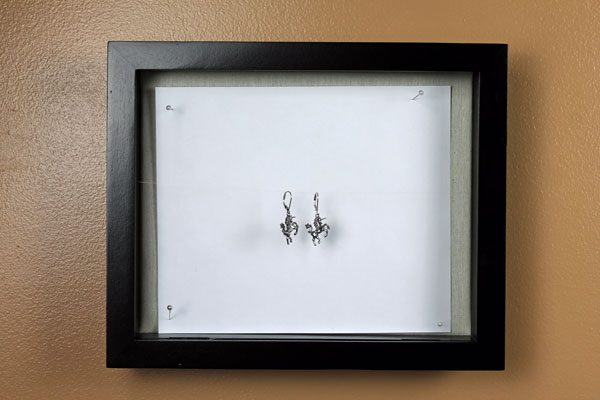
It can be tricky to take nice studio-style photographs of dangle earrings. Laying them flat can distort how the earrings look. And hanging them on something can be tricky because props can distract from your pretty jewelry. After playing with a few different ideas, I built a jewelry photography stand to photograph my earrings. It hangs on the wall like a photograph and displays my earrings nicely for studio style pictures.
Learn how to make a jewelry photography stand with simple items you may have around the house or can easily get at you local craft store or online. Then I’ll show you how to photograph your jewelry with your new stand.
Materials
To create this DIY jewelry photography stand, you’ll need:
White paper OR your choice of decorative backdrop paper
Instructions
First, carefully remove the glass from the shadow box. Discard it or reuse the glass for another project.
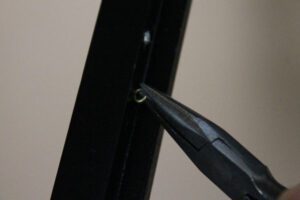
Next, using your jewelry pliers, screw an eye screw into the side of the shadow box. You’ll want put the screw on the swing side of the shadow box, near where the glass was attached.
Screw a second eye screw into the opposite side of the shadow box.
Tightly tie the fishing line to one eye screw. Then, tie the other end of the fishing line to the second eye screw. Make sure you pulling the string tightly enough to support the weight of your earrings without sagging, but not so tightly as to rip out the first eye screw.
With the pins included in the shadow box, pin your backdrop paper to the inside of the shadow box.
Photographing Earrings on your Jewelry Stand
Now that your jewelry photography stand is complete, all you have left to do is hang your earrings and take a photo.
Ensure that you have hung your photo stand near a window with lots of natural light. Otherwise you’ll need to get a set of studio lights to make sure your photos are not underexposed. Try the flash if you like, but I don’t recommend it. The flash tends to distort very shiny jewelry, especially with close up photos.
Place your earrings on the wire, and space them so they don’t touch each other.
I use a tripod to take my earring photos, to keep it as steady as possible. Plus this makes it easier to photograph multiple pieces of jewelry, without having to re-position the camera every time.
Zoom in on the earrings, taking the frame of the stand out of your photo. Focus the camera on the earrings, and capture your photograph. Experiment with different pieces of paper and different textures behind your jewelry to find your personal style. Most people go with white. I say do what you think looks best.
I remove the string from my images in Photoshop using the healing brush tool set to “content aware.” The program removes the string so it looks as though the earrings are floating in the air. You could also use a decorative string or ribbon from the start of your project, and then you would not need to use Photoshop after taking your pictures.
Now you’re ready to take professional-looking studio-style photographs of your earrings on your DIY jewelry stand. Have fun!
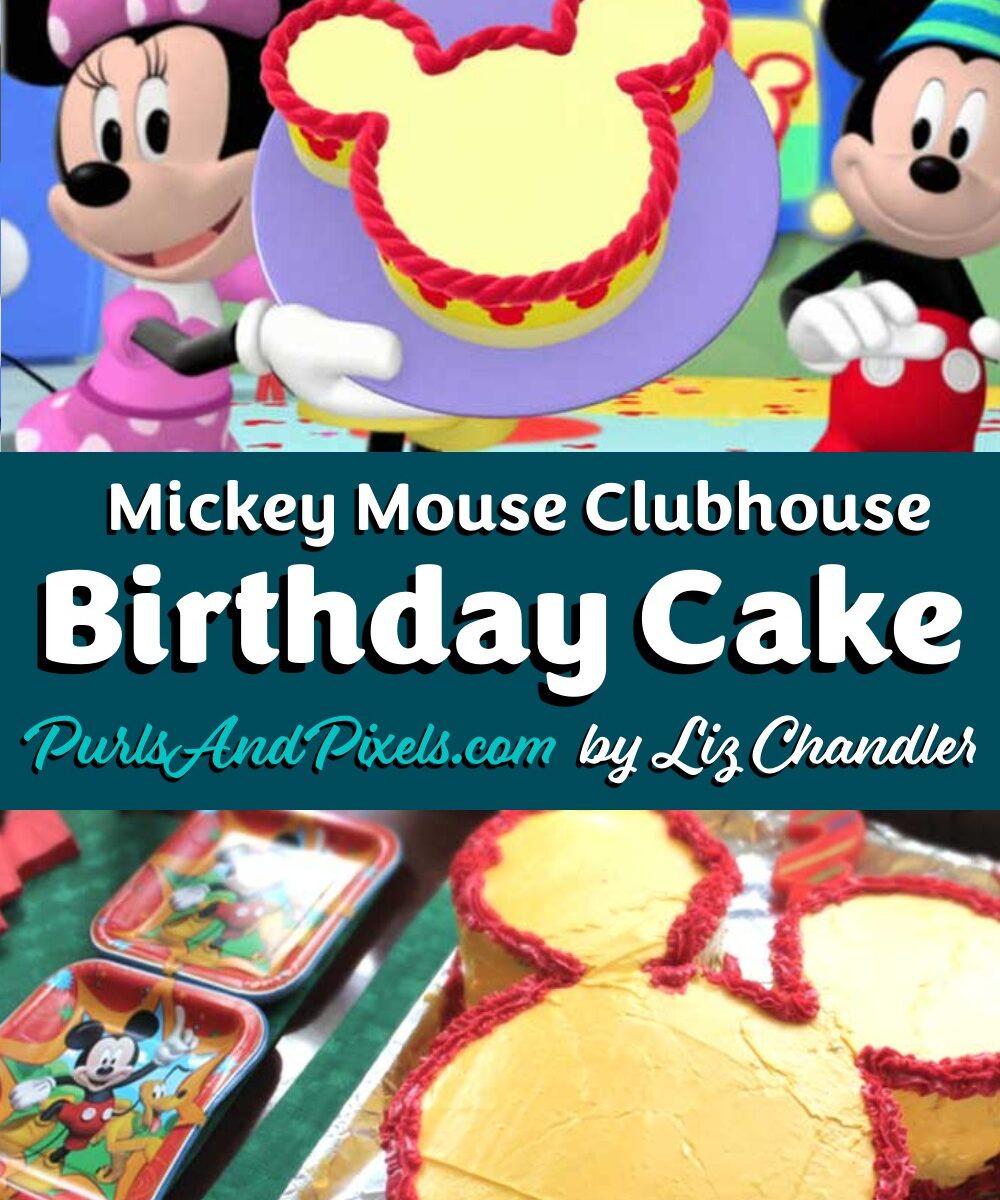
When my little one turned 2, he was completely obsessed with Disney Junior’s Mickey Mouse Club House. So, of course, I decided to throw him a Mickey themed birthday party. The most important part of the party was his mickey cake. Mickey Mouse has a birthday in one of the episodes, and his cake is a yellow and red Mickey head. I tried to mimic this cake, and here is how I did it.
How to Make Mickey’s Birthday Cake
Baking Pans
First things first, you will need three round cake pans to make Mickey’s Birthday Cake. One should be 8 inches and two should be 4 inches. I used two sets of these pans for my cake:
This will be a two layer cake. The 8 inch pan will make Mickey’s face, and the 4 inch pans will be his ears.
Cake Recipe
I used my all time favorite chocolate cake recipe for this cake. It comes from Hershey Kitchens and you can get the full recipe and see other people’s reviews of it here. I love this chocolate cake because it is extremely moist and fluffy. It has the consistency of a box mix cake, but the flavor of homemade. Love it!
If you already have a favorite cake recipe, use it. This Mickey cake is all about the cake’s shape, so as long as your recipe can be baked into round layer cake pans, you can use any flavor or recipe you desire.
You’ll need to make a double batch of cake. So, either double your cake recipe, or make the cake twice. I made the cake twice, since my mixer just won’t hold two batches worth of ingredients. And, since my oven isn’t enormous, I was worried all the cakes wouldn’t fit at the same time.
For the first set of cakes, divide your batter between one 8-inch cake pan and two 4-inch cake pans. Put a little more than half of the cake batter into the 8-inch pan, and divide the rest between the two 4-inch pans. Don’t overfill the pans or you’ll have spillage during baking.
Bake as directed in the cake recipe you are following.
While these three cakes are cooling on wire racks, repeat this process. So, make another batch of cake and divide it among an 8-inch pan and two 4 inch pans. Bake and cool these cakes as well.
Once your cakes are cool, you can stack them and decorate.
Decorating Mickey’s Birthday Cake
Stack the cakes
First, frost one of the 8-inch cakes with a filling or frosting of your choice. I used chocolate frosting, but this is where you can get creative with flavor.
Carefully stack the second 8-inch cake on top of the first.
Place two of the 4 inch cakes so they make Mickey’s ears. Frost them with your filling frosting, then stack the other 4 inch cakes on top. You should now have a two layer cake that looks like mickey.
Frost your cake
You’ll need two batches of vanilla frosting – or two cans if you use store bought like I did. Dye one can of the frosting with a generous amount of yellow food coloring. I used Lemon Yellow from the Wilton icing color set.
Frost the cake yellow, as smoothly as you can. Then pipe red along the top outside of the Mickey shape, then around the bottom of the cake.
All done! Hip Hip Hooray!
Did you try making a Mickey’s birthday cake for your little one? Let me know how it turned out. Comment below or share pictures with #PurlsAndPixels on Pinterest, Instagram, Facebook, or Twitter.


 Instructions