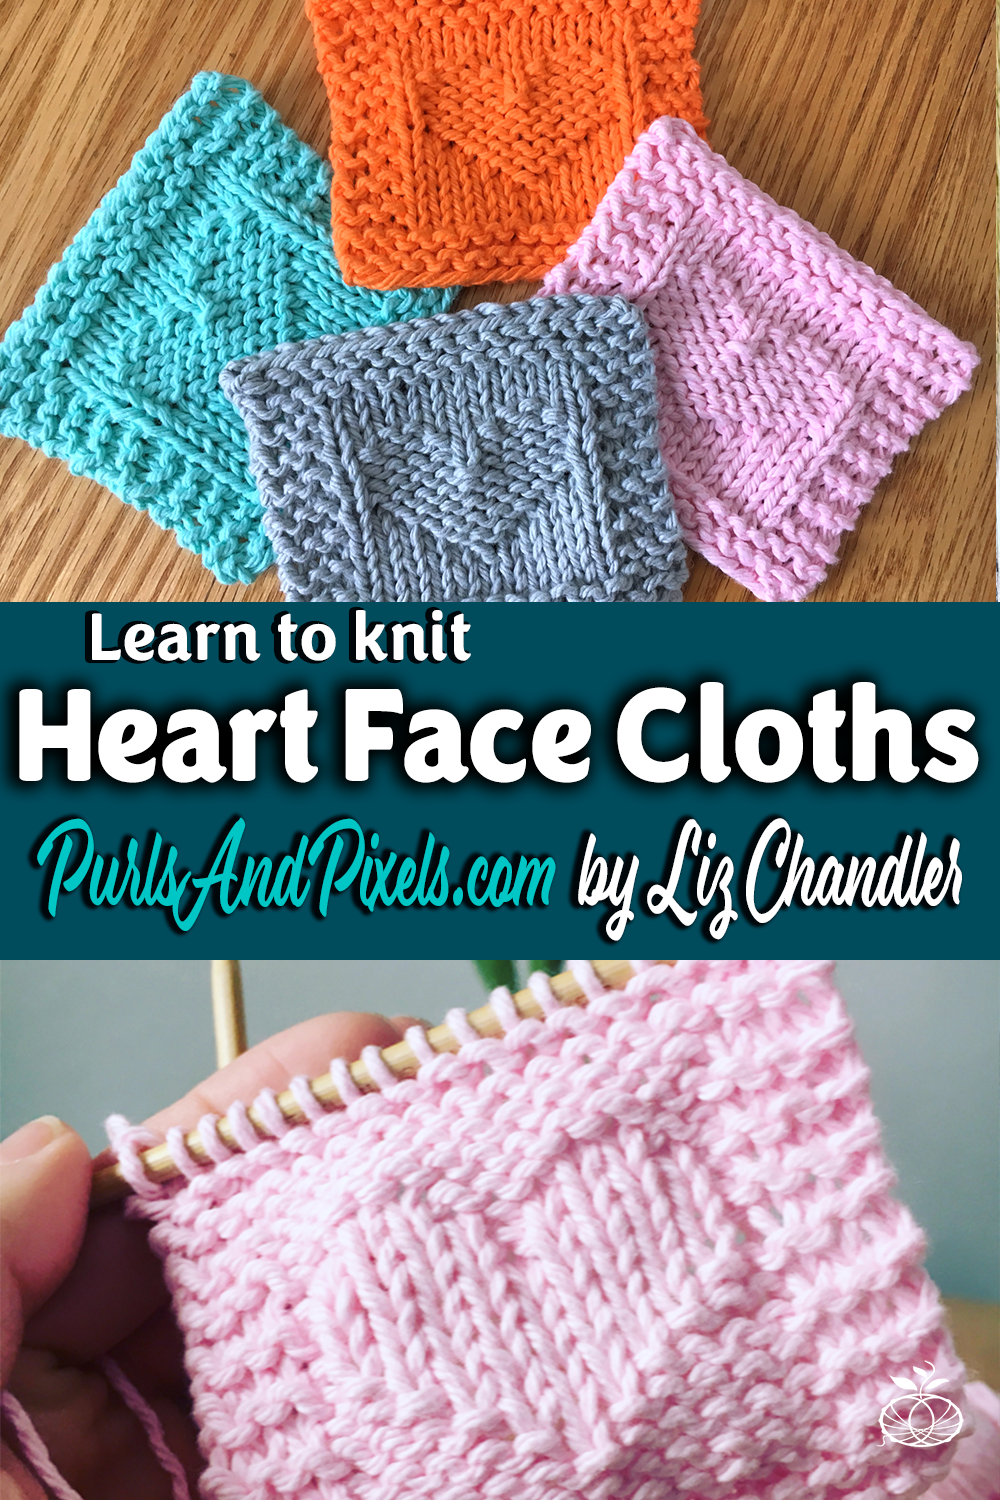
Heart Face Scrubby Free Knitting Pattern

Heart face scrubby free knitting pattern from Liz @PurlsAndPixels

Heart Face Scrubby Free Knitting Pattern

A Free Knitting Pattern from Liz @PurlsandPixels
Heart face scrubby free knitting pattern from Liz @PurlsAndPixels

I’d like to give you all a little gift this Valentines day, so I have written up a quick heart face scrubby free knitting pattern. Enjoy! (P.S. I’m supposed to tell you that the links to Amazon on this site are affiliate links; if you use them to make a purchase, Amazon sends me a commission, at no cost to you.)

I love to use little handmade cotton squares to use with makeup remover and micellar water. Rather repeatedly throwing away disposable cotton pads, I make my own little face scrubbies with cotton yarn. After I use one, I put it in a Mason Jar, then when my collection is dirty I wash them up. A little OxyClean in the wash really helps to get them clean of makeup residue and then they’re ready to use again.

Heart face scrubby handmade gift basket free knitting pattern from Liz @PurlsAndPixels

These little heart scrubbies are super quick to make. The simple pattern also makes them easy to knit. They don’t use much yarn either, so they’re great for using up leftover scrap yarn.

Make a bunch for your own facial care routine. Or create a little gift basket for Valentines Day or other holidays. Add several scrubbies, a wide-mouth mason jar (for storing used scrubbies that need to be washed), and makeup remover or micellar water to a cute basket and you’ve got a beautiful handmade spa basket. You could even throw in some nice soap and a few full-sized washcloths to make it extra-special (find my seed stitch washcloth pattern here).

About this Knitting Pattern

Heart face scrubby free knitting pattern from Liz @PurlsAndPixels

This heart face scrubby pattern is a beginner to easy level knitting pattern and is great for knitters who have an understanding of knits and purls.

Materials

One 95-yard (2 ounce) skein of cotton worsted weight yarn (shown in Lily Sugar ‘n Cream 100% Cotton Yarn), in your choice of color

  • one heart face scrubby uses about 9.5 yards (0.2 oz.)*

*Weight estimated with Lily Sugar n’ Cream yarn; other yarn weights may vary.

36-inch (91 cm) long US No. 7 (4.5 mm) circular needle or 9-inch (23 cm) long US No. 7 (4.55 mm) straight needles (or size needed to obtain gauge)

Measuring tape

Tapestry needle

Gauge

19 stitches x 26 rows = 4 x 4 inches in stockinette stitch on No. 7 (4.5 mm) needles. (Learn how to check your gauge here.)

Abbreviations

k = knit

p = purl

Instructions: Heart Face Scrubby

(3 inches x 3.5 inches (unwashed) & shrinks to 3 inches x 3 inches after machine washing in cold water )

Knit flat, turning after each row.

Row 1: Cast on 17 stitches. Turn.

Rows 2 – 5: k 17. (17 stitches) Turn.

Row 6: k 3, p 11, k 3. (17stitches) Turn.

Row 7: k 17. (17 stitches) Turn.

Row 8: k 3, p 5, k 1, p 5, k 3. (17 stitches) Turn.

Row 9: k 7, p 3, k 7. (17 stitches) Turn.

Row 10: k 3, p 3, k 5, p 3, k 3. (17 stitches) Turn.

Row 11: k 5, p 7, k 5. (17 stitches) Turn.

Row 12: k 3, p 1, k 9, p 1, k 3. (17 stitches) Turn.

Row 13: k 4, p 9, k 4. (17 stitches) Turn.

Row 14: k 3, p 1, k 4, p 1, k 4, p1, k 3. (17 stitches) Turn.

Row 15: k 4, p 4, k 1, p 4, k 4. (17 stitches) Turn.

Row 16: k 3, p 2, k 2, p 3, k 2, p 2, k 3. (17 stitches) Turn.

 Row 17: k 17. (17 stitches) Turn.

Row 18: k 3, p 11, k 3. (17 stitches) Turn.

Rows 19 – 22: k 17. (17 stitches) Turn.

Row 23: Bind off in knit stitches. Cut yarn, leaving an 8-inch tail, and pull through.

Weave in ends. Block if desired.

Knitting Chart

For this simple pattern you may or may not find a chart helpful. It’s included in case you’d like it.

Heart face scrubby free knitting pattern chart from Liz @PurlsAndPixels

Print the Heart Face Scrubby Free Knitting Pattern

Printable version of this free knitting pattern

Printable Heart Face Scrubby Free Knitting Pattern PDF by Liz @PurlsAndPixels

Care

If you use the materials called for in the pattern, your final product will be machine washable. To keep your heart face scrubbies looking their best, hand wash or machine wash separately on delicate cycle in cold water. A scoop of OxiClean can be added to the wash to help remove makeup residue. You may tumble dry on low heat or lay flat to dry.

Note: these scrubbies will shrink from 3 x 3.5 inches to 3 x 3 inches after washing as directed above.

Heart face scrubby free knitting pattern from Liz @PurlsAndPixels

©2019, Liz Chandler of PurlsAndPixels.

This pattern is for personal use, gifting, and charitable donation of completed items. You may also sell handmade items created using this pattern. Do not copy this pattern and distribute it. If you’d like to share the pattern, refer your friends to my website, purlsandpixels.com so they may obtain a copy.

If you find any errors or have any questions, email purlsandpixels@gmail.com and I will do my best to help.

I’d love to see your finished work! Tag your photos with @PurlsAndPixels on Twitter or Instagram.

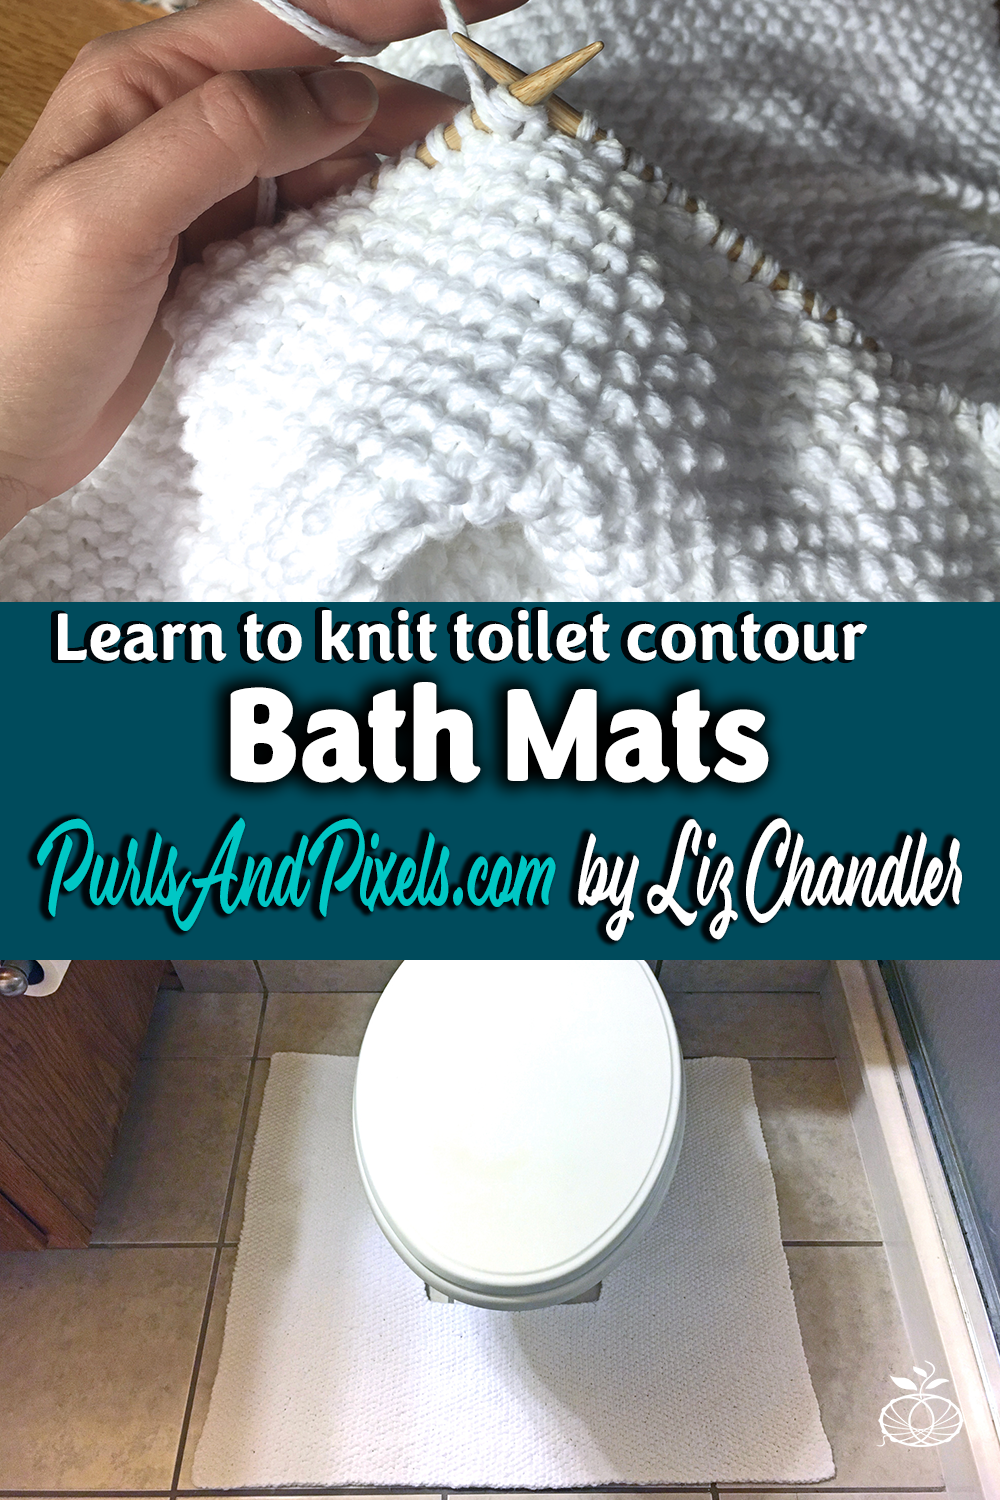
Toilet Contour Rug & Bath Mat Free Knitting Pattern

Learn to knit toilet contour bath mats with this knitting pattern from Liz Chandler @PurlsAndPixels.

Toilet Contour Rug & Bath Mat

A Free Knitting Pattern from Liz @PurlsAndPixels

Learn to knit toilet contour bath mats with this knitting pattern from Liz Chandler @PurlsAndPixels.

This free knitting pattern shows you how to make a toilet contour rug and matching bath mat. I designed the toilet rug to help with my little son’s potty training. The contour rug is shorter on the front and wider on the sides than traditional toilet rugs; this helps catch rouge accidents from potty training boys. Instructions are also included in this pattern set for a matching rectangular bath mat.

These bath mats are made by holding two strands of worsted weight cotton yarn together and knitting them as one. You’ll work in a seed stitch pattern, which creates a nice, absorbent texture.

About this Knitting Pattern

Toilet Contour Rug & Bath Mat, free knitting pattern from Liz @PurlsAndPixelsThis Toilet Contour Rug & Bath Mat pattern set is an easy to intermediate level knitting pattern and is best for knitters who have an understanding of knits, purls, and binding off.

Materials

Two 706-yard Skeins of Lily Sugar ‘N Cream worsted weight yarn, White (or your preferred color)

  • Toilet Contour Rug uses about 959 yards (19 oz.)
  • Bath Mat uses about 1009 yards (20 oz.)

36 inch (91cm) long US No. 10 / 6 MM circular needles (or size needed to obtain gauge)

Measuring tape

Tapestry needle

Gauge

13 stitches and 19 rows in stockinette (with two strands held together) = 4 inches

Abbreviations

k = knit

p = purl

** = repeat the pattern between the asterisks

Instructions: Toilet Contour Rug

(32 x 28 inches)

Toilet Contour Rug & Bath Mat, free knitting pattern from Liz @PurlsAndPixels

Knit flat, turning after each row. Hold two strands of yarn together and knit as if they are one strand.

Row 1: Cast on 104 stitches. (104 stitches) Turn.
Row 2: *k, p* x 52. (104 stitches) Turn.
Row 3: *p, k* x 52. (104 stitches) Turn.
Rows 4 – 61: Repeat Rows 2 and 3.
[Bind off center and separate flaps] Row 62: *k, p* x 38. Bind off next 29, leaving last bind off stitch as an active loop. *p, k* x 37. (76 live stitches) Turn.Toilet Contour Rug & Bath Mat, free knitting pattern from Liz @PurlsAndPixels

[Begin first flap; work only the first set of live stitches that remain on the needles.] Row 63: *p, k* x 19. (38 stitches) Turn.
Row 64: *k, p* x 19. (38 stitches) Turn.
Rows 65 – 169: Repeat Rows 63 and 64.
Row 170: Bind off 38. Cut yarn and pull through.

Toilet Contour Rug & Bath Mat, free knitting pattern from Liz @PurlsAndPixels

[Begin second flap; move to the remaining live stitches. Join yarn and begin knitting second flap to match the first flap.] Row 63, part 2: *p, k* x 19. (38 stitches) Turn.
Row 64, part 2: *k, p* x 19. (38 stitches) Turn.
Rows 65 – 169, part 2: Repeat Rows 63 and 64.
Row 170: Bind off 38. Cut yarn and pull through.
Weave in all loose ends. Block if desired.

Instructions: Bath Mat

(32 x 24 inches)

Knit flat, turning after each row. Hold two strands of yarn together and knit as if they are one strand.

Row 1: Cast on 104 stitches. (104 stitches) Turn.

Row 2: *k, p* x 52. (104 stitches) Turn.

Row 3: *p, k* x 52. (104 stitches) Turn.

Rows 4 – 155: Repeat Rows 2 and 3.

Row 156: Bind off. Cut yarn and pull through.

Weave in all loose ends. Block if desired.

Print the Toilet Contour Rug & Bath Mat Free Knitting Pattern Set

Printable version of this free knitting pattern

Printable Toilet Contour Rug & Bath Mat Free Knitting Pattern PDF by Liz @PurlsAndPixels

Care

If you use the materials called for in the pattern, your final product will be machine washable. To keep your bath mats looking their best, hand wash or machine wash separately on delicate cycle in cold water. You may tumble dry on low heat or lay flat to dry.

Make matching washcloths

If you like these bath mats, you can make matching washcloths. Find my free Seed Stitch Washcloth Knitting Pattern here.

Toilet Contour Rug & Bath Mat, free knitting pattern from Liz @PurlsAndPixels

©2018, Liz Chandler of PurlsAndPixels.

This pattern is for personal use, gifting, and charitable donation of completed items. You may also sell handmade items created using this pattern. Do not copy this pattern and distribute it. If you’d like to share the pattern, refer your friends to my website, purlsandpixels.com so they may obtain a copy.

If you find any errors or have any questions, email purlsandpixels@gmail.com and I will do my best to help.

I’d love to see your finished work! Tag your photos with @PurlsAndPixels on Twitter or Instagram.

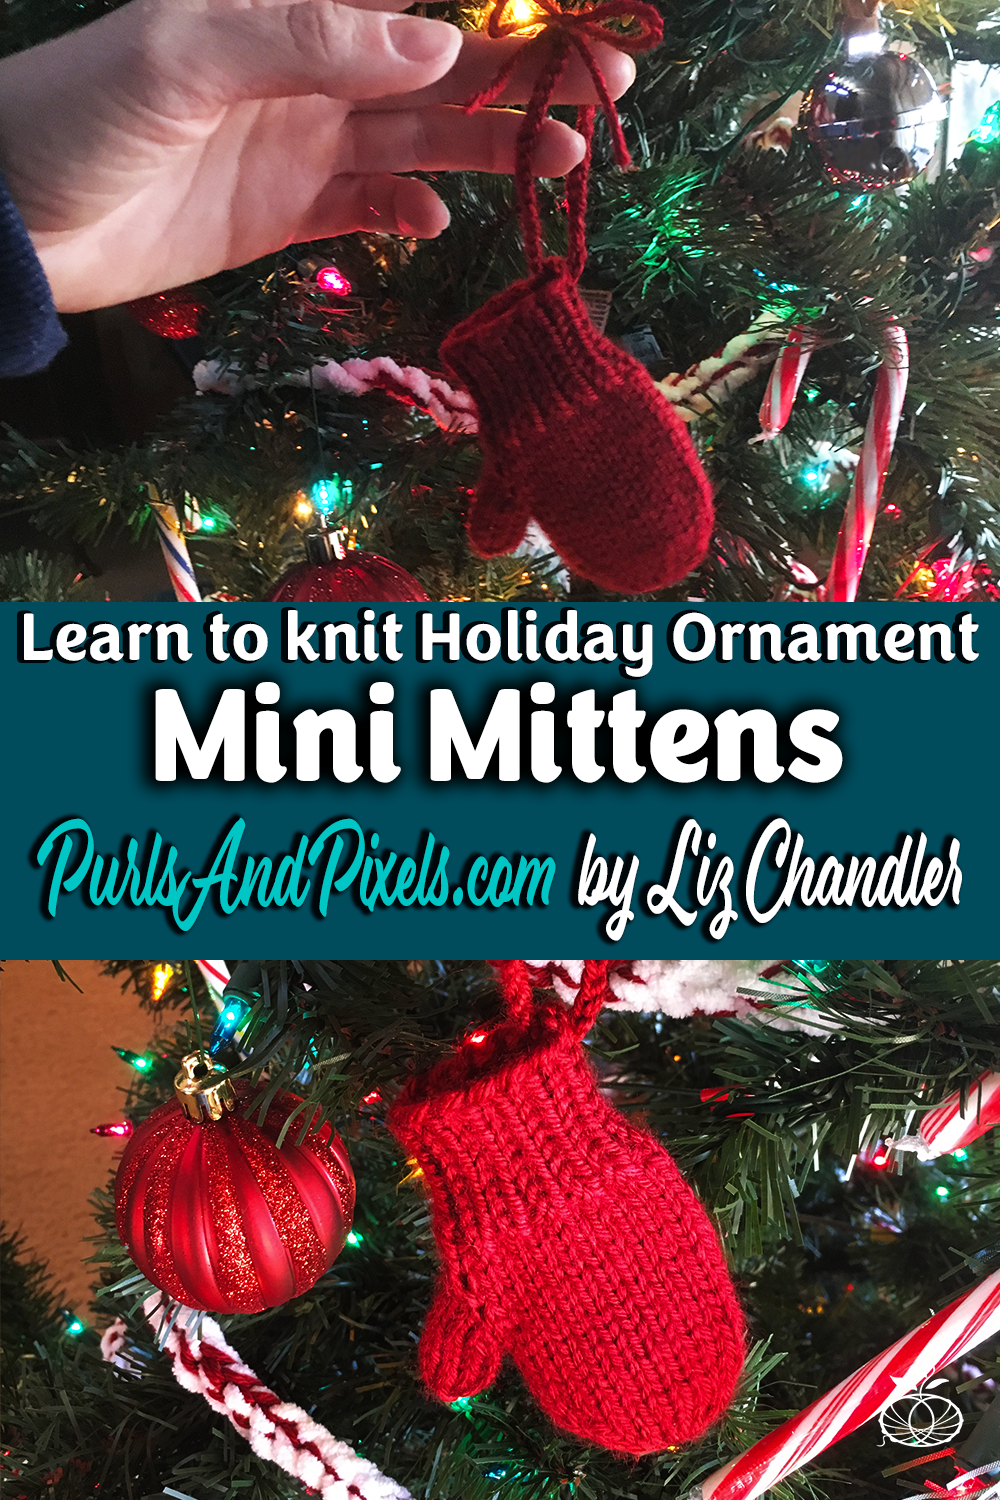
Mitten Holiday Ornament Free Knitting Pattern

Learn to knit holiday ornament mini mittens with this free knitting pattern sample from Liz Chandler @PurlsAndPixels.

Mitten Holiday Ornament

A Free Knitting Pattern from Liz @PurlsAndPixels

Learn to knit holiday ornament mini mittens with this free knitting pattern sample from Liz Chandler @PurlsAndPixels.

This tiny mitten makes the perfect holiday ornament. These little handmade ornaments are perfect for knitting up your yarn scraps; you’ll only need about 0.3 ounces of yarn Try this pattern with any of your leftover worsted weight yarn. Mix it up by making the knit, purl rib cuff in one color and the rest of the mitten in another. It is also adorable in variegated yarn colors. Try embellishing the hand of the mitten with embroidered patterns to make this tiny mitten even more exciting.

About this Quick Knitting Pattern

Mitten Holiday Ornament Free Knitting Pattern from Liz @PurlsAndPixelsThis little mitten ornament pattern is best for intermediate level knitters who have an understanding of knitting in the round with double point needles. You’ll also need to know how to increase by making one, and decrease with slip, slip, knit and knit two together. You will craft it by knitting from the bottom up in a simple rib and stockinette pattern.

Materials

One 315-Yard Skein of Caron Simply Soft worsted weight yarn, Autumn Red (or your preferred color)

  • uses approximately 15.75 yards (0.3 ounces) per mitten – double yardage if making two ornaments

No. 3/3.125 MM double point needles (DPNs) (or two sizes smaller than needles used to obtain gauge)

No. 5/3.75 MM double point needles (DPNs) (or size needed to obtain gauge)

Three stitch markers

Small stitch holder

Measuring tape

Tapestry needle

Gauge

20 stitches and 28 rows = 4 inches x 4 inches in stockinette stitch on No. 5/3.75 MM needles.

Abbreviations

k = knit

p = purl

** = repeat the pattern between the asterisks

m1 = make 1 [Pick up the strand between the stitch just worked and the next stitch from front to back with the left needle and knit into the back of it.]

sl = slip stitch as if to purl with yarn held in back

k2tog = knit two together

ssk = slip, slip, knit [Slip two stitches as if to knit. Insert left needle from left to right into the fronts of the two slipped stitches. Pull working yarn thru both stitches with right needle to knit together.]

Instructions: Mitten Holiday Ornament

(Measures 4 inches top to bottom; 2 inches wide, without thumb)

Knit in the Round. Use stitch marker to keep track of the beginning/ends of your rows by placing it in the first stitch of each row/round. Make one or two, as desired.

[Using no. 3 DPNs] Row 1: Cast on 24 stitches. Divide onto 3 DPNs (8 stitches on each DPN). Join (taking care not to twist stitches) and *k, p* x 12. (24 stitches)

Rows 2 – 9: *k, p* x 12. (24 stitches)

[Switch to no. 5 DPNs] Rows 10 – 12: k 24. (24 stitches)

Row 13: k 11. Place stitch marker on the 11th knit stitch. m1. k 2. m1. k 1 and place marker on this stitch. k 10. (26 stitches)

Row 14: k 26. (26 stitches)

Row 15: k to marker. sl marker. m1. k to second marker. m1. sl second marker. k 10. (28 stitches)

Row 16: k 28. (28 stitches)

Row 17: k to marker. sl marker. m1. k to second marker. m1. sl second marker. k 10. (30 stitches)

Row 18: k 11. sl next 8 stitches onto stitch holder. k 11. {This will separate thumb stitches from hand stitches} (22 stitches on needles)

Rows 19 – 24: k 22. (22 stitches)

[Begin finger decreases] Row 25: k 1, ssk, k 5, k2tog, k 2, ssk, k 5, k2tog, k 1. (18 stitches)

Row 26: k 18. (18 stitches)

Row 27: k 1, ssk, k 3, k2tog, k 2, ssk, k 3, k2tog, k 1. (14 stitches)

Cut yarn leaving a 12-inch tail. With tapestry needle, draw yarn tightly through remaining 14 stitches. Weave in end.

Mitten Holiday Ornament Thumbs

[Using no. 5 DPNs] Thumb Row 1: Put 8 stitches from stitch holder onto three needles. k 8 in the round. (8 stitches)

Thumb Rows 2 – 4: k 8. (8 stitches)

Thumb Row 5: k2tog x 4. (4 stitches)

Cut yarn leaving a 12-inch tail. With tapestry needle, draw yarn tightly through remaining 4 stitches. Weave in end.

Weave in remaining loose ends. [Tip for the thumb base] With the loose end remaining at the base of the thumb, use duplicate stitch to close the gap that remains where the thumb attaches to the hand.

For more help weaving in your ends, see this guide to Finishing Mittens.

Block if desired.

Optional Mitten Holiday Ornament Hanger

Learn to knit holiday ornament mini mittens with this free knitting pattern sample from Liz Chandler @PurlsAndPixels.Choose a pretty ribbon and tie it in a loop with a bow to the cuff of the mitten. Alternatively, using the same yarn or a contrasting color, you can use a size F/3.75 MM crochet hook to chain a 6-inch cord by following these instructions:

Ensuring you leave a 4-inch tail before your slip knot, chain 35. Cut yarn and pull through, leaving a 4-inch tail. Pull one end of the chain through an open knitted loop on your Ornament Sized Mitten. Tie a bow using the two loose yarn tails of the chain.

Print the Free Mitten Holiday Ornament Knitting Pattern

Printable version of this free knitting pattern

Printable Mitten Holiday Ornament pattern PDF by Liz @PurlsAndPixels

Make full size mittens

If you like these tiny mittens, you can make them for your whole family. My knit mitten pattern in all sizes is available for download here on my site.

More Holiday Craft Ideas

Love DIY Christmas and holiday projects? Find more handmade holiday craft ideas at my Holiday Pattern Roundup Post.

Mitten Holiday Ornament Free Knitting Pattern from Liz @PurlsAndPixels

©2017, Liz Chandler of PurlsAndPixels.

This pattern is for personal use, gifting, and charitable donation of completed items. You may also sell handmade items created using this pattern. Do not copy this pattern and distribute it. If you’d like to share the pattern, refer your friends to my website, purlsandpixels.com so they may obtain a copy.

If you find any errors or have any questions, email purlsandpixels@gmail.com and I will do my best to help.

See purlsandpixels.com for more great patterns or to order this item handmade by me. I’d love to see your finished work! Tag your photos with @PurlsAndPixels on Twitter or Instagram.

Cherry Candy Cane Potholder Easy Free Knitting Pattern

Easy cherry candy cane pot holder knitting pattern a quick holiday knitting project from Liz @PurlsAndPixels

Cherry Candy Cane Potholder

An Easy Free Knitting Pattern from Liz @PurlsAndPixels

Easy cherry candy cane pot holder knitting pattern a quick holiday knitting project from Liz @PurlsAndPixels

Knit a festive holiday pot holder with this incredibly quick and simple free knitting pattern. This oversize pot holder made in Lion Brand Yarn’s super bulky Wool-Ease yarn makes a lovely decoration for your party or a gift for the host of your Christmas festivities. Shown in the color “Hudson Bay,” this quick knitting project is reminiscent of cherry candy canes. It can make a fun holiday piece, but is subdued enough to be used year-round. Use it to display bowls of yummy food and vases of fresh-cut flowers. 

About this Quick Knitting Pattern

This extra-thick, oversize potholder is made by doubling up strands of super bulky yarn. When using a self-striping yarn, as recommended, make sure you use a single dye lot and line up the striping colors before you begin knitting. Using two skeins from the same dye lot ensures you will have enough yarn for a complete square; however, you may try dividing one skein equally in separate balls.

Cherry Candy Cane Potholder Knitting Pattern

This pattern is suitable for beginners. It is worked in garter stitch, a knitting stitch made entirely of knit stitches. The trickiest part is lining up the yarn stripes from two skeins of yarn so that they match when knit together. Take care to line up the yarn colors before you knit, and you’ll be off to an excellent start.

A note about heat: I use these pot holders under potted plants, flower vases, and the like. I don’t advise using them as oven mitts, but if you try it, please be safe. These may not be heat resistant. With the yarn I’ve recommended, these pot holders are only a little heat resistant, so be very careful if you are going to try and use them as oven mitts; the yarn can scorch with very high heat.

Materials

Two 87-Yard Skeins of Lion Brand Yarns Wool-Ease Thick and Quick, Hudson Bay (or your preferred color). Alternatively, divide one 87-yard skein into two matching balls, ensuring the yarn colors will line up when knit with two strands held together.

  • One potholder uses about 87 yards (5 oz.)

US No. 17 / 12 mm knitting needle

No. 17 (12MM) 32-inch circular needles or 14-inch straight needles (or size needed to obtain gauge)

Measuring tape

Tapestry needle

Gauge

7 stitches and 11 rows in stockinette = 4 inches

Abbreviations

k = Knit.

Instructions: Cherry Candy Cane Potholder

(10 inch x 10 inch square)

Knit with 2 strands held together. Using two skeins from the same dye lot, line up the colors from the two balls so that the colors match when held together.

Row 1: Cast on 20.

Rows 2 through 34: k 20. (20 stitches)

Row 35: Bind off.

Print the Free Cherry Candy Cane Potholder Knitting Pattern

Printable version of this free knitting pattern

Printable Cherry Candy Cane Potholder pattern PDF by Liz @PurlsAndPixels

More Holiday Craft Ideas

Love DIY Christmas and holiday projects? Find more handmade holiday craft ideas at my Holiday Pattern Roundup Post.

Merry Christmas & Happy Holidays!

Free easy beginner knitting pattern, cherry candy cane potholder for Christmas or holiday parties, pattern from Liz @PurlsAndPixels

©2017, Liz Chandler of PurlsAndPixels.

This pattern is for personal use, gifting, and charitable donation of completed items. You may also sell items made using this pattern. Do not copy this pattern and distribute it. If you’d like to share the pattern, refer your friends to my website, purlsandpixels.com, so they may obtain a copy.

If you find any errors or have any questions, email purlsandpixels@gmail.com and I will do my best to help.

I’d love to see your finished work! Tag your photos with @PurlsAndPixels on Twitter or Instagram.

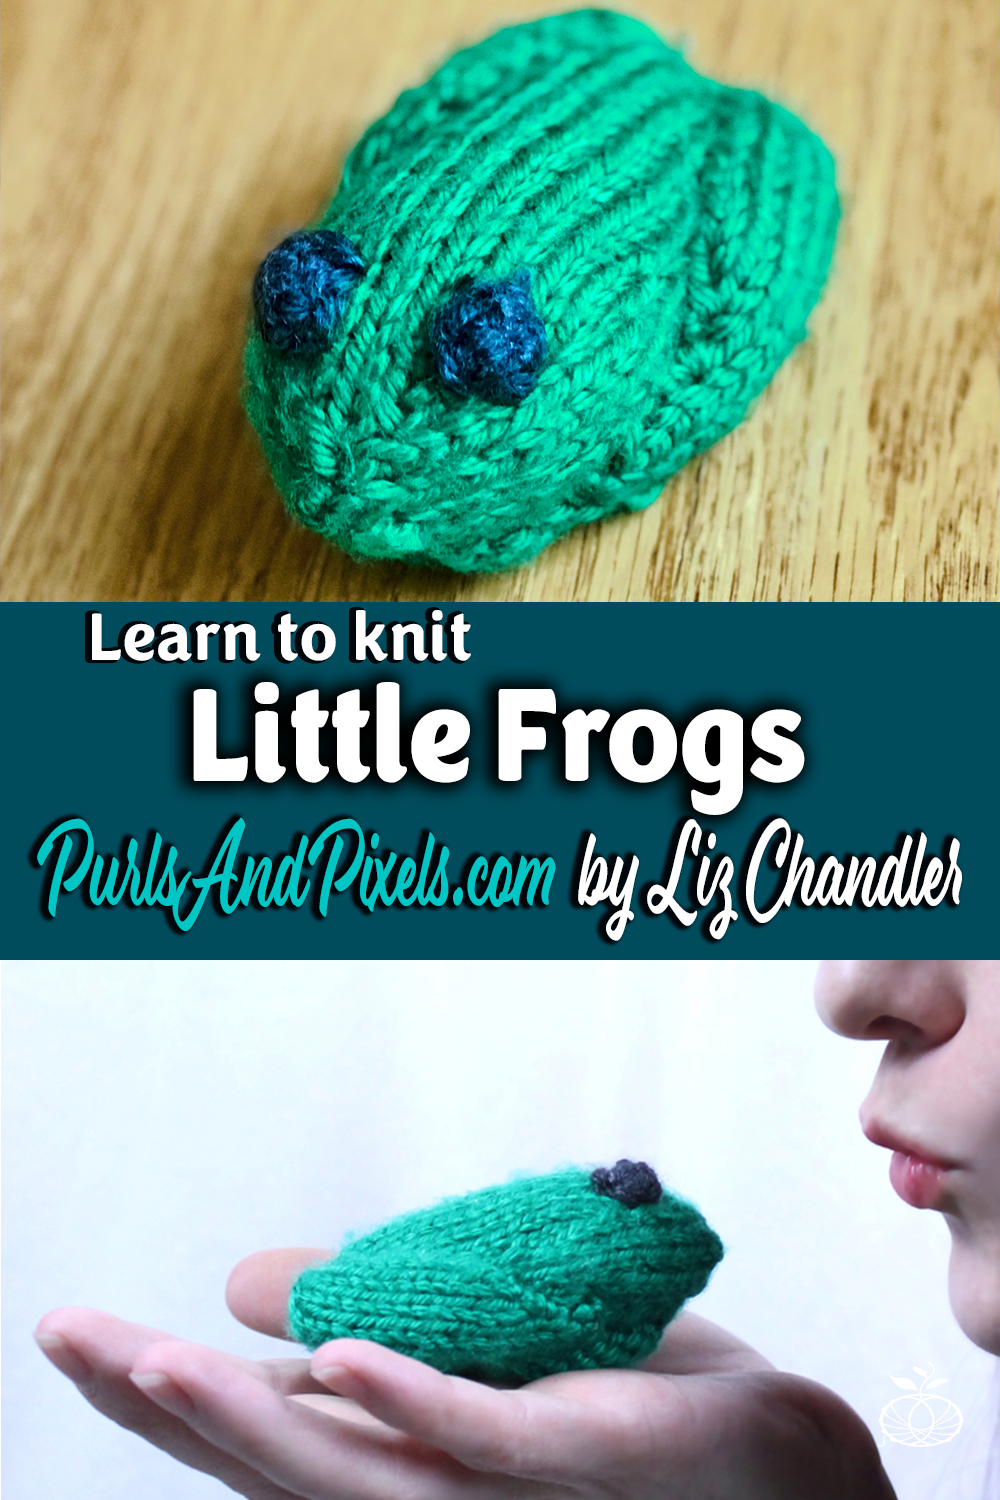
Little Frog Free Knitting Pattern

Little frog knitting pattern, free from Liz Chandler @PurlsAndPixels

Little Frog Knitting Pattern

A Free Knitting Pattern from Liz @PurlsAndPixels

Little frog knitting pattern, free from Liz Chandler @PurlsAndPixels

Knit this little frog for your favorite person. This little knitted toy is a great project for left over yarn, using only about 20 yards.

How this Little Knit Frog is Made

This little frog is knit in three main pieces. You’ll make his body first, then make and sew his legs on. I have included instructions for crochet eyes, but you can also substitute small buttons for eyes. I chose Caron Simply Soft in Kelly Green to make this guy, but try him in your favorite worsted weight yarn and color.

Materials

Little frog knitting pattern, free from Liz Chandler @PurlsAndPixels

Abbreviations

Little knit frog toy, free knitting pattern from @PurlsAndPixels

  • k = Knit.
  • p = Purl.
  • ** = Repeat the pattern between the asterisks.
  • make 1 = Pick up the strand between the stitch just worked and the next stitch from front to back with the left needle and knit into the back of it.
  • k2tog = Knit two together.
  • ssk = Slip, slip, knit. [Slip two stitches as if to knit. Insert left needle from left to right into the fronts of the two slipped stitches. Pull working yarn through both stitches with right needle to knit together.]
  • sl1pwyif = Slip one stitch purlwise with yarn in front.
  • sl1kwyib = Slip one stitch knitwise with yarn in back.
  • sc = single crochet

Gauge

20 stitches and 28 rows in stockinette = 4 inches on No. 5/3.75 MM needles

Instructions: Little Knit Frog

(measures approximately 3” x 2”)

 Frog Body

(Knit in the round with Color 1. Use stitch marker to keep track of the beginning/ends of your rows by placing it in the first stitch of each row/round.)

Row 1: Provisionally cast on 8. Join round.

Row 2: k 8 (8 stitches).

Row 3: k 8 (8 stitches).

Row 4: k1, make 1, k2, make 1, k2, make 1, k 2, make 1, k1 (12 stitches).

Row 5: k 12 (12 stitches).

Row 6: k1, make 1, k4, make 1, k2, make 1, k 4, make 1, k1 (16 stitches).

Row 7: k 16 (16 stitches).

Row 8: k1, make 1, k6, make 1, k2, make 1, k 6, make 1, k1 (20 stitches).

Rows 9 thru 16: k 20 (20 stitches).

Row 17: k1, make 1, k8, make 1, k2, make 1, k 8, make 1, k1 (24 stitches).

Row 18: k 24 (24 stitches).

Row 19: k1, make 1, k10, make 1, k2, make 1, k 10, make 1, k1 (28 stitches).

Row 20: k 28 (28 stitches).

Row 21: k1, ssk, k8, k2tog, k2, ssk, k8, k2tog, k1 (24 stitches).

Row 22: k24 (24 stitches).

Row 23: k1, ssk, k6, k2tog, k2, ssk, k6, k2tog, k1 (20 stitches).

Row 24: k20 (20 stitches).

Row 25: k1, ssk, k4, k2tog, k2, ssk, k4, k2tog, k1 (16 stitches).

Row 26: k16 (16 stitches).

Row 27: k1, ssk, k2, k2tog, k2, ssk, k2, k2tog, k1 (12 stitches).

Row 28: k12 (12 stitches).

Row 29: ssk, k2tog, ssk, k2tog (4 stitches).

Cut yarn leaving 12-inch tail and bind off with Kitchener’s stitch.

Stuff the frog body with a small bit of Polyfill, but don’t overstuff.

Move the stitches from your provisional cast on to knitting needles, and close the frog with Kitchener’s stitch. Weave in loose ends.

Frog Back Legs

(Knit flat with Color 1, turning after each row. Make 2.)

Row 1: Cast on 11 stitches. Turn.

Row 2: sl1pwyif, p10 (11 stitches).

Row 3: sl1kwyib, k10 (11 stitches).

Row 4: sl1pwyif, p10 (11 stitches).

Row 5: sl1kwyib, make 1, k9, make 1, k1 (13 stitches).

Row 6: sl1pwyif, p12 (13 stitches).

Row 7: sl1kwyib, k12 (13 stitches).

Row 8: sl1pwyif, p 12 (13 stitches).

Row 9: sl1kwyib, ssk, k7, k2tog, k1 (11 stitches).

Row 10: sl1pwyif, p10 (11 stitches).

Row 11: sl1kwyib, ssk, k5, k2tog, k1 (9 stitches).

Row 12: sl1pwyif, p8 (9 stitches).

Row 13: sl1kwyib, ssk, k3, k2tog, k1 (7 stitches).

Row 14: sl1pwyif, p2tog, k1, p2tog, k1 (5 stitches).

Row 15: sl1kwyib, k4 (5 stitches).

Row 16: sl1pwyif, p4 (5 stitches).

Row 17: Bind off.Little frog knitting pattern, frog legs

Cut yarn, leaving a 12-inch tail and pull through.

Allow the legs to curl up into themselves a bit, as they naturally will. Sew both legs to the narrow end of the frog, leaving some of the curled edges inside.

Frog Front Legs

(Knit flat with Color 1, turning after each row. Make 1.)

Row 1: Cast on 14 stitches. Turn.

Row 2: sl1pwyif, p13 (14 stitches).

Row 3: sl1kwyib, k13 (14 stitches).

Row 4: sl1pwyif, p13 (14 stitches).

Row 5: Bind off in knit stitch pattern.Little frog knitting pattern, feet

Cut yarn, leaving a 12-inch tail, and pull through. Allow the fabric to curl long-ways, with the purl-side facing out. With darning needle, sew to body in a “v” shape, with the point of the “v” ending under the frog’s “chin.” Sew one tight stitch across the middle point (the bottom of the “v”) to make the front feet appear separate. Weave in loose ends.

Frog Eyes

(Crochet with Color 2. Make 2.)

Row 1: Chain 2.

Row 2: sc4 into 1st chain.

How to crochet small round circles, step 1

How to crochet small round circles, step 2
Pull yarn tail to tighten center of circle.

How to crochet small round circles, step 3
Cut yarn, leaving an 8-inch tail, and pull through.

How to crochet small round circles, step 4
With darning needle, sew tail trough the legs of the first sc stitch.

How to crochet small round circles, step 5
Next, bring tail down and between the legs of the last sc stitch.

How to crochet small round circles, step 6
This will create a smooth finished circle.

Little knit frog pattern by Liz @PurlsAndPixels
Sew frog eyes (or buttons) to frog’s face, on top of its head. Weave in loose ends.

Print the Free Little Knit Frog Pattern

Printable version of this free knitting pattern

Printable little frog knitting pattern PDF by Liz @PurlsAndPixels

Little frog knitting pattern, free from Liz Chandler @PurlsAndPixels

©2017, Liz Chandler of PurlsAndPixels. This pattern is for personal use, gifting, and charitable donation of completed items. You may also sell items made using this pattern. Do not copy and sell the pattern or use it for any commercial purpose. Thank you!

Find this on Ravelry to save for later.

I’d love to see how he turns out! Share your little knit frog pictures by tagging @PurlsAndPixels on Twitter and Instagram.

Lucky Clover Cozy Free Knitting Pattern

Lucky clover coffee cozy St. Patrick's Day free knitting pattern ,design from Liz @PurlsAndPixels

Lucky Clover Cozy

A Free Knitting Pattern from Liz @PurlsAndPixels

Lucky clover coffee cozy St. Patrick's Day free knitting pattern ,design from Liz @PurlsAndPixels

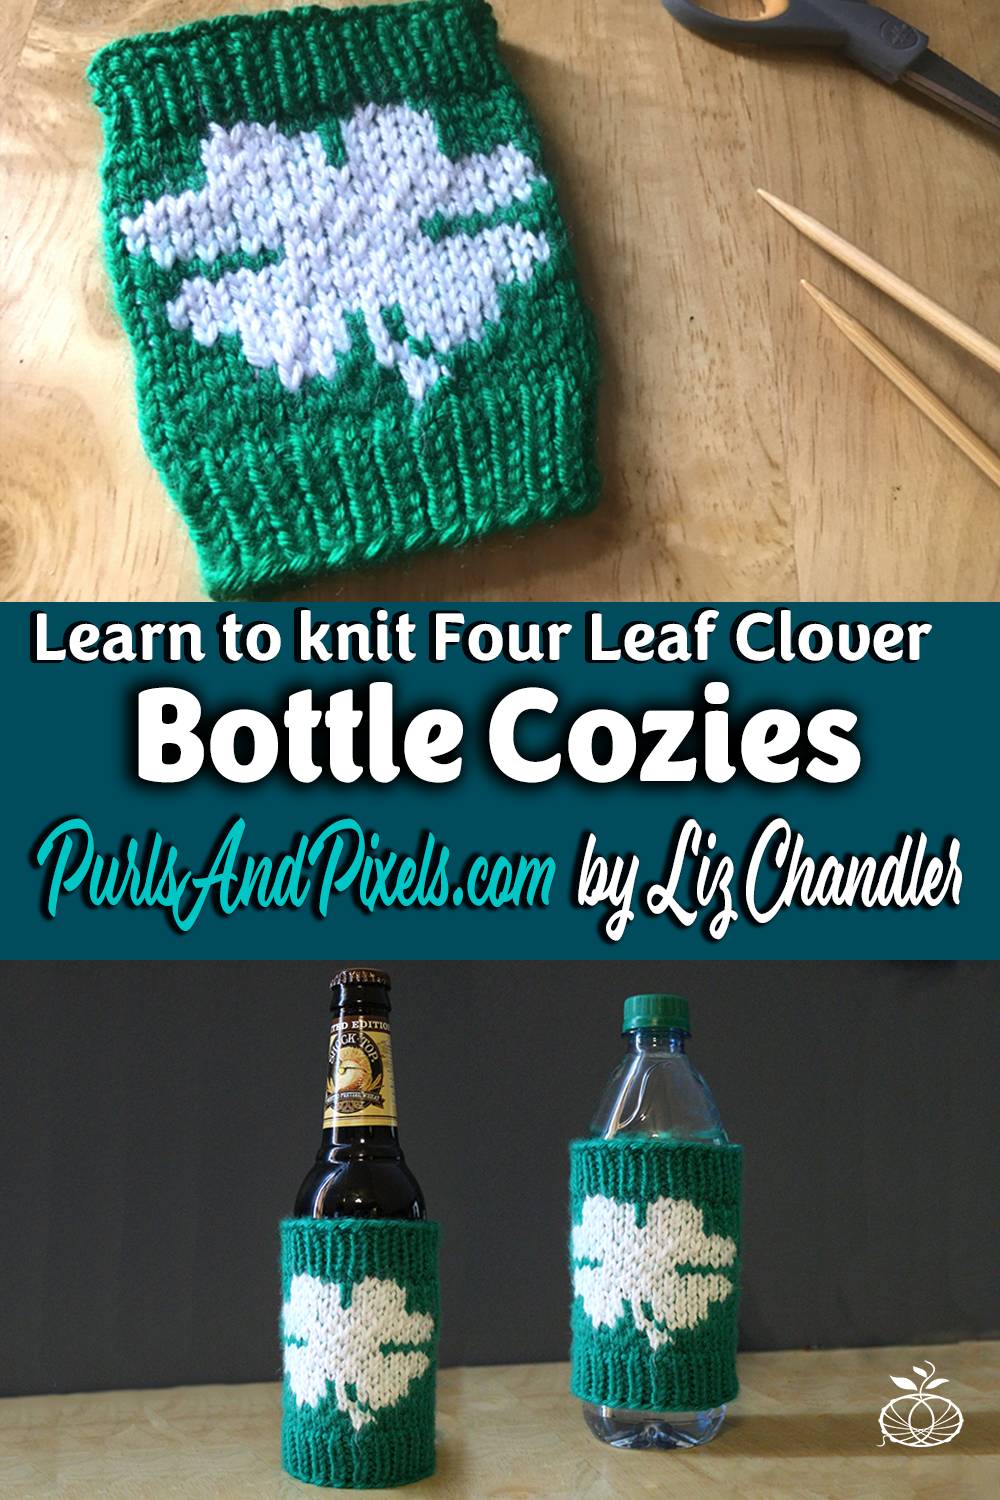
Knit an adorable sweater for your favorite bottle or coffee cup. This little green knit coffee cozy has a big white shamrock on each side. Knit your own bottle cozy or coffee cozy from my free patterns and charts here.

How this Coffee Cozy is Made

Lucky clover beer bottle cozy, free knitting pattern for St. Patrick's day designed by Liz @PurlsAndPixelsHere you will find two separate, but similar knitting patterns. One pattern is for a lucky clover beer and bottle cozy. The other knitting pattern shows you how to make a lucky clover coffee cozy. The coffee cozy is four rows wider, so it should fit most tall, handle-less coffee cups. The bottle cozy will fit most 16-20 ounce bottles of beer, water, soda, or even baby bottles.

These adorable cozies are made with two basic stitch patterns, that are knit in the round: the knit, purl rib, and the stockinette stitch. The four leaf clover pattern is knit into the cozy using a fair isle technique and carrying the two colors along together as you work.

This cozy is a quick project that is perfect for scrap yarn that has been left over from another project. You only need between .6 and .8 ounces or 19 -21 yards of yarn to make this minimalist coffee cozy. If you need help figuring out how much scrap yarn you have left, my post on yarn math might be useful.

I used Caron Simply Soft yarn to design the pattern, which is a basic, acrylic, worsted-weight yarn. Try any solid color you like, or mix it up with a variegated or patterned yarn. You can substitute almost any worsted weight yarn in almost any material, like sheep’s wool, alpaca, cotton or even a silk-blend for this project.

MaterialsLucky shamrock coffee cozy St. Patrick's Day free knitting pattern ,design from Liz @PurlsAndPixels

Abbreviations

k = Knit.

p = Purl.

** = Repeat the pattern between the asterisks.

Gauge

20 stitches and 28 rows in stockinette = 4 inches on No. 5/3.75 MM needles

Lucky four leaf clover coffee cozy St. Patrick's Day free knitting pattern ,design from Liz @PurlsAndPixelsInstructions: Lucky Coffee Cozy

(4.5 inches tall and fits cups 9-11 around)

Knit in the round. Use stitch marker to keep track of the beginning/ends of your rows by placing it in the first stitch of each row/round.

[Using no. 3 DPNs] In Green, Row 1: Cast on 50 stitches. Divide onto 3 DPNs. Join, taking care not to twist stitches. *k 1, p 1* x 25 (50 stitches).

Rows 2 thru 7: *k 1, p 1* x 25 (50 stitches).

Free four leaf clover shamrock coffee cozy knitting chart and pattern from Liz @PurlsAndPixels

[Switch to no. 5 DPNs] Start applying the knitting chart, switching between green and white yarn. Begin at the bottom right corner and work to the left, while knitting in this pattern: Rows 8 thru 28: k 50 (50 stitches).

[Switch to no. 3 DPNs] Rows 29 thru 35: *k 1, p 1* x 25 (50 stitches).

[Switch to no. 5 DPNs] Row 36: Bind off.

Weave in ends. Block if desired.

Printable version of this free knitting pattern

Printable lucky clover coffee cozy knitting pattern and chart PDF by Liz @PurlsAndPixels

Lucky clover bottle cozy, free knitting pattern for St. Patrick's day designed by Liz @PurlsAndPixelsInstructions: Lucky Bottle Cozy

(4.5 inches tall and fits bottles 7-8 inches around)

Knit in the round. Use stitch marker to keep track of the beginning/ends of your rows by placing it in the first stitch of each row/round.

[Using no. 3 DPNs] In Green, Row 1: Cast on 50 stitches. Divide onto 3 DPNs. Join, taking care not to twist stitches. *k 1, p 1* x 23 (46 stitches).

Rows 2 thru 7: *k 1, p 1* x 23 (46 stitches).

Free four leaf clover bottle cozy shamrock knitting chart and pattern from Liz @PurlsAndPixels

[Switch to no. 5 DPNs] Start applying the knitting chart, switching between green and white yarn. Begin at the bottom right corner and work to the left, while knitting in this pattern: Rows 8 thru 28: k 46 (46 stitches).

[Switch to no. 3 DPNs] Rows 29 thru 35: *k 1, p 1* x 23 (46 stitches).

[Switch to no. 5 DPNs] Row 36: Bind off.

Weave in ends. Block if desired.

Printable version of this free knitting pattern

Printable lucky clover bottle cozy knitting pattern and chart PDF by Liz @PurlsAndPixels

Size Notes

These are one-size-fits-most patterns.

The coffee cozy should fit most hot and hold coffee cups that don’t have handles. The bottle cozy should fit most 16 to 20 ounce bottles.

Care

Hand-wash cold separately and lay-flat to dry.

Lucky clover beer bottle cozy, free knitting pattern for St. Patrick's day designed by Liz @PurlsAndPixels

©2017, Liz Chandler of PurlsAndPixels.

This pattern is for personal use, gifting, and charitable donation of completed items. You may also sell handmade items created using this pattern. Do not copy this pattern and distribute it. If you’d like to share the pattern, refer your friends to my website, purlsandpixels.com so they may obtain a copy.

If you find any errors or have any questions, email purlsandpixels@gmail.com and I will do my best to help.

I’d love to see your finished work! Tag your photos with @PurlsAndPixels on Twitter or Instagram.

Rice Stitch Baby Blanket Free Knitting Pattern

Free Rice Stitch Baby Blanket Knitting Pattern by Liz Chandler @PurlsAndPixels.

Rice Stitch Baby Blanket

A Free Knitting Pattern from Liz @PurlsAndPixels

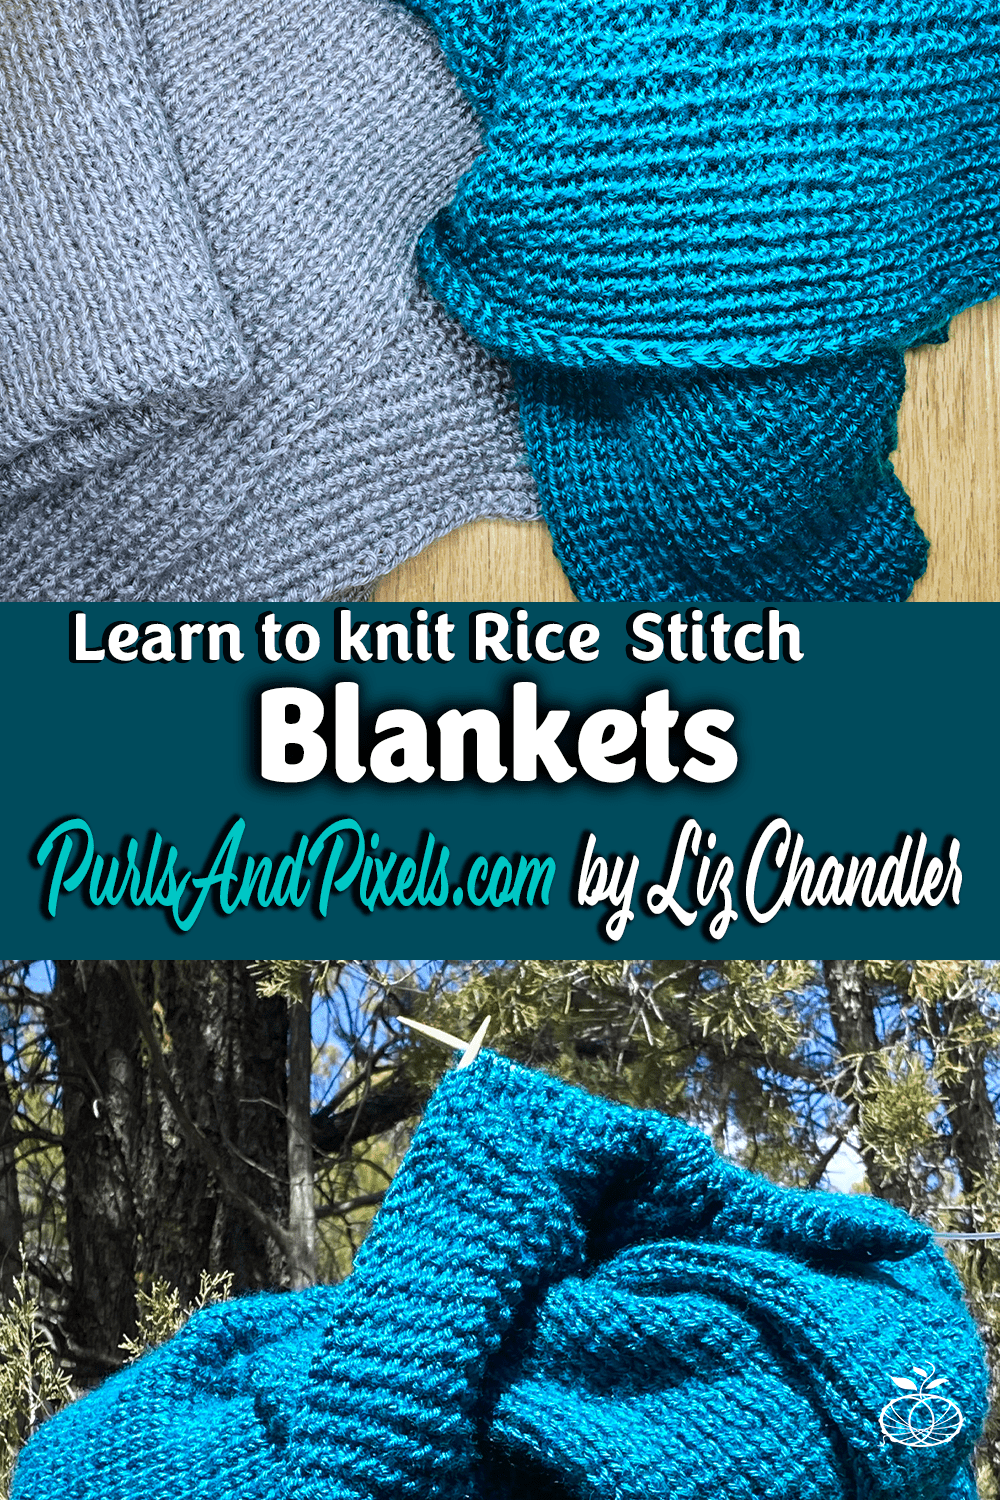
This rice stitch baby blanket is a great way to practice your knitting and purling skills. The rice stitch makes a fabric with two lovely textures on either side. This will make a soft and cuddly blanket that would make an excellent baby shower gift. It is also a great way for a new or expecting mother just learning to make something for her little one. Make this with a solid color yarn for a classic minimalist heirloom blanket. Or you can spice it up with a variegated version of worsted weight yarn like Simply Soft Paints.

How this Simple Baby Blanket is Made

Below, I will give you instructions for making the same blanket in two ways. Beginners can make this blanket with the Broken Rib Stitch, since it is all knits and purls. You can also knit it in rice stitch, to help you learn how to knit through the back loop. This can be good practice; as you “ktbl” and twist stitches intentionally, you will learn to spot twisted stitches more easily. This will help you spot mistakes in your other projects.

As you can see, the Rice Stitch has slightly more twist in the fabric. It also tends to curl a tiny bit less than the Broken Rib Stitch, but not noticeably. Either pattern you follow will result in the nearly the exact same blanket, so choose what is best for you.

Neaten knitted edges with slipped stitches

To neaten the edges of the blanket, you’ll slip the first stitch off your needle as if to purl, without actually working the stitch. On the knit rows, you’ll hold your yarn in back of your work when you do this. I’ll abbreviate this as “sl1pwyib.” On the purl rows, you will hold the yarn in the front of your work when you slip the first stitch; this will be abbreviated “sl1pwyif.” You can find a full tutorial (with a video), which shows you how to neaten your edges with slipped stitches at this link.

The most difficult part of making this baby blanket is keeping tack of the pattern. It can be easy to accidentally knit two stitches and lose your pattern in the knit, purl rows. Make sure you watch your stitch rows and columns and compare them with the pictures to make sure your pattern is developing properly. If you spot a knitting mistake, you can go back and fix it if you need to.

Free knitting lessons, learn to knit online with Liz @PurlsAndPixels

Materials

AbbreviationsFree baby blanket knitting pattern from Liz @PurlsAndPixels

Gauge

18 stitches and 24 rows in stockinette stitch = 4 inches by 4 inches square

Instructions: Rice Stitch Baby Blanket

(40 inches x 40 inches)

Row 1: Cast on 163 stitches. Turn.

Row 2: sl1pwyif, *k1tbl, p* x 81 (163stitches). Turn.

Row 3: sl1pwyib, k 162 (163 stitches). Turn.

Repeat Rows 2 & 3 x 119 (240 rows total).

Row 241: Bind off with the same tension as the rest of the piece (do not bind of loosely like most other patterns call for). Cut yarn leaving an 8-inch tail and pull through.

Weave in ends.

Instructions: Broken Rib Stitch Baby Blanket

(40 inches x 40 inches)

Row 1: Cast on 163 stitches. Turn.

Row 2: sl1pwyif, *k, p* x 81 (163 stitches). Turn.

Row 3: sl1pwyib, k 162 (163 stitches). Turn.

Repeat Rows 2 & 3 x 119 (240 rows total).

Row 241: Bind off with the same tension as the rest of the piece (do not bind of loosely like most other patterns call for). Cut yarn leaving an 8-inch tail and pull through.

Weave in ends.

Printable version of this free knitting pattern

Printable rice stitch baby blanket knitting pattern PDF by Liz @PurlsAndPixels


Size Notes

This blanket will be a 40-inch by 40-inch square.

Care

If you use the materials called for in the pattern, your final product will be machine washable. To keep your baby blanket looking its best, hand wash or machine wash separately on delicate cycle in cold water. You may tumble dry on low heat or lay flat to dry.

Tip:

Keep this away from Velcro! Yarn and Velcro are never friends. Your blanket will absolutely snag if you lay it on a Velcro jacket or a toy with a Velcro seam. Other than that, these little blankets last for years if you make sure to wash them gently.

Free baby blanket knitting pattern, Rice stitch blanket from PurlsAndPixels

©2017, Liz Chandler of PurlsAndPixels. Revised 2018.

This pattern is for personal use, gifting, and charitable donation of completed items. You may also sell handmade items created using this pattern. Do not copy this pattern and distribute it. If you’d like to share the pattern, refer your friends to my website, purlsandpixels.com so they may obtain a copy.

If you find any errors or have any questions, email purlsandpixels@gmail.com and I will do my best to help.

I’d love to see your finished work! Tag your photos with @PurlsAndPixels on Twitter or Instagram.

Seed Stitch Washcloth Free Knitting Pattern

Seed Stitch Washcloth

Seed Stitch Washcloth a free knitting pattern from Liz Chandler @PurlsAndPixels.
A Free Knitting Pattern from Liz @PurlsAndPixels

This easy and quick seed stitch washcloth knitting pattern lets you learn the seed stitch. Plus, using these handmade washcloths feels so much better than store bought cloths. The 100% cotton yarn makes them both absorbent and exfoliating. A bundle of these in pretty colors might make a nice baby shower gift or housewarming present.

How this Seed Stitch Washcloth is Made

The seed stitch is a very simple knitting pattern that can be easily made by alternating knit and purl stitches in the pattern below.

Materials

Knitting Needles
Long Circular Needles
36-inch (91 cm) long US No. 7 (4.5 mm) circular needle (or size needed to obtain gauge)

Or Straight Needles
9-inch (23 cm) long US No. 7 (4.5 mm) straight needles (or size needed to obtain gauge)

Yarn
One 95-yard (2 ounce) skein of cotton worsted weight yarn* (shown in Lily Sugar ‘n Cream 100% Cotton Yarn), in your choice of color.
– one washcloth uses about 71.25 yards (1.5 oz.)

*Shown in Lily Sugar ‘n Cream 100% Cotton Yarn in “Robins Egg” and “White” (#AffiliateLinks). Weights estimated with Lily Sugar n’ Cream yarn; other yarn weights may vary. Weight does not include gauge swatch. A 4×4 inch gauge swatch with a 2 row by 3 stitch border uses an additional 19 yards (0.4 oz.).

Tools: A measuring tape and a darning needle.

Abbreviations

  • k = knit
  • p = purl
  • ** = repeat the pattern between the asterisks

GaugeSeed stitch knit washcloth, free knitting pattern by PurlsAndPixels

19 stitches x 26 rows = 4 x 4 inches in stockinette stitch on No. 7 (4.5 mm) needles. (Learn how to check your gauge here.)

Instructions

(8 inches x 8 inches after washing in cold water; 8.5 inches x 9.25 inches before washing)

Use the long-tail cast on method. Knit flat, turning after each row.

Row 1: Cast on 40 stitches. Turn.

Row 2: *k, p* x 20. (40 stitches) Turn.

Row 3: *p, k* x 20. (40 stitches) Turn.

Rows 4 – 73: Repeat rows 2 and 3.

Row 74: Bind off loosely in the pattern of Row 2. Cut yarn, leaving an 8-inch tail, and pull through. Weave in ends.

In cold water, hand wash or machine wash on delicate. Block while still wet, ensuring cloths are roughly 8 inches square, then allow to air dry.

Seed stitch knit washcloth, free knitting pattern by PurlsAndPixels

Size Notes

This washcloth will be an 8-inch by 8-inch square.

Care

If you use the materials called for in the pattern, your final product will be machine washable. To keep your seed stitch washcloth looking its best, hand wash or machine wash separately on delicate cycle in cold water. You may tumble dry on low heat.

More Washcloth Patterns

If you like this free sample pattern, you may also like my Simple Washcloth Collection. It includes:

  • this pattern (a seed stitch washcloth),
  • a seed stitch face scrubby,
  • a full-size garter stitch washcloth,
  • a garter stitch face scrubby,
  • a stockinette stitch washcloth, &
  • a stockinette stitch face scrubby.
Simple Washcloth Knitting Pattern Collection from Liz @PurlsAndPixels

Old Version

This pattern was revised in 2021. If you prefer the original version you can find it here: The original (2016) version of this Seed Stitch Washcloth Free Knitting Pattern.

Seed Stitch Washcloth, Free knitting pattern for beginners using 100% cotton yarn, from Liz @PurlsAndPixels

©2016, Liz Chandler of PurlsAndPixels. Revised 2021.

This pattern is for personal use, gifting, and charitable donation of completed items. You may also sell handmade items created using this pattern. Do not copy this pattern and distribute it. If you’d like to share the pattern, refer your friends to my website, purlsandpixels.com so they may obtain a copy.

If you find any errors or have any questions, email purlsandpixels@gmail.com and I will do my best to help.

I’d love to see your finished work! Tag your photos with @PurlsAndPixels on Twitter or Instagram.