The Calm Before the Snowstorm: Preparing in Colorado’s Fickle Weather

Learn how I snowstorm prep in Colorado. Homesteading with Liz Chandler @PurlsAndPixels

Snowstorm Prep in Southwest Colorado

by Liz Chandler

Ah, the weather in Colorado – as changeable as a toddler’s mood swings. We all know that fleeting moment of warmth just before a snowstorm hits. It’s like nature’s way of saying, “Here’s a quick taste of spring before I dump more snow on you!” In that brief respite, it’s time to get your game face on and snowstorm prep.

Preparing for the Incoming Snowstorm

The Calm Before the Snowstorm: Preparing in Colorado's Fickle Weather by Liz Chandler

Picture this: The sun’s out, the snow’s melting, and I’m doing a mad dash around the yard. Garden tools left out? Check. Animals comfy in their shelters? Check. Buildings ready to face the snowy wrath? Check, check, check. Because in Colorado, you’ve got to seize the moment!

Animals and Outbuildings

Sure you can refill the chicken feed tomorrow. They’ve got a little left. But do you really want to hike out there in a foot of snow? I sure don’t, so I make sure to top off the hens’ feeders and waterers when it is warm and beautiful. The girls are happy, I’m happy. It is a win-win!

Colorado snowstorm prep tip: refill the chicken feeders on the warm day before most storms.

Tools, Hoses, and Toys

Colorado snowstorm prep tip: make sure your snowplow and other equipment are in working order and accessible.

An essential tip for preparing for Colorado snowstorms is to meticulously check and ensure the functionality of your snowplow and other winter equipment. Confirm that the snowplow is in optimal working condition, with all components thoroughly inspected and any necessary repairs addressed. Additionally, it is crucial to guarantee that the equipment is easily accessible when the need arises. A well-maintained and readily available snowplow can significantly streamline the process of clearing driveways and pathways, contributing to a more efficient and stress-free response to the winter weather challenges that often grace the Colorado landscape.

Colorado snow prep tip: put the wheel barrow and other garden tools away before it snows.

Another crucial tip for preparing for Colorado snowstorms involves taking advantage of the fleeting warm days: make it a priority to pick up outdoor toys and tools. These items left scattered in the yard may soon find themselves buried under a blanket of snow, complicating cleanup and potentially causing damage.

Get your tools orgainized for winter before the first storm hits. Keep them organized by upcycling an old pallet. Find the DIY from Liz Chandler @PurlsAndPixels.

If your weather has been warm enough to use the garden hoses, it’s time to unhook them from the house and outdoor faucets. Leaving water hoses connected in freezing temperatures can cause the hoses or, worse, the pipes in your house to freeze and burst from the expanding water turning ice.

By seizing the opportunity to tidy up during those brief spells of milder weather, you ensure a smoother transition into the snowy days ahead, saving both time and effort in the long run.

Colorado snowstorm prep tip: pick up toys and tools on warm days or they'll get buried in the snow.

Finish Shoveling

Colorado Snowstorm prep tip: Finish shoveling icy spots as soon as they thaw or you'll get more snow on top and they will be stuck all winter.

Alright, fellow winter warriors, here’s a snow survival nugget: treat icy spots like ninja snow – quick and sneaky! The game plan? Finish shoveling those frosty troublemakers as soon as they thaw. Why, you ask? Well, let’s just say we want to avoid a winter-long staring contest with stubborn ice patches. If you procrastinate, they might just call in more snow reinforcements and set up camp for the entire season. So, grab your shovel, channel your inner snow superhero, and let’s keep our winter pathways drama-free and slip-proof!

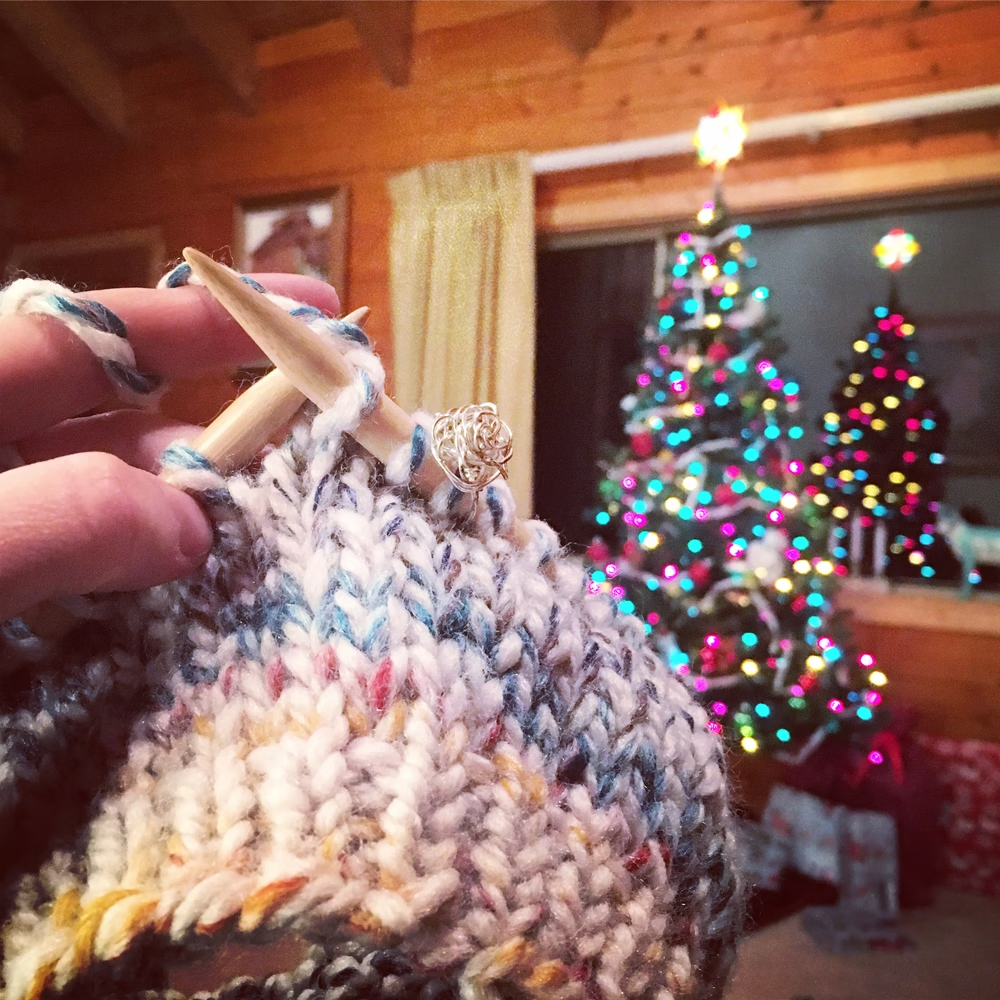
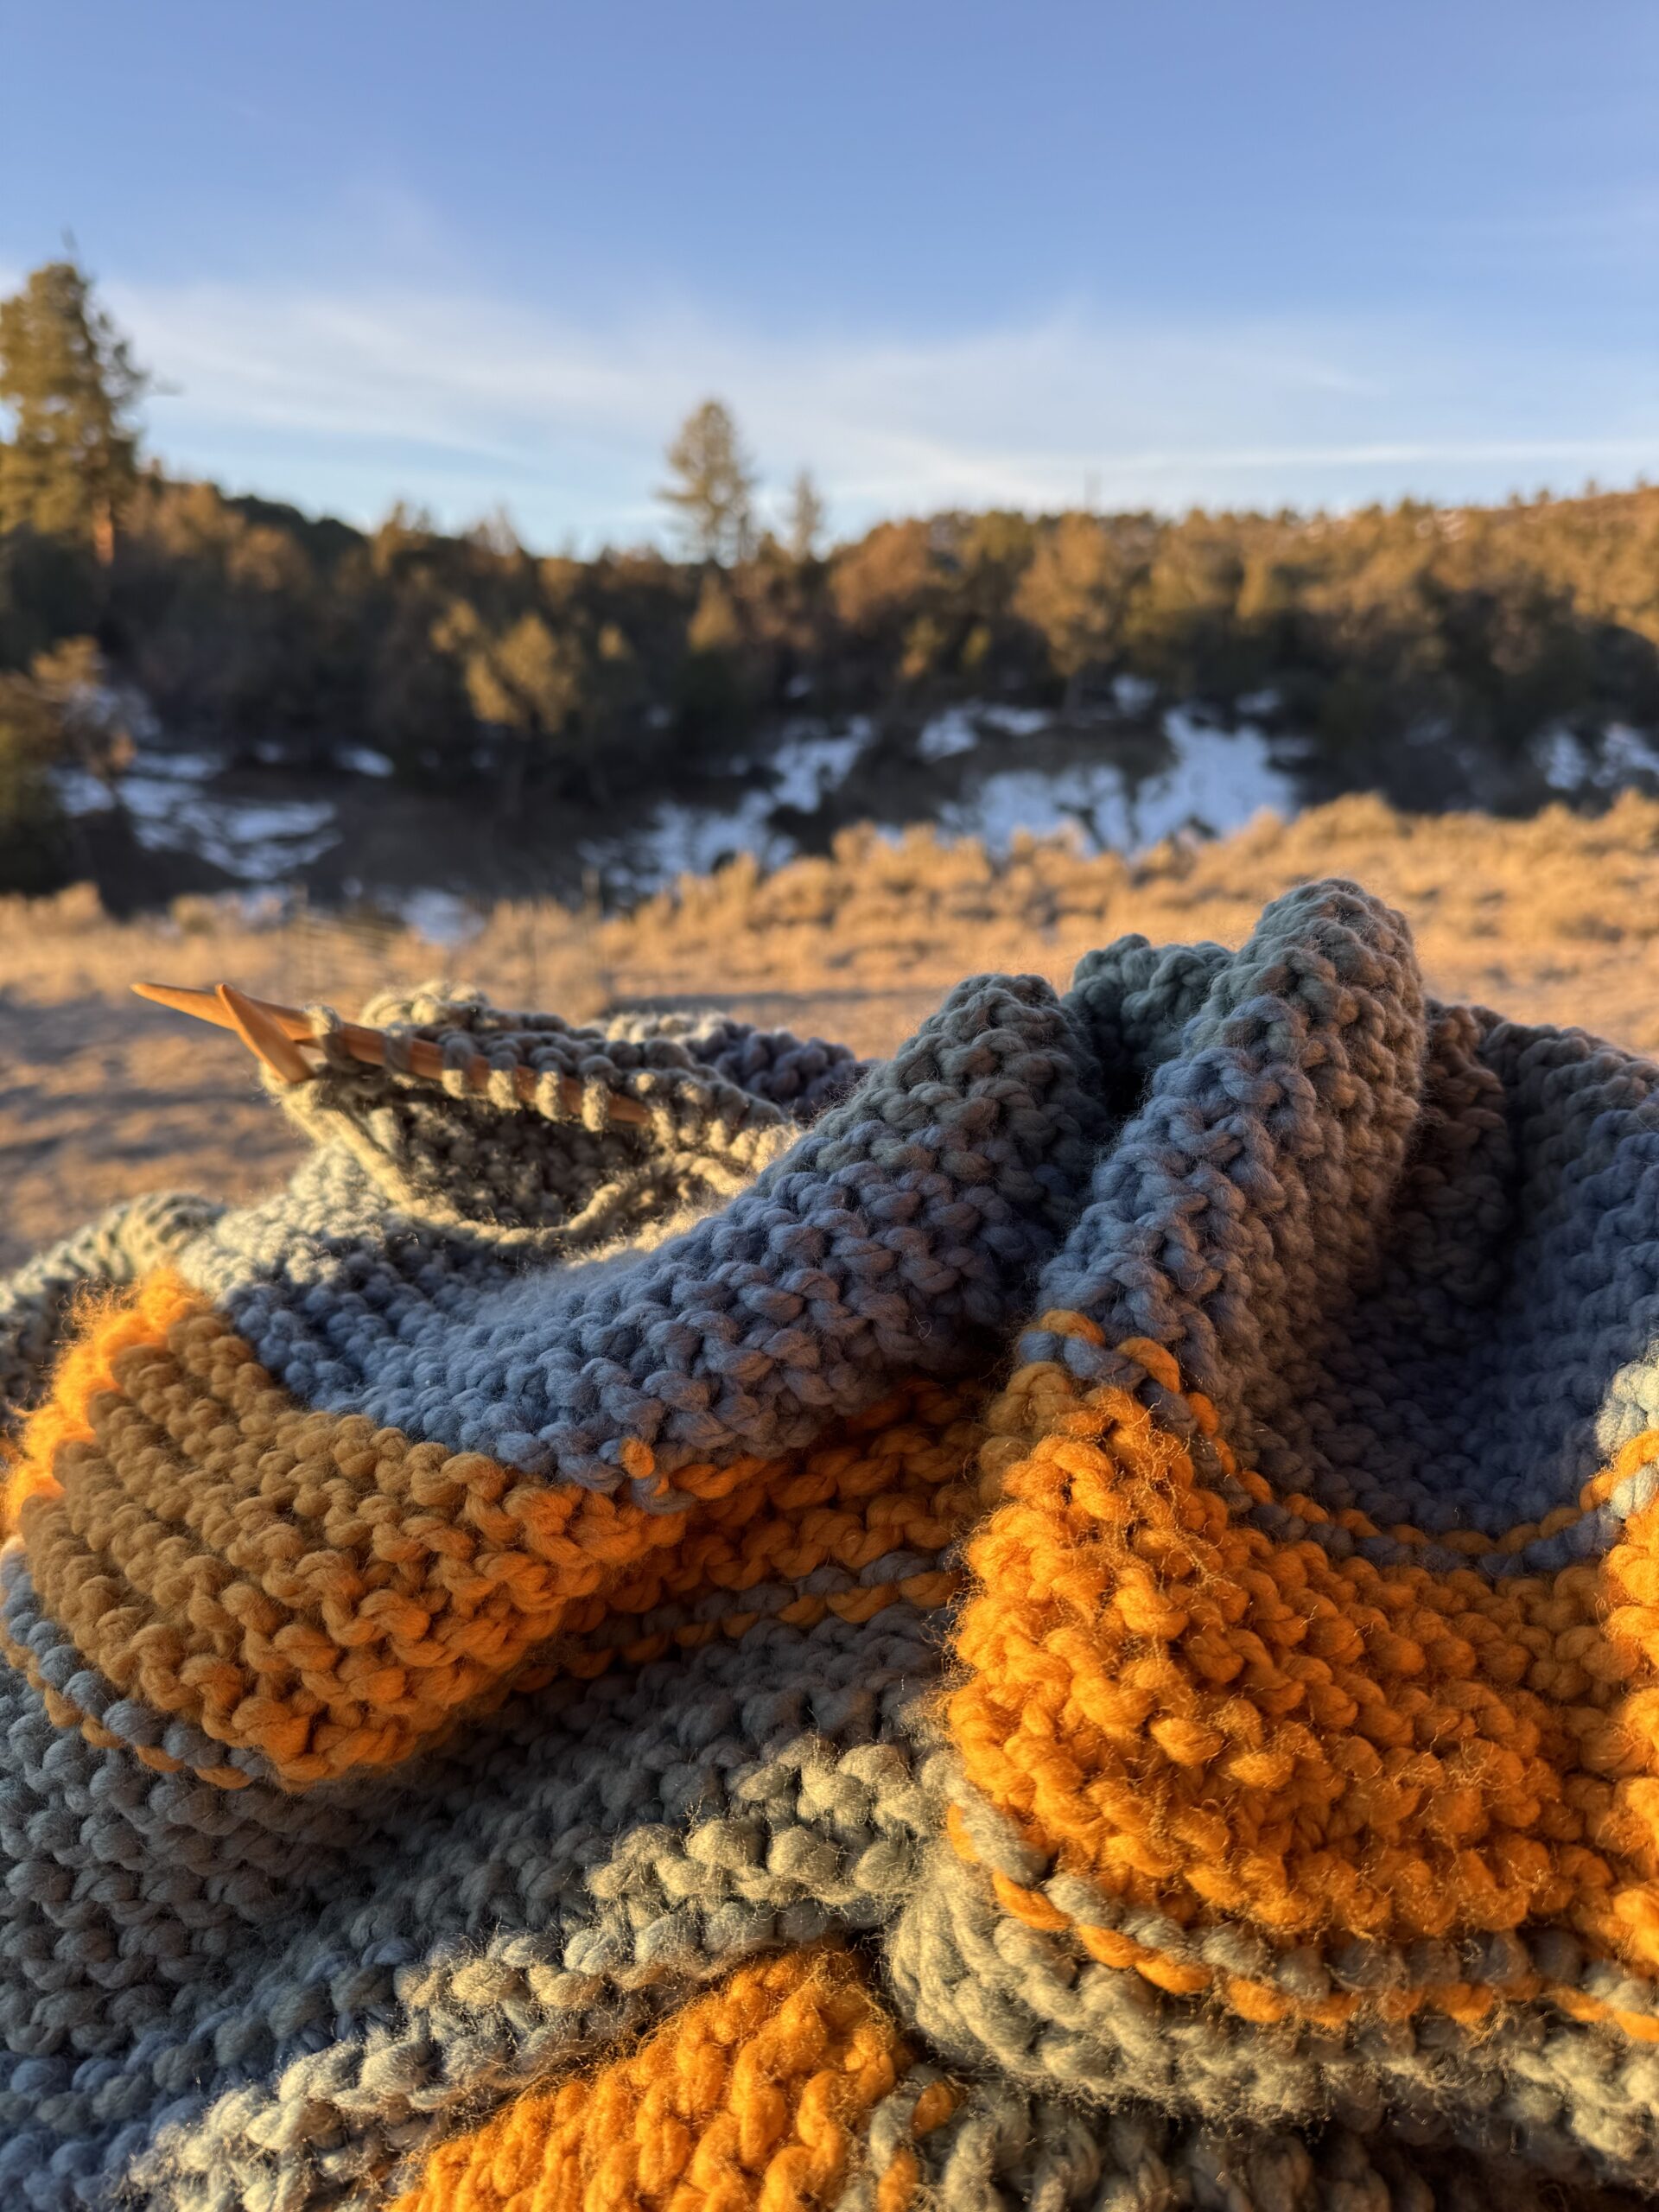
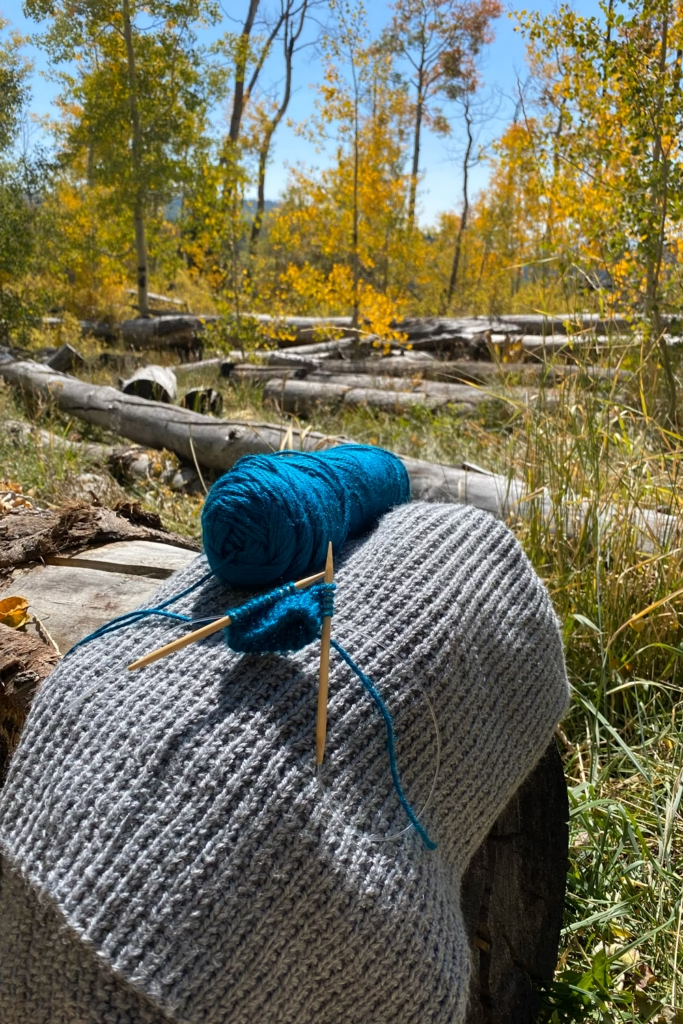
Embracing Indoor Activities: Knitting During Snowstorms

Knitting Journal: Winter Wonderland by Liz Chandler @PurlsAndPixels.

As soon as the snowflakes commence their enchanting dance, it’s officially knitting o’clock! Believe me, it’s the ideal way to embrace the storm. The needles go clickety-clack, and in the blink of an eye, I transform into a crafting maestro in the midst of a winter wonderland.

Saluting the Quirks of Colorado Weather

Ah, Colorado – where the weather keeps us on our toes! That last sunny hurrah before a snowstorm? It’s our reminder to prep smart and savor every twist and turn. So, here’s to our ever-surprising skies and the quirky rituals that make our snowy days a tad cozier.

Hey, how do you snowstorm prep in Colorado’s yo-yo weather? Share your tips for embracing the unexpected or let me know your secret weather-predicting weapon. WeatherBug, anyone?

Colorado snowstorm prep.

Watch that Sky


Share this With Friends!

Wildlife Tales from My Colorado Craft Haven

Look, a mule deer. Colorado wildlife knitting outside with Liz Chandler @PurlsAndPixels.

Where Knitting Meets Critters and Gardens Host Gossip Sessions

So, picture this: Southwest Colorado, where my knitting needles and gardening trowels mingle with the locals – the wildlife! From my crafting corner, I’ve got a front-row seat to nature’s sitcom, and let me tell you, it’s both hilarious and awe inspiring.

Hummingbird High-Speed Chase

Colorado has the best hummingbirds. Squirrel spying on the garden. Colorado wildlife knitting outside with Liz Chandler @PurlsAndPixels.

Ever tried knitting while hummingbirds zip around? It’s like a NASCAR race with wings! These speedsters inspire me to pick vibrant yarn colors, because, let’s face it, life’s too short for dull colors when hummingbirds are around.

Squirrel Shenanigans and Cheeky Chipmunks

Squirrel spying on the garden. Colorado wildlife knitting outside with Liz Chandler @PurlsAndPixels.

Gardening with squirrels and chipmunks around is a bit like playing hide-and-seek. They eye my veggies, I try to protect ’em. It’s a constant game of “Who’s got the best tricks?” Their antics remind me to knit resilient stitches, just in case they decide to get crafty with my knitting basket.

A silly chipmunk tries to drive a Tonka Truck through my garden. Colorado wildlife knitting outside with Liz Chandler @PurlsAndPixels.

Deer Drama Queen

As twilight sets in, the deer emerge, looking all majestic until they nibble on my carefully tended plants! They’re the garden divas, strutting in for a snack. But hey, their elegance sometimes sneaks into my knitting patterns – subtle and graceful, just like those sneaky but graceful nibblers.

Mamma mule deer and her twin fawns looking for food. Colorado wildlife knitting outside with Liz Chandler @PurlsAndPixels.

Butterfly Makeovers

A caterpillar snacks on dill in the garden. Colorado wildlife knitting outside with Liz Chandler @PurlsAndPixels.

From caterpillar chaos to butterfly beauty, the garden’s got its own makeover show! It’s like witnessing a craft project in fast-forward. Their transformations nudge me to experiment with new knitting patterns – after all, change is a beautiful thing, right?

A yellow butterfly in flight to a fruit tree blossom. Colorado wildlife knitting outside with Liz Chandler @PurlsAndPixels.
A yellow butterfly lands on a fruit tree blossom. Colorado wildlife knitting outside with Liz Chandler @PurlsAndPixels.

Songbird Karaoke Nights

Wild Colorado Songbird observing the lettuce in my garden.  Wild turkeys love to peck at the garden. Colorado wildlife knitting outside with Liz Chandler @PurlsAndPixels.

These songbirds make my gardening soundtrack! It’s a full-on karaoke session out there. Their tunes fuel my knitting rhythm. Who knew a knitting session could double as an open mic night for nature’s finest crooners? And what’s extra-exciting in my neck of the woods is to hear the Steller’s Jays imitate the local hawks. Sometimes I hear a hawk scream and look up to see this fellow. The little stinker does it to clear the garden of other birds that might be competing for food. They hear a hawk and flee, while the Jay feasts happily, knowing the birds of prey are not on the attack.

Steller's Jays can imitate hawks and other sounds. Colorado wildlife knitting outside with Liz Chandler @PurlsAndPixels.
A hawk scratches his face, taking a break. Wild turkeys love to peck at the garden. Colorado wildlife knitting outside with Liz Chandler @PurlsAndPixels.

Wild Turkey Troublemakers

Wild turkeys love to peck at the garden. Colorado wildlife knitting outside with Liz Chandler @PurlsAndPixels.

Now, speaking of wild birds, I often run into the most beautiful flock of wild turkeys while knitting and gardening outside. They are adorable and so fun to watch. But they do love a good garden snack, just like anyone else. Do I share? Usually. They’re too fun to run off. Oh, and it is also amazingly fun to watch wild turkeys take flight.

Wild turkeys love to peck at the garden. Colorado wildlife knitting outside with Liz Chandler @PurlsAndPixels.

Bumbling Bees

Lets not forget the most important of the garden creatures to visit while I’m clicking my knitting needles. Both honey and bumble bees are both vital to the garden’s survival and to my knitting bliss. Listen to the sweet soft buzzing while you weave together your newest knitting project. Your mind will thank you for the tranquility.

Don’t Forget to Look Up

Those knitting stitches do keep your eyes focused. But don’t forget to take a break and look up every now and then. Otherwise you might miss spotting some really amazing wildlife.

Don't forget to look up, or you might miss the wildlife.Colorado wildlife knitting outside with Liz Chandler @PurlsAndPixels.

In Southwest Colorado, my knitting and gardening adventures unfold amidst the quirkiest cast of characters – the local wildlife! Their shenanigans and charm sneak into my crafting choices, adding a touch of nature’s comedy to my cozy craft haven.

Join Liz Chandler knitting in her Colorado mountain haven. Garden, grow, and learn to knit at purlsandpixels.com.

Knit along with me and be sure you follow me on Instagram: that’s where I share my best nature and knitting photos.

Let’s be friends! @PurlsAndPixels on Instagram.

Starting Seedlings on New Year’s Day

Starting seedlings on New Year's Day. A cold climate tradition with Liz Chandler @PurlsAndPixels.

My New Year’s Day tradition? Starting seedlings. Yes, I know it seems early, but the timing is just right if you live in a cold climate with a short growing season. Some of those stubborn, slow growing garden plants like tomatoes and peppers just don’t have time to make their yummy fruit. I can’t tell you how many sad, frozen green tomatoes I have pouted over. So, now I have a new tradition: starting seedlings on New Year’s Day. Sewing my slow-growing seeds inside on January 1st to gives them the best head-start possible.

Starting seedlings on New Year's Day. A cold climate tradition with Liz Chandler @PurlsAndPixels.

Winter Seedlings

Starting seedlings on New Year's Day. A cold climate tradition with Liz Chandler @PurlsAndPixels.

I live and garden in Southwest Colorado, Zone 6A. (Find your Plant Hardiness Zone at the USDA website.) That means our typical planting season, like many of the colder Zones, is pretty short. Plants can safely be outside from June 1st through mid-September. Those three and a half months fly by, and, in my experience, sneaky September frosts often kill off your favorite flowers and veggies before they fully ripen. Tragic.

Instead of planting little seedlings outside when June comes along, I need to plant fairly large tomatoes, peppers, and perennials inside quite early. To give them time to develop, I start now! And it sure makes for a happy New Year’s Day to get your hands dirty and start watching something grow.

Gardening Inside

Since my home is fairly well lit, I do have the advantage of bright sun in my bedroom most of the day. This means that come January 1st, my bedroom doubles as a seed-starting room and plant nursery. I adore waking up to my little garden of plants every morning.

When planting my seeds, I don’t do anything too fancy. I use square white starter pots and regular potting soil (affiliate links). Make sure the soil is thoroughly saturated with water before planting your seed. When watering, be gentle and careful not to disturb the seed. Or, try watering from the bottom. Place a tray under the seed pot and keep that tray filled with water; the plant will soak the water up through the holes in the pot without disturbing delicate seedlings.

Starting seedlings on New Year's Day. A cold climate tradition with Liz Chandler @PurlsAndPixels.

I do supplement their lighting with an LED grow light like this one found on Amazon. This helps prevent the plants from getting leggy (too tall) while they wait to go outside. If your home doesn’t have great lighting, you will probably want to use grow lights for all your indoor garden plants.

Replenish their water to keep your plants hydrated, and a bit of diluted fertilizer once a month after they’ve established themselves is all you’ll need to keep your indoor plants happy. Then, once summer arrives (and those nasty freezes go away), you can harden the plants off and plant them out in the garden.

Hardening Off

Acclimating your plants to the outdoor weather is even more important when they’ve spent so much time inside. Make sure you bring them outside on nice, calm days. Too much wind, cold, or heat will shrivel your sheltered plant babies. Give them just a few hours in the outdoor shade to start with. Then, slowly add time to their outdoor recess until they can handle a full day and night outside. I’ll even take the extra step of letting them sit in their garden spot while still in their pots. If they get wilt-y or start getting crispy leaf tips, they may need a different place in the garden or a bit more time in the shade before they are planted out.

Starting seedlings on New Year's Day. A cold climate tradition with Liz Chandler @PurlsAndPixels.

A New Gardening Tradition for a New Year

If you’re like me and live in a very chilly part of the world, starting seedlings on New Year’s Day could be an exciting new tradition. And it might just be the ticket to a full harvest this summer.

Starting seedlings on New Year's Day. A cold climate tradition with Liz Chandler @PurlsAndPixels.

Happy New Year and happy gardening!


My Knitting Garden

Build a knitting garden with Liz Chandler @PurlsAndPixels.

Welcoming Gardening into my Knitting Haven

Build a knitting garden with Liz Chandler @PurlsAndPixels.

Dear fellow knitting enthusiasts, welcome to an exciting new chapter in my creative journey! Today, I’m thrilled to share a budding passion that’s been quietly flourishing alongside my knitting adventures – the vibrant world of gardening. I hope you will join me in my knitting garden, so we can grow together.

A Shared Thread: Knitting and Gardening

Build a knitting garden with Liz Chandler @PurlsAndPixels.

For those who’ve followed my knitting escapades, you’ll understand the joy of crafting something magical out of a simple skein of yarn. Now, imagine that same sense of creation but with soil, seeds, and a garden spade. Gardening, much like knitting, is a canvas for creativity, a testament to patience, and a journey filled with growth.

A Personal Connection

Build a knitting garden with Liz Chandler @PurlsAndPixels.

You might wonder, “Gardening on a knitting blog?” Well, let me share a little secret – gardening has become more than just planting flowers and growing veggies. Growing food and flowers has intertwined itself with my knitting journey in ways I couldn’t have imagined. The vibrant colors of my garden have found their way into yarn choices. The rhythm of knitting often echoes the peacefulness of a garden in bloom.

Where Knitting Meets Greenery

Build a knitting garden with Liz Chandler @PurlsAndPixels.

Picture this: knitting needles click in harmony with the rustling leaves. A newly sprouted garden bed inspires the next knitting pattern. Curious wildlife wanders by. These moments, where knitting meets nature, have become cherished encounters that I can’t wait to share with all of you.

Spinning a Yarn in the Garden

Build a knitting garden with Liz Chandler @PurlsAndPixels.

Gardening and knitting – two seemingly distinct worlds – have found common ground in my creative space. Just as knitting stitches come together to form a beautiful piece, so do the seeds planted in my garden. They both sprout into a colorful tapestry that resonates with the essence of my knitting projects.

What’s Next?

As we embark on this gardening-knitting journey together, expect to see the garden growing onto my knitting blog pages more often. From planting tips that complement yarn choices, to stories where garden motifs find their way into our knitting patterns, a whole new chapter is waiting to be unraveled. I may also tell you a little about my chickens, too.

Build a knitting garden (with chickens!) with Liz Chandler @ PurlsAndPixels.

So, my dear knitting companions, prepare to see a hint of green among my yarn stash. Gardening has strolled into my knitting haven, and I couldn’t be more excited to knit this new story with all of you.

Holiday Pattern Roundup

Liz Chandler's Holiday Craft DIY Roundup with knitting patterns, crochet patterns, and easy DIY gifts and decorations at PurlsAndPixels.

Holiday DIY Craft Roundup: Knitting, Crochet, and Craft Patterns from Liz Chandler @PurlsAndPixels

With the holidays fast approaching, I’ve gathered all my festive knitting, crochet, and craft patterns into one place to help you add some handmade charm to your season. Whether you’re decorating your home or creating heartfelt gifts, these projects are perfect for crafters of all levels!

Tiny Knit Mitten Ornaments

These adorable mini mittens are perfect for trimming your tree or crafting a festive garland. They’re also a wonderful holiday DIY craft for using up leftover yarn. Quick to knit and irresistibly cute!
➡️ Get the pattern here

Learn to knit holiday ornament mini mittens with this free knitting pattern sample from Liz Chandler @PurlsAndPixels.

Peppermint Twist Garland

Create a fun candy-cane-inspired garland to decorate your tree, staircase, or mantle. This simple chain project is a great activity for kids and adds a handmade touch to your decor.
➡️ Find the pattern here

Learn to crochet a peppermint garland with this easy tutorial from Liz Chandler @PurlsAndPixels.

Cherry Candy Cane Potholder

This oversized potholder doubles as a festive decor accent. Its chunky yarn construction makes it both quick to knit and sturdy enough for holiday entertaining. Pair it with a candy cane centerpiece for extra holiday cheer!
➡️ Get the pattern here

Easy cherry candy cane pot holder knitting pattern a quick holiday knitting project from Liz @PurlsAndPixels

Learn to Knit Gift Set

Delight the aspiring crafter in your life with a DIY knitting gift basket! Include essentials like yarn, needles, scissors, and a link to my online beginner’s guide. It’s a thoughtful gift that lasts a lifetime.
➡️ Find out how to make it here

Give the gift of handmade by creating this do-it-yourself (DIY) Learn to Knit Gift Set. Get the list of everything you'd need to start your knitting lessons without buying any supplies.

Santa’s Gift Tags

Add a magical touch to presents from Santa with these printable, customizable gift tags. With this quick holiday DIY craft, you can edit the design to personalize for your little ones. Use them year after year for a charming family tradition.
➡️ Download the tags here

Printable "From Santa" Gift Tags for Christmas, a Free DIY project from Liz Chandler

Cookies as Gifts – Shipping Tips

Send holiday cheer to faraway loved ones with homemade cookies! Learn my tried-and-true tips for packaging and shipping cookies so they arrive fresh and intact.
➡️ Check out my tips here

Homemade cookies baked fresh from the oven are my favorite holiday gift to give. When loved ones are far away, you can ship cookies to their homes. Find Liz Chandler's tips @PurlsAndPixels

Santa Hat and Gloves

Keep your family cozy and festive with matching Santa hats and gloves! This beginner-friendly knitting pattern ensures everyone looks adorable on Christmas morning.
➡️ Get the pattern here

Santa Hats and Gloves in all sizes knitting pattern from Liz Chandler @PurlsAndPixels

Mini Santa Hat Ornament

Tiny Santa Hats make anything more festive! Knit them for tree ornaments, garlands, wreaths, and gift boxes.
➡️ Get the pattern here

Learn to knit Tiny Santa Hat mini ornaments with this free knitting pattern from Liz Chandler @PurlsAndPixels.

More Holiday Craft Ideas

Looking for more inspiration? Browse my holiday articles filled with cozy crafts and clever gift ideas:
🎄 Liz’s Holiday Gift Guide

🎁 DIY Gift Ideas

💞 Valentine’s Day Gift Ideas: Handcrafted with Love

🏡 Cozy Home Inspiration

🛍️ Shop Cozy Gifts on Amazon


Happy Holidays! Merry Christmas! Happy Crafting!

I hope this Holiday Pattern Roundup got you in the mood to create something amazing! I can’t wait to see what you create! Share your finished projects with me using @PurlsAndPixels. 😊

Knitting Inspiration from Nature

Hot air balloon sunrise, nature photo by Liz Chandler @PurlsAndPixels

Transforming the Colors of the Wild into Cozy Creations 🏔️

Life out here in the Rocky Mountains is wild. Literally. Some days, I’m watching deer stroll past my window like they own the place. Other days, I’m rescuing my knitting from a particularly bold gust of wind. No matter what the day brings, one thing stays the same: wherever I go, yarn is never far behind. My knitting inspiration comes from all the nature around me.

I love taking pictures of mountains, forests, and cozy little moments. If you look closely, you’ll probably notice a trend. There’s often a ball of yarn or a half-finished project lurking in the shot. That’s not a coincidence. That’s just me, living my life, chasing daylight to get the perfect shot, and occasionally “shooting” coyotes. With a camera, of course. Knitting inspiration can come from anywhere, even wildlife. No need to alert the game warden. 📸

A coyote behind a massive tree stump in the Colorado pinon forest. Photo by Liz Chandler @PurlsAndPixels.

Why PurlsAndPixels is Packed with Pretty Nature Photos

Knitting inspiration from nature is everywhere, when you know where to look. The rich reds of autumn leaves, the deep blues of a twilight sky, and the soft neutrals of river stones all create the perfect yarn color inspiration from nature. Every time I step outside, I see textures and hues that practically beg to be turned into a new project. A misty morning might call for a delicate lace shawl, while the rugged bark of an old pine tree whispers, “You need more cozy cables in your life.” Living in the mountains, knitting is not just a hobby; it is a cozy knitting lifestyle, where the rhythm of the needles matches the quiet pace of nature. This mountain knitting aesthetic finds its way into everything I create, blending the beauty of the outdoors with the comfort of handmade warmth. Whether it is the soft tones of fresh snowfall or the earthy richness of autumn, knitting inspired by nature is always waiting right outside my door, tempting me to cast on just one more project.

1. Color Inspiration is Everywhere

The vibrant stripes on a canyon wall? Perfect for a chunky scarf. The soft blues of a misty morning? That’s a cozy pair of mittens waiting to happen. Nature is basically a giant, untamed yarn store, and I take full advantage of it. If you are looking for knitting inspiration from nature, step outside and see what colors you can find.

Colorado canyon at Mesa Verde National Park. Photo by Liz Chandler @PurlsAndPixels.

2. Texture, Texture, Texture

Knitting is all about feel. Soft wools, bumpy cables, smooth stitches. When I see the rough bark of an aspen tree or the soft fluff of a baby bunny’s fur, I can’t help but think, this would make a fantastic sweater. The natural textures found in the woods offer endless knitting inspiration.

Fluffy bunny rabbit in the forest meadow. Colorado wildlife photo by Liz Chandler @PurlsAndPixels.

3. It’s All About the Cozy Life

I don’t just knit. I live the whole cozy, slow-living, tea-sipping, blanket-wrapped experience. Taking these photos lets me freeze those moments. The ones where the fire is crackling, my needles are clicking, and everything feels just right. Since I can’t invite the whole internet into my cabin for cocoa, this is the next best thing.

Photos © Liz Chandler of  PurlsAndPixels. All photos here are my own, taken by me. Please enjoy, but do not reproduce them for any commercial purpose without my permission. Email purlsandpixels@gmail.com for inquiries about specific images.

Want More Knitting and Cozy Life Inspiration from Nature?

I share free knitting tutorials, rustic living ideas, and peeks at my latest projects, plus the occasional wildlife encounter. Sound like your vibe?

📷 See more of my photos full of knitting inspiration from nature on Instagram: @PurlsAndPixels.

Read More

🦌 Wildlife Tales from My Colorado Craft Haven

🦌 Embracing the Rustic Homestead Lifestyle

🌲 10 Tips for Starting Your Homestead: Simple Steps to Turn Your Dream into Reality

🦁 Living with Mountain Lions

🐻 Keeping Bears Out of the Chicken Coop

🏡 Cozy Lifestyle Basics: Mountain Living Edition

Mountain Living Essentials

✨ Never Miss a Mountain Story 

Join my newsletter for exclusive patterns, homesteading tips, and wildlife updates! 💌

How to Wind a Center-Pull Yarn Ball

How to wind yarn into center-pull balls by hand - a lesson with Liz @PurlsAndPixels.

Whether you have unraveled a project or just have some leftover yarn, by now you probably have some scraps that are in need of organization. Winding yarn into neat balls keeps your strings from becoming a hopeless tangled mess. While there are many ways to coil yarn for storage, center-pull yarn balls are the most versatile; they allow you to work directly from either end of the string.

(In the article below, I have linked to items on Amazon.com, so you can see examples of the equipment I reference. Please know all links to Amazon are affiliate links, and if you make a purchase through them, I will earn a small commission at no cost to you. Now, on to the important information.)

Center-Pull Yarn

Learn to wind a center-pull yarn ball with just your hands in this lesson with Liz @PurlsAndPixels.

Each ball of yarn is made of one long strand with two ends. There are a number of ways to coil the yarn so that it does not tangle. Some yarn is pre-wound into center pull balls or skeins (tube-shaped balls) by the manufacturer. When you see a string coming from the center of the ball or skein, you can probably work directly from either end.

Working from the center of a ball is often more convenient. When you work with the end on the outside of the ball, the yarn will likely roll and flop around. Yarn bowls and containers can help keep your yarn from escaping. But center-pull balls can be even more effective at reducing the movement of your ball of yarn. Pulling from outside of the ball forces it to roll. But when you pull from the center, the yarn uncoils without turning the ball.

Many yarn-makers, however, wind their yarn into “hanks” instead of center-pull balls or skeins. To make a hank, the manufacturer makes one large circle of yarn then twists it together for storage and shipping. Hanks are incredibly difficult to work from directly, so to use yarn that comes in a hank, you will need to wind it into a ball.

Winding frogged yarn, scrap yarn, and hanks of yarn into center-pull balls keeps yarn neat, organized, and ready to use.

Machines like “yarn swifts” and “yarn winders” are available to assist you in turning yarn into a usable form. A yarn swift holds the yarn from a hank in place while you wind your ball. Then, you can use a yarn winder to turn that yarn into a “cake” which is much like a center pull ball. Or, instead of investing in fancy machines, you can use just your hands and wind hanks, leftovers, and frogged yarn into center-pull balls.

Video Guide: How to Wind a Center-Pull Yarn Ball

Written Guide: How to Wind a Center-Pull Yarn Ball

Below I’ll show you how to wind a center pull yarn ball step-by-step. I am winding the ball from a larger center-pull skein so that I can knit two items at once from the same yarn. I also wind partially used skeins into new balls for tidier storage.

Step 1: Learn to wind a center-pull yarn ball with just your hands in this lesson with Liz @PurlsAndPixels.

Wind Yarn into a Ball, Step 1:

Drape the yarn end between your left pointer finger and thumb, laying it across your palm.

Step 2: Learn to wind a center-pull yarn ball with just your hands in this lesson with Liz @PurlsAndPixels.

Wind Yarn into a Ball, Step 2:

Clasp the end of the yarn with your left ring and pinkie fingers, then, with your right hand, pick up the other end of the yarn just above your left pointer finger. With the strand in your right hand, begin to wrap the yarn over the top of your left pointer finger.

Step 3: Learn to wind a center-pull yarn ball with just your hands in this lesson with Liz @PurlsAndPixels.

Wind Yarn into a Ball, Step 3:

Bring the yarn down between your pointer and middle fingers, then between your thumb and pointer finger, forming a loop around your left pointer finger.  

Step 4: Learn to wind a center-pull yarn ball with just your hands in this lesson with Liz @PurlsAndPixels.

Wind Yarn into a Ball, Step 4:

Wrap the yarn around your left thumb in a counterclockwise motion.  

Step 5: Learn to wind a center-pull yarn ball with just your hands in this lesson with Liz @PurlsAndPixels.

Wind Yarn into a Ball, Step 5:

Wind the yarn up between your left thumb and pointer finger to form a figure-eight (8) shape.

Step 6: Learn to wind a center-pull yarn ball with just your hands in this lesson with Liz @PurlsAndPixels.

Wind Yarn into a Ball, Step 6:

Continue wrapping the yarn around your pointer finger and thumb in figure eight shapes (as in steps two thru five).

Step 7: Learn to wind a center-pull yarn ball with just your hands in this lesson with Liz @PurlsAndPixels.

Wind Yarn into a Ball, Step 7:

When you have wrapped the yarn around your fingers in figure eights at least 20 times, you can stop and move to the next step. To make a larger ball of yarn, wrap more figure eights; when the yarn wraps reach your left thumb knuckle, move to step eight.  

Step 8: Learn to wind a center-pull yarn ball with just your hands in this lesson with Liz @PurlsAndPixels.

Wind Yarn into a Ball, Step 8:

With your right thumb and pointer finger, pinch all the strands at the center of the figure-eight shape (just between your left thumb and pointer finger).

Step 9: Learn to wind a center-pull yarn ball with just your hands in this lesson with Liz @PurlsAndPixels.

Wind Yarn into a Ball, Step 9:

While continuing to pinch the center of the yarn figure-eight with your right hand, gently remove your left hand from the yarn loops.

Step 10: Learn to wind a center-pull yarn ball with just your hands in this lesson with Liz @PurlsAndPixels.

Wind Yarn into a Ball, Step 10:

Continue to pinch the center of the figure-eight with your right hand.

Step 11: Learn to wind a center-pull yarn ball with just your hands in this lesson with Liz @PurlsAndPixels.

Wind Yarn into a Ball, Step 11:

With your left hand, fold the two loops of the figure eight up, toward each other, pinching them together over your right thumb.

Step 12: Learn to wind a center-pull yarn ball with just your hands in this lesson with Liz @PurlsAndPixels.

Wind Yarn into a Ball, Step 12:

While continuing to pinch the loops with your left hand, gently remove your right thumb. Pick up the yarn strand you have been winding with your right hand.  

Step 13: Learn to wind a center-pull yarn ball with just your hands in this lesson with Liz @PurlsAndPixels.

Wind Yarn into a Ball, Step 13:

Gently wind the strand in your right hand around the yarn you have pinched in your left hand. Be sure you do not wrap the tail end of the yarn into the ball, or you will lose your center-pull. Also, try not to wind too tightly; this can make yarn lose its stretch.

Step 14: Learn to wind a center-pull yarn ball with just your hands in this lesson with Liz @PurlsAndPixels.

Wind Yarn into a Ball, Step 14:

Continue winding your yarn around until you have formed a ball in your desired size. Always ensure you do not wrap the center-pull end into the ball. When you are finished wrapping, clip the yarn with scissors (if necessary). Carefully tuck the end that you held with your right hand into the ball to secure it in place.

Learn to wind a center-pull yarn ball with just your hands in this lesson with Liz @PurlsAndPixels.

Practice With My Knitting Patterns

Simple Washcloth Knitting Pattern Collection from Liz @PurlsAndPixels

If you’ve been following my lessons, you now have enough information to knit all of the washcloths and face scrubbies in my Simple Washcloth Knitting Pattern Collection. Happy knitting!

How to wind yarn into center-pull balls by hand - a lesson with Liz @PurlsAndPixels.

Up Next

Next up, a lesson about gauge. Learn what gauge means in knitting and you to check your gauge to make sure your knits end up the right size.

Go Back to the Learn to Knit Index

Shipping Cookie Gifts

Homemade cookies baked fresh from the oven are my favorite holiday gift to give. When loved ones are far away, you can ship cookies to their homes. Find Liz Chandler's tips @PurlsAndPixels
How to ship cookies for gifts and care packages, tutorial from Liz @PurlsAndPixels

How to ship cookies for gifts and care packages

This year the holiday budget was a little tight, so I decided to make everyone cookie baskets for Christmas.

Christmas cookie gifts. How to wrap cookies for gifts, tutorial from PurlsAndPixels.

For our nearby friends and family I picked up some round, decorative plastic boxes. I used cupcake papers and aluminum foil to separate the different types of cookies and arrange them nicely.

Packing up bundles of pretty cookies to give as a gift is not too difficult to do when your friends and family are local, but much of my family lives over 2000 miles away. It took a bit of creative packaging, but I was successful at shipping cookie gifts cross-country. Let me show you how I did it so you can ship your on cookie gifts for holidays and care packages.

Choosing the right cookies

Choose your favorite cookies for this project, because almost* any cookie will do. Give a big batch of your favorite kind of cookie, or make an assortment and let them try a variety of your homemade baked goods. I especially like to share Soft Gingerbread Cookies shaped like Hippos for Christmas (recipe here).

*If you plan to ship your cookies in the mail, choose cookies that are on the denser and thicker side. Treats that are especially thin or fragile can be tasty, but probably wont make it thru the mail. The cookies pictured held up well in shipping.

For my gift baskets this year, I made gingerbread cookies, snowball cookies, chocolate chip cookies, fudge, and peanut brittle. I’ve pinned all of the recipes for my favorite treats here, so check out and follow my cookie, candy, and crafty eats boards for ideas on home-cooked gifts.

Packaging materials

How to wrap cookies for gifts and care packages, tutorial from Liz @PurlsAndPixels

If you are mailing your cookies, you are going to need a few supplies. You’ll need:

Carefully wrap between 6 and 12 of each type of cookie in cellophane. Next, wrap that bundle of cookies again, this time loosely with in aluminum foil. Gently mold the foil around the cookies to make a block and keep the cookies from sliding around inside the bundle. Place this double-wrapped cookie bundle in a Ziploc bag. Repeat this process with the rest of the cookies that you want to ship. Place them in the shipping box, filling any empty spaces in the box with cellophane or other packing filler to make sure the cookie bundles don’t slide around in the box. I added a gift wrapped pair of handmade mittens to the box, as well. Tape up the box and you’re ready to get a shipping label and mail your cookies.

I used USPS three day priority shipping to save a few dollars, but it would probably be even better to use one day shipping.

After packing up all the cookies and treats in the box, I taped it shut and wrote FRAGILE in large capital letters with a big red marker on two sides of the box.

I shipped one package in a USPS flat rate box, and another in a standard brown shipping box. Both were successful, so use what you have available.

How they arrived

After shipping these cookies over 2000 miles from Virginia to Colorado, I expected to loose a few cookies to breakage along the way. Trucks and airplanes are bouncy, so I thought at least a few would be lost. Lucky for me, all of the cookies this year arrived in good shape. I know using the aluminum foil as a protective cushion for shipping the cookies really helped. But, I think a major part of the success of this gift project was because I was lucky with my postal carrier for USPS. The boxes had been treated very carefully. I hope your postal worker is as kind and careful as ours.

Cookies before being given as gifts by PurlsAndPixels

Did you try it? Let me know how your luck was with shipping cookie gifts. What kind of cookies did you send in your gift or care package? Did they get there in good shape? Let me know in the comments below.

More Holiday Craft Ideas

Love DIY Christmas and holiday projects? Find more handmade holiday craft ideas at my Holiday Pattern Roundup Post.

And, find my 10 Thoughtful DIY Gift Ideas here.

You can also follow my blog with Bloglovin.