After knitting fingerless gloves, you will have four loose ends to weave in. Using a darning needle, you can sew the tails into your work in a manner that matches your pattern. Then, I like to tie tiny knots to secure the tails into the work. I have divided this lesson into three parts; the cast-on tail, the bind off tails, and the tail at base of the thumb.
Below you will find both video and written guides to help you learn how to finish your fingerless gloves.
Lessons – How to Weave in the Loose Ends of Fingerless Gloves
After separating the sections of your glove with your stitch holder, you will knit the hand portion. Then, you can remove the live stitches from the stitch holder and start knitting the thumb. You can knit thumbs in the round in the magic loop, as well as on DPNs (click here to go to the DPN instructions). In the magic loop, you will slip the stitches from your holder onto long circular needles. Then you will knit in the round to create a thumb and finish out your glove or mitten.
Below you will find both video and written guides to help you learn how knit off stitch holders with long circular needles.
Video Guide: How Knit from Stitch Holders with in the Magic Loop
Written Guides: How to Knit from Stitch Holders in the Magic Loop
Knit Off Stitch Holder in the Magic Loop, Step 1:
Unclip the stitch holder. Place it in your left hand with the sharp tip pointing toward your right.
Knit Off Stitch Holder in the Magic Loop, Step2:
Pick up one end of a long circular needle with your right hand. Insert the tip of the needle into the first stitch on the holder purlwise (into the front leg from back to front).
Knit Off Stitch Holder in the Magic Loop, Step 3:
Slide the stitch off the stitch holder and onto the needle.
Knit Off Stitch Holder in the Magic Loop, Step4:
Slip one-half of the stitches from the holder onto the needle tip in the same manner.
Knit Off Stitch Holder in the Magic Loop, Step5:
Pull the needle tip through the stitches in a leftward direction, moving the stitches onto the needle cord.
Knit Off Stitch Holder in the Magic Loop, Step6:
Continue to hold the same needle in your right hand and bring the tip around toward the stitch holder.
Knit Off Stitch Holder in the Magic Loop, Step7:
Slip the remaining stitches from the holder onto the needle tip purlwise, as before. Set the empty stitch holder aside.
Knit Off Stitch Holder in the Magic Loop, Step8:
Gently pull the cord and bring the other end of your circular needle into the first set of stitches.
Knit Off Stitch Holder in the Magic Loop, Step9:
Turn your work and pull the back needle rightward to prepare to knit in the magic loop. Pick up a strand of working yarn and place the tail between the left-hand needle and the cord.
Knit Off Stitch Holder in the Magic Loop, Step10:
Work into the first stitch on the left-hand needle and begin knitting in the round as your pattern instructs.
In my pattern for Basic Knit Mittens you will also use stitch holders to make the thumbs.
Up Next
Now that you can knit a glove from start to finish, you will want to know how to take care of all those leftover strings. We will start learning to weave in loose ends on fingerless gloves in the next lesson.
After you have separated your glove thumb and hand with a stitch holder, you’ll knit the hand of the glove. Then, you will want to make the thumb using the live stitches you have saved. To work the live stitches off your stitch holder, you will first need to put them back onto your knitting needles. Here, the stitch holder will be reserving stitches that you can knit in the round to turn into your glove thumb. You can use four double point needles to accomplish this task.
Below you will find both video and written guides to help you learn how knit off stitch holders with DPNs.
Video Guide: How Knit from a Stitch Holder with DPNs
Written Guides: How to Knit from a Stitch Holder with DPNs
Knit Off Stitch Holder with DPNs, Step 1:
Unclip the stitch holder. Place it in your left hand with the sharp tip pointing toward your right.
Knit Off Stitch Holder with DPNs, Step 2:
Pick up a double point needle (DPN) with your right hand. Insert the tip of the needle into the first stitch on the holder purlwise (into the front leg from back to front).
Knit Off Stitch Holder with DPNs, Step 3:
Slide the stitch off the stitch holder and onto the DPN.
Knit Off Stitch Holder with DPNs, Step 4:
Slip about one-third of the stitches from the holder onto the first double point needle in the same manner.
Knit Off Stitch Holder with DPNs, Step 5:
Let go of the first DPN and pick up a second DPN in your left hand. Slip another third of the stitches purlwise onto the second DPN.
Knit Off Stitch Holder with DPNs, Step 6:
Pick up a third DPN and slip the remaining stitches onto it purlwise. Set the empty stitch holder aside.
Knit Off Stitch Holder with DPNs, Step 7:
Pick up a strand of working yarn and place the tail between the first and third needles.
Knit Off Stitch Holder with DPNs, Step 8:
With a fourth DPN held in your right hand, work into the first stitch on the first DPN and begin knitting in the round as your pattern instructs.
You can also use the Standard Bind Off to take the stitches off your needles when you have been working in the magic loop. Bind off down one side of your work, turn, and adjust your knitting needles. Then, bind off down the second side of your project to make a smooth edge to your round.
Before you start, remember to loosen up:
This bind off tends to be a bit tight, so you may want to loosen up your tension when knitting this last row. Many patterns will specifically tell you to “bind off loosely,” to remind you to adjust the tightness of the stitches.
Or, go up two or three needle sizes:
Instead of adjusting how tightly you knit, you can also switch needle sizes. Try moving to a needle that is two or three sizes larger than the one you have been using for the rest of the pattern. This allows you to keep the same knitting tension in your yarn as you cast off, while still loosening the bind off stitches enough to match the rest of the piece. Some patterns instruct you to switch needle sizes for the last row, to help you ensure your ends are more even.
Below you will find both video and written guides to help you learn how to bind off your long circular needles.
Video Guide: How to Bind Off in the Round in the Magic Loop
Written Guide: How to Bind Off in the Round in the Magic Loop
Bind Off Magic Loop, Step 1:
Following the pattern you have been using for previous rows, knit the first two stitches of your last row.
Bind Off Magic Loop, Step 2:
Insert the left needle tip into the front loop of the first knit stitch on your right needle from front to back.
Bind Off Magic Loop, Step 3:
Lift the first stitch on the right needle up and over the second stitch on the right needle.
Bind Off Magic Loop, Step 4:
Pull the second stitch on the right needle through the first stitch.
Bind Off Magic Loop, Step 5:
Slide the left needle out of the stitch on the right needle.
Bind Off Magic Loop, Step 6:
At this point, the first knit stitch should be anchored onto the second and only one loop should remain on your right-hand needle.
Bind Off Magic Loop, Step 7:
Following your pattern, work the next stitch off your left needle and onto the right needle.
Bind Off Magic Loop, Step 8:
In the same manner as before, lift the first stitch on your right-hand needle over the second stitch, drawing the second stitch through the first, leaving only one stitch on your right-hand needle.
Bind Off Magic Loop, Step 9:
Repeat steps seven and eight until you have reached the last two stitches and freed the left-hand needle from your work.
Bind Off Magic Loop, Step 10:
Turn your work by rotating the entire project so that the back side of your magic loop is on the front side. Pull the needle cord on the front side of your work leftward, to bring the front needle back into the live stitches. Take care not to let go of the right-hand needle or you may drop the single stitch it holds.
Bind Off Magic Loop, Step 11:
Continue binding off the second side of your magic loop by repeating steps 7 and 8.
Bind Off Magic Loop, Step 12:
Work in the same manner until you have reached the last stitch and freed the left-hand needle from your work.
Bind Off Magic Loop, Step 13:
Set your work down, leaving the knitting needle in the last stitch. With very sharp scissors, clip the working yarn about eight or ten inches away from your last stitch. This will free your work from the ball of yarn.
Bind Off Magic Loop, Step 14:
Pull the yarn tail through to anchor it in; do this by enlarging the last stitch with your knitting needle until the tail slides completely through. The loop will become a straight loose end.
Practice With My Knitting Patterns
Ready to try it?
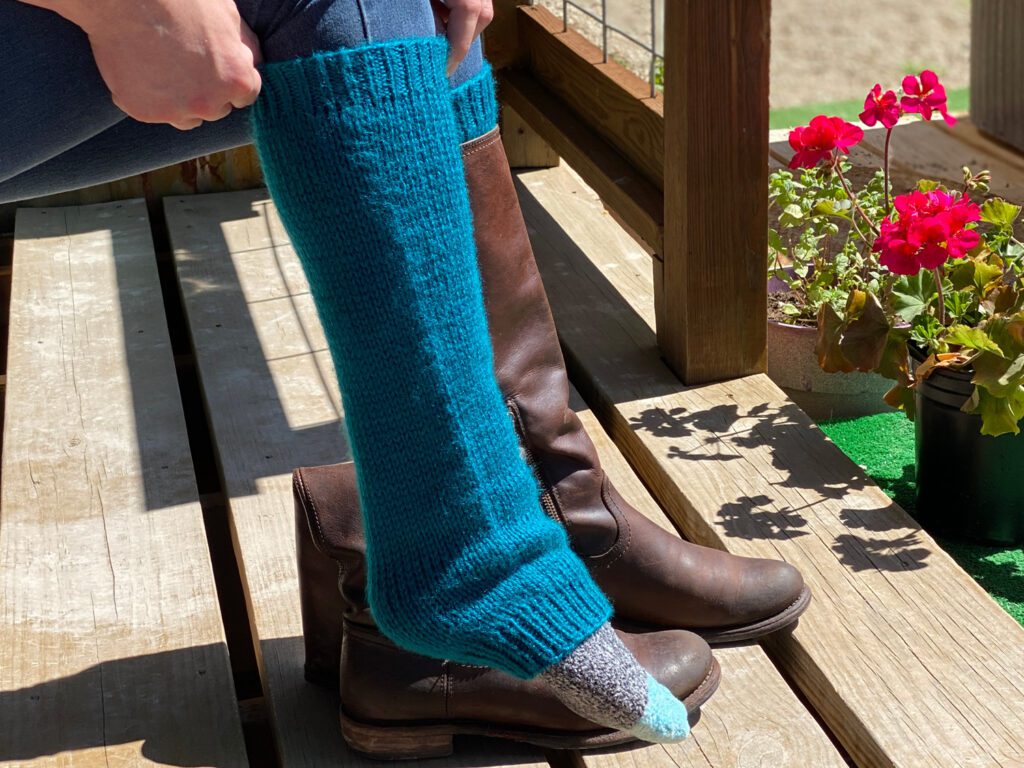
In this lesson, I am knitting Simple Fingerless Gloves, which require a standard bind off at the end of the fingers and thumb.
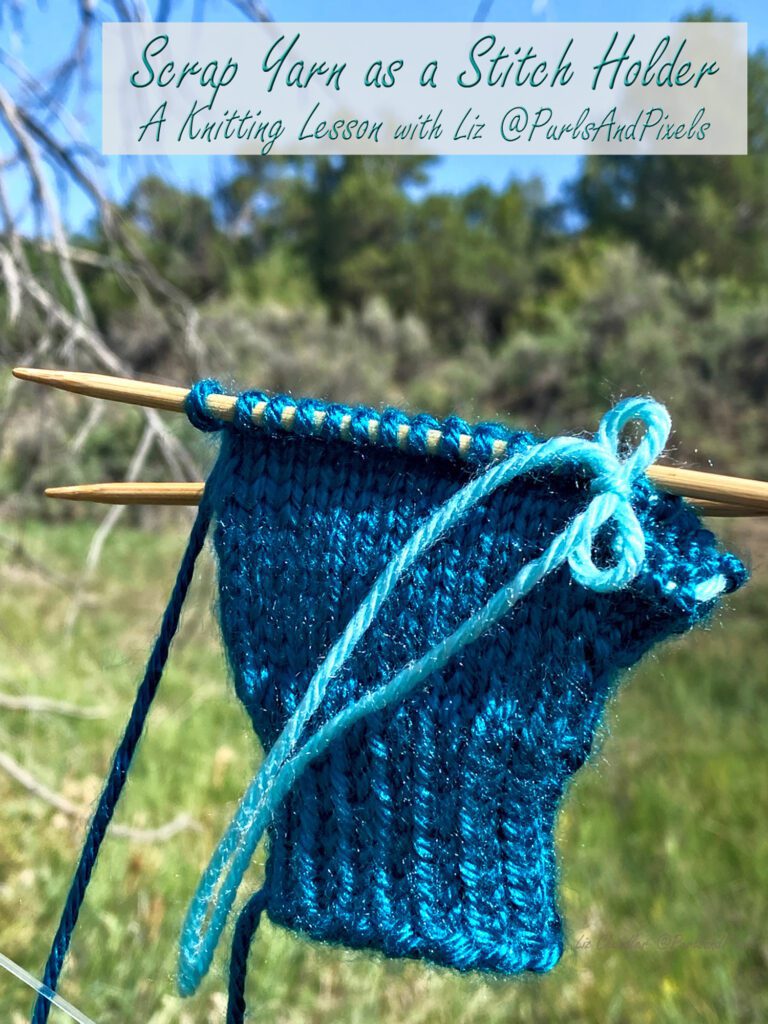
If you need to use a stitch holder, but do not have one available, you can substitute a strand of scrap yarn. Using a darning needle, thread a bit of yarn through live stitches that need to be kept workable for later. Tie a small knot in the scrap yarn to keep it in place and it will hold your stitches until you are ready to knit them again.
Video Guide: How to Use Scrap Yarn Instead of Stitch Holders
Written Guides: How to Use Scrap Yarn Instead of Stitch Holders
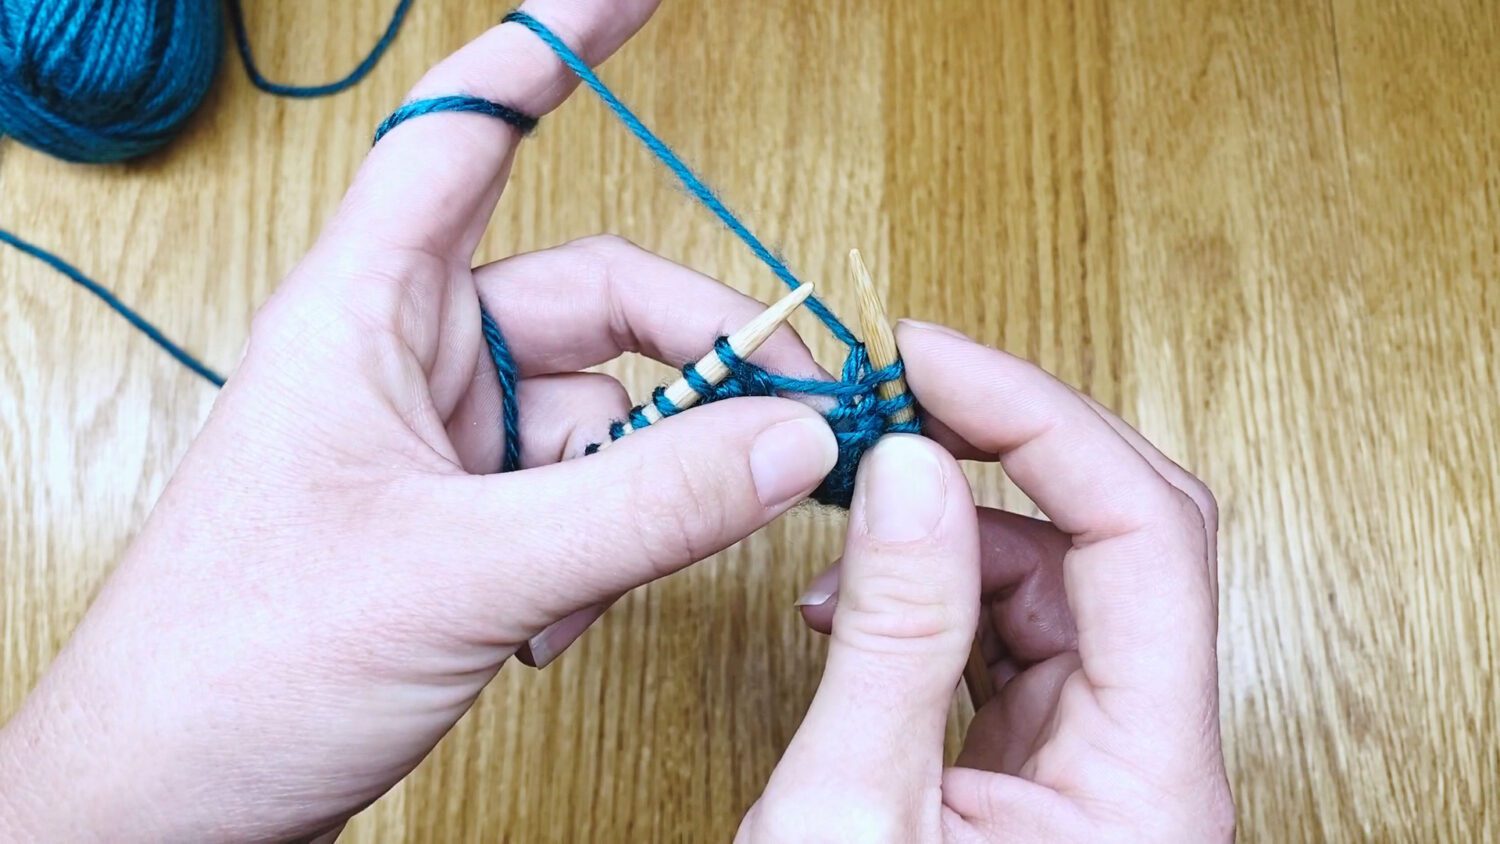
Scrap Yarn as Stitch Holder, Step 1:
Thread a scrap of yarn that is at least 12 inches long onto a darning needle. Place the working yarn behind the knitting needles. Let go of the righthand needle and pick up the darning needle with your right hand.
Scrap Yarn as Stitch Holder, Step 2:
Insert the tip of the darning needle into the front leg of the next live stitch from back to front (as if to purl).
Scrap Yarn as Stitch Holder, Step 3:
Slip the stitch onto the tip of the darning needle.
Scrap Yarn as Stitch Holder, Step 4:
Slip all the stitches your pattern instructs onto the darning needle and scrap yarn in the same manner.
Scrap Yarn as Stitch Holder,Step 5:
Pull the darning needle and scrap yarn through the stitches, so the stitches sit on the yarn. Ensure you do not allow the stitches to drop off the scrap of yarn.
Scrap Yarn as Stitch Holder, Step 6:
Carefully remove the scrap yarn from the darning needle.
Scrap Yarn as Stitch Holder, Step 7:
Tie a knot or bow in with the ends of the scrap yarn, which can be undone later.
Scrap Yarn as Stitch Holder, Step 8:
Pick up the working yarn and knit into the next live stitch.
In my pattern for Basic Knit Mittens you will also separate the thumb and hand sections with a stitch holder.
Up Next
To finish off fingerless gloves and other round knits, you’ll need to learn how to bind off. In the next lesson we will learn how to bind off when working in the Magic Loop.
When you are knitting gloves or other shaped knitwear, you may need to separate groups of live stitches. For example, when knitting gloves, you will need to separate the hand section from the thumb. To do this, you can slip some of your live stitches onto a stitch holder to work later.
A stitch holder is a clip, which looks a bit like a large safety pin. This tool allows you to take some of your live stitches off your knitting needles and save them to work later. Slide a group of live stitches onto the stitch holder so that you can skip them.
In glove knitting, you will place the thumb stitches onto the stitch holder, then knit the hand portion of the glove. At the end of your project, you will go back and knit the stitches off your stitch holder, turning them into a thumb.
Below you will find both video and written guides to help you learn how use stitch holders. If you do not have a stitch holder available, you can also learn to substitute scrap yarn.
Video Guide: How to Slip Stitches onto a Stitch Holder
Written Guides: How to Slip Stitches onto a Stitch Holder
Slip Stitches onto a Stitch Holder, Step 1:
Place the working yarn behind the knitting needles. Let go of the righthand needle and pick up an open stitch holder with your right hand.
Slip Stitches onto a Stitch Holder, Step 2:
Insert the tip of the stitch marker into the front leg of the next live stitch from back to front (as if to purl).
Slip Stitches onto a Stitch Holder, Step 3:
Slip the stitch onto the tip of the stitch marker.
Slip Stitches onto a Stitch Holder, Step 4:
Slip all the stitches your pattern instructs onto the stitch marker in the same manner.
Slip Stitches onto a Stitch Holder, Step 5:
Close the stitch marker.
Slip Stitches onto a Stitch Holder, Step 6:
Gently pull the stitch marker down and out of the way of your knitting needles.
Slip Stitches onto a Stitch Holder, Step 7:
Pick up the working yarn and knit into the next live stitch.
Slip Stitches onto a Stitch Holder, Step 8:
At this point your live stitches will connect behind the stitches on the holder with a single strand.
What if I Don’t Have a Stitch Holder?
If you do not have a stitch holder available you can substitute a piece of scrap yarn. See that lesson here.
You can order the stitch holders I used in this video on Amazon at this link (affiliate link).
In my pattern for Basic Knit Mittens you will also use stitch holders to make the thumbs.
Up Next
After you finish knitting the hand portion of your fingerless gloves, you will need to it off the needles. In the next lesson we will learn how to bind off when working in the Magic Loop.
The “make one right” increase allows you to add stitches to knitted rows that are in progress. These increases will lean toward the right, so your work will grow in a rightward direction. This increase is especially helpful in knitting sweaters because it allows you to create larger spaces for arms and shoulders.
Below you will find both video and written guides to help you learn how to knit M1R increases.
Video Guide: How to Knit Make One Right (M1R) Increases
Written Guides: How to Knit Make One Right (M1R) Increases
M1R, Step 1:
Locate the strand of yarn that is between two live stitches and just below your needles.
M1R, Step 2:
Insert the tip of your left needle under the strand between the live stitches from back to front.
M1R, Step 3:
You will now have a new live stitch on your left needle tip.
M1R, Step 4:
Insert the right needle tip into the front leg of the new live stitch.
M1R, Step 5:
With the right needle tip, grab the working yarn and draw it through the stitch.
M1R, Step 6:
Slide the stitch you have just worked into off your left needle, allowing the new stitch to remain on your right needle.
Once you have shaped the thumb opening of a glove or mitten, you will usually be instructed to slip the thumb stitches onto a stitch holder. In the next lesson I will show you how.
As its name suggests, the “make one left” increase is a left-leaning stitch. Use this increase to add live stitches to a work that is already in progress. This will lengthen your knitted rows and enable you to shape your knitwear.
Note: When knitting a pattern that states “make one” it is usually safe to assume the pattern means make one left.
Below you will find both video and written guides to help you learn how to knit increases.
Video Guide: How to Knit Make One Left (M1L) Increases
Written Guides: How to Knit Make One Left (M1L) Increases
M1L, Step 1:
Locate the strand of yarn that is between two live stitches and just below your needles.
M1L, Step 2:
Insert the tip of your left needle under the strand between the live stitches from front to back.
M1L, Step 3:
You will now have a new live stitch on your left needle tip.
M1L, Step 4:
Insert the right needle tip into the back leg of the new live stitch.
M1L, Step 5:
With the right needle tip, grab the working yarn and draw it through the stitch.
M1L, Step 6:
Slide the stitch you have just worked into off your left needle, allowing the new stitch to remain on your right needle.
In my pattern for Basic Knit Mittens you will also use increases to make the thumb gussets.
Up Next
Once you have shaped the thumb opening of a glove or mitten, you will usually be instructed to slip the thumb stitches onto a stitch holder. In the next lesson I will show you how.