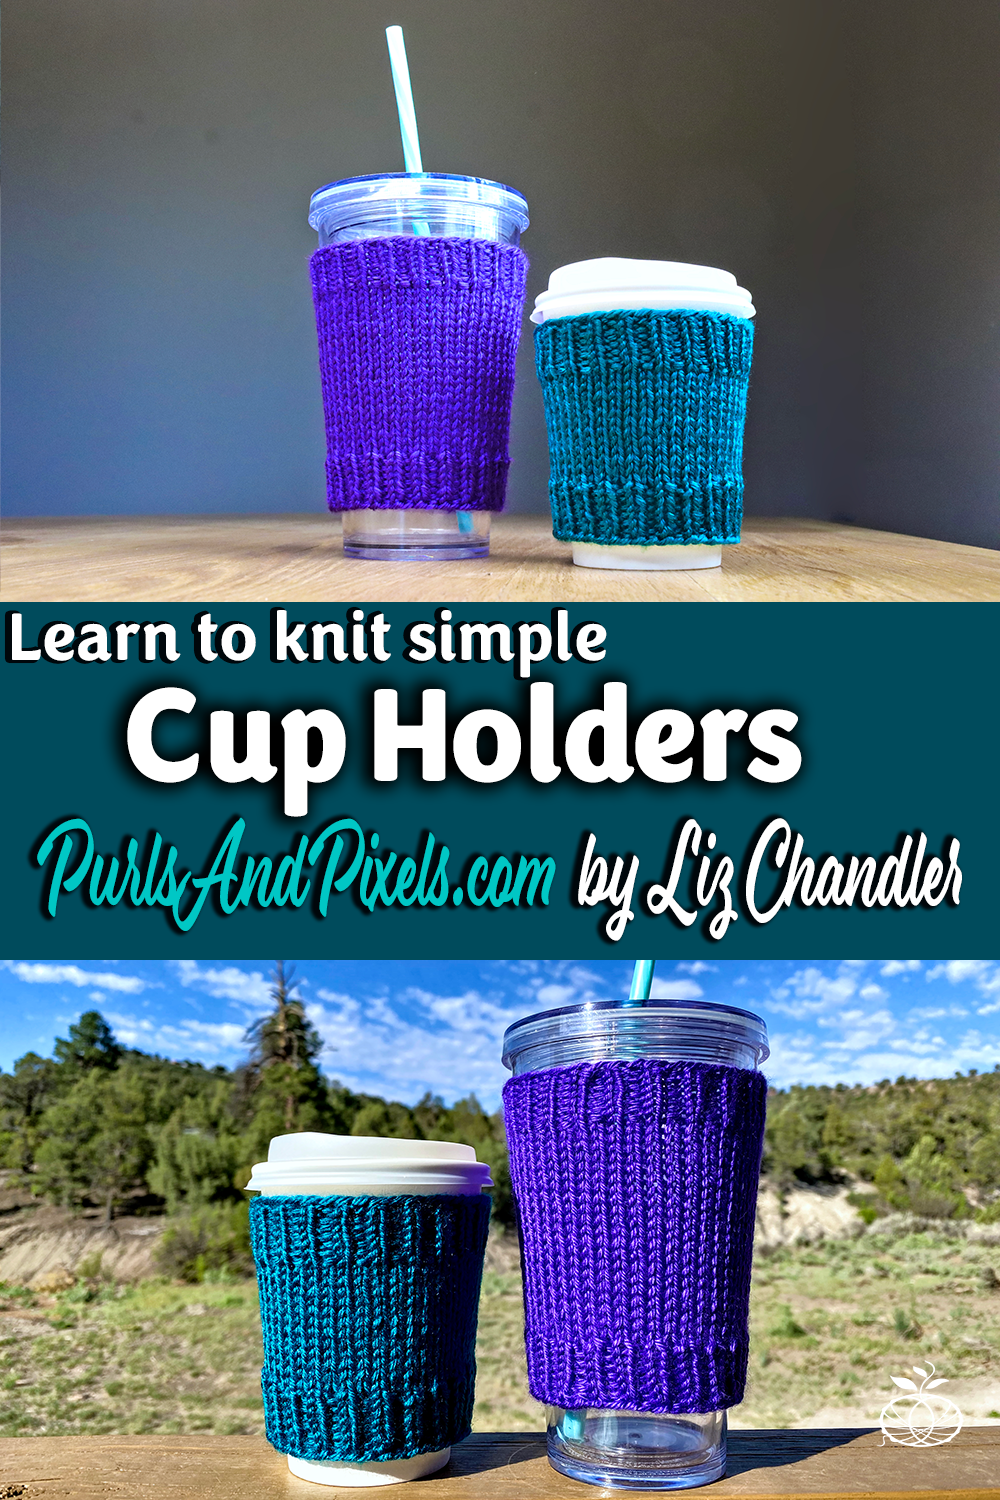
Basic Cup Cozy Knitting Pattern

Learn to knit your own basic cup cozy with this free knitting pattern by Liz Chandler @PurlsAndPixels, now with DPN and Magic Loop instructions.

Basic Cup Cozy Free Knitting Pattern

You can make your own basic cup cozy with this free knitting pattern. These knitted cup cozies are meant to fit around cups with no handles. The small size is great for coffeehouse-style paper cups and the large size works well for reusable hot and cold cups.

How these Cup Cozies are Made

I have now included directions below for both Double Point Needles and the Magic Loop, so you can knit in the round with your favorite method.

This cozy pattern begins and ends with knit purl rib. In the middle, you will make a stockinette stitch pattern in the round. Unlike flat knitting, stockinette stitch in the round is made by knitting all the stitches in every row/round. You will also switch needle sizes while working the pattern. Knit, purl ribbing tends to make larger stitches than stockinette; switching needle sizes between the two parts helps the individual stitches stay roughly the same size.

This is a quick and easy project that is also perfect for scrap yarn that has been left over from another project. If you need help figuring out how much scrap yarn you have left, my post on yarn math might be useful.

I used Caron Simply Soft yarn to design the pattern, which is a basic, acrylic, worsted-weight yarn. Try any solid color you like, or mix it up with a variegated or patterned yarn.

You can substitute worsted weight yarns in this pattern. Almost any yarn fiber is suitable for this project; try acrylic, wool, alpaca, cotton, or bamboo. Avoid silk and silk blends.

Be careful with hot cups; your finished object may not be heat resistant.

Learn to knit your own basic cup cozy with this free knitting pattern by Liz Chandler @PurlsAndPixels, now with DPN and Magic Loop instructions.

Materials

Abbreviations

k = Knit.

p = Purl.

** = Repeat the pattern between the asterisks.

Gauge

20 stitches and 28 rows in stockinette = 4 inches on No. 5/3.75 MM needles

Instructions: Small Cup Cozy

(Cups 9 inches to 11 inches around; measures 4 inches top to bottom)

Use the long-tail cast on method. Knit in the round. For Double Point Needles, follow DPN instructions written in italics. For circular needles, follow magic loop instructions in bold. If desired, use a stitch marker to keep track of the beginning/ends of your rows/rounds by placing it between the last and first stitch of each row/round.

[Using No. 3 DPNs or long circular needle] Row 1: Cast on 46 stitches. Divide onto 3 DPNs (15 on 1st, 16 on 2nd, and 15 on 3rd DPN). Or separate stitches on long circular needles for magic loop (23 on each side). (46 stitches)

Row 2: Join the round (taking care not to twist stitches) and *k, p* x 23. (46 stitches)

Rows 3 – 8: *k, p* x 23. (46 stitches)

[Switch to No. 5 DPNs or circular needles] Rows 9 – 20: k 46. (46 stitches)

[Switch to No. 3 DPNs or circular needles] Row 21: k 46. (46 stitches)

Rows 22 – 27: *k, p* x 23. (46 stitches)

[Switch to a No. 5 DPN or circular needle] Row 28: Bind off in *k, p* pattern. Cut yarn, leaving an 8-inch tail, and pull through. Weave in ends. Block if desired.

Instructions: Large Cup Cozy

(Cups 9 inches to 11 inches around; measures 5 inches top to bottom)

Use the long-tail cast on method. Knit in the round. For Double Point Needles, follow DPN instructions written in italics. For circular needles, follow magic loop instructions in bold. If desired, use a stitch marker to keep track of the beginning/ends of your rows/rounds by placing it between the last and first stitch of each row/round.

[Using No. 3 DPNs or long circular needle] Row 1: Cast on 46 stitches. Divide onto 3 DPNs (15 on 1st, 16 on 2nd, and 15 on 3rd DPN). Or separate stitches on long circular needles for magic loop (23 on each side). (46 stitches)

Row 2: Join the round (taking care not to twist stitches) and *k, p* x 23. (46 stitches)

Rows 3 – 8: *k, p* x 23. (46 stitches)

[Switch to No. 5 DPNs or circular needles] Rows 9 – 28: k 46. (46 stitches)

[Switch to No. 3 DPNs or circular needles] Row 29: k 46. (46 stitches)

Rows 30 – 35: *k, p* x 23. (46 stitches)

[Switch to a No. 5 DPN or circular needle] Row 36: Bind off in *k, p* pattern. Cut yarn, leaving an 8-inch tail, and pull through. Weave in ends. Block if desired.

Printable version of this free knitting pattern

Printable Basic Cup Cozy Knitting Pattern PDF by Liz @PurlsAndPixels

OLD VERSION

This pattern was revised in December 2021 to include instructions for a smaller size and for knitting in the magic loop. If you prefer the original, double point only, version, you can find those instructions at the following link: Old Version, DPN only, Printable simple coffee cozy knitting pattern PDF by Liz @PurlsAndPixels

Size Notes

This is a one-size-fits-most pattern; it should fit most hot and hold coffee cups that don’t have handles. The small size is great for coffeehouse-style paper cups and the large size works well for reusable hot and cold cups.

Care

If you use the materials called for in the pattern, your final product will be machine washable. To keep your coffee cozy looking its best, hand wash or machine wash separately on delicate cycle in cold water. You may tumble dry on low heat or lay flat to dry.

Learn to knit your own basic cup cozy with this free knitting pattern by Liz Chandler @PurlsAndPixels, now with DPN and Magic Loop instructions.

©2017, Liz Chandler of PurlsAndPixels. Revised 2021.

This basic cup cozy knitting pattern is for personal use, gifting, and charitable donation of completed items. You may also sell handmade items created using this pattern. Do not copy this pattern and distribute it. If you’d like to share the pattern, refer your friends to my website, purlsandpixels.com so they may obtain a copy.

If you find any errors or have any questions, email purlsandpixels@gmail.com and I will do my best to help.

I’d love to see your finished work! Tag your photos with @PurlsAndPixels on Twitter or Instagram.