Chunky Knit Candy Pillow Toy Free Pattern

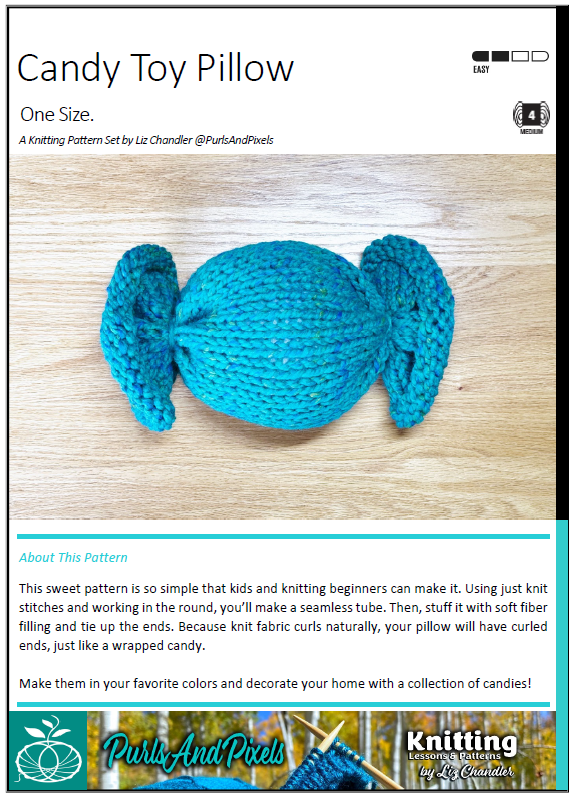
Even kids and beginners can knit this easy Candy Toy Pillow. Get the printable PDF knitting pattern from Liz Chandler @PurlsAndPixels.

A Fun, Squishy Project by Liz Chandler @PurlsAndPixels 🍬

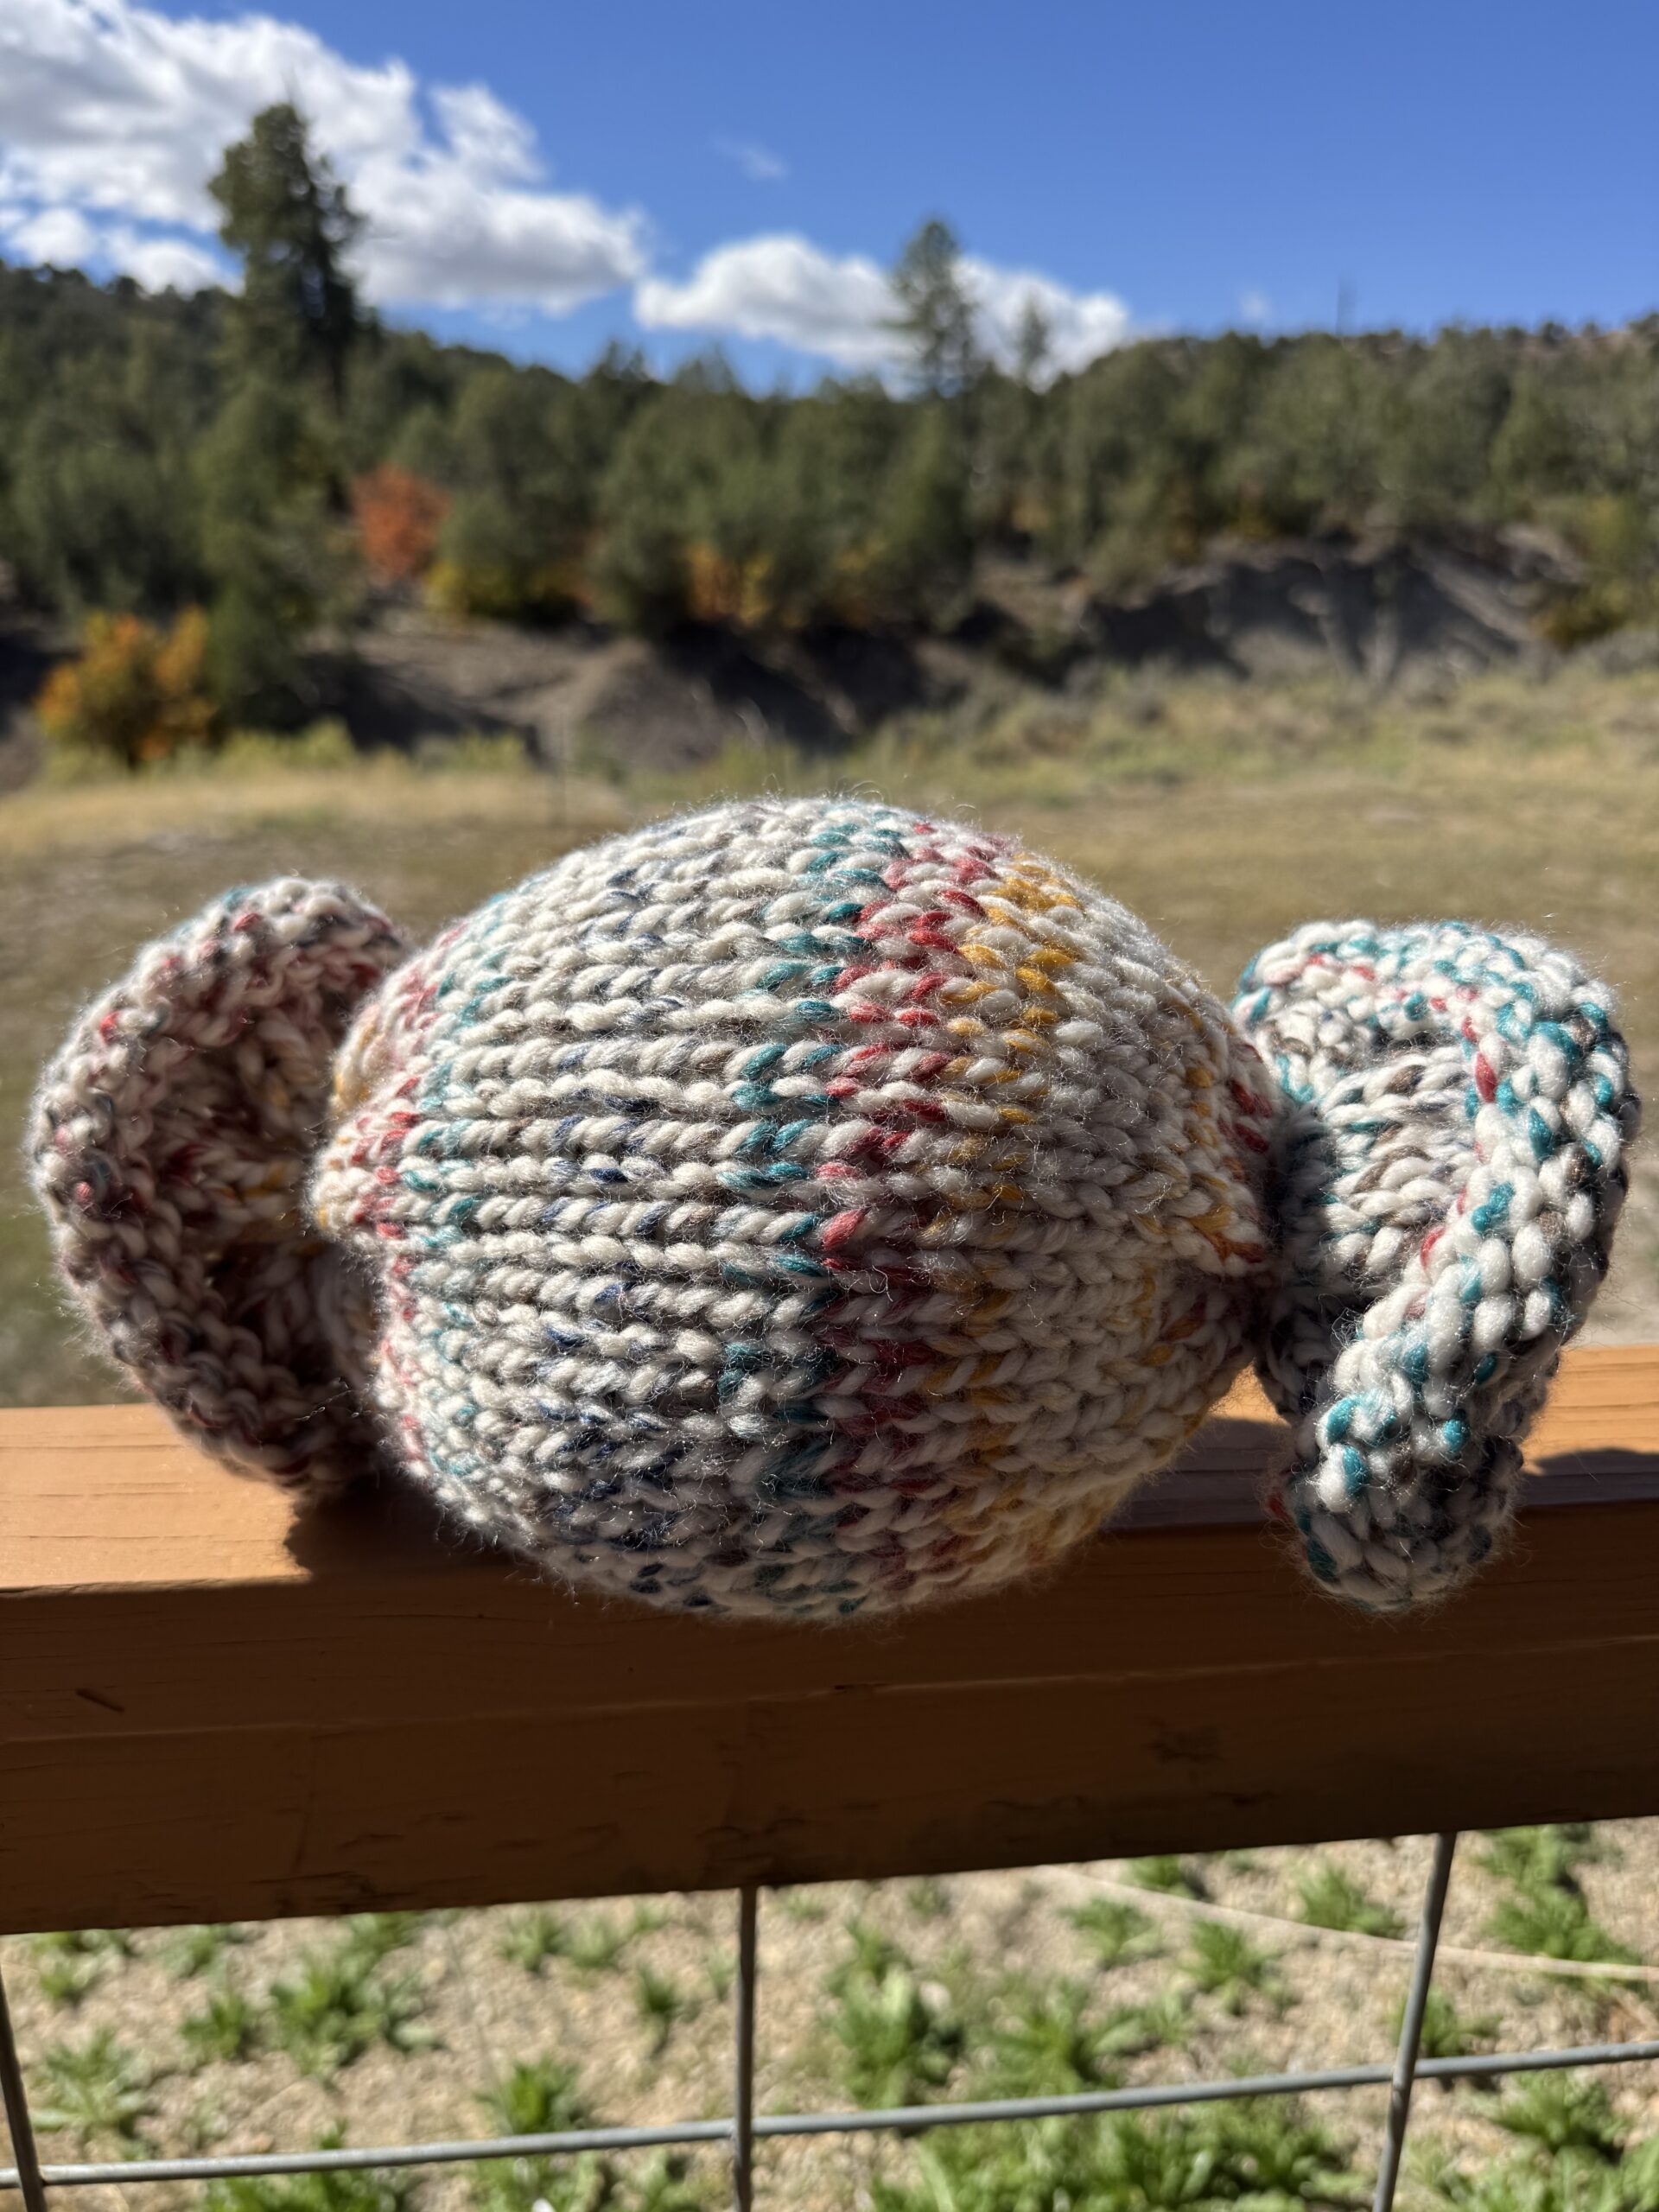
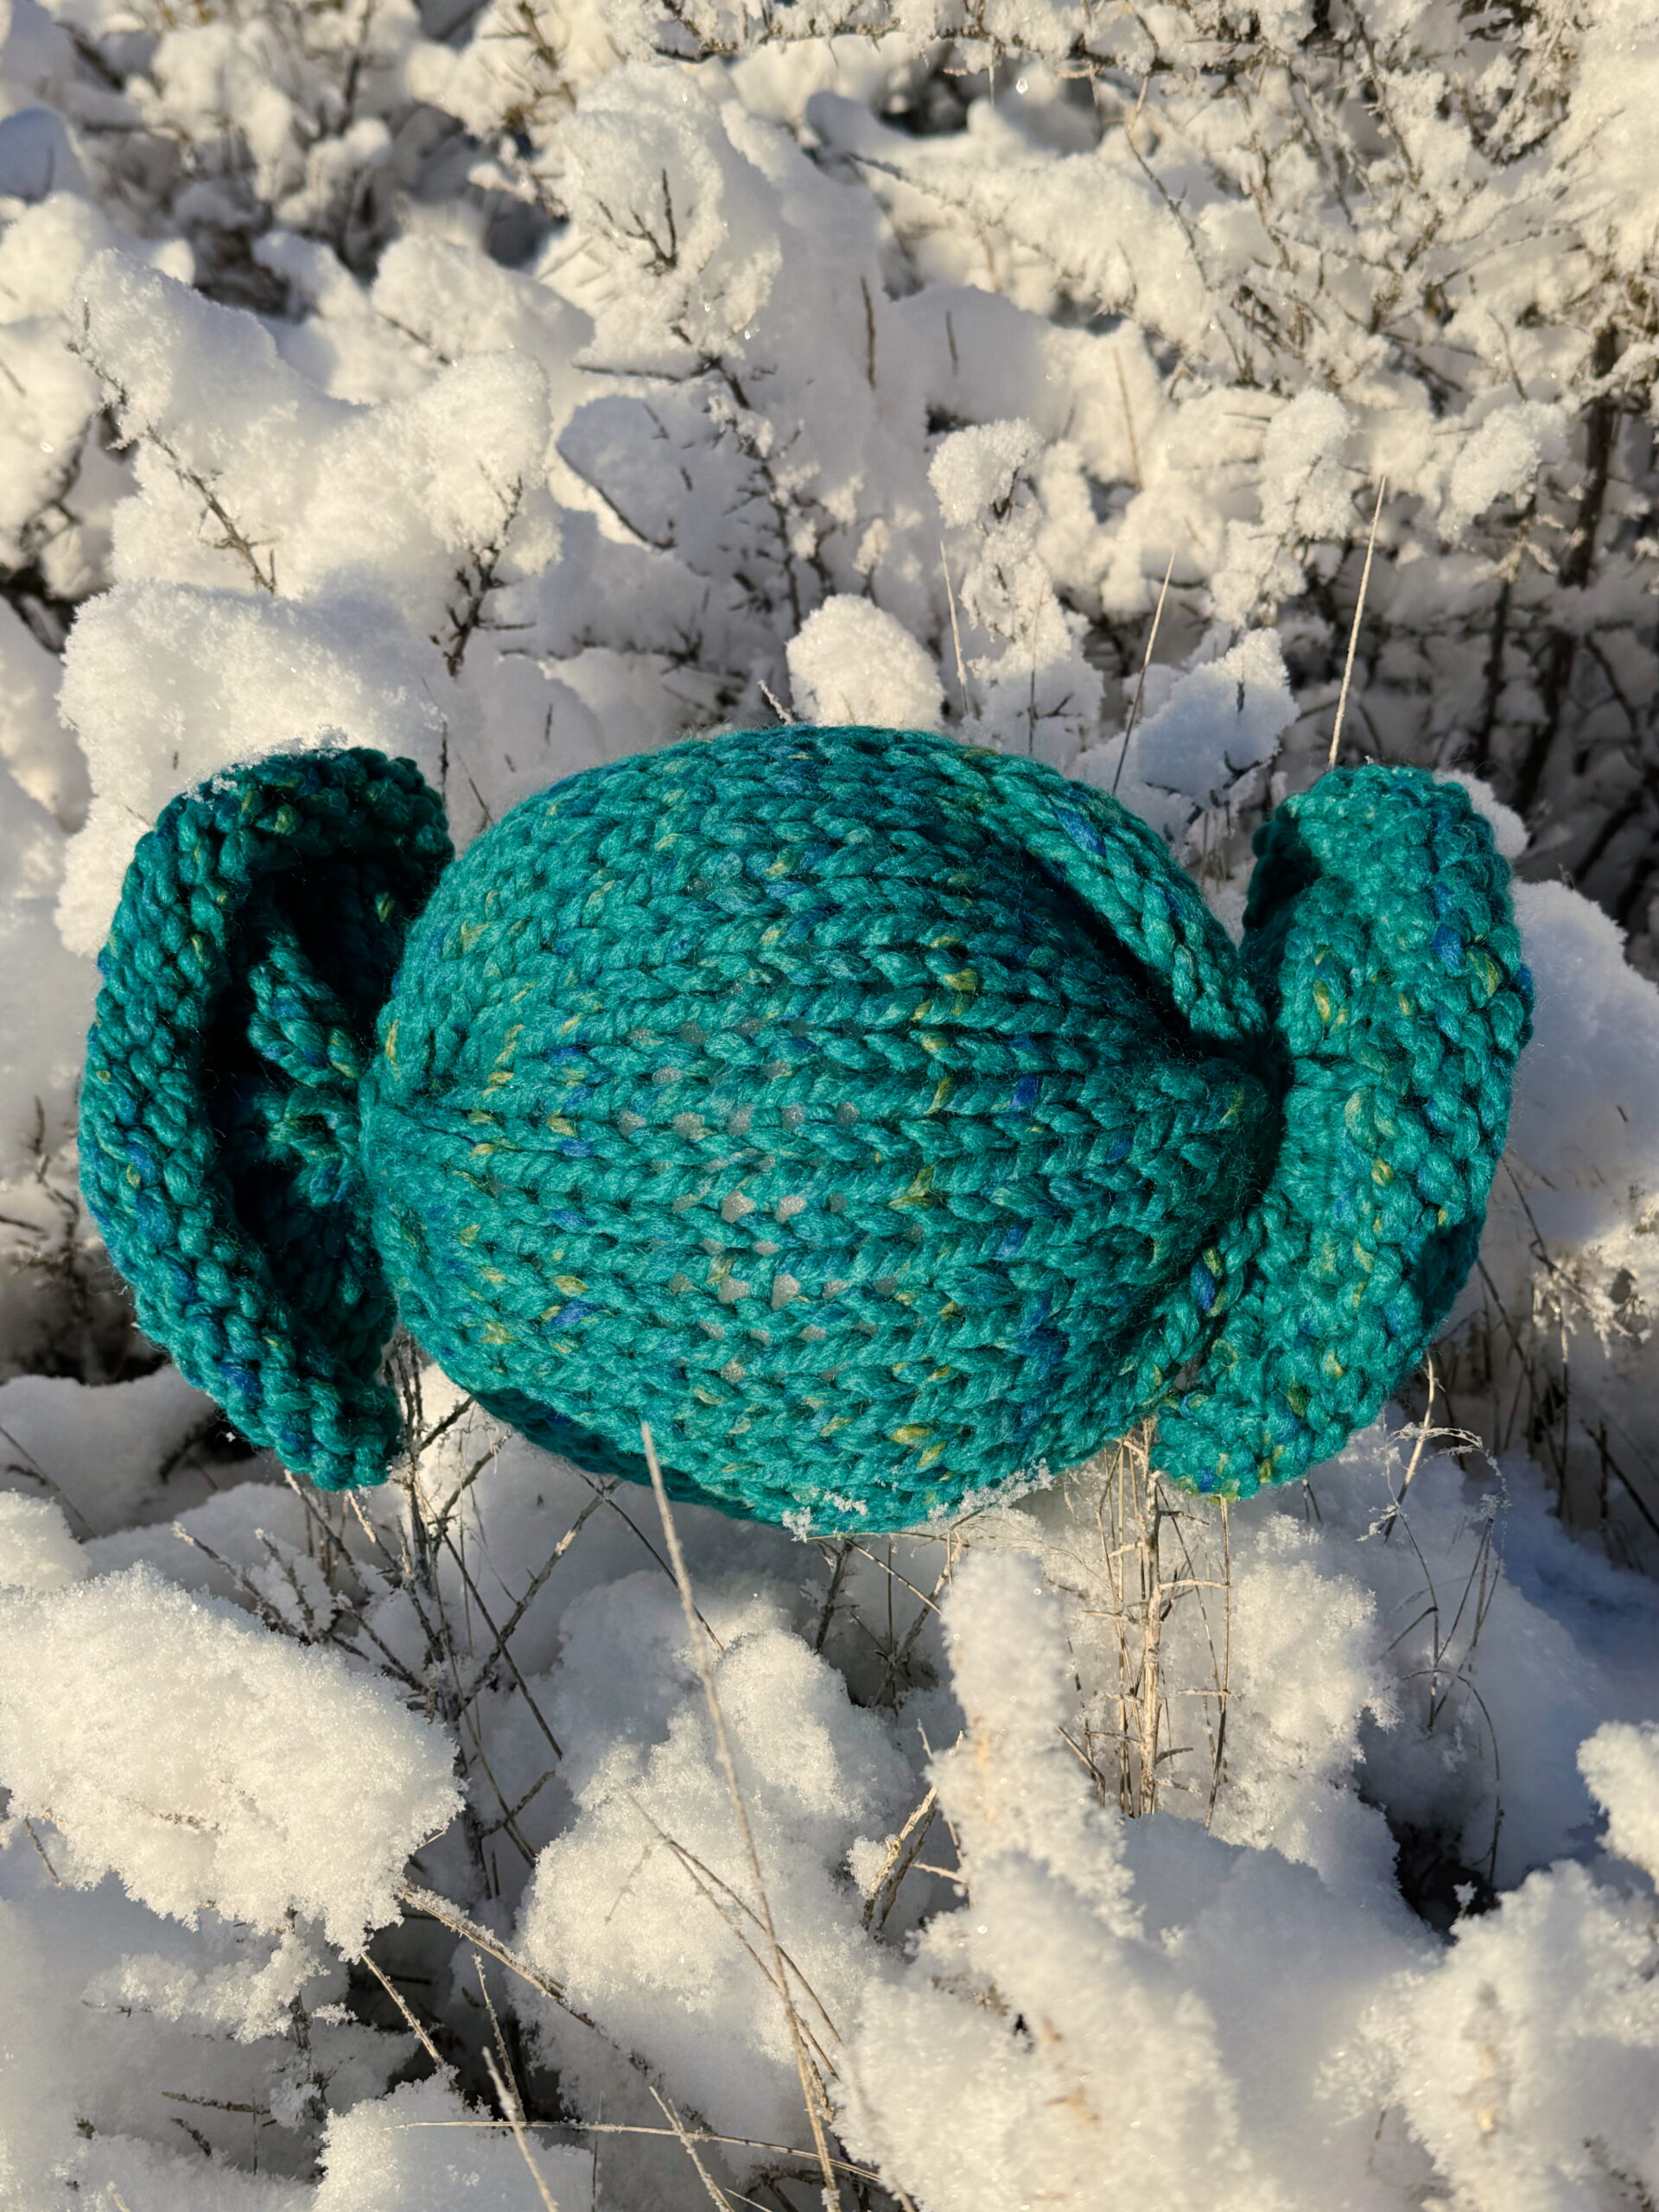
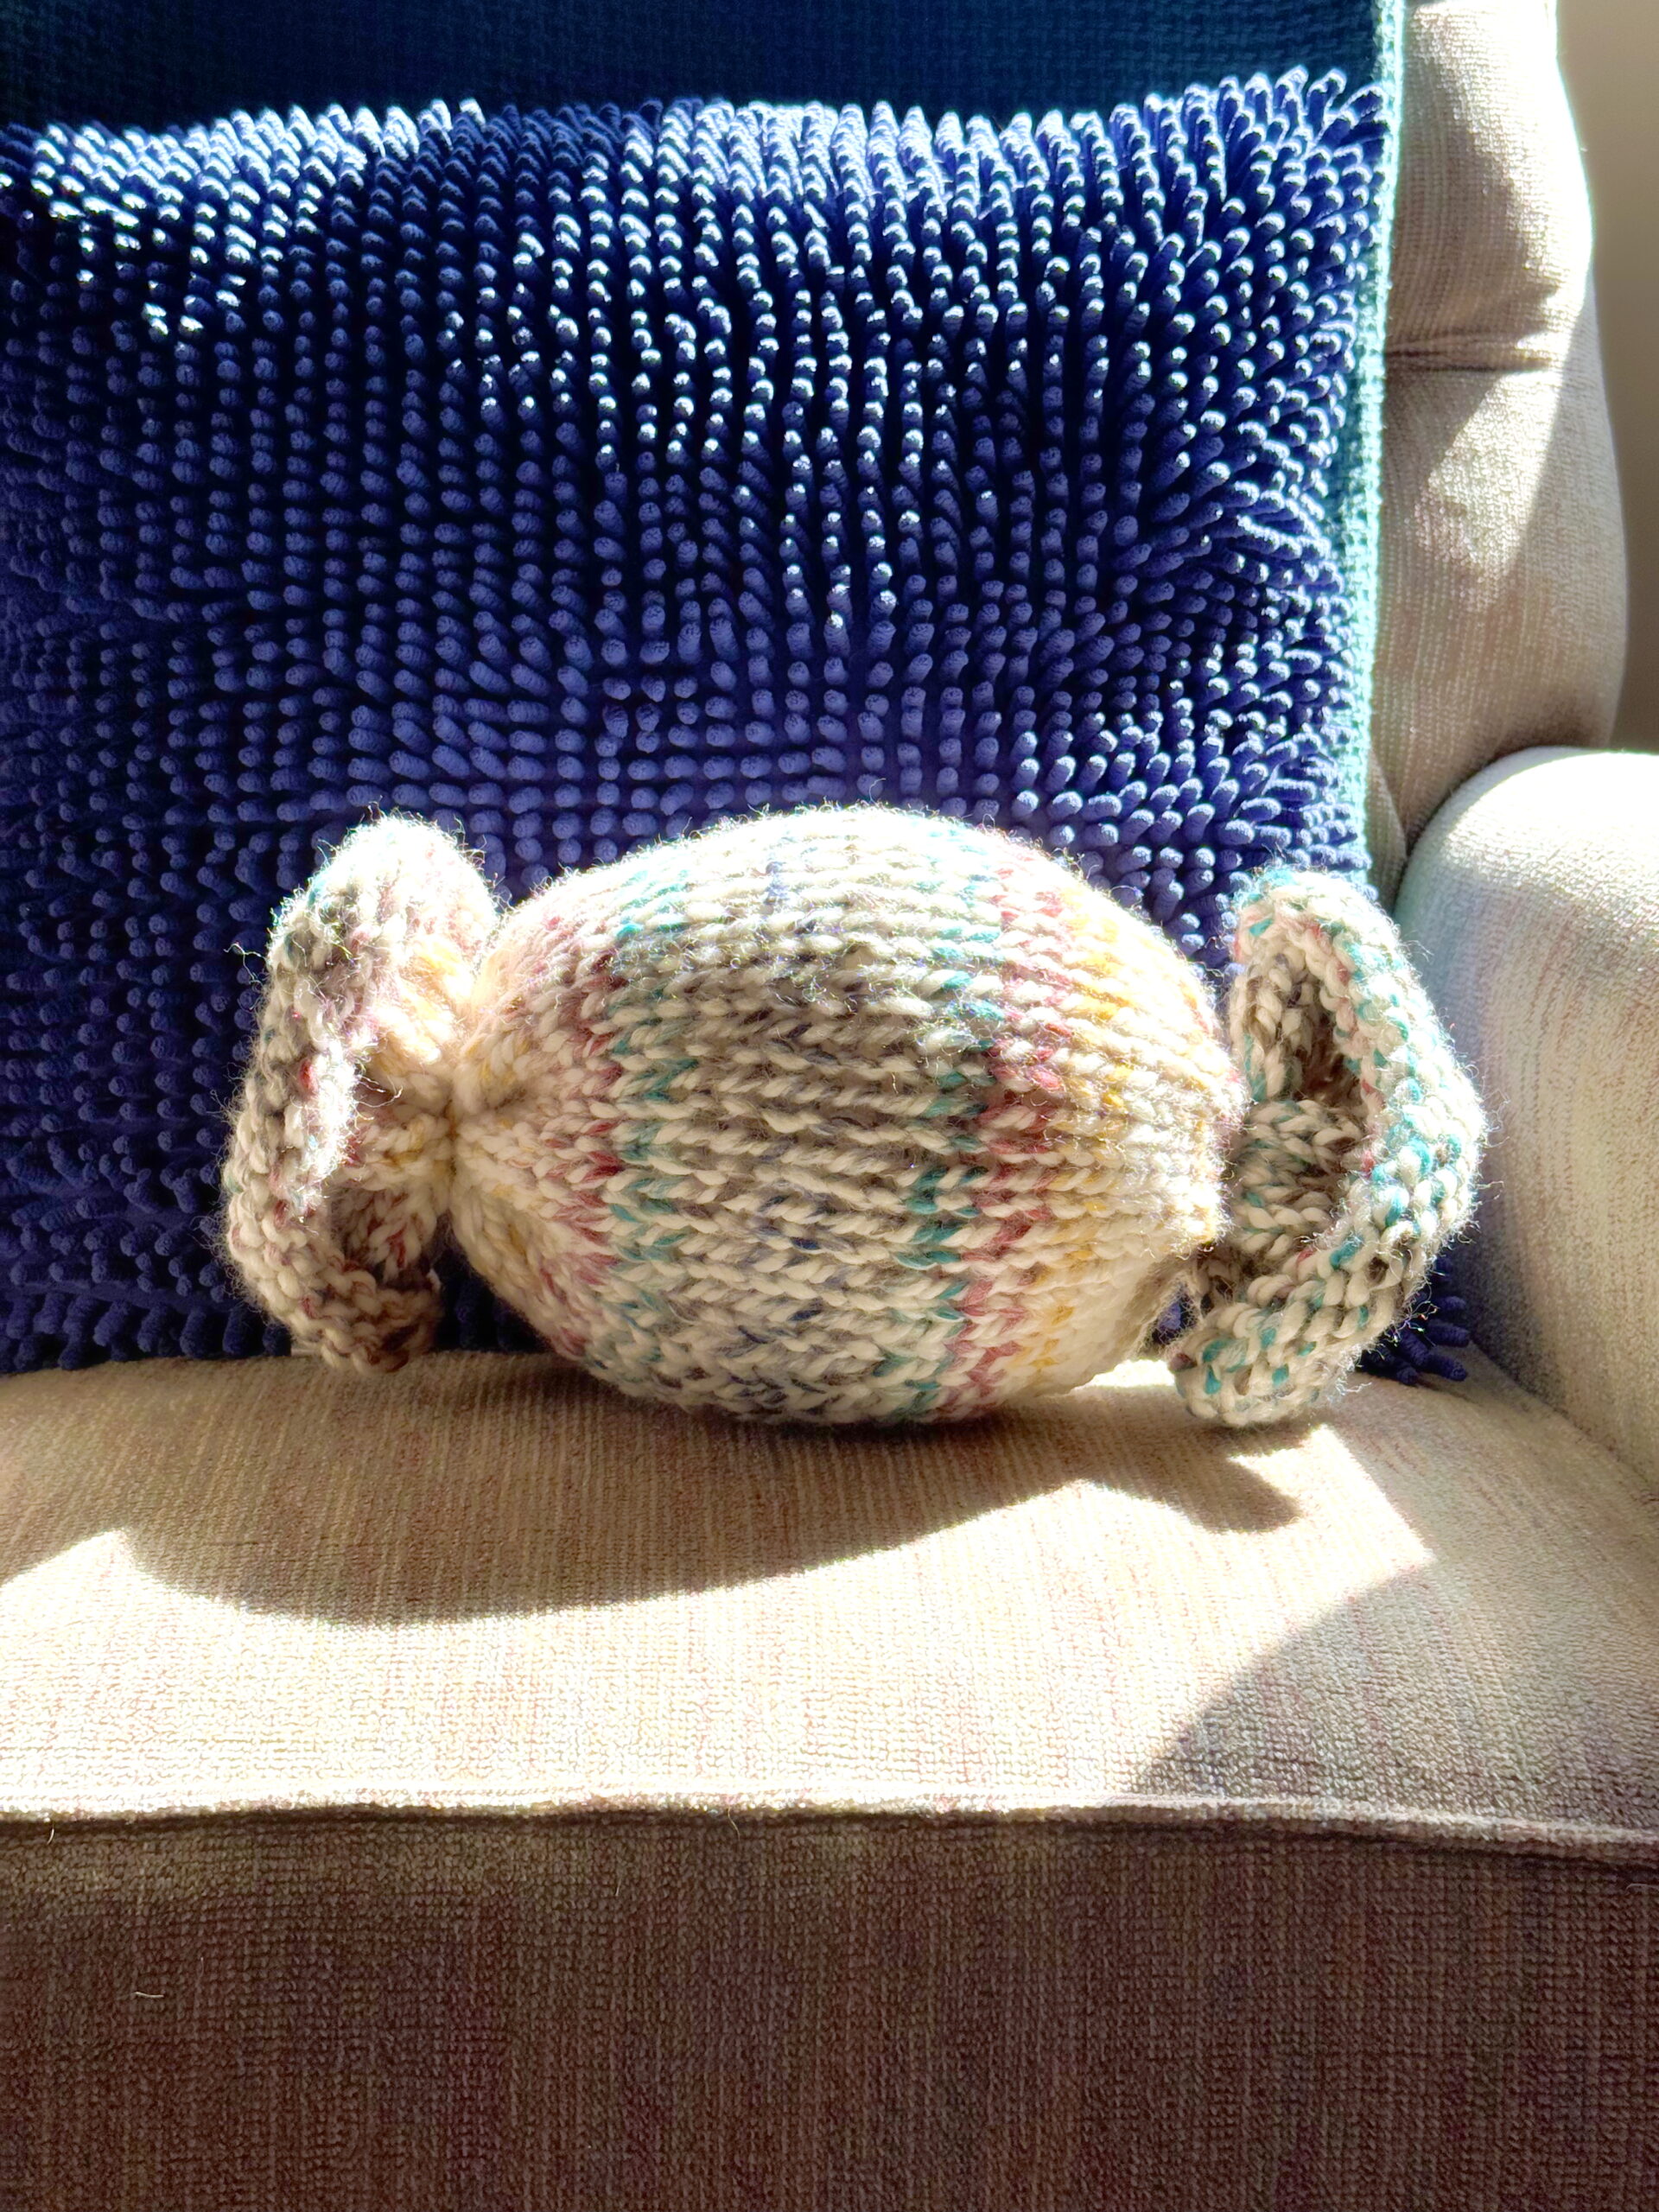
This cheerful project looks just like a giant wrapped candy, but it is really a chunky knit pillow toy. Soft, squishy, and playful, this knitting pattern is perfect for beginners of all ages. With super bulky yarn and only knit stitches in the round, you can make a colorful pillow that looks like candy. It is a great way to get kids excited about knitting and a fun project for adults who enjoy quick, creative knits.

⏱️ Time to make: 2 to 3 hours
🧶 Skill level: Beginner (kid-friendly)
🧵 Stitches used: Knit (in the round, no purling, no sewing)

The sweetest knitting project around. Knit the free and easy candy pillow toy with knitting instructions in this pattern by Liz Chandler @PurlsAndPixels.

This pillow is easy enough for kids to learn on and fun enough for adults who want a fast, playful project. Knit it in the round, stuff it with fluff, and tie up the ends to make it look like a wrapped piece of candy.

Prefer to knit offline?

This pattern is free to read below, but if you’d rather print it or save it for later, I’ve created a clean, ad-free PDF version for you.

  • Includes complete, row-by-row instructions
  • Easy to print or use on your tablet
  • Supports my small business 💖
Get the easy beginner and kid-friendly candy pillow toy knitting pattern from Liz Chandler @PurlsAndPixels.

Kids Can Knit This Free Chunky Knit Candy Pillow Pattern! 🎉

This pattern is a wonderful first project for kids. Since it uses only the knit stitch in the round, there are no tricky parts to slow you down. Kids can watch their pillow grow like magic and then proudly show off a candy pillow they made themselves. 🍬🧶

🍬 Beginner friendly: Only the knit stitch is needed.
🧶 Quick knit: Super bulky yarn means this works up in just a few hours.
🎁 Great gift: Kids can make one for friends, or you can surprise a candy lover.
🏡 Playful decor: Adds a pop of color and fun to bedrooms, playrooms, or the couch.

If you need help, there are instructions and video tutorials here on PurlsAndPixels for every step you’ll take:

Materials for the Free Chunky Knit Candy Pillow Pattern

Knitting Needles

  • 16-inch (41 cm) US No. 13 (9 mm) circular needle, or size needed to match gauge.

Yarn

Stuffing

A soft fiber toy/pillow filling like PolyFil.

Notions

Gauge

12 stitches x 15 rows = 4 x 4 inches in Stockinette Stitch on No. 13 (9.0 mm) needles. (Learn how to check your gauge here.)

Abbreviations

k = knit

Learn to knit the easiest and cutest toy around. The knit candy toy pattern lets you make your own stuffed candy pillow even if you are brand new to knitting. Perfect for kids and beginners, get the free knitting pattern from Liz Chandler @PurlsAndPixels.

Instructions: Chunky Knit Candy Pillow Toy

(When complete, the toy will be about 12 inches long x 6 inches tall x 6 inches wide.)

Knit the Toy:

Use the Long-Tail Cast On method. Knit in the round.

Row 1: Cast on 32 stitches. (32 stitches)

Row 2: Join the round (taking care not to twist stitches) and k 32. (32 stitches)

Rows 3 – 47: k 32. (32 stitches) [Work should measure 17 inches at this point.]

Row 48: Bind off loosely. Cut yarn, leaving an 8-inch (20.32-cm) tail, and pull through. Weave in ends. Block if desired.

Stuff the Toy:

(video instructions)

Clip two 17-inch-long pieces of yarn from the ball.

Measure about 4 inches from the end of the work, then tie up one end of your pillow with one of the yarn pieces.

Put stuffing inside the knitted tube and fluff to make a round center.

Using the second piece of yarn, tie the remaining open end closed about 4 inches from the edge of the work.

Fluff your pillow into shape and you are all finished!

Printable version of this free knitting pattern

Printable Candy Knit Toy Pillow pattern PDF by Liz @PurlsAndPixels

How to Use a Knit Candy Toy Pillow

🍬 Hug it, squish it, and play with it!
🧸 Use it as a toy or pillow.
🎁 Knit a whole bowl of candy pillows in different colors.

Learn to knit the easiest and cutest toy around. The knit candy toy pattern lets you make your own stuffed candy pillow even if you are brand new to knitting. Perfect for kids and beginners, get the free knitting pattern from Liz Chandler @PurlsAndPixels.

©2025, Liz Chandler of PurlsAndPixels.

This pattern is for personal use, gifting, and charitable donation of completed items. You may also sell handmade items created using this pattern. Do not copy this pattern and distribute it. If you’d like to share the pattern, refer your friends to my website, purlsandpixels.com so they may obtain a copy.

If you find any errors or have any questions, email purlsandpixels@gmail.com and I will do my best to help.

I’d love to see your finished work! Tag your photos with @PurlsAndPixels on Twitter or Instagram.

More Free Knitting Patterns You’ll Love

🛁 How to Knit a Washcloth: A Beginner-Friendly Tutorial

Easy & Quick Chunky Knit Coffee Cozy: Perfect for Beginners

🙏 Gratitude Blanket Pattern: Cozy Comfort for Every Home

🧣 Beginner Knit Scarf Pattern: Simple and Beautiful

Don’t Miss a Stitch! 🧶

Love cozy knitting projects? Sign up for my newsletter to get more free patterns, helpful tips, and updates straight to your inbox. 💌

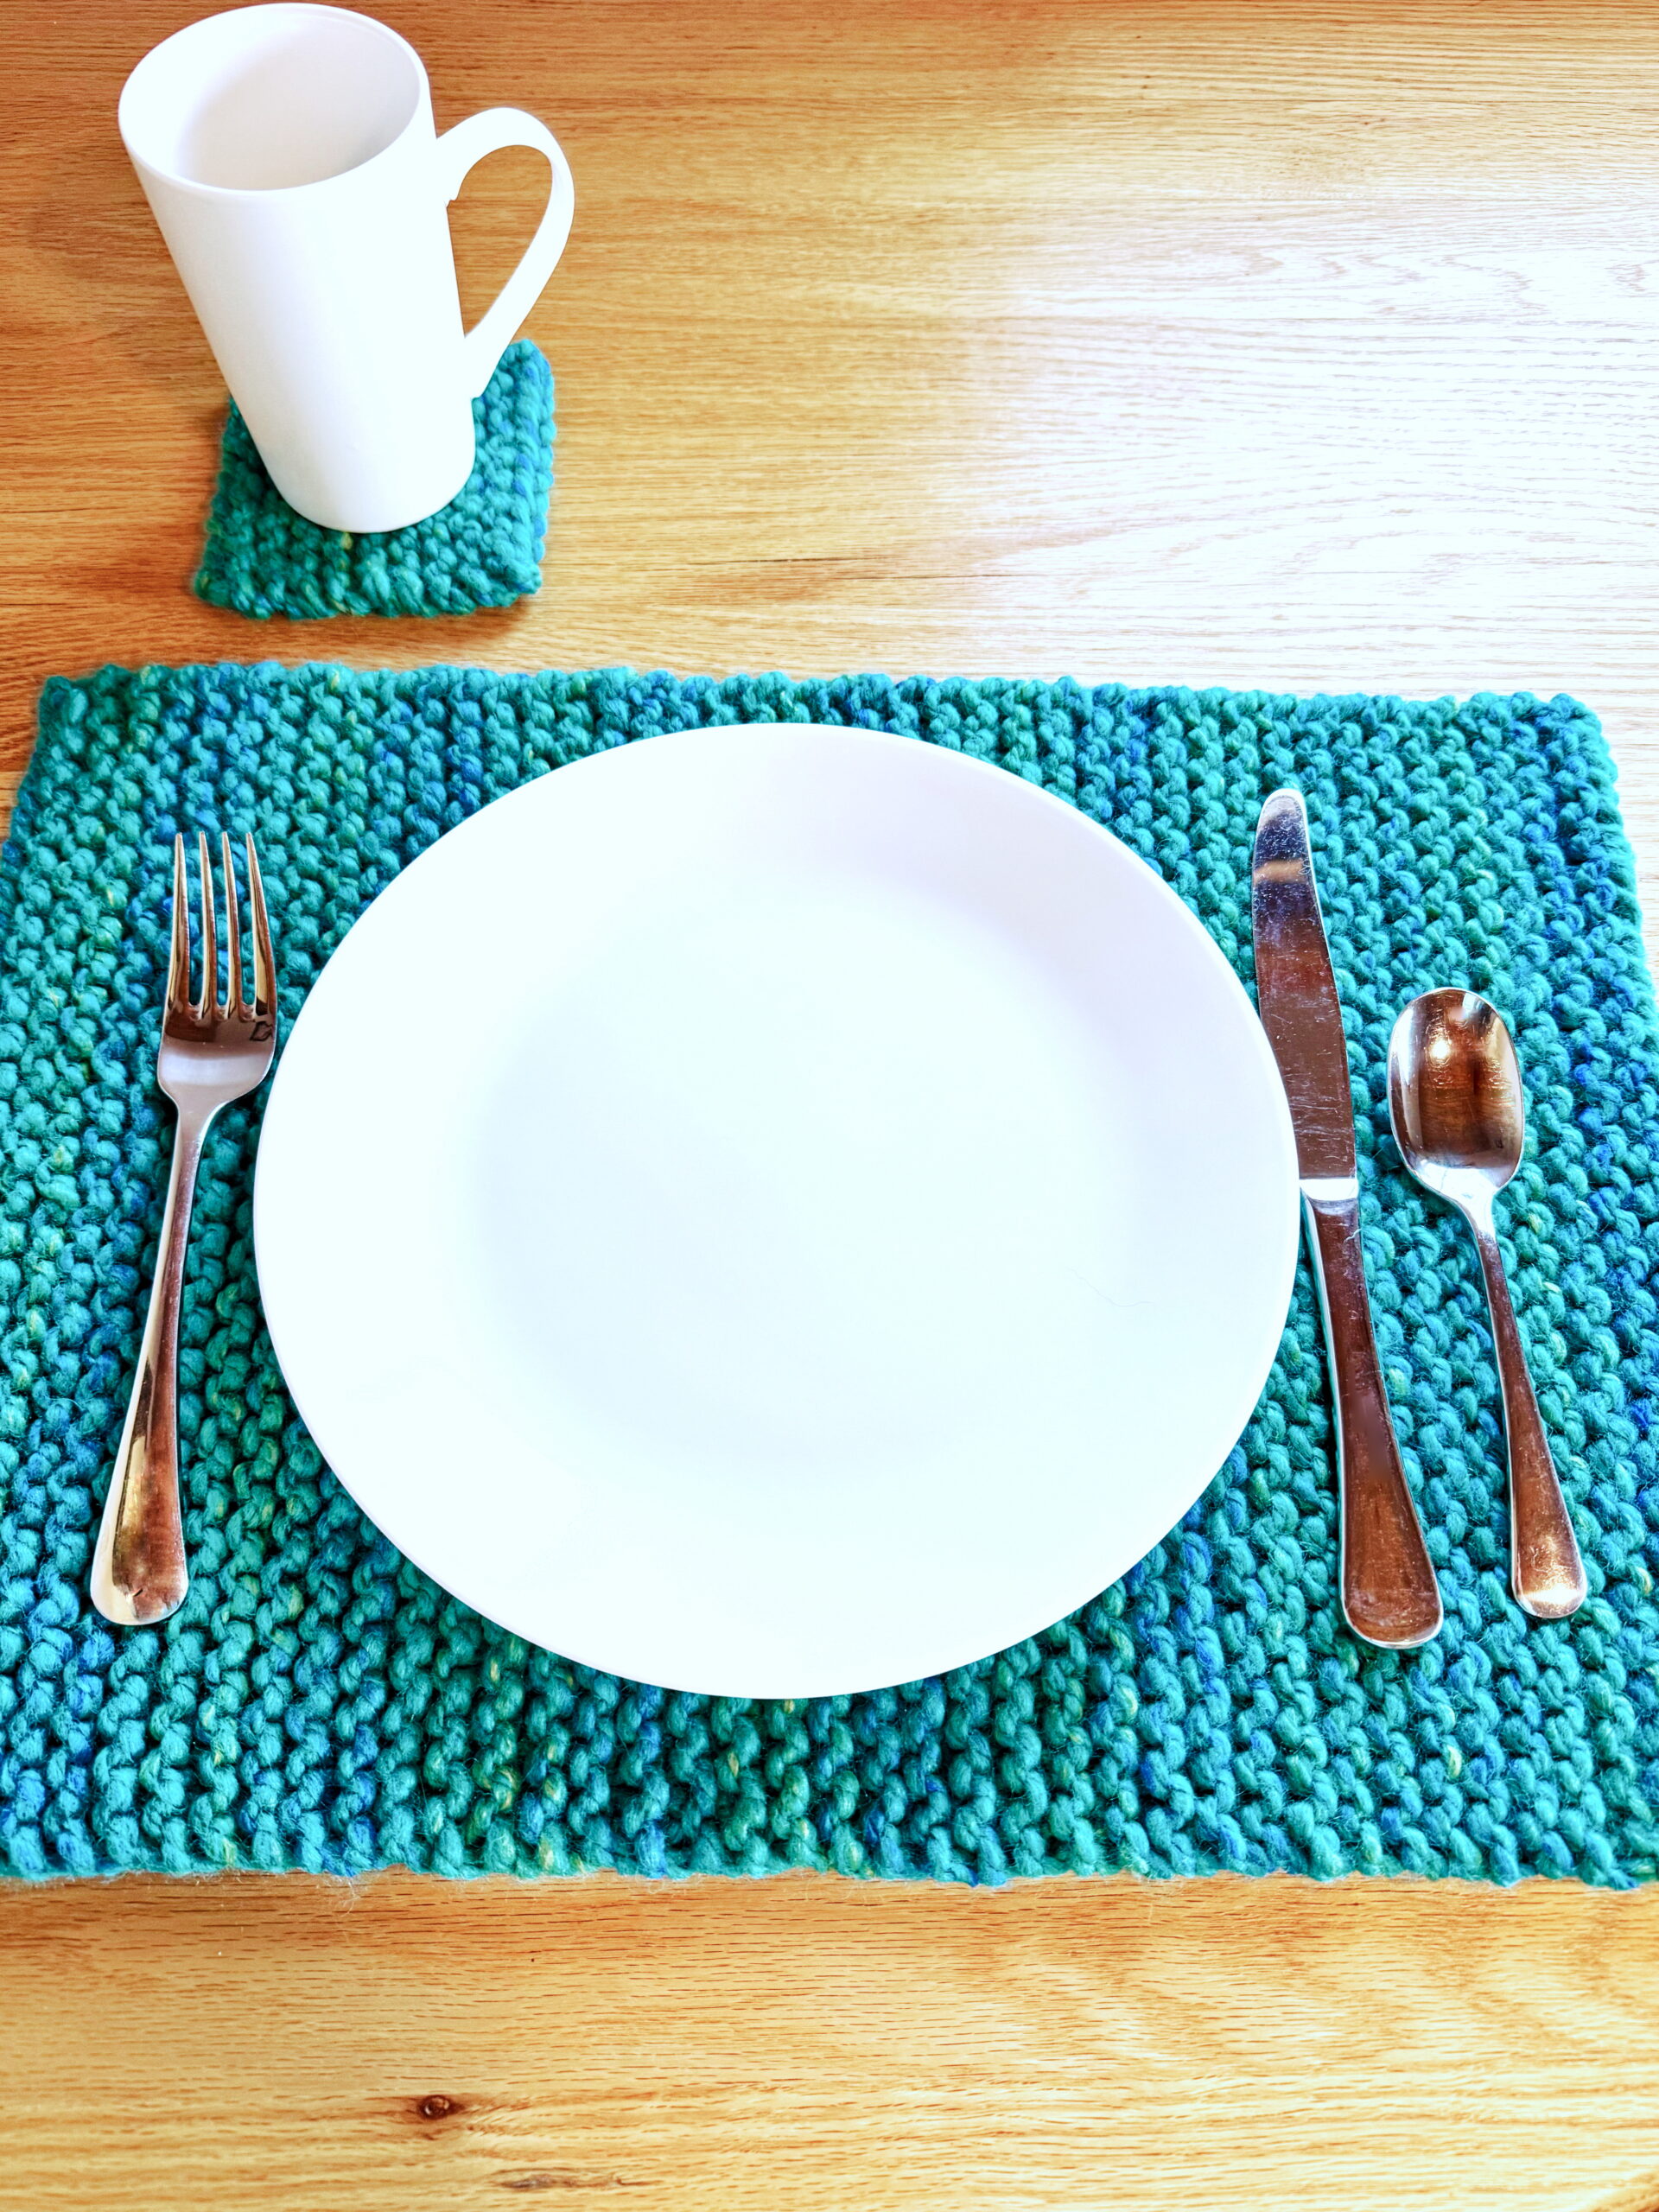
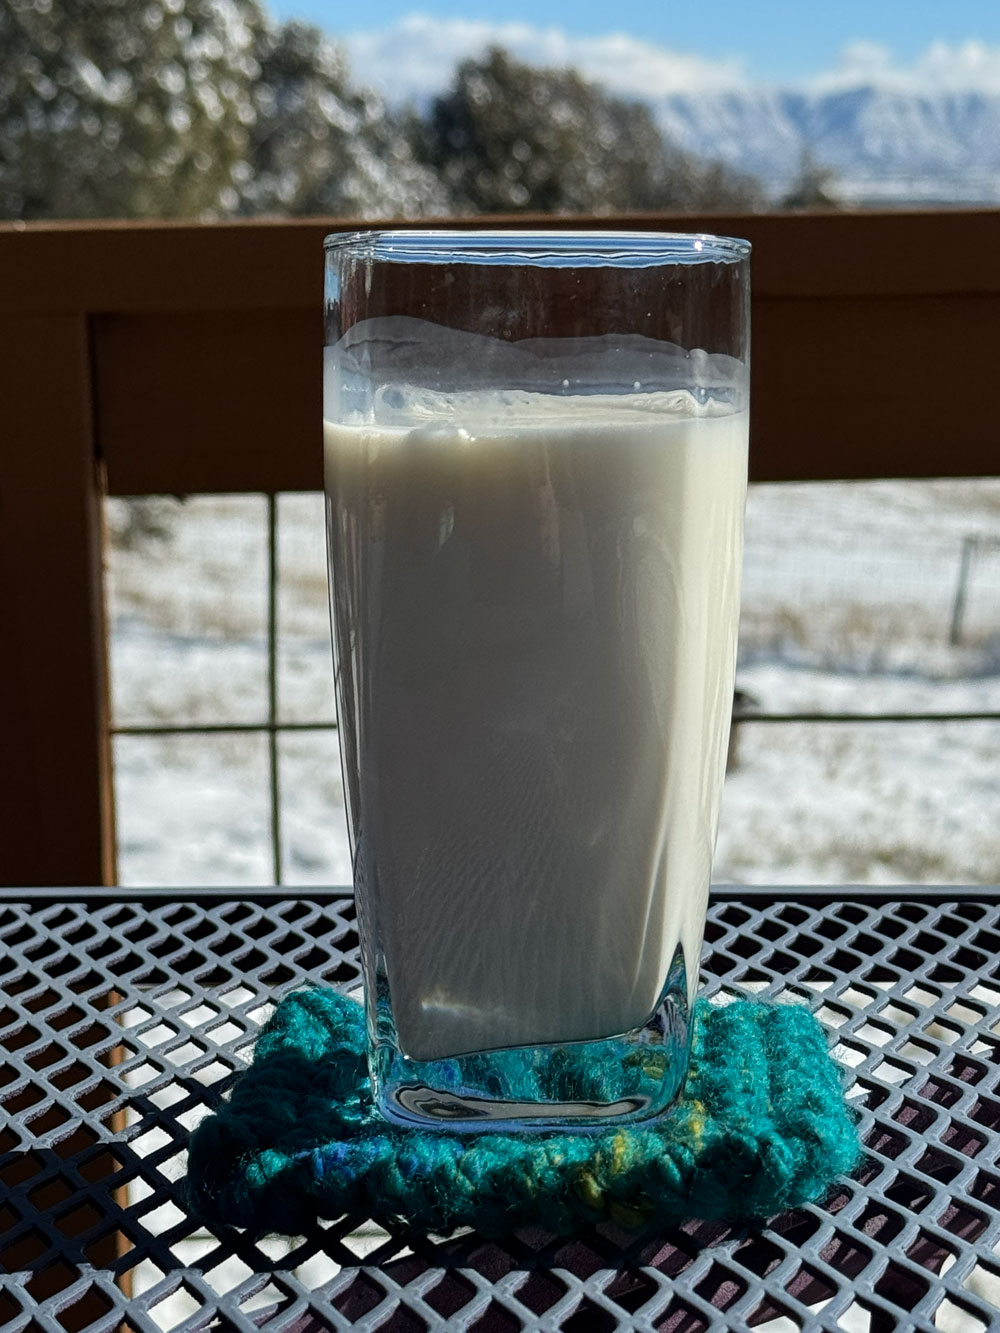
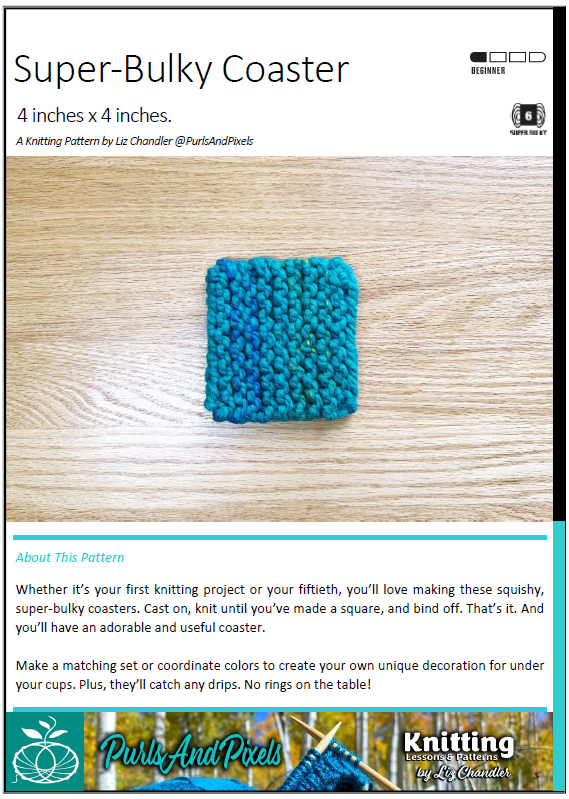
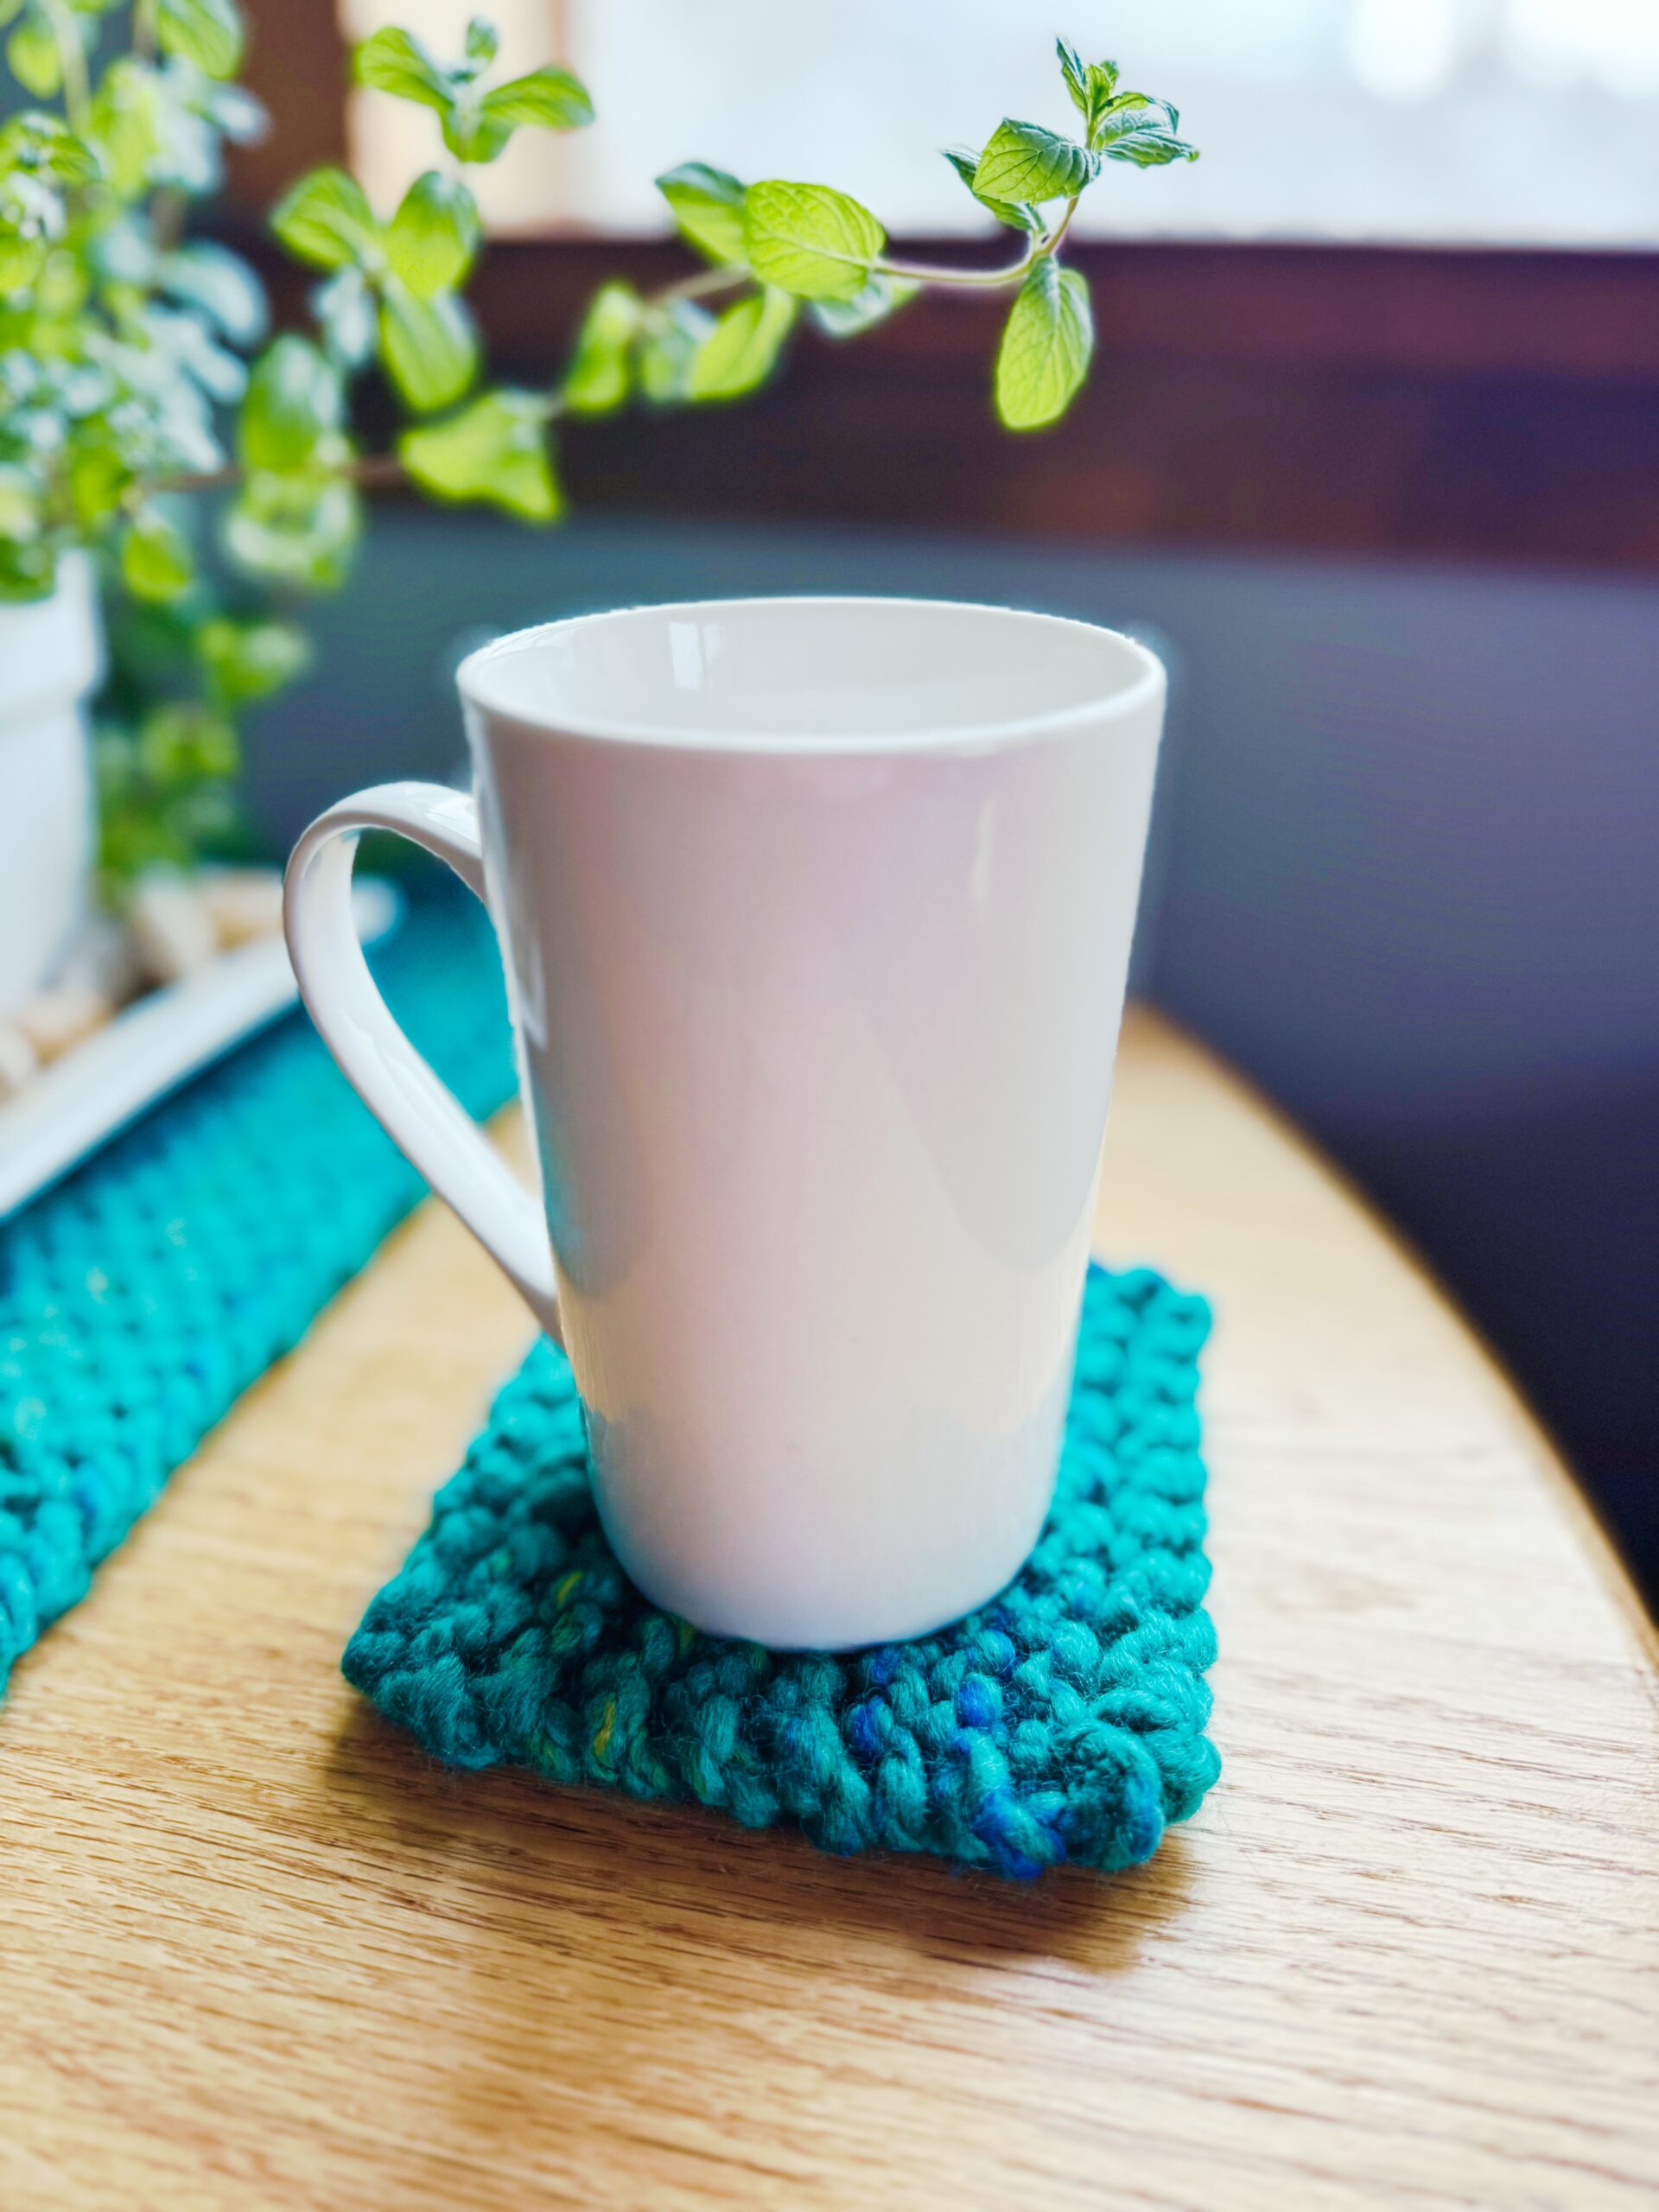
Beginner Chunky Knit Coaster

A Free Knitting Pattern by Liz Chandler @PurlsAndPixels ☕

Looking for an easy knitting pattern that kids and adults can enjoy? This beginner chunky knit coaster pattern is quick, practical, and a perfect way to learn the basics. Using only knit and purl stitches with chunky yarn on straight needles, you will create a sturdy, washable coaster in about an hour. It is a simple project that helps new knitters build confidence while making something useful.

⏱️ Time to make: 30 minutes to 1 hour
🧶 Skill level: Beginner (kid-friendly)
🧵 Stitches used: Knit and purl (worked flat)

Free Easy Beginner Chunky Knit Coaster

If you are teaching kids how to knit or just starting yourself, this coaster is the ideal first project. It works up quickly, lays flat, and still looks neat even if your stitches are uneven.

Why this pattern works so well for beginners:

🧶 Fast and forgiving: Chunky yarn knits up quickly with fewer stitches.
🧵 Simple stitches: Only knit stitches are needed.
Practical and fun: A coaster is a finished piece you can use right away or gift to someone special.

You may find yourself knitting an entire set for your coffee table or watching your kids make gifts they can be proud of.

🔗 Want more beginner-friendly patterns? Check out my free knitting tutorials and other cozy patterns!

Why Make Beginner Chunky Knit Coasters?

This project is more than just a practice square. It is a way to make something functional while learning:

Protects your table: Keeps surfaces safe from coffee rings, tea stains, and water drips.
🎁 Perfect for gifting: A handmade present that kids can proudly share with friends, family, or teachers.
🧶 Great stash buster: Use up leftover bulky yarn.
📘 Foundation project: The first beginner projects in my upcoming Kids Can Knit book.

Essential Skills for Your Easy Chunky Knit Coaster

Learn to Knit Online With Free Tutorials

New to knitting? You are in the right place. These free tutorials walk you through all the skills used in this project:

Want to learn more? Check out the full Learn to Knit Index or download the Free Knitting Starter Kit with printable PDFs and calm video walkthroughs.

Materials for Your Easy Chunky Knit Beginner Coasters

Knitting Needles

Circular Needles

Yarn

One 87-yard (5-ounce) skein of super-bulky (No. 6) yarn* (shown in Wool Ease Thick & Quick by Lion Brand Yarn “Carousel”), in your choice of color).

  • One coaster uses approximately 9.6 yards (0.6 oz.)

*Weights estimated with Wool Ease Thick & Quick by Lion Brand Yarn; other yarn weights may vary.

Notions

Gauge

12 stitches x 15 rows = 4 x 4 inches in Stockinette Stitch on No. 13 (9.0 mm) needles. (Learn how to check your gauge here. But honestly, if you’re a brand new beginner, don’t worry about it. Just start following the pattern.)

Abbreviations

k = knit

Instructions: Beginner Chunky Knit Coaster

(Legs 7 inches to 15 inches [17.78 cm to 38.1  cm] around; measures 5 inches [12.7 cm] top to bottom)

Use the Long-Tail Cast On method. Knit flat, turning after each row.

Row 1: Cast on 10 stitches. (10 stitches)

Rows 2 – 18: k 10. (10stitches)

Row 19: Bind off loosely in k pattern. Cut yarn, leaving an 8-inch (20.32-cm) tail, and pull through. Weave in ends. Block if desired.

Printable version of this free knitting pattern

Printable Easy Chunky Knit Coaster pattern PDF by Liz @PurlsAndPixels

Caring for Beginner Chunky Knit Coasters

If you use the materials called for in the pattern, your final product will be machine washable. To keep your coasters looking their best, hand wash or machine wash separately on delicate cycle in cold water. Lay flat to dry. Read more about how to care for handknits here.

2025, Liz Chandler of PurlsAndPixels.

This pattern is for personal use, gifting, and charitable donation of completed items. You may also sell handmade items created using this pattern. Do not copy this pattern and distribute it. If you’d like to share the pattern, refer your friends to my website, purlsandpixels.com so they may obtain a copy.

If you find any errors or have any questions, email purlsandpixels@gmail.com and I will do my best to help.

I’d love to see your finished work! Tag your photos with @PurlsAndPixels on Twitter or Instagram.

Create a Cozy Coffee Nook: Add Your New Handmade Coasters (and More) to the Kitchen

🍵 Quick & Easy Coffee Cup Cozy: Fun to Knit and Use

🧣Chunky Knit Scarf Pattern: Simple, Quick, and Beautiful

🥾 Easy Chunky Knit Boot Cuffs

🙏 Gratitude Blanket Pattern: Cozy Comfort for Every Home

🛁 Double-Thick Cotton Washcloth Pattern: Knits Up in No Time

Don’t Miss a Stitch! 🧶

Love cozy knitting projects? Sign up for my newsletter to get more free patterns, helpful tips, and updates straight to your inbox. 💌

Single-Row Striped Scarf Free Knitting Pattern

Learn to knit single-row striped scarves with two colors of yarn in this free knitting pattern by Liz Chandler @PurlsAndPixels.

by Liz Chandler @PurlsandPixels

Most stripe patterns make you cut the yarn after each row, turning your scarf into a fringe-factory. But if you’re looking for a way to knit stripes without cutting yarn, here’s the secret: slide your stitches to the other end of your circular needles between rows. This simple trick lets you keep both yarns attached and alternate rows cleanly, with no snipping required.

This striped scarf is quick to knit, easy to memorize, and uses just two yarns to make a bold, modern accessory. It’s beginner-friendly but feels a bit magical when you get it right.

Single-Striped Scarf Knitting Pattern by Liz Chandler @PurlsAndPixels

Prefer to knit offline?

Download Printable Knitting Pattern

This pattern is free to read below, but if you’d rather print it or save it for later, I’ve created a clean, ad-free PDF version for you.

  • Includes complete, row-by-row instructions
  • Easy to print or use on your tablet
  • Supports my small business 💖

By using my color-changing trick and keeping it simple with garter stitch, this scarf ends up cozy, clever, and easy to finish. It’s the perfect project for gift knitting or stash-busting your favorite color combos.

How this Single-Row Striped Scarf Free Knitting Pattern is Made

This scarf is knit flat in rows, but the yarn is never cut. Instead, you slide your work to the other end of your circular needles to change colors every row.

You will need to know how to:

Materials

You will need the following materials, which you can purchase at your local yarn shop or on Amazon.com via the affiliate links below:

Knitting Needles:
Long Circular Needles
36-inch (91 cm) long US No. 8 (5.0 mm) circular needle (or size needed to obtain gauge)

Yarn:

Two 315-yard (6 ounce) skeins of worsted weight yarn* (shown in Caron Simply Soft Yarn), in your choice of color.

  • one standard scarf uses about 514.5 yards (9.8 oz.)
  • one extra-wide scarf uses about 624.75 yards (11.9 oz.)

*Shown in Caron Simply Soft Yarn. Weights estimated with Caron Simply Soft yarn; other yarn weights may vary. Weight does not include gauge swatch. A 4×4 inch gauge swatch with a 2 row by 3 stitch border uses an additional 21 yards (0.4 oz.).

Tools:

A measuring tape and a darning needle.

Gauge

18 stitches x 24 rows = 4 x 4 inches in stockinette stitch on No. 8 (5.0 mm) needles. (Learn how to check your gauge here.)

Abbreviations

k = knit

Instructions: Narrow-Width Striped Scarf Free Knitting Pattern     

(5 inches x 6 feet [12.7 cm x 1.8288 m] or desired length)

Knit flat. To help avoid tangling the working yarn, turn your work counterclockwise when instructed to “turn.” Hold Color 1 in front of the work when switching to Color 2.

[With Color 1] Row 1: Cast on 24 stitches. Turn.

[With Color 2] Row 2: k 24. (24 stitches) Do not turn; slide all live stitches to the left-hand needle tip.

[With Color 1] Row 3: k 24. (24 stitches) Turn.

Repeat Rows 2 and 3 until scarf measures 6 feet or your desired length.

[With Color 2] Row 2: k 24. (24 stitches) Do not turn; slide all stitches to the left-hand needle tip.

[With Color 1] Bind off loosely. Cut yarn, leaving an 8-inch tail, and pull through.

Tie off or weave in ends.

Instructions: Standard-Width Striped Scarf Free Knitting Pattern

(7 inches x 6 feet [17.78 cm x 1.8288 m] or desired length)

Knit flat. To help avoid tangling the working yarn, turn your work counterclockwise when instructed to “turn.” Hold Color 1 in front of the work when switching to Color 2.

[With Color 1] Row 1: Cast on 32 stitches. Turn.

[With Color 2] Row 2: k 32. (32 stitches) Do not turn; slide all live stitches to the left-hand needle tip.

[With Color 1] Row 3: k 32. (32 stitches) Turn.

Repeat Rows 2 and 3 until scarf measures 6 feet or your desired length.

[With Color 2] Row 2: k 32. (32 stitches) Do not turn; slide all live stitches to the left-hand needle tip.

[With Color 1] Bind off loosely. Cut yarn, leaving an 8-inch tail, and pull through.

Tie off or weave in ends.

Instructions: Extra-Wide Striped Scarf Free Knitting Pattern

(9 inches x 6 feet [2.7432 cm x 1.8288 m] or desired length)

Knit flat. To help avoid tangling the working yarn, turn your work counterclockwise when instructed to “turn.” Hold Color 1 in front of the work when switching to Color 2.

[With Color 1] Row 1: Cast on 40 stitches. Turn.

[With Color 2] Row 2: k 40. (40 stitches) Do not turn; slide all live stitches to the left-hand needle tip.

[With Color 1] Row 3: k 40. (40 stitches) Turn.

Repeat Rows 2 and 3 until scarf measures 6 feet or your desired length.

[With Color 2] Row 2: k 40. (40 stitches) Do not turn; slide all live stitches to the left-hand needle tip.

[With Color 1] Bind off loosely. Cut yarn, leaving an 8-inch tail, and pull through.

Tie off or weave in ends.

Printable version of this free knitting pattern

Printable Striped Scarf PDF Knitting Pattern

Single stripe knitting pattern free from Liz Chandler @PurlsAndPixels.

Care

If you use the materials listed above, your scarf will be machine washable. For best results, hand wash or use a delicate cycle in cold water. Lay flat to dry or tumble dry low.

🛁 Read more Knitwear Care Tips

Knit a 2 color scarf without all the messy loose ends. Get the free striped scarf knitting pattern from Liz Chandler at PurlsndPixels.

© 2025, Liz Chandler of PurlsAndPixels.

This pattern is for personal use, gifting, and charitable donation of completed items. You may also sell handmade items created using this pattern. Do not copy this pattern and distribute it. If you’d like to share the pattern, refer your friends to my website, purlsandpixels.com so they may obtain a copy.

If you find any errors or have questions, email purlsandpixels@gmail.com and I’ll do my best to help.

Tag @PurlsAndPixels on Instagram or Twitter to show off your finished scarf!

More Patterns You’ll Love

🧣 Easy Chunky Knit Scarf Pattern: A Warm, Wearable Hug
🙏 Gratitude Blanket Pattern: When You Need Extra-Cozy Knitting Joy
🎉 Basic Slouch Hat Pattern: A Versatile Style Option
🔥 Basic Ear Warmer Pattern: Quick Gift-Ready Project
🧹 All Knitting Patterns by Liz: Learn to Knit All the Things

Read More

Don’t Miss a Stitch!

Love cozy knitting projects? Join me on YouTube, Pinterest, and Instagram! And don’t forget to sign up for my newsletter to get more free patterns, helpful tips, and updates straight to your inbox. 💌

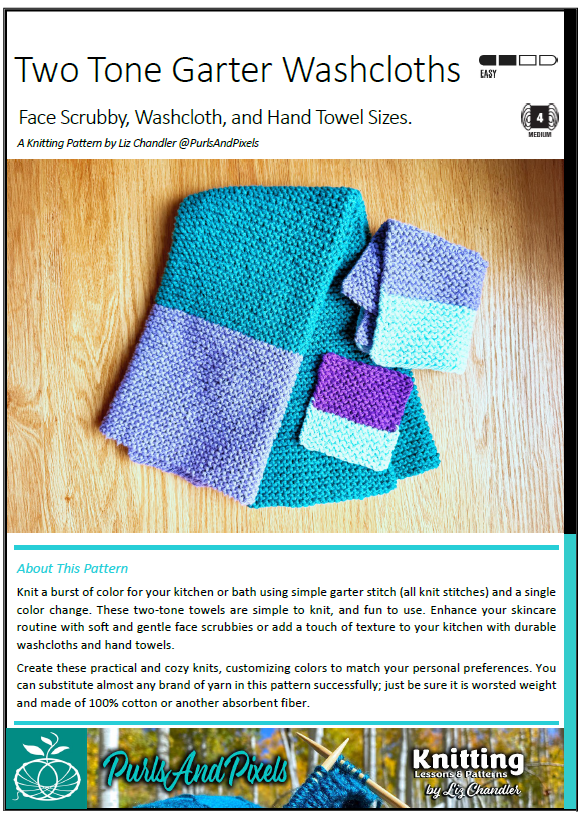
Two Color Garter Stitch Washcloth Free Knitting Pattern

Learn to knit two-tone garter stitch washcloths in three sizes with this free knitting pattern from Liz Chandler at PurlsAndPixels.

by Liz Chandler @PurlsandPixels

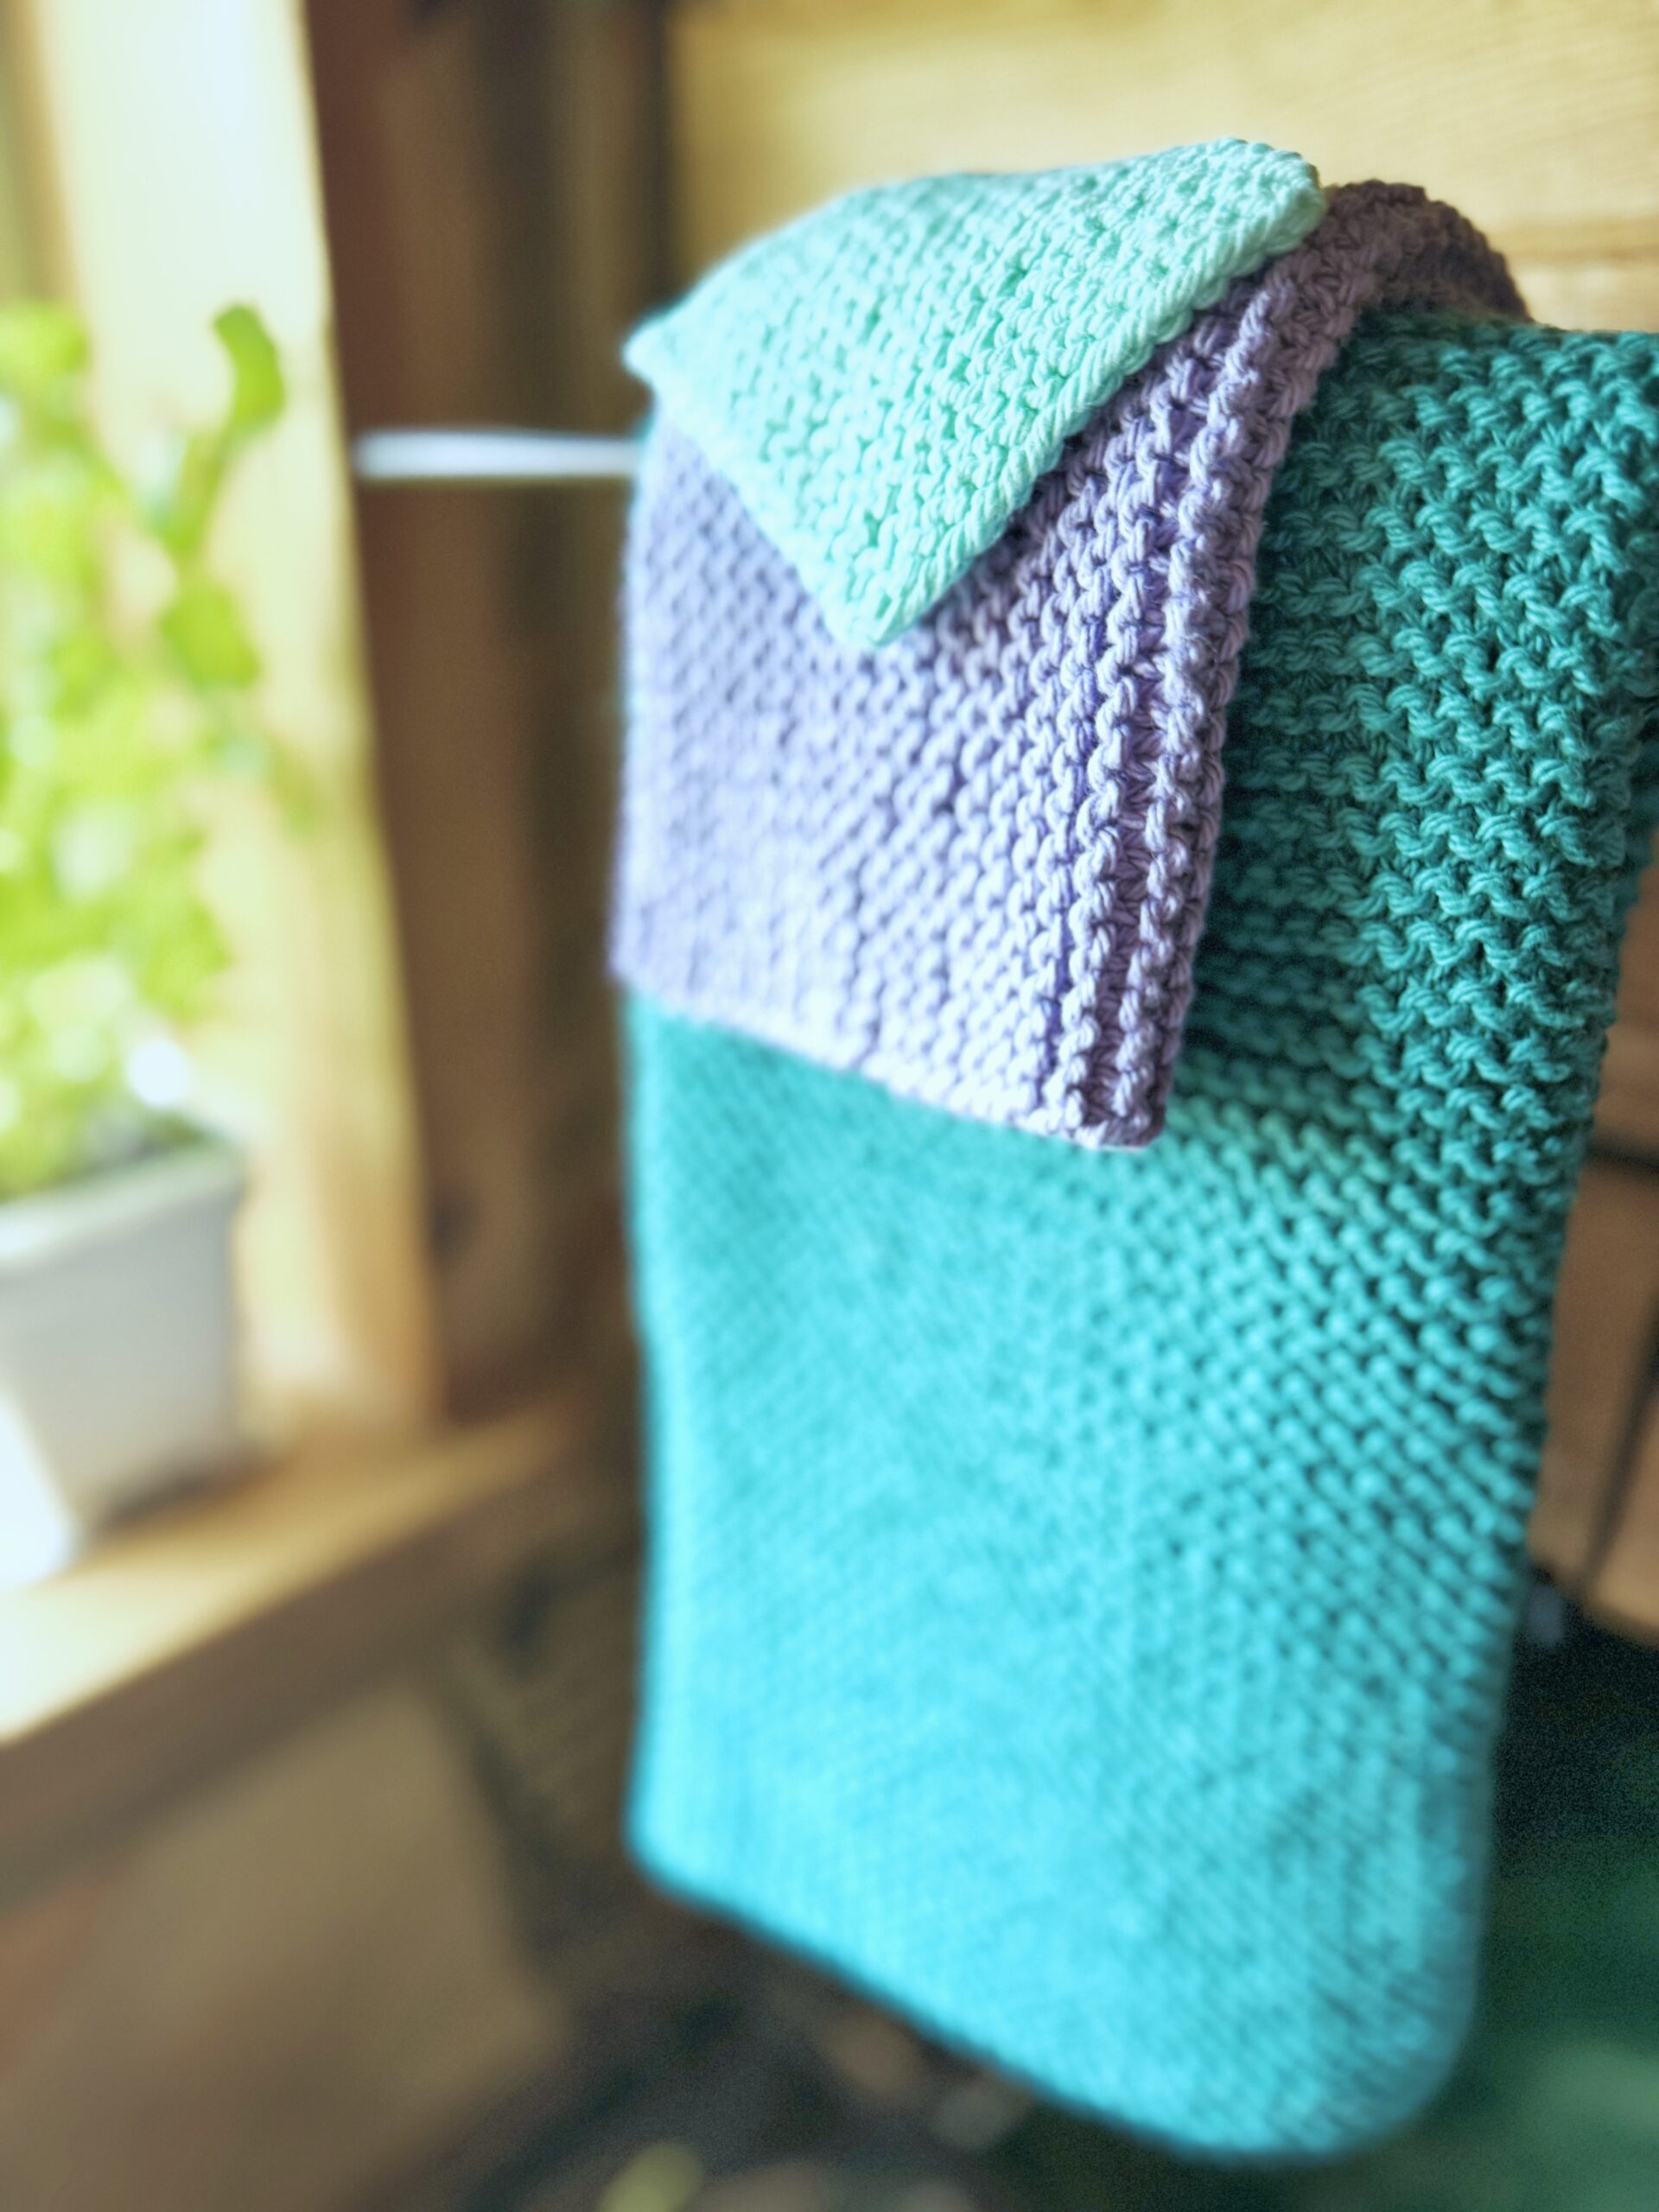
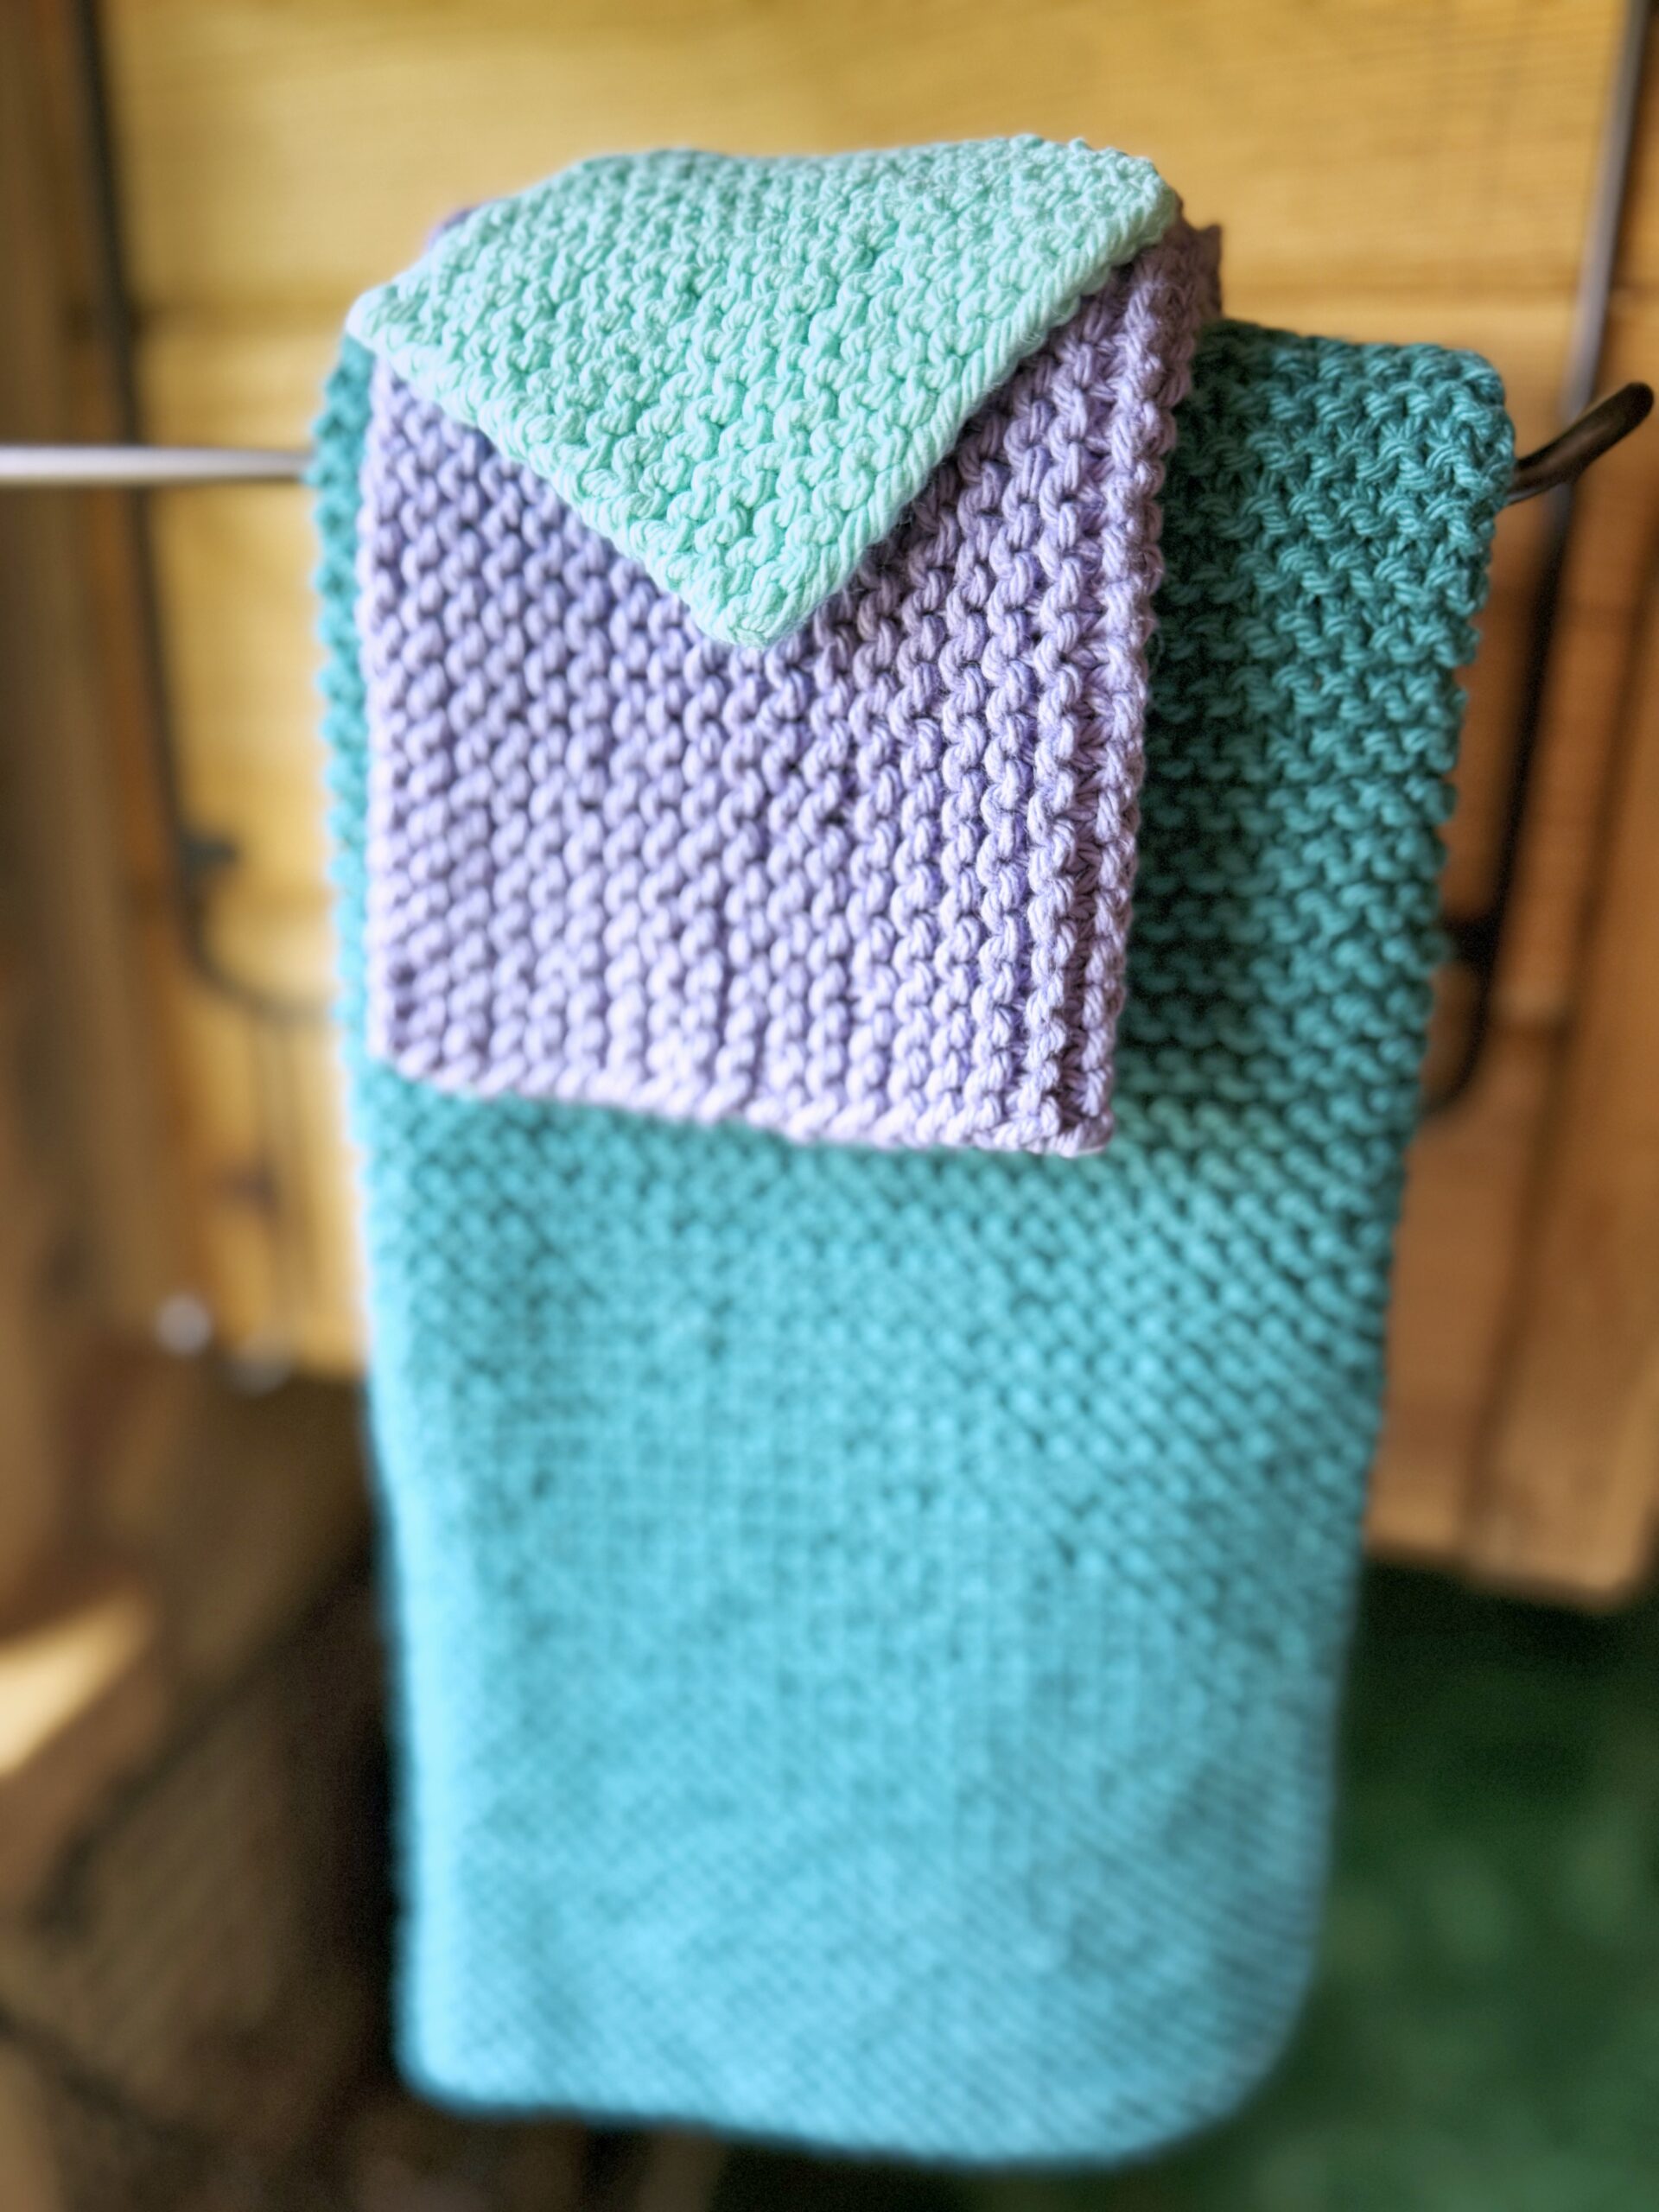
Give your everyday cloths a little something extra. The Two Color Garter Stitch Washcloth Free Knitting Pattern adds a playful twist to classic garter stitch with a simple color change that makes each piece pop. This free pattern includes three coordinating designs: a soft face scrubby, a standard 8″ x 8″ washcloth, and a full hand towel to round out your handmade set.

Knit your own 2-tone garter stitch washcloth in three sizes with this free knitting pattern from Liz Chandler at PurlsAndPixels.

You’ll knit each piece flat, using only the knit stitch to build bouncy garter ridges while your color combo does all the heavy lifting. It’s an easy, relaxing project with eye-catching results. They’re perfect for thoughtful gifts or adding a touch of handmade charm to your daily routine.

Prefer to knit offline?

This pattern is free to read below, but if you’d rather print it or save it for later, I’ve created a clean, ad-free PDF version for you.

  • Includes complete, row-by-row instructions
  • Easy to print or use on your tablet
  • Supports my small business 💖
Get Liz Chandler's Two Color Garter Stitch Washcloths Knitting Pattern PDF download at PurlsAndPixels.

How this Two Color Garter Stitch Washcloth Free Knitting Pattern is Made

Each piece in this set is worked flat, turning after each row and knitting every stitch. No purling, no shaping – just smooth, steady rows of garter stitch. A single color change adds visual interest without complicating the pattern, making it an easy way to keep things fun while keeping your hands relaxed. The face scrubby is a great standalone project, and the washcloth and hand towel follow the same simple rhythm, letting you build on the basics with confidence.

You will need to know how to:

If your are not familiar with any of these skills, you can find all of my free knitting lessons in my Learn to Knit Index.

Plus, you can watch a full video tutorial on how to knit this washcloth in my YouTube lesson here:

How to Knit a 2-Color Washcloth | Easy Garter Stitch Pattern for Beginners

Materials

Knitting Needles:
Long Circular Needles
36-inch (91 cm) long US No. 7 (4.5 mm) circular needle (or size needed to obtain gauge)

Yarn:
One 95-yard (2 ounce) skein of cotton worsted weight yarn* (shown in Lily Sugar ‘n Cream 100% Cotton Yarn), in your choice of two colors

  • one face scrubby uses about 4.75 yards (0.1 oz) of Color 1 and 14.25 yards (0.3 oz) of Color 2
  • one washcloth uses about 80.75 yards (0.5 oz) of Color 1 and 60.5 yards (1.275 oz) of Color 2
  • one hand towel uses about 475 yards (118.75 oz.) of Color 1 and yards (356.25 oz) of Color 2

* Weights estimated with Lily Sugar n’ Cream yarn; other yarn weights may vary. Weight does not include gauge swatch. A 4×4 inch gauge swatch with a 2 row by 3 stitch border uses an additional 19 yards (0.4 oz.).

Tools:

Gauge

19 stitches x 26 rows = 4 x 4 inches in stockinette stitch on No. 7 (4.5 mm) needles. (Learn how to check your gauge here.)

Abbreviations

k = knit

Instructions: Two Color Garter Face Scrubby

(3 inches x 3 inches [7.62 cm x 7.62 cm] after washing in cold water; 3.5 inches x 3.25 inches [8.89 cm x 8.225 cm] before washing)

Use the long-tail cast on method. Knit flat, turning after each row.

[With Color 1] Row 1: Cast on 14 stitches. Turn.

Rows 2 – 11: k 14. (14 stitches) Turn. [Measures 1.5 inches]

[With Color 2] Rows 12 – 27: k 14. (14 stitches) Turn.

Row 28: Bind off loosely in the pattern of Row 2. Cut yarn, leaving an 8-inch tail, and pull through. Weave in ends.

In cold water, hand wash or machine wash on delicate. Block while still wet, ensuring cloths are roughly 3 inches square, then allow to air dry.

Instructions: Two Color Garter Washcloth

(8 inches x 8 inches [20.32 cm x 20.32 cm] after washing in cold water; 8.5 inches x 9.25 inches [21.59 cm x 23.49 cm] before washing)

Use the long-tail cast on method. Knit flat, turning after each row.

[With Color 1] Row 1: Cast on 36 stitches. Turn.

Rows 2 – 20: k 36. (36 stitches) Turn. [Measures 2.5 inches]

[With Color 2] Rows 35 – 72: k 36. (36 stitches) Turn.

Row 73: Bind off loosely in the pattern of Row 2. Cut yarn, leaving an 8-inch tail, and pull through. Weave in ends.

In cold water, hand wash or machine wash on delicate. Block while still wet, ensuring cloths are roughly 8 inches square, then allow to air dry.

Instructions: Two Color Garter Hand Towel

(17 inches x 23 inches [43.18 cm x 58.42 cm] after washing in cold water; 17.5 inches x 24 inches [44.45 cm x 60.96 cm] before washing)

Use the long-tail cast on method. Knit flat, turning after each row.

[With Color 1] Row 1: Cast on 80 stitches. Turn.

Rows 2 – 46: k 80. (80 stitches) Turn. [Measures 6 inches]

[With Color 2] Rows 47 – 180: k 80. (80 stitches) Turn

Row 181: Bind off loosely in the pattern of Row 2. Cut yarn, leaving an 8-inch tail, and pull through. Weave in ends.

In cold water, hand wash or machine wash on delicate. Block while still wet, ensuring cloths are roughly 17 inches wide and 23 inches long, then allow to air dry.

Printable version of this free knitting pattern

Printable Two Color Garter Stitch Washcloth PDF Knitting Pattern

Knit easy, two-color garter stitch washcloths in three sizes with this free knitting pattern from Liz Chandler at PurlsAndPixels.

Care

If you use the materials called for in the Two Color Garter Stitch Washcloth Free Knitting Pattern, your final product will be machine washable. To keep your washcloth looking its best, hand wash or machine wash separately on delicate cycle in cold water. You may tumble dry on low heat or lay flat to dry.

🛁 Read more Knitwear Care Tips
Size & Use Notes

Each piece is designed for real-life utility:

  • Face scrubby for your nighttime skincare or baby bathtime
  • Washcloth for everyday dishes or self-care
  • Hand towel for drying hands in the kitchen or bathroom

These cloths make a thoughtful little set for gifting, especially when bundled with handmade soap or added to a basket of homegrown or homemade goodies.

Knit easy, two-color garter stitch washcloths in three sizes with this free knitting pattern from Liz Chandler at PurlsAndPixels.

©2025, Liz Chandler of PurlsAndPixels.

This pattern is for personal use, gifting, and charitable donation of completed items. You may also sell handmade items created using this pattern. Do not copy this pattern and distribute it. If you’d like to share the pattern, refer your friends to my website, purlsandpixels.com so they may obtain a copy.

If you find any errors or have any questions, email purlsandpixels@gmail.com and I will do my best to help.

I’d love to see your finished work! Tag your photos with @PurlsAndPixels on Twitter or Instagram.

More Patterns You’ll Love

🍽️ Beginner Garter Stitch Washcloth Free Knitting Pattern: A solid color towel pattern

🧶 Beginner Knit Scarf Easy Knitting Pattern: A light-weight garter stitch scarf

🧣 Easy Chunky Knit Scarf Pattern: A thick and quick garter stitch scarf

🙏 Gratitude Blanket Pattern: An extra-cozy garter stitch blanket

🛁 Knitted Dishcloth Patterns: More fun towel designs you can knit

🧺 All Knitting Patterns from Liz @PurlsAndPixels: Learn to Knit All the Things

Read More

Don’t Miss a Stitch! 🧶

Love cozy knitting projects? Join me on YouTube, Pinterest, and Instagram! And don’t forget to sign up for my newsletter to get more free patterns, helpful tips, and updates straight to your inbox. 💌

Beginner Garter Stitch Washcloth Free Knitting Pattern

Learn to knit simple garter stitch washcloths in three sizes with this free knitting pattern from Liz Chandler at PurlsAndPixels.

by Liz Chandler @PurlsandPixels

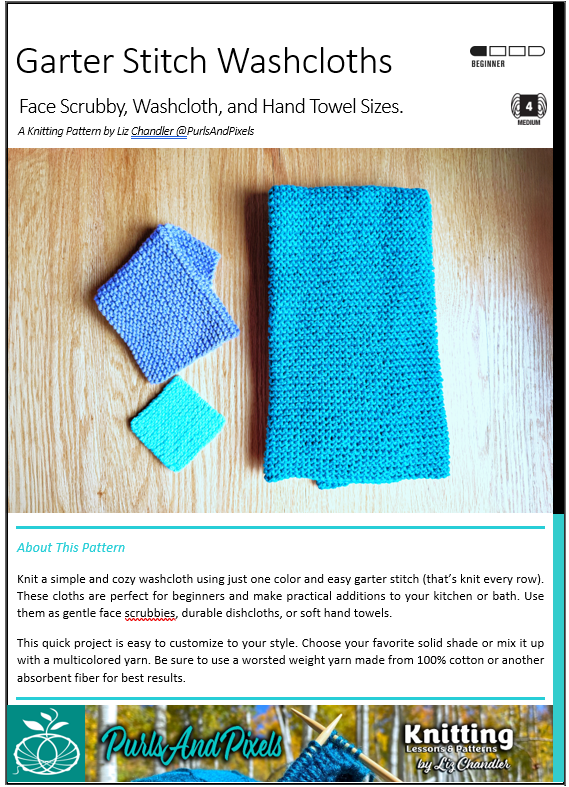
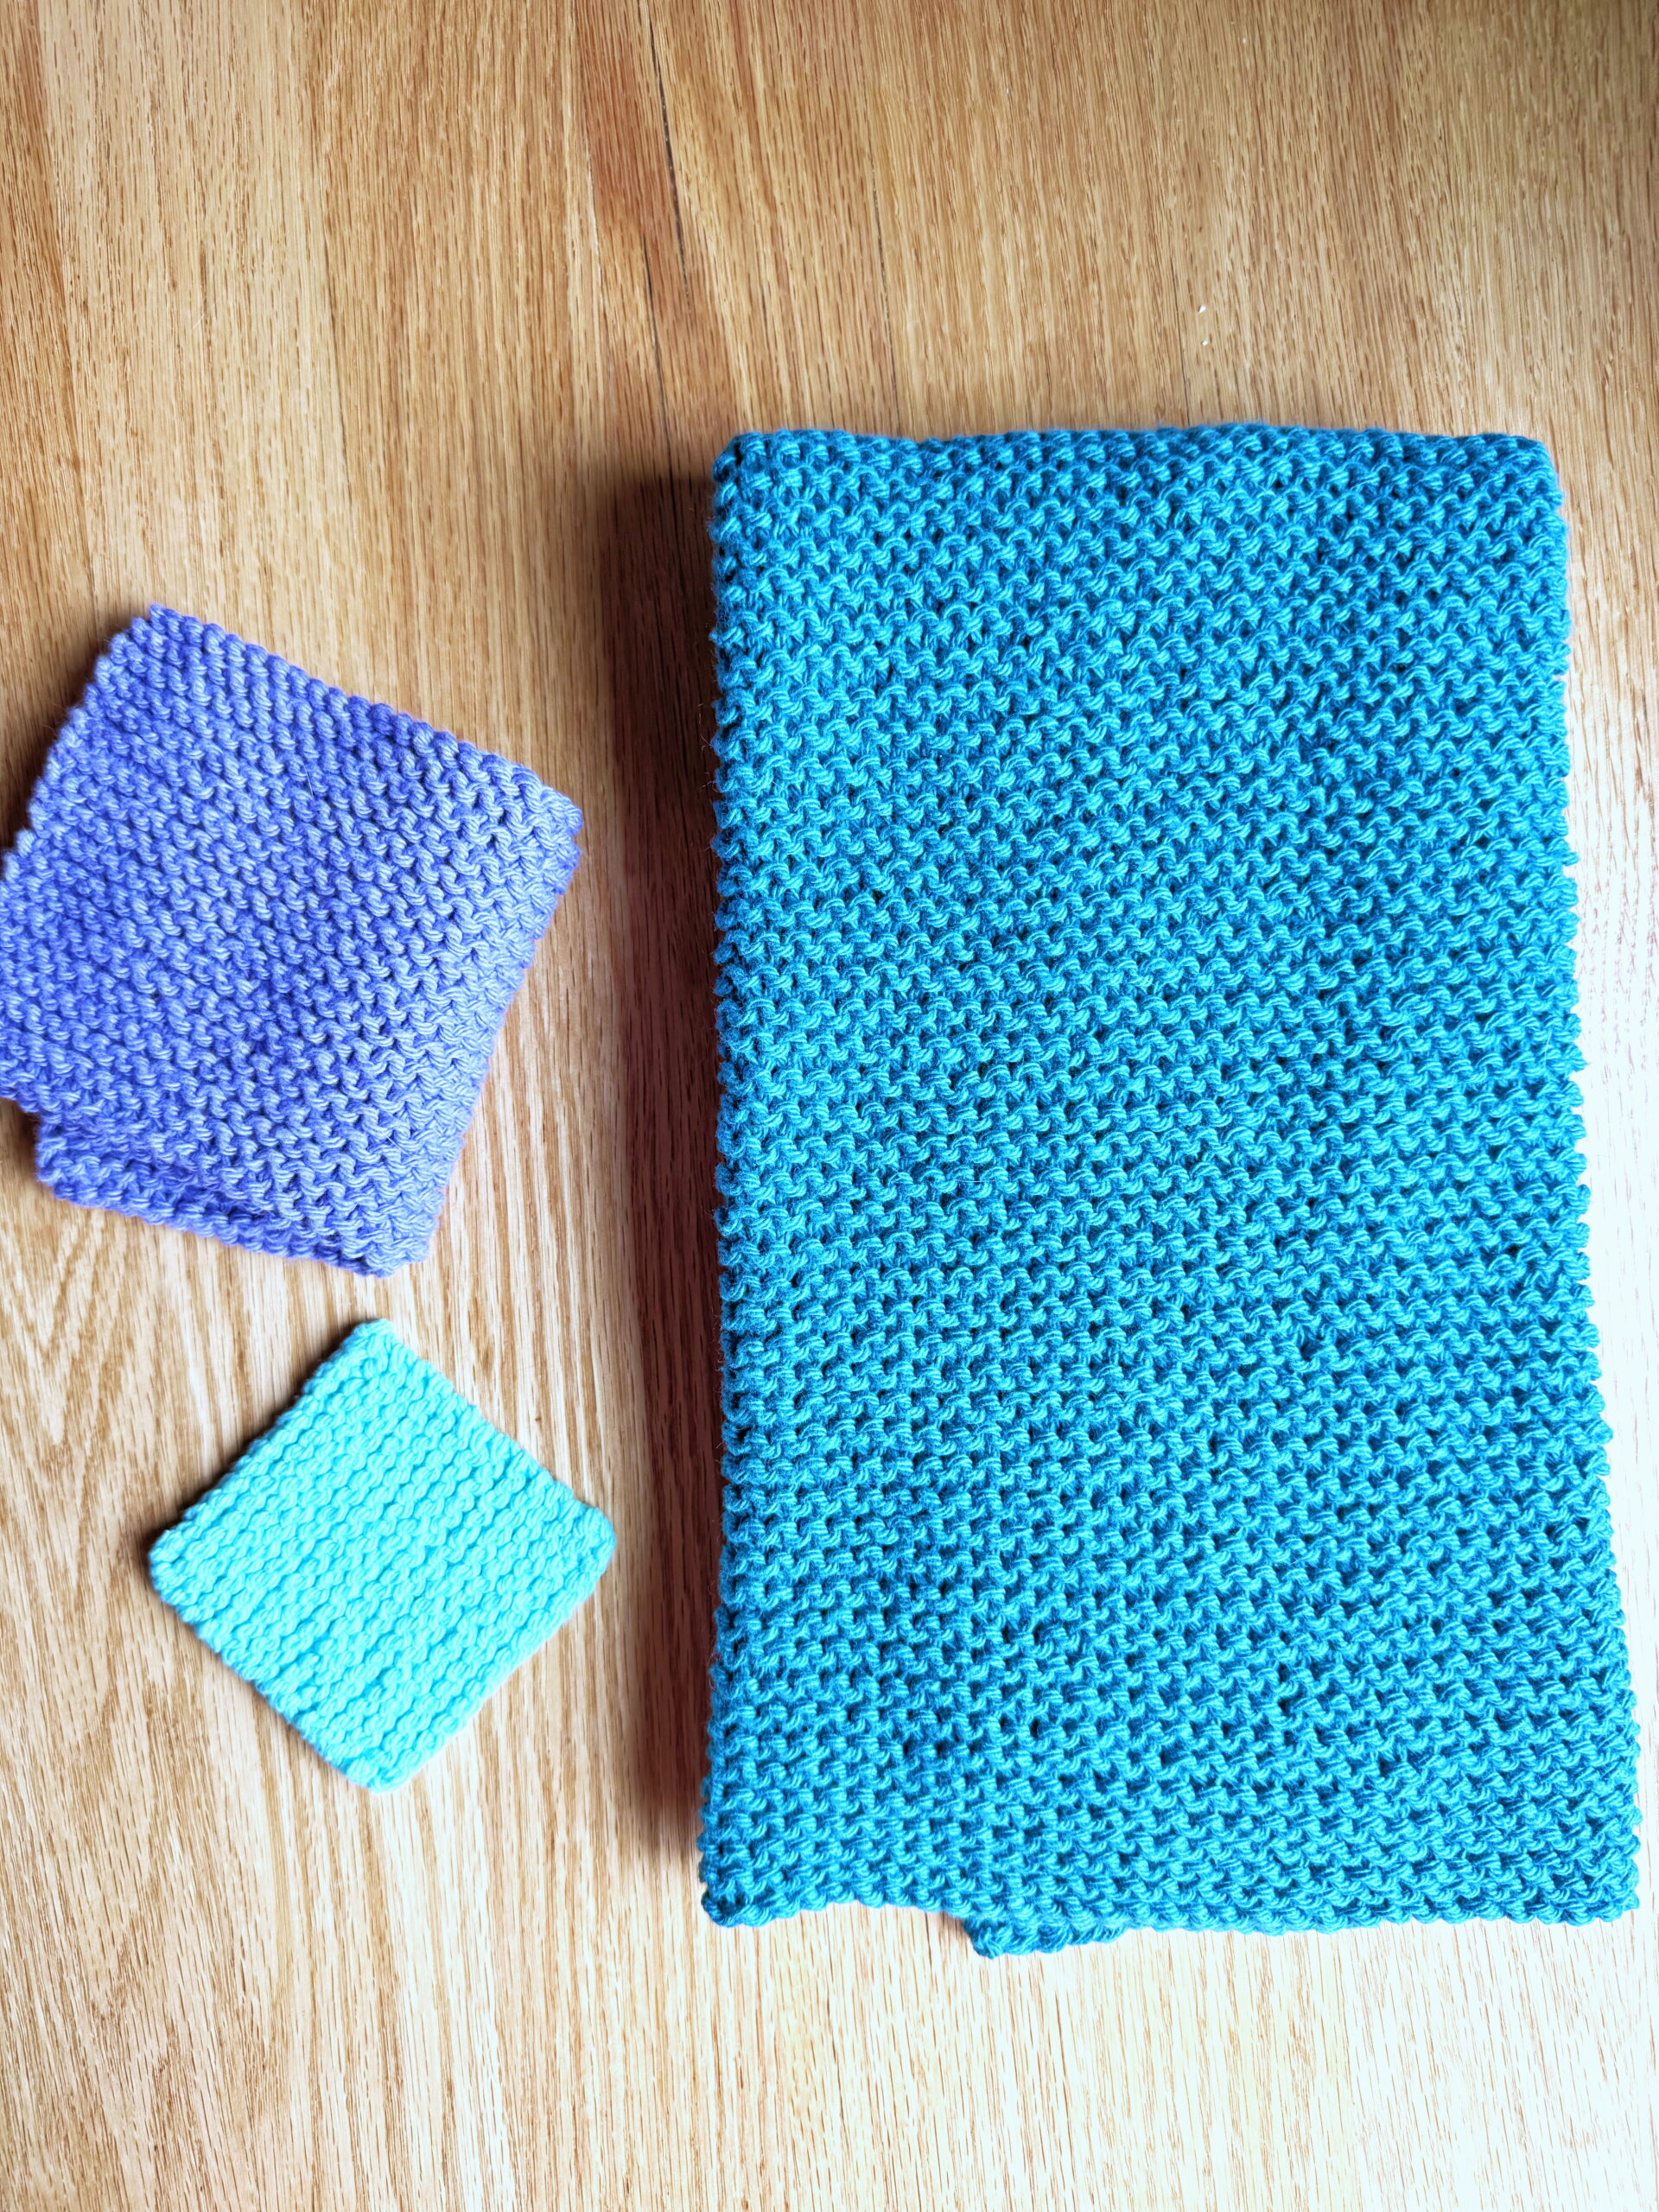
If you’re wondering what to knit first, this is your answer. A one-color garter stitch washcloth is the ultimate beginner project; it’s low-risk, fully useful, and incredibly relaxing. This free knitting pattern includes three beginner-friendly pieces: a face scrubby, a classic 8″ x 8″ washcloth, and a full hand towel. Together, they make a complete set that’s perfect for gifting or stocking your home with handmade, sustainable basics.

Learn to knit adorable but simple hand towels and washcloths with the Garter Stitch washcloth knitting pattern by Liz Chandler @PurlsAndPixels.

Each item is worked flat using only the knit stitch, so you can practice your tension, build muscle memory, and enjoy the rhythm of the needles without worrying about purling or shaping. Whether you’re settling in with a cup of tea or knitting in stolen moments throughout your day, this project helps you slow down while making something practical and beautiful.

Prefer to knit offline?

This pattern is free to read below, but if you’d rather print it or save it for later, I’ve created a clean, ad-free PDF version for you.

  • Includes complete, row-by-row instructions
  • Easy to print or use on your tablet
  • Supports my small business 💖
Get Liz Chandler's Garter Stitch Washcloths Knitting Pattern PDF download at PurlsAndPixels.

How this Beginner Garter Stitch Washcloth Free Knitting Pattern is Made

Each piece in this set is knit flat and turned after each row. All stitches are knit, with no purling, increasing, or decreasing needed. The face scrubby included in this set is a great first project on its own, and the washcloth and hand towel build on that same simple skill.

You will need to know how to:

If your are not familiar with any of these skills, you can find all of my free knitting lessons in my Learn to Knit Index.

Plus, you can watch a full video tutorial on how to knit this washcloth in my lesson here.

Materials

Knitting Needles:
Long Circular Needles
36-inch (91 cm) long US No. 7 (4.5 mm) circular needle (or size needed to obtain gauge)

Yarn:
One 95-yard (2 ounce) skein of cotton worsted weight yarn* (shown in Lily Sugar ‘n Cream 100% Cotton Yarn), in your choice of color

  • one face scrubby uses about 19 yards (.4 oz)
  • one washcloth uses about 71.25 yards (1.5 oz)
  • one hand towel uses about 475 yards (7.7 oz.)

* Weights estimated with Lily Sugar n’ Cream yarn; other yarn weights may vary. Weight does not include gauge swatch. A 4×4 inch gauge swatch with a 2 row by 3 stitch border uses an additional 19 yards (0.4 oz.).

Tools:

Gauge

19 stitches x 26 rows = 4 x 4 inches in stockinette stitch on No. 7 (4.5 mm) needles. (Learn how to check your gauge here.)

Abbreviations

k = knit

Instructions: Garter Stitch Face Scrubby

(3 inches x 3 inches [7.62 cm x 7.62 cm] after washing in cold water; 3.5 inches x 3.25 inches [8.89 cm x 8.225 cm] before washing)

Use the long-tail cast on method. Knit flat, turning after each row.

Row 1: Cast on 14 stitches. Turn.

Rows 2 – 27: k 14. (14 stitches) Turn

Row 28: Bind off loosely in the pattern of Row 2. Cut yarn, leaving an 8-inch tail, and pull through. Weave in ends.

In cold water, hand wash or machine wash on delicate. Block while still wet, ensuring cloths are roughly 3 inches square, then allow to air dry.

Instructions: Garter Stitch Washcloth

(8 inches x 8 inches [20.32 cm x 20.32 cm] after washing in cold water; 8.5 inches x 9.25 inches [21.59 cm x 23.49 cm] before washing)

Use the long-tail cast on method. Knit flat, turning after each row.

Row 1: Cast on 36 stitches. Turn.

Rows 2 – 72: k 36. (36 stitches) Turn.

Row 73: Bind off loosely in the pattern of Row 2. Cut yarn, leaving an 8-inch tail, and pull through. Weave in ends.

In cold water, hand wash or machine wash on delicate. Block while still wet, ensuring cloths are roughly 8 inches square, then allow to air dry.

Instructions: Garter Stitch Hand Towel

(17 inches x 23 inches [43.18 cm x 58.42 cm] after washing in cold water; 17.5 inches x 24 inches [44.45 cm x 60.96 cm] before washing)

Use the long-tail cast on method. Knit flat, turning after each row.

Row 1: Cast on 80 stitches. Turn.

Rows 2 – 180: k 80. (80 stitches) Turn.

Row 181: Bind off loosely in the pattern of Row 2. Cut yarn, leaving an 8-inch tail, and pull through. Weave in ends.

In cold water, hand wash or machine wash on delicate. Block while still wet, ensuring cloths are roughly 17 inches wide and 23 inches long, then allow to air dry.

Printable version of this free knitting pattern

Printable Beginner Garter Stitch Washcloth PDF Knitting Pattern

Knit easy garter stitch washcloths in three sizes with this free knitting pattern from Liz Chandler at PurlsAndPixels.

Care

If you use the materials called for in the Beginner Garter Stitch Washcloth Free Knitting Pattern, your final product will be machine washable. To keep your washcloth looking its best, hand wash or machine wash separately on delicate cycle in cold water. You may tumble dry on low heat or lay flat to dry.

🛁 Read more Knitwear Care Tips

Size & Use Notes

Each piece is designed for real-life utility:

  • Face scrubby for your nighttime skincare or baby bathtime
  • Washcloth for everyday dishes or self-care
  • Hand towel for drying hands in the kitchen or bathroom

They also make a cozy matched set for gifting, especially when bundled with a bar of handmade soap or tucked into a basket of homestead goods.

Knit your own DIY garter stitch washcloth in three sizes with this free knitting pattern from Liz Chandler at PurlsAndPixels.

©2025, Liz Chandler of PurlsAndPixels.

This pattern is for personal use, gifting, and charitable donation of completed items. You may also sell handmade items created using this pattern. Do not copy this pattern and distribute it. If you’d like to share the pattern, refer your friends to my website, purlsandpixels.com so they may obtain a copy.

If you find any errors or have any questions, email purlsandpixels@gmail.com and I will do my best to help.

I’d love to see your finished work! Tag your photos with @PurlsAndPixels on Twitter or Instagram.

More Patterns You’ll Love

🧶 Beginner Knit Scarf Easy Knitting Pattern: A light-weight garter stitch scarf

🧣 Easy Chunky Knit Scarf Pattern: A thick and quick garter stitch scarf

🙏 Gratitude Blanket Pattern: An extra-cozy garter stitch blanket

🛁 Knitted Dishcloth Patterns: More fun towel designs you can knit

🧺 All Knitting Patterns from Liz @PurlsAndPixels: Learn to Knit All the Things

Read More

Don’t Miss a Stitch! 🧶

Love cozy knitting projects? Join me on YouTube, Pinterest, and Instagram! And don’t forget to sign up for my newsletter to get more free patterns, helpful tips, and updates straight to your inbox. 💌
Knit Wasp Nest Decoy

A Free Knitting Pattern from Liz Chandler 🐝

So, I have a problem with wasps. Well, not really a problem; they are great helpers in the garden eating all the aphids. But, when they try to turn my sacred porch space into their new nursery, I get annoyed (or worse, stung). To keep these little stinkers out of my space I’ve designed a knit wasp nest decoy that should be weather-proof.

Last year, I tried the classic “paper bag trick” to keep wasps from nesting near the house. You know the one: crumple a brown paper sack to look like a wasp nest, hang it up, and hope for the best. It worked really well… until it rained. Then it just looked like sad trash blowing in the wind.

A wasp nest decoy made of brown paper works, but doesn't last. Try my knitting pattern to make a more weather-proof knit wasp nest decoy.

This year, I’m declaring war. I’ve been stung too many times, and I’m done playing nice. So I grabbed some UV-resistant paracord and knit myself a proper wasp nest decoy. I stuffed it with a gray trash bag for structure. Now, it’s tough enough for summer storms, realistic enough to fool territorial insects, and, let’s be honest, a lot more fun to make.

Wait… Do Fake Nests Actually Work?

Yes… for the right bugs.

Most hornets, paper wasps, and yellowjackets are extremely territorial. If they see another nest in the area, they usually back off and go find a less “claimed” spot, often hundreds of feet away.

To the wasps? This is an intruder’s home base.
To me? It’s a cozy little hot air balloon decoration with a purpose.

These wasps are great for the garden but terrible for porch living. Keep them from building a nest in unwanted places with a hand knit wasp nest decoy designed by Liz Chandler @PurlsAndPixels.

And unlike the paper version, this one:

  • Holds its shape through wind and rain
  • Won’t disintegrate in a week
  • Actually looks like the real thing (but without the buzz and bite)

If you get nests popping up on your home, put up a decoy. It may be just enough to make the wasp change their mind about their spot. Or, you might have to knock these little nests down (if you can’t do it safely yourself, contact a professional). Placing the decoy can make the wasps think whatever lives in the fake hive ruined their nest.

A paper wasp nest begins as a small grey honeycomb like structure.

What It Won’t Do

This won’t repel:

  • Ants
  • Mosquitoes
  • Bees (they’re unbothered by wasps)
  • Termites or ground dwellers

But if your porch or eaves are regular nesting sites for hornets or wasps, this might be just the nudge they need to build elsewhere.

Knit wasp nest decoy hanging on the porch. Get the free pattern from Liz Chandler @PurlsAndPixels.

Where to Hang It

  • Under eaves
  • Porch rafters
  • Barns, sheds, or garages
  • Any spot that’s been a favorite for wasps in the past

Choose a place that’s visible to flying insects but slightly sheltered. Early in the season is best. It is easier to deter wasps before nests are started.

How to Knit this Wasp Nest Decoy Pattern

This quick knit is worked in the round and shaped to mimic the tapered, layered form of a real wasp nest. It’s practical, weirdly charming, and deeply satisfying, especially if you’ve ever flailed around with a broom trying to knock a real one down.

Use a UV resistant nylon paracord for this project to keep it sun and water resistant. I chose a gray color, but light brown also works for this decoy. Then, stuff with a plastic bag to keep it’s shape.

Materials to Knit a Wasp Nest Decoy

Knitting Needles

Double Point Needles (DPNs)

Or Long Circular Needles

Yarn

One 100 Foot Hank of Paracord* (shown Paracord Planet Paracord color Diamonds), in your choice of color.

* Length estimated with Paracord Planet Paracord; other materials may vary. Does not include gauge swatch.

Tools

Gauge 

8 stitches x 10 rows = 4 x 4 inches in Stockinette Stitch on No. 10 (6.0 mm) needles.

Abbreviations

k = knit
p = purl
** = repeat the pattern between the asterisks
M1L = make one left [Pick up the strand between the stitch just worked and the next stitch from front to back with the left needle and knit into the back of it.]
k2tog = knit two together

Paracord and US No. 10 knitting needles will get you started on making your own wasp decoy. Get the free pattern from Liz Chandler @PurlsAndPixels.

Instructions: Wasp Nest Decoy

(measures 6 inches [15.24 cm] tall by 5 inches [12.7 cm] wide)

This project is knit from the top down. Use the Long-Tail Cast On method. Knit in the round. For Double Point Needles, follow DPN instructions written in italics. For circular needles, follow Magic Loop instructions written in bold. If desired, use a stitch marker to keep track of the beginning/ends of your rows/rounds by placing it between the last and first stitch of each row/round.

[Using DPNs or long circular needles] Row 1: Cast on 6 stitches. Divide onto 3 DPNs (2 on each DPN). Or separate stitches on long circular needles for Magic Loop (3 on each side). (6 stitches)

Row 2: Join the round (taking care not to twist stitches) and k 6. (6 stitches)

Row 3: *k, M1L* x 6. (12 stitches)

Row 4: k 12. (12 stitches)

Row 5: *k, M1L* x 12. (24 stitches)

Row 6: k 24. (24 stitches)

Row 7: *k, M1L* x 24. (48 stitches)

Rows 8 – 11: k 48. (48 stitches)

Row 12: *k 2, k2tog* x 12. (36 stitches)

Row 13: k 36. (36 stitches)

Row 14: *k, k2tog* x 12. (24 stitches)

Rows 15 – 17: k 24. (24 stitches)

Row 18: *k, k2tog* x 12. (12 stitches)

Row 19: k2tog x 6. (6 stitches)

Turn wrong-side (purl-side) out.

Cut yarn and draw through remaining 6 stitches.

Bring the yarn tail from the bottom of the project through to the inside up towards the top. Tie both yarn tails together to create a loop that can be used to hang the decoy.

Stuff the decoy with a plastic bag or your desired weatherproof filling.

Printable version of this free knitting pattern

Printable Free Wasp Nest Decoy Knitting Pattern PDF by Liz @PurlsAndPixels

Learn to knit a weatherproof wasp decoy with Liz Chandler's free pattern at PurlsAndPixels.

⚠️ Quick Disclaimer:

This project is a preventive trick, not a full-on wasp removal plan. It may deter hornets, paper wasps, or yellowjackets, especially if used early in the season before nests are built. But if you’ve already got an active infestation, please don’t try to knit your way out of it.
Call a pest control professional to handle the sting-y stuff safely.

Enjoy your relaxing porch time by keeping yellowjackets from building their own nests. Use a decoy knit yourself with a pattern from Liz Chandler @PurlsAndPixels.

Liz Chandler of PurlsAndPixels.

This pattern is for personal use, gifting, and charitable donation of completed items. You may also sell handmade items created using this pattern. Do not copy this pattern and distribute it. If you’d like to share the pattern, refer your friends to my website, purlsandpixels.com so they may obtain a copy.

If you find any errors or have any questions, email purlsandpixels@gmail.com and I will do my best to help.

I’d love to see your finished work! Tag your photos with @PurlsAndPixels on Twitter or Instagram.


Quick & Easy Coffee Cup Cozy: Fun to Knit and Use

🧣Chunky Knit Scarf Pattern: Simple, Quick, and Beautiful

🙏 Gratitude Blanket Pattern: Cozy Comfort for Every Home

🛁 Double-Thick Cotton Washcloth Pattern: Knits Up in No Time

🥾 Quick & Easy Boot Cuffs Knitting Pattern: Cute & Cozy

Looking for More Help Around the Homestead? 🌱

Don’t Miss a Stitch! 🧶

Love cozy knitting projects? Sign up for my newsletter to get more free patterns, helpful tips, and updates straight to your inbox. 💌
Easy Chunky Knit Boot Cuffs

Make these Easy Chunky Knit Boot Cuffs in flash with this free & quick knitting pattern from Liz Chandler at PurlsAndPixels.

A Free Knitting Pattern by Liz Chandler @PurlsAndPixels 🥾

Looking for a beginner-friendly knitting pattern that is fast, fun, and actually useful? These easy chunky knit boot cuffs are a perfect pick. Designed with new knitters in mind, they use basic stitches, thick yarn, and a simple rib pattern to create a cozy accessory you can wear or gift.

⏱️ Time to make: 1 – 2 hours
🧶 Skill level: Beginner
🧵 Stitches used: Knit and purl rib (in the round)

Learn to make Easy Chunky Knit Boot Cuffs in flash with this free & quick knitting pattern from Liz Chandler at PurlsAndPixels.

Free Easy Chunky Knit Boot Cuffs

If you are new to knitting, these boot cuffs are a perfect project. They knit up quickly, use forgiving chunky yarn, and look polished even if your stitches are not perfect yet. Plus, they add a bit of cozy charm right where boots can rub, making them both practical and stylish.

Here is why this pattern works so well for beginners:

  • 🧶 Fast and forgiving: Chunky yarn means quick results and fewer stitches.
  • 🧵 Simple ribbing: Made with only knit and purl stitches.
  • 👢 Comfortable and cute: Adds a soft layer at the top of your boots.

These are just plain fun to make. You might find yourself knitting a pair for every set of boots in your closet!

🔗 Want more beginner-friendly patterns? Check out my free knitting tutorials and other cozy patterns!

Why Make These Easy Chunky Knit Boot Cuffs?

These cozy cuffs are more than just a quick win. They are practical, giftable, and stylish. Here are just a few reasons knitters love this pattern:

🥾 Stylish and versatile: Wear them tucked into boots or folded over the top for a layered look.

🧦 Boot comfort: These boot cuffs offer a comfy twist by adding extra cushioning around the ankle, right where boots can rub. They will not replace socks, but they do help make your footwear a bit more cozy.

🎁 Great for gifting: They knit up fast and look polished, making them perfect for handmade gifts.

🧶 Stash buster: Use up leftover chunky yarn in a useful way.

Get into the swing of knitting by making your own boot cuffs! Free pattern at purlsandpixels.com

Essential Skills for Your Easy Chunky Knit Boot Cuffs

Learn to Knit Online With Free Tutorials

New to knitting? You are in the right place. These free tutorials walk you through all the skills used in this project:

Want to learn more? Check out the full Learn to Knit Index or download the Free Knitting Starter Kit with printable PDFs and calm video walkthroughs.

Materials for Your Easy Chunky Knit Boot Cuffs

Knitting Needles

Circular Needles

Yarn

One 87-yard (5-ounce) skein of super-bulky (No. 6) yarn* (shown in Wool Ease Thick & Quick by Lion Brand Yarn “Carousel”), in your choice of color).

  • One pair of small boot cuffs uses approximately 27.84 yards (1.6 oz.)
    • One pair of medium boot cuffs uses approximately 34.8 yards (2 oz.)
  • One pair of large boot cuffs uses approximately 41.76 yards (2.4 oz.)

*Weights estimated with Wool Ease Thick & Quick by Lion Brand Yarn; other yarn weights may vary.

Notions

Gauge

12 stitches x 15 rows = 4 x 4 inches in Stockinette Stitch on No. 13 (9.0 mm) needles. (Learn how to check your gauge here.)

Abbreviations

k = knit

p = purl

Chunky Boot Cuff knitting pattern using extra-bulky yarn, free from Liz Chandler @PurlsAndPixels.

Instructions: Small Chunky Ribbed Boot Cuffs Pattern

(Legs 7 inches to 15 inches [17.78 cm to 38.1  cm] around; measures 5 inches [12.7 cm] top to bottom)

Use the Long-Tail Cast On method. Knit in the round. Use a stitch marker to keep track of the beginning/ends of your rows/rounds by placing it between the last and first stitch of each row/round. Make two (2) for a pair.

Row 1: Cast on 18 stitches. (18 stitches)

Row 2: Join the round (taking care not to twist stitches) and *k, p* x 9. (18 stitches)

Rows 3 – 14: *k, p* x 9. (18 stitches)

Row 15: Bind off loosely in *k, p* pattern. Cut yarn, leaving an 8-inch (20.32-cm) tail, and pull through. Weave in ends. Block if desired.


Instructions: Medium Chunky Ribbed Boot Cuffs Pattern

(Legs 10 inches to 17 inches [25.4 cm to 43.18 cm] around; measures 5 inches [12.7 cm] top to bottom)

Use the Long-Tail Cast On method. Knit in the round. Use a stitch marker to keep track of the beginning/ends of your rows/rounds by placing it between the last and first stitch of each row/round. Make two (2) for a pair.

Row 1: Cast on 22 stitches. (18 stitches)

Row 2: Join the round (taking care not to twist stitches) and *k, p* x 11. (22 stitches)

Rows 3 – 14: *k, p* x 11. (22 stitches)

Row 15: Bind off loosely in *k, p* pattern. Cut yarn, leaving an 8-inch (20.32-cm) tail, and pull through. Weave in ends. Block if desired.


Instructions: Large Chunky Ribbed Boot Cuffs Pattern

(Legs 12 inches to 19 inches [30.48 cm to 48.26 cm] around; measures 5 inches [12.7 cm] top to bottom)

Use the Long-Tail Cast On method. Knit in the round. Use a stitch marker to keep track of the beginning/ends of your rows/rounds by placing it between the last and first stitch of each row/round. Make two (2) for a pair.

Row 1: Cast on 28 stitches. (28 stitches)

Row 2: Join the round (taking care not to twist stitches) and *k, p* x 14. (28 stitches)

Rows 3 – 14: *k, p* x 14. (28 stitches)

Row 15: Bind off loosely in *k, p* pattern. Cut yarn, leaving an 8-inch (20.32-cm) tail, and pull through. Weave in ends. Block if desired.


Printable version of this free knitting pattern

Printable Easy Chunky Knit Boot Cuffs pattern PDF by Liz @PurlsAndPixels

Watch the Full How to Knit Boot Cuffs Video

Not sure how to follow the pattern? No worries! I’ve knit this boot cuff on video with lots of tips and helpful advice. Knit along with me!

How to Knit Boot Cuffs (Easy & Cozy Beginner Project!) 🧶

Caring for Easy Chunky Knit Boot Cuffs

If you use the materials called for in the pattern, your final product will be machine washable. To keep your boot cuffs looking their best, hand wash or machine wash separately on delicate cycle in cold water. Lay flat to dry. Read more about how to care for handknits here.

Make these Easy Chunky Knit Boot Cuffs in flash with this free & quick knitting pattern from Liz Chandler at PurlsAndPixels.

How to Wear & Style Your Boot Cuffs

Slide the cuffs over leggings or skinny jeans, then put on your boots. You can also fold them over the tops of your boots for a cute, finished look. The ribbing naturally hugs your leg for a snug fit.

How to wear boot cuffs 🥾🧶

2025, Liz Chandler of PurlsAndPixels.

This pattern is for personal use, gifting, and charitable donation of completed items. You may also sell handmade items created using this pattern. Do not copy this pattern and distribute it. If you’d like to share the pattern, refer your friends to my website, purlsandpixels.com so they may obtain a copy.

If you find any errors or have any questions, email purlsandpixels@gmail.com and I will do my best to help.

I’d love to see your finished work! Tag your photos with @PurlsAndPixels on Twitter or Instagram.


Quick & Easy Coffee Cup Cozy: Fun to Knit and Use

🧣Chunky Knit Scarf Pattern: Simple, Quick, and Beautiful

🙏 Gratitude Blanket Pattern: Cozy Comfort for Every Home

🛁 Double-Thick Cotton Washcloth Pattern: Knits Up in No Time

Don’t Miss a Stitch! 🧶

Love cozy knitting projects? Sign up for my newsletter to get more free patterns, helpful tips, and updates straight to your inbox. 💌
Quick & Easy Coffee Cup Cozy

Learn to knit a quick and easy cup cozy using chunky yarn, knit stitches, and some cute buttons. Find the free pattern from Liz Chandler @PurlsAndPixels.

A Free Knitting Pattern by Liz Chandler @PurlsAndPixels ☕

There’s nothing quite like wrapping your hands around a warm cup of coffee, tea, or cocoa on a chilly morning. A cozy makes it even better by keeping your drink warm and your hands comfortable. This easy, beginner-friendly knitting project is a fun way to create something useful, and the best part is that one size fits most cups, including the ever-popular Stanley mug that kids and adults adore!

Knit a cupholder for your favorite mug with this free knitting pattern from Liz Chandler @PurlsAndPixels.

Free Chunky Knit Cup Cozy Pattern: Easy Beginner Knitting Project

This quick chunky knit cup cozy pattern knits up in less than an hour, making it perfect for beginners. Whether you’re crafting for yourself or making a last-minute handmade gift, this cozy coffee sleeve is a must-try!

🔗 Want more beginner-friendly patterns? Check out my free knitting tutorials and other cozy patterns!

Why Make This Coffee Cup Cozy?

Knitting should be fun and stress-free, and this cup cozy is a perfect beginner project. This kid-friendly project is simple, quick, and makes a useful little accessory for your favorite drinks. Whether you’re making one for yourself or as a gift, here’s why you’ll love this pattern:

🧶 Chunky Yarn for Fast Results: See your progress quickly and enjoy a soft, cozy finish. Thick yarn makes it extra warm and comfy to hold.

🪡 Only One Stitch: This pattern uses just the knit stitch, making it a great way to build confidence and practice knitting skills.

🎁 Easy to Use and Gift: Knit flat and secured with buttons, this cozy wraps around mugs with handles and fits a variety of cups. It’s a great project for all ages; you can knit one for yourself, a teacher, a parent, or a friend!

Knit a cup cozy with this free, easy, and quick knitting pattern that even beginners can make. Find the design from Liz Chandler @PurlsAndPixels.

The Fastest Beginner-Friendly Mug Cozy Pattern

This cozy works up in less than an hour and uses minimal yarn, making it perfect for using up those leftover balls of chunky yarn. Whether you’re making a coffee sleeve for yourself or a thoughtful DIY gift, this pattern is beginner-friendly and satisfyingly quick.

Essential Skills for Your Mug Cozy

For this simple coffee cup sleeve, you’ll need to know how to:

If you need help, there are instructions and video tutorials here on PurlsAndPixels for every step you’ll take.

How to Knit an Easy, Quick Cup Cozy: Follow Along with the Free Beginner Friendly Knitting Pattern

Materials for Your Chunky Cup Cozy

Knitting Needles

Long Circular Needles

Or Straight Needles

Yarn

One 87-yard (5-ounce) skein of super-bulky (No. 6) yarn* (shown in Wool Ease Thick & Quick by Lion Brand Yarn “Carousel”), in your choice of color).

  • One cozy uses approximately 17.4 yards (1 oz.)

*Weights estimated with Wool Ease Thick & Quick by Lion Brand Yarn; other yarn weights may vary.

Notions

Gauge

12 stitches x 15 rows = 4 x 4 inches in Stockinette Stitch on No. 13 (9.0 mm) needles. (Learn how to check your gauge here.)

Abbreviations

k = knit

Instructions: Chunky Knit Cup Cozy Pattern

(3 inches (7.62 cm) x 9 inches (22.86 cm) or desired length)

Instructions: Use the long tail cast on. Knit flat, turning after each row.

Row 1: With two strands held together, cast on 8 stitches. (8 stitches) Turn.

Rows 2 – 38: k 8. (8 stitches) Turn. [Work should measure approximately 9 inches (22.86 cm) long at this point. For extra-wide cups, knit a few more rows before binding off.]

Row 39: Bind off loosely.

Cut yarn, leaving an 8-inch (20.32-cm) tail, and pull through. Weave in ends. Block if desired.

Attach three buttons to one end of the cozy: one at the top, bottom, and center of the edge. Ensure your buttons are properly sized so they can use the natural holes in the knitting as buttonholes.

Embellish with decorative touches if desired.

Printable version of this free knitting pattern

Printable Chunky Cup Cozy pattern PDF by Liz @PurlsAndPixels

Use this free pattern to design a cup cozy as unique as you are; choose a fun color, the perfect buttons, and maybe even a pin or applique embellishment. Free pattern from Liz Chandler @PurlsAndPixels

Pro Tips for Perfect Coffee Cup Cozies

  • Choose the Right Yarn: Chunky or super bulky yarn works best for a warm, cushy feel and quick knitting. Wool blends add extra insulation and grip the cups a bit better than very smooth acrylics.
  • Use Sturdy Buttons: Since this cozy fastens around the cup handle, pick buttons that are large enough to stay secure but easy to fasten and unfasten.
  • Test the Fit: Before weaving in your ends, wrap the cozy around different cups to ensure a snug but not too-tight fit.
  • Make it Gift-Ready: Pair it with a bag of coffee or box of tea for an easy, thoughtful present. Bonus points if you customize the cozy with a fun button or embroidery!
  • Make It Washable: Coffee spills happen! Use machine-washable yarn so your cozy stays fresh and clean with minimal effort.
Cup cozy knitting pattern for your favorite mug, free from Liz Chandler @PurlsAndPixels

Why Knitters Love This Pattern

  • Perfect for beginner knitters
  • Quick 15-minute project
  • Ideal handmade gift for hot beverage lovers
  • Minimal yarn requirements
  • Customizable to any mug size

2025, Liz Chandler of PurlsAndPixels.

This pattern is for personal use, gifting, and charitable donation of completed items. You may also sell handmade items created using this pattern. Do not copy this pattern and distribute it. If you’d like to share the pattern, refer your friends to my website, purlsandpixels.com so they may obtain a copy.

If you find any errors or have any questions, email purlsandpixels@gmail.com and I will do my best to help.

I’d love to see your finished work! Tag your photos with @PurlsAndPixels on Twitter or Instagram.

Learn to knit a cup holder for your favorite mug and add unique buttons to make it your own custom design. Free knitting pattern from Liz Chandler @PurlsAndPixels

Simple Cup Cozy: A Free Pattern with Worsted Weight Yarn

🍀 Lucky Bottle Cozy: A Four Leaf Clover on a Bottle Sized Cozy

🧣Chunky Knit Scarf Pattern: Simple, Quick, and Beautiful

🙏 Gratitude Blanket Pattern: Cozy Comfort for Every Home

🛁 How to Knit a Washcloth: A Beginner-Friendly Tutorial

Don’t Miss a Stitch! 🧶

Love cozy knitting projects? Sign up for my newsletter to get more free patterns, helpful tips, and updates straight to your inbox. 💌