Switch Needle Sizes on Flat Knits

Learn to switch needle sizes when making a flat knit - a knitting lesson with Liz @PurlsAndPixels.

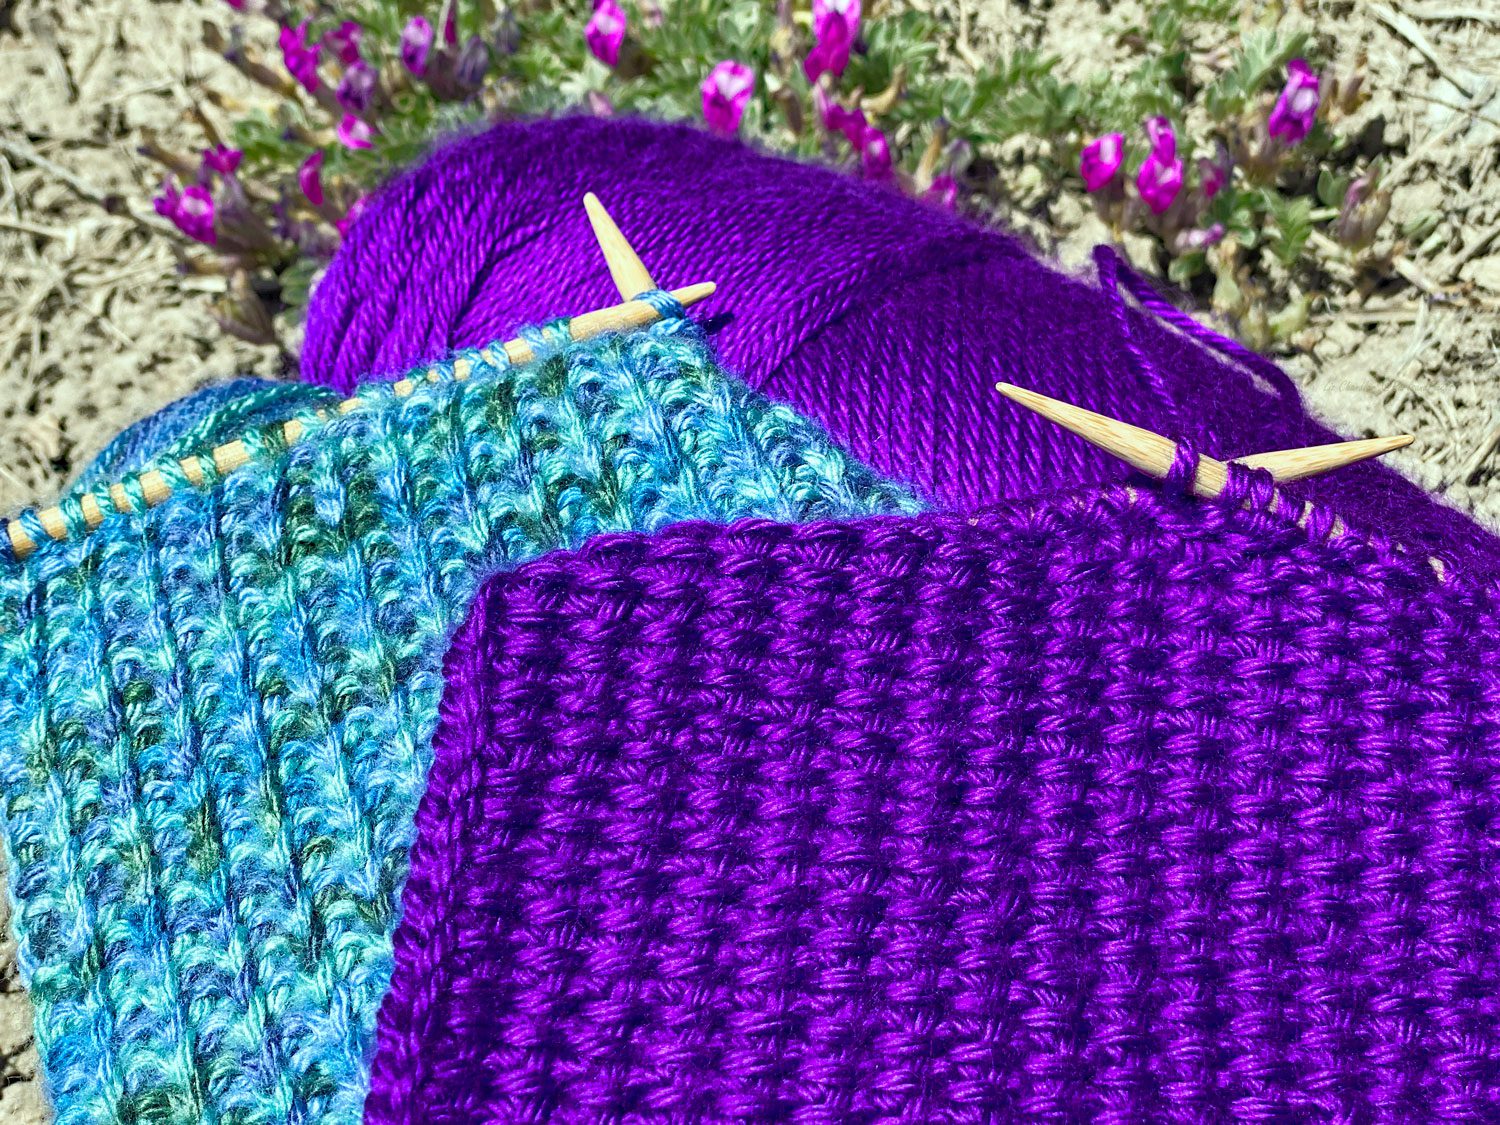
You will occasionally find a knitting pattern that asks you to switch needle sizes when you already have live stitches on the needles. Designers usually include this instruction when they want you to change your stitch size and knitting tension. This can help to prevent saggy cast-on rows. Switching needle sizes can also help ensure that your stitches match in size when you shift from one knitting pattern to another within the same design. For example, knit purl rib tends to be knit more loosely than stockinette stitch; using a smaller needle for your ribbing can help the two sections match more closely. Pattern-writers may also use a needle size change to add visual interest to their designs.

Below you will find both video and written guides to help you learn how to switch needle sizes on flat knits. I will show you how I switch needle sizes after knitting the cast-on row and turning my work. I am knitting this flat piece with circular needles, but these instructions also apply when you are using straight knitting needles.

Video Guide: How to Switch Needle Sizes on Flat Knits

Written Guide: How to Switch Needle Sizes on Flat Knits

Step 1: How to switch needle sizes when knitting a flat project -  lesson from Liz @PurlsAndPixels.

Switch Needle Sizes, Step 1:

Work up to the point where the pattern instructs you to switch needle sizes, then set the needle in your right hand aside.

Step 2: How to switch needle sizes when knitting a flat project - lesson from Liz @PurlsAndPixels.

Switch Needle Sizes, Step 2:

Pick up a needle in the new size with your right hand, ensuring the needle tips point toward each other.

Step 3: How to switch needle sizes when knitting a flat project - lesson from Liz @PurlsAndPixels.

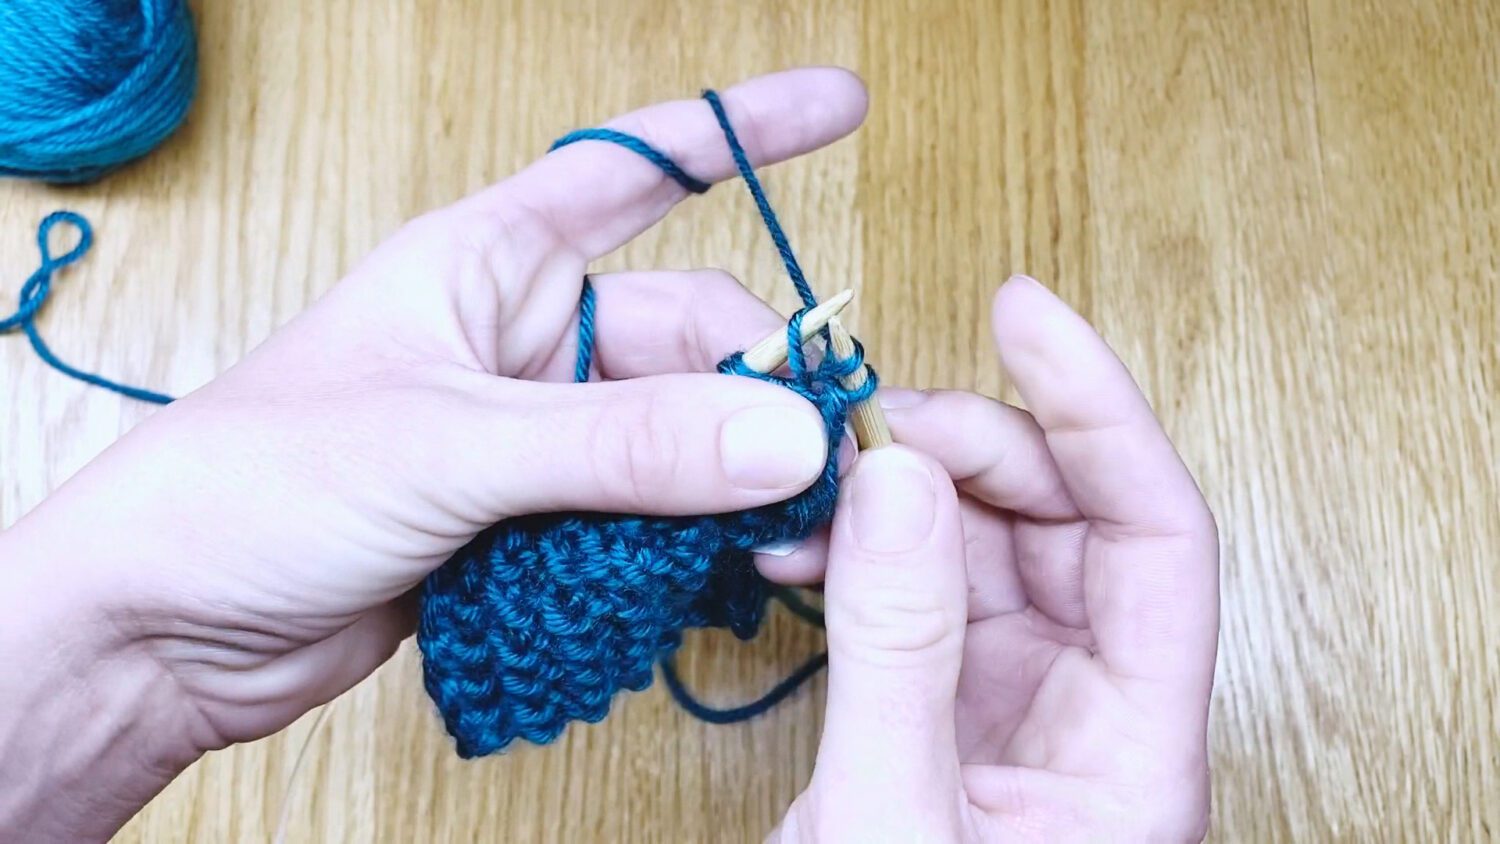
Switch Needle Sizes, Step 3:

Begin working the live stitches off the old needle size and onto the new needle size.

Step 4: How to switch needle sizes when knitting a flat project - lesson from Liz @PurlsAndPixels.

Switch Needle Sizes, Step 4:

When you have finished working the row, your left needle (in the old size) will be free of the project.

Step 5: How to switch needle sizes when knitting a flat project - lesson from Liz @PurlsAndPixels.

Switch Needle Sizes, Step 5:

Set the old needles aside.

Step 6: How to switch needle sizes when knitting a flat project - lesson from Liz @PurlsAndPixels.

Switch Needle Sizes, Step 6:

Turn your work. Then, with your right hand, pick up the second needle in the new size and prepare to knit the next row. You have now completely switched knitting needle sizes.

Practice With My Knitting Pattern

Slipped Stitches Scarf - a free knitting pattern from Liz Chandler @PurlsAndPixels.

Try switching needle sizes with a knitting project. My free Slipped Stitches Scarf asks you to switch from a smaller needle to a larger needle after you cast on. This keeps the first row from being loose and saggy. Give it a try.

Learn to switch needle sizes when making a flat knit - a knitting lesson with Liz @PurlsAndPixels.

Up Next

Learn to knit in the round with double point needles (DPNs) in this free lesson with Liz Chandler @PurlsAndPixels.

It’s time to level up your knitting! In the next lesson, I will introduce you to “knitting in the round.” You will learn to make a seamless tube with double point needles. Then, you can make your first ear warmer headbands!

Go Back to the Learn to Knit Index

The Magic Knot – Joining a New Ball of Yarn

Learn how to add more yarn in the middle of a knitting project by making a "magic knot" in this free lesson with Liz @PurlsAndPixels.

As you knit, you will often find yourself coming to the end of a ball of yarn without your project being finished. This will be especially true with larger knitted pieces, like scarves and blankets. When your ball of yarn runs out, or if you find a break in the yarn you have been working with, you can use a simple knotting technique, commonly referred to as a “magic knot,” to join new yarn to your working yarn. While there are other ways to join yarn, I find this knot to be the strongest and most versatile way to accomplish the task.

Adding a new ball of yarn to your knitting project by making a magic knot creates a tiny, nearly invisible knot anchoring the strands together.

You can join new yarn by simply knitting it into the net stitch in your pattern. This technique, however, leaves you with extra yarn tails to weave into the project. Using a magic knot to tie the two ends together lets you continue working without making additional loose ends.

A magic knot is created by tying two small knots, which tighten against one another when the string is pulled or stretched. The knot becomes stronger the more you pull on the two ends of yarn. Because the magic knot isn’t bulky, it blends the two ends of yarn together almost invisibly

Below you will find both video and written guides to help you learn how to add new yarn to your knitting project.

A Note About Yarn Color

In the following instructions, you will see two separate colors of yarn being tied together. This is meant to distinguish the ends as you learn. Usually, however, you will use a new ball of yarn in the same color with which you have been working.

Video Guide: How to Join New Yarn

Written Guide: How to Join New Yarn with a Magic Knot

Step 1: Learn how to join new yarn to your knitting project with the magic knot in this lesson with Liz @PurlsAndPixels.

Magic Knot, Step 1:

Arrange your yarn so that the new yarn ball is on your left and the knitting project is on your right. Lay the two yarn ends parallel to one-another, with the tails pointing in opposite directions. Place the new yarn tail at the bottom and the old yarn tail at the top.

Step 2: Learn how to join new yarn to your knitting project with the magic knot in this lesson with Liz @PurlsAndPixels.

Magic Knot, Step 2:

Bring the tail of the new yarn up and over the old yarn strand.

Step 3: Learn how to join new yarn to your knitting project with the magic knot in this lesson with Liz @PurlsAndPixels.

Magic Knot, Step 3:

Lift the old yarn slightly and bring the new yarn end down and under the old yarn.

Step 4: Learn how to join new yarn to your knitting project with the magic knot in this lesson with Liz @PurlsAndPixels.

Magic Knot, Step 4:

Next, bring the tail of the new yarn up so that it crosses over itself and forms a loop around the old yarn.

Step 5: Learn how to join new yarn to your knitting project with the magic knot in this lesson with Liz @PurlsAndPixels.

Magic Knot, Step 5:

Tuck the tail of the new yarn through the loop you just made, ensuring the end of the new yarn is pointing toward the right (toward your knitting project).

Step 6: Learn how to join new yarn to your knitting project with the magic knot in this lesson with Liz @PurlsAndPixels.

Magic Knot, Step 6:

Pull the tail of the new yarn to form a knot around the old yarn.

Step 7: Learn how to join new yarn to your knitting project with the magic knot in this lesson with Liz @PurlsAndPixels.

Magic Knot, Step 7:

Pull both ends of the new yarn to tighten the knot onto the old yarn. Ensure the old yarn remains in the same position in which it started.  

Step 8: Learn how to join new yarn to your knitting project with the magic knot in this lesson with Liz @PurlsAndPixels.

Magic Knot, Step 8:

Now, pick up the end of the old yarn tail.

Step 9: Learn how to join new yarn to your knitting project with the magic knot in this lesson with Liz @PurlsAndPixels.

Magic Knot, Step 9:

Bring the tail of the old yarn down and over the new yarn strand.  

Step 10: Learn how to join new yarn to your knitting project with the magic knot in this lesson with Liz @PurlsAndPixels.

Magic Knot, Step 10:

Lift the new yarn slightly and bring the old yarn end up and under the new yarn.

Step 11: Learn how to join new yarn to your knitting project with the magic knot in this lesson with Liz @PurlsAndPixels.

Magic Knot, Step 11:

The old yarn tail should cross under itself to form a loop around the new yarn. Pick up the old yarn tail while keeping open the loop you have just created.

Step 12: Learn how to join new yarn to your knitting project with the magic knot in this lesson with Liz @PurlsAndPixels.

Magic Knot, Step 12:

Tuck the tail of the old yarn through the loop, ensuring the end of the yarn is pointing leftward, toward your new ball of yarn.

Step 13: Learn how to join new yarn to your knitting project with the magic knot in this lesson with Liz @PurlsAndPixels.

Magic Knot, Step 13:

Pull both ends of the old yarn to tighten the knot onto the new yarn. Ensure the new yarn remains in the same position in which it started.

Step 14: Learn how to join new yarn to your knitting project with the magic knot in this lesson with Liz @PurlsAndPixels.

Magic Knot, Step 14:

Once the two knots have been secured, pick up the new yarn strand on your left and the old yarn strand on your right. Pull the two strings in opposite directions; this will cause the two knots to start slipping toward each other.

Step 15: Learn how to join new yarn to your knitting project with the magic knot in this lesson with Liz @PurlsAndPixels.

Magic Knot, Step 15:

When the two knots meet, pull hard on the yarn ends to check that the knots tighten against one another and do not slip.

Step 16: Learn how to join new yarn to your knitting project with the magic knot in this lesson with Liz @PurlsAndPixels.

Magic Knot, Step 16:

When you are certain your knot is tight, clip the two loose ends away from the knot with very sharp scissors.

Step 17: Learn how to join new yarn to your knitting project with the magic knot in this lesson with Liz @PurlsAndPixels.

Magic Knot, Step 17:

Check the strength of your knot once more by pulling the new and old yarn ends in opposite directions. If your knot is made correctly, it will not come undone.

Step 18: Learn how to join new yarn to your knitting project with the magic knot in this lesson with Liz @PurlsAndPixels.

Magic Knot, Step 18:

You can now continue knitting your project.

Practice With My Knitting Patterns

Rice Stitch Baby Blanket - a free knitting pattern from Liz @PurlsAndPixels.

My free Rice Stitch Blanket pattern uses several balls of yarn. Try out your magic knot on this project.

Slipped Stitches Scarf - a free knitting pattern from Liz Chandler @PurlsAndPixels.

You can also practice joining new yarn when knitting my free Slipped Stitches Scarf.

Learn how to add more yarn in the middle of a knitting project by making a "magic knot" in this free lesson with Liz @PurlsAndPixels.

Up Next

Some patterns will ask you to change the needle size with which you’ve been knitting. Let’s learn how to switch needle sizes as you work on a flat knitted project next.

Go Back to the Learn to Knit Index

Slipped Stitches Scarf

Slipped Stitches Scarf - a free knitting pattern from Liz Chandler @PurlsAndPixels.
Slipped Stitches Scarf - a free textured scarf knitting pattern from Liz Chandler @PurlsAndPixels.

The Slipped Stitches Scarf Free Knitting Pattern

I don’t usually share my knitting patterns until I have tried them a few times myself. This time, I am so excited I just can’t wait that long. So, I am releasing the pattern for my Slipped Stitches Scarf before I have finished knitting it myself. Let’s call this a free test knitting pattern for now? Please email purlsandpixels@gmail.com if you find any errors. Happy knitting!

Use this scarf to practice slipping stitches to add texture to your knitting. You will also slip the first stitch of every row to smooth the edges.

In this pattern, you will need two needle sizes. The smaller needle will be used to cast on the first row of stitches. Then, you will knit the second row with a larger needle held in your right hand. Once you have knit all the stitches off the smaller needle, set the small needles aside. Make the remainder of the scarf with the larger (US No. 8 / 5 mm) needles. (Find a full tutorial about switching needle sizes here.)

After you have switched to the larger needles, remember not to knit too tightly or you will have difficulty working the next row. Because of all the slipped stitches in this design, the fabric of this scarf is more tightly woven and slightly thicker than a scarf made in Garter Stitch.

About This Free Slipped Stitches Scarf Knitting Pattern

This is an easy-level scarf pattern, but it does require following a pattern that includes slipped stitches. You will need to know how to make a long-tail cast on, knit, slip stitches purlwise, slip stitches knitwise, and bind off in pattern. Visit my Learn to Knit Guide if you need to learn any of these skills before you start.

Yarn Suggestions:   Use a soft yarn fiber for this project, such as acrylic, wool, silk, alpaca, or a soft fiber blend. This scarf is particularly attractive in variegated (multicolored) yarn.

Slipped Stitches Scarf - a free knitting pattern from Liz Chandler @PurlsAndPixels.

Materials

Knitting Needles:
Long Circular Needles
36-inch (91 cm) long US No. 5 (3.75 mm) circular needle (or three sizes smaller than needles used to obtain gauge)
36-inch (91 cm) long US No. 8 (5.0 mm) circular needle (or size needed to obtain gauge)

Or Straight Needles
9-inch (23 cm) long US 5 (3.75 mm) straight needles (or three sizes smaller than needles used to obtain gauge)
9-inch (23 cm) long US No. 8 (5.0 mm) straight needles (or size needed to obtain gauge)


Yarn:
Two 315-yard (6 ounce) skeins of worsted weight yarn, in your choice of color.*
– one standard scarf uses about 420 yards (8 oz.)

*Shown in Caron Simply Soft Yarn “Iris” and “Spring Brook” (#AffiliateLinks). Weights estimated with Caron Simply Soft yarn; other yarn weights may vary. Weight does not include gauge swatch. A 4×4 inch gauge swatch with a 2 row by 3 stitch border uses an additional 21 yards (0.4 oz.).

Tools:

A measuring tape and a darning needle.

Gauge

18 stitches x 24 rows = 4 x 4 inches in stockinette stitch on No. 8 (5.0 mm) needles. (Learn how to check your gauge here.)

Abbreviations

k = knit

sl1pwyif = slip one stitch purlwise with yarn in front

sl1kwyib = slip one stitch knitwise with yarn in back

sl1kwyif = slip one stitch knitwise with yarn in front

** = repeat the pattern between the asterisks

Instructions: Slipped Stitches Scarf

(7 inches x 5 feet or desired length)

Use the long-tail cast on method. Knit flat, turning after each row.

[Using No. 5 needles] Row 1: Cast on 42 stitches. Turn.

[Switch to No. 8 needles] Row 2: sl1pwyif, *k 1, sl1kwyif* x 20, k 1. (42 stitches) Turn.

Row 3: sl1pwyif, *k 1, sl1kwyib* x 20, k 1. (42 stitches) Turn.

Repeat Rows 2 and 3 until scarf measures 5 feet or your desired length.

Bind off loosely in pattern of Row 2. Cut yarn, leaving an 8-inch tail, and pull through. Weave in ends. Block if desired.

Print the Free Slipped Stitches Scarf Knitting Pattern

Printable version of this free knitting pattern

Printable Slipped Stitches Scarf pattern PDF by Liz @PurlsAndPixels

Slipped Stitches Scarf - a free textured scarf knitting pattern from Liz Chandler @PurlsAndPixels.

©2021, Liz Chandler of PurlsAndPixels.

This pattern is for personal use, gifting, and charitable donation of completed items. You may also sell handmade items created using this pattern. Do not copy this pattern and distribute it. If you’d like to share the pattern, refer your friends to my website, purlsandpixels.com so they may obtain a copy.

If you find any errors or have any questions, email purlsandpixels@gmail.com and I will do my best to help.

I’d love to see your finished work! Tag your photos with @PurlsAndPixels on Twitter or Instagram.

sl1kw – Slipping Stitches to Add Texture to Knitting

Learn to slip stitches knitwise with yarn in front - sl1kwyif - a knitting lesson with Liz @PurlsAndPixels.

In an earlier lesson you learned how to slip stitches purlwise at the edges of your work. Recall that slipping purlwise does not twist the stitch, but simply moves it from needle to needle.

  • Slipping a stitch purlwise with the yarn in back leaves a loop on the back side of the work.
  • Slipping a stitch purlwise with the yarn in front leaves a loop on the front side of the work.

You can also add texture to a knitting a pattern by slipping stitches. Because you do not work into slipped stitches, they will alter the normal row and column grid that knitting every stitch creates. This makes slipped stitches appear larger than the other stitches.

To add further texture to patterns, you can also slip stitches knitwise. Unlike slipping purlwise, slipping a stitch knitwise creates a twisted stitch.

  • Slipping a stitch knitwise with the yarn in back will twist the stitch and leave a loop on the back side of your work.
  • Slipping a stitch knitwise with the yarn in front will twist the stitch and leave a loop on the front side of your work.
Learn to slip stitches knitwise with yarn in front - sl1kwyif - a knitting lesson with Liz @PurlsAndPixels.

Unclear Instructions (sl)

Occasionally, a designer will not specify what type of slipped stitch you should make. When this happens, it is usually safe to assume they meant for you to slip the stitch purlwise with yarn in back (sl1pwyib). This slipped stitch alters the texture of your pattern the least and is traditionally what is intended by the generic instruction “sl” or “slip a stitch.”

Below you will find both video and written guides to help you learn to slip stitches knitwise.

Video Guide: How to Slip Stitches (sl st) in Knitting

Written Guide: How to Slip Stitches Knitwise

Slip Stitches Knitwise with Yarn in Back

Slipping a stitch knitwise with the yarn in back will twist the stitch and leave a loop on the back side of your work.

Step 1: Learn to slip stitches knitwise with yarn in back - sl1kwyib - a knitting lesson with Liz @PurlsAndPixels.

sl1kwyib, Step 1:

Hold the working yarn behind your stitches. Insert your needle into the live stitch as if to knit it (insert your right needle into the front leg of the stitch from the front to the back).

Step 2: Learn to slip stitches knitwise with yarn in back - sl1kwyib - a knitting lesson with Liz @PurlsAndPixels.

sl1kwyib, Step 2:

Do not work into the stitch that is being slipped. Instead, begin to slide the stitch off the left needle and onto the right needle. When you have moved the stitch completely onto the right needle without knitting or purling into it, you have slipped the stitch.   

Slip Stitches Knitwise with Yarn in Front

Slipping a stitch knitwise with the yarn in front will twist the stitch and leave a loop on the front side of your work.

Step 1: Learn to slip stitches knitwise with yarn in front - sl1kwyif - a knitting lesson with Liz @PurlsAndPixels.

sl1kwyif, Step 1:

Hold the working yarn in front of your stitches. Insert your needle into the live stitch as if to knit it (insert your right needle into the front leg of the stitch from the front to the back).

Step 2: Learn to slip stitches knitwise with yarn in front - sl1kwyif - a knitting lesson with Liz @PurlsAndPixels.

sl1kwyif, Step 2:

Do not work into the stitch that is being slipped. Instead, begin to slide the stitch off the left needle and onto the right needle. When you have moved the stitch completely onto the right needle without knitting or purling into it, you have slipped the stitch.

Learn to slip stitches knitwise with yarn in front - sl1kwyif - a knitting lesson with Liz @PurlsAndPixels.

Practice With My Knitting Pattern

Slipped Stitches Scarf - a free knitting pattern from Liz Chandler @PurlsAndPixels.

Ready to try it? You can practice slipping stitches with my free Slipped Stitches Scarf pattern.

Up Next

Now, you are probably getting to the point where your projects are larger than one ball of yarn. In the next lesson, I will show you what I do when my yarn runs out mid-project. Using a “magic knot” to tie new yarn to the old yarn creates a tiny, super-strong knot that connects the two balls of yarn.

Go Back to the Learn to Knit Index

ktbl – Knit Thru the Back Loop to Twist Knit Stitches

Learn to twist stitches and add texture to knitting by knitting thru the back loop (ktbl) in this lesson with Liz @PurlsAndPixels.

Occasionally, patterns will ask you to “knit through the back loop” (ktbl) or “purl through the back loop” (ptbl) of your stitch. This is one way to twist your stitches to add texture to the pattern. Working into the back leg (loop) of the live stitch will cross the legs of the stitch. Unlike slipping stitches knitwise, twisted stitches made by knitting thru the back loop do not alter the row count, since you work into the live stitch.

Incorporating a twisted stitch into your knitting patterns can subtly change the look of your knits. For example, a “Broken Rib Stitch” pattern is made of knits and purls. The “Rice Stitch” is the same pattern, except a twisted stitch replaces one of the knits. While the difference is hard to spot, the Rice Stitch has a bit more texture than the broken rib stitch and it tends to lay flatter.

To accomplish a twisted stitch without changing your row count, you can knit through the back loop. This really means that you will need to work into the back leg of the next live stitch. When looking at a live stitch, you will see that one side is in front of your knitting needle and the other is in back.

The front leg is the side of the knit stitch that is in front of your needle.

The back leg, then, is the side of the stitch at the back of your needle.  

Below you will find both video and written guides to help you learn to knit through the back loop to twist stitches.

Video Guide: How to Knit Thru the Back Loop (ktbl)

Written Guide: How to Knit Thru the Back Loop (ktbl)

Step 1: How to knit through the back loop "ktbl" a knitting lesson with Liz Chandler @PurlsAndPixels.

ktbl, Step 1:

Hold the working yarn behind your left needle. Insert the tip of your right needle into the back loop of the next live stitch on the left needle from front to back.

Step 2: How to knit through the back loop "ktbl" a knitting lesson with Liz Chandler @PurlsAndPixels.

ktbl, Step 2:

Bring the right needle tip over the working yarn and begin to make a counterclockwise loop around it.

Step 3: How to knit through the back loop "ktbl" a knitting lesson with Liz Chandler @PurlsAndPixels.

ktbl, Step 3:

Pull the loop on your right needle tip through the stitch on your left needle.

Step 4: How to knit through the back loop "ktbl" a knitting lesson with Liz Chandler @PurlsAndPixels.

ktbl, Step 4:

Slide the stitch you have just worked into off your left needle, placing the new twisted stitch on your right needle.

Practice With My Knitting Pattern

Rice Stitch Baby Blanket - a free knitting pattern from Liz @PurlsAndPixels.

Ready to try it? You can practice twisting stitches with my free Rice Stitch Blanket pattern.

Learn to twist stitches and add texture to knitting by knitting thru the back loop (ktbl) in this lesson with Liz @PurlsAndPixels.

Up Next

Let’s learn another way to add texture to your knitting. In the next lesson, I will show you how to slip stitches knitwise to add interesting patterns to your knits.

Go Back to the Learn to Knit Index

sl1pw – Slip Stitches to Neaten the Edges of Knitting

Learn to slip stitches purlwise to neaten the edges of your flat knits in this knitting lesson with Liz @PurlsAndPixels.

Slipping a stitch means moving a live stitch from the right needle to the left needle without working into it. You have already learned that this can be a mistake you need to correct. But, sometimes, a pattern will ask you to slip stitches intentionally; this can add texture to a piece of knitting, help you shape knitwear, or prevent curling edges.

To introduce you to intentionally slipping knit stitches, we will start with slipping stitches to neaten the edges of your knitted work.

Learn to slip stitches purlwise to neaten the edges of your flat knits in this knitting lesson with Liz @PurlsAndPixels.

Sometimes flat knitted pieces tend to curl and can look a little rough on the edges, especially with certain knitting patterns. To avoid this problem, you can slip the first stitch of a row “purlwise” without working it. Doing so creates a smoother edge to your knitted work and helps to prevent curling.

Slipping stitches “purlwise” (as if you will purl them), moves them from needle to needle without changing them; these stitches will be neither twisted nor worked.

Here, you will learn to slip stitches purlwise in two ways: with the yarn in back and with the yarn in front of the work. These are abbreviated “sl1pwyib” and “sl1pwyif.”

Below you will find both video and written guides to help you learn to slip stitches at the edges of your flat knits.

Video Guide: How to Slip Stitches for Neater Edges in Knitting

Written Guide: How to Slip Stitches Purlwise

To neaten the edges of your knits, slip the first stitch of every row purlwise. On the knit side of your project, or where you would have made a knit stitch in your pattern, you will slip one stitch purlwise with the yarn in back of your work (sl1pwyib).

Step 1: sl1pwyib - slip 1 stitch purlwise with yarn in back - a knitting lesson with Liz @PurlsAndPixels.

sl1pwyib, Step 1:

Hold the working yarn behind your stitches. Insert your needle into the live stitch as if to purl it (insert your right needle into the front leg of the stitch from the back to the front).

Step 2: sl1pwyib - slip 1 stitch purlwise with yarn in back - a knitting lesson with Liz @PurlsAndPixels.

sl1pwyib, Step 2:

Do not work into the stitch that is being slipped. Instead, slide the stitch off the left needle and onto the right needle. When you have moved the stitch completely onto the right needle without knitting or purling into it, you have slipped the stitch.    

On the purlside of your project, or where you would have made a purl stitch in your pattern, slip the first stitch purlwise with the yarn in front of your work.

Step 1: sl1pwyif - slip 1 stitch purlwise with yarn in front - a knitting lesson with Liz @PurlsAndPixels.

sl1pwyif, Step 1:

Hold the working yarn in front of your stitches. Insert your needle into the live stitch as if to purl it (insert your right needle into the front leg of the stitch from the back to the front).

Step 2: sl1pwyif - slip 1 stitch purlwise with yarn in front - a knitting lesson with Liz @PurlsAndPixels.

sl1pwyif, Step 2:

Do not work into the stitch that is being slipped. Instead, slide the stitch off the left needle and onto the right needle. When you have moved the stitch completely onto the right needle without knitting or purling into it, you have slipped the stitch.    

Practice With My Knitting Pattern

Rice Stitch Baby Blanket - a free knitting pattern from Liz @PurlsAndPixels.

Ready to try it? You can practice slipping stitches with my free Rice Stitch Blanket pattern.

Learn to slip stitches purlwise to neaten the edges of your flat knits in this knitting lesson with Liz @PurlsAndPixels.

Up Next

Learn to knit through the back loop (ktbl) to twist stitches and add texture to knits - a lesson with Liz @PurlsAndPixels.

In the next lesson, you will learn why you might want to twist knit stitches intentionally. I’ll show you how to knit through the back loop (ktbl) and twist knit stitches on purpose. This will also help you knit my Rice Stitch Blanket.

Go Back to the Learn to Knit Index

Frog

Learn to "frog" knitting - unravel your work to fix mistakes or reuse yarn in this knitting lesson from Liz Chandler @PurlsAndPixels.

If you find a mistake that is too far back to easily correct, you can “frog” or unravel your knitting to reach and fix the mistake or to completely start your project over.

What is Frogging?

Unraveling knitted yarn to fix mistakes or reuse the yarn is called "frogging."

Unraveling worked yarn is called “frogging.” This can be useful if you find a mistake in a knitting pattern you have been working and need to go back and try again. Frogging is also a great way to recycle yarn. You can undo a wonky practice project and reuse the yarn or unravel an old sweater to make a new hat.

By the way, if you came here to knit a frog (not frog a knit) I have a free frog knitting pattern available at this link.

Unraveling knitted yarn to fix mistakes or reuse the yarn is called "frogging."

Below you will find both video and written guides to help you learn to frog rows of knitting and fix mistakes.

Video Guide: How to Frog Knitting

Written Guide: How to Frog Knitting and Fix a Mistake

Frogging a Whole Project

Learn to "frog" or unravel an entire knit project in this knitting lesson with Liz @PurlsAndPixels.

If you are working on a project and decide you just don’t want to make it anymore, you can salvage the yarn by frogging your knitting. Frogging a work in progress is simple. Just pull the knitting needle out of the live stitches and start pulling on the working yarn; this will cause your knitting to unravel. Lay the yarn in a neat pile as you pull, to avoid tangles. Then, wind the frogged yarn into a new ball and you will be ready to start over or begin a new project.

Frogging to Fix Mistakes in Knitting

If you spot a knitting mistake in your work that is difficult to fix with simple tricks, you may need to frog a few rows so you can reach and correct your mistake. This can be a little tricky and you may not get it right the first time. Practice on a piece that you do not mind unraveling completely.

Step 1: Learn to "frog" knitting (unravel your work) to fix mistakes - a knitting lesson from Liz @PurlsAndPixels.

Frog, Step 1:

Carefully pull the knitting needle out of your live stitches, making sure you do not stretch your work.

Step 2: Learn to "frog" knitting (unravel your work) to fix mistakes - a knitting lesson from Liz @PurlsAndPixels.

Frog, Step 2:

Gently pull the working yarn; this begin unraveling the knit stitches.

Step 3: Learn to "frog" knitting (unravel your work) to fix mistakes - a knitting lesson from Liz @PurlsAndPixels.

Frog, Step 3:

To prevent columns from running, be sure to pull the yarn slowly, undoing one knit stitch at a time.

Step 4: Learn to "frog" knitting (unravel your work) to fix mistakes - a knitting lesson from Liz @PurlsAndPixels.

Frog, Step 4:

When you have reached the row with your mistake, finish undoing stitches until you have reached the end of a row. Check that you have stopped undoing stitches so that your working yarn is in the same location it was when you removed the knitting needle.

Step 5: Learn to "frog" knitting (unravel your work) to fix mistakes - a knitting lesson from Liz @PurlsAndPixels.

Frog, Step 5:

Correct the mistake. In this example, a twisted stitch must be untwisted; turn the stitch so the legs are no longer crossed. Take care not to stretch the knitting, as this will cause stitches to run.

Step 6: Learn to "frog" knitting (unravel your work) to fix mistakes - a knitting lesson from Liz @PurlsAndPixels.

Frog, Step 6:

Correct the mistake. In this example, a twisted stitch must be untwisted; turn the stitch so the legs are no longer crossed. Take care not to stretch the knitting, as this will cause stitches to run.

Step 7: Learn to "frog" knitting (unravel your work) to fix mistakes - a knitting lesson from Liz @PurlsAndPixels.

Frog, Step 7:

Insert your knitting needle back into your stitches. Ensure that it will be in the same position in which it started. Here, we removed the needle by pulling toward the left. To reinsert it, it should be carefully pushed through the stitches moving toward the right.

Step 8: Learn to "frog" knitting (unravel your work) to fix mistakes - a knitting lesson from Liz @PurlsAndPixels.

Frog, Step 8:

When you have replaced all your stitches onto the knitting needle, you can resume your pattern at the beginning of the row where your mistake had been.  

Practice With My Knitting Patterns

Basic Washcloth and Face Scrubby knitting pattern by Liz @PurlsAndPixels

In this guide I was making a Simple Face Scrubby. Knit along with me. This pattern is part of my Simple Washcloth Knitting Pattern Collection.

Learn to "frog" knitting - unravel your work to fix mistakes or reuse yarn in this knitting lesson from Liz Chandler @PurlsAndPixels.

Up Next

After you have learned to frog, you may have a pile of loose yarn. Don’t let it tangle and go to waste. Learn to wind a center-pull yarn ball with just your hands in the next lesson.

Go Back to the Learn to Knit Index

Fix Slipped Knit Stitches

Learn to fix slipped knit stitches in this knitting lesson about spotting and repairing mistakes from Liz Chandler @PurlsAndPixels.

Before you can fix slipped knit stitches, you will need to know what they are and how to spot them.

If you move a live stitch from needle to needle without working into it, you have slipped a stitch.

When you slip a stitch accidentally, it will alter the weave of your finished object. Slipped stitches will appear as enlarged stitches on the knitside of your work. When you stretch your work a bit, you will see that your rows no longer line up correctly around that extra-large stitch.

Learn to spot slipped knit stitches then fix the mistake with this knitting lesson from Liz @PurlsAndPixels.

When you turn to the purlside, there will be a loose and misplaced loop among the purl stitches; this is the stitch that was not worked with the rest of its row. 

Learn to spot slipped knit stitches then fix the mistake with this knitting lesson from Liz @PurlsAndPixels.

Below are video and written guides, which will help you learn to spot, then fix slipped knit stitches.

Video Guide: Common Knitting Mistakes, Fixing Slipped Knit Stitches

Written Guide: Fixing Slipped Knit Stitches

Once you have spotted a slipped stitch in a prior row, you can fix it before you bind off your work. You can fix a slipped stitch from either the knitside or the purlside of your work. Below, I’ll show you how to fix the mistake from the purlside.

Step 1: How to fix slipped knit stitches, a knitting lesson with Liz @PurlsAndPixels.

Fix a Slipped Stitch, Step 1:

Continue working your pattern until you reach the column in which you have slipped a stitch.

Step 2: How to fix slipped knit stitches, a knitting lesson with Liz @PurlsAndPixels.

Fix a Slipped Stitch, Step 2:

When you reach the stitch at the top of the column in which the mistake is located, carefully slide it off the left-hand needle tip.

Step 3: How to fix slipped knit stitches, a knitting lesson with Liz @PurlsAndPixels.

Fix a Slipped Stitch, Step 3:

Pull gently on the stitch you just dropped off the needle, unraveling the column of stitches only until you reach your mistake.

Step 4: How to fix slipped knit stitches, a knitting lesson with Liz @PurlsAndPixels.

Fix a Slipped Stitch, Step 4:

When working from the purlside, place the slipped stitch behind the “ladder” of undone stitches.

Step 5: How to fix slipped knit stitches, a knitting lesson with Liz @PurlsAndPixels.

Fix a Slipped Stitch, Step 5:

Insert your crochet hook into the slipped stitch from the back to the front. Be sure your stitch is not twisted by confirming that the legs are not crossed.

Step 6: How to fix slipped knit stitches, a knitting lesson with Liz @PurlsAndPixels.

Fix a Slipped Stitch, Step 6:

With the crochet hook, grab the strand directly above the twisted stitch.

Step 7: How to fix slipped knit stitches, a knitting lesson with Liz @PurlsAndPixels.

Fix a Slipped Stitch, Step 7:

Pull the hook and the strand of yarn through the loop on the crochet hook; this will chain the strand through the newly untwisted stitch.

Step 8: How to fix slipped knit stitches, a knitting lesson with Liz @PurlsAndPixels.

Fix a Slipped Stitch, Step 8:

Continue pulling the strands of yarn directly through the loop on the crochet hook until no more strands remain in the “ladder” of loose stitches. Always check that each corrected stitch is not twisted before you move on to the next.

Step 9: How to fix slipped knit stitches, a knitting lesson with Liz @PurlsAndPixels.

Fix a Slipped Stitch, Step 9:

Once you have reached the top of your work, ensure no loose strands remain above or behind the column you have just corrected.

Step 10: How to fix slipped knit stitches, a knitting lesson with Liz @PurlsAndPixels.

Fix a Slipped Stitch, Step 10:

Move the loop from your crochet hook to the left-hand knitting needle.

Step 11: How to fix slipped knit stitches, a knitting lesson with Liz @PurlsAndPixels.

Fix a Slipped Stitch, Step 11:

To prevent twisted stitches, be sure the right leg is in front of the needle and the left leg is behind the needle. 

Step 12: How to fix slipped knit stitches, a knitting lesson with Liz @PurlsAndPixels.

Fix a Slipped Stitch, Step 12:

Check that you have corrected the problem, then continue working on your pattern.

Practice With My Knitting Patterns

Basic Washcloth and Face Scrubby knitting pattern by Liz @PurlsAndPixels

In this guide I was making a Simple Face Scrubby. Knit along with me. This pattern is part of my Simple Washcloth Knitting Pattern Collection.

Learn to fix slipped knit stitches in this knitting lesson about spotting and repairing mistakes from Liz Chandler @PurlsAndPixels.

Up Next

After you have learned to fix your knitting mistakes, you may want to know how to unravel a few rows to correct a problem. Or you can undo an entire knitting project to reuse the yarn. Either way, knitters call this “frogging,” and I will show you how in the next tutorial.

Go Back to the Learn to Knit Index

LET’S KEEP IN TOUCH!

I’d love to keep you updated with the latest news and offers from PurlsAndPixels.🧶💕

We don’t spam! Read our privacy policy for more info.