Knit Wasp Nest Decoy

A Free Knitting Pattern from Liz Chandler 🐝

So, I have a problem with wasps. Well, not really a problem; they are great helpers in the garden eating all the aphids. But, when they try to turn my sacred porch space into their new nursery, I get annoyed (or worse, stung). To keep these little stinkers out of my space I’ve designed a knit wasp nest decoy that should be weather-proof.

Last year, I tried the classic “paper bag trick” to keep wasps from nesting near the house. You know the one: crumple a brown paper sack to look like a wasp nest, hang it up, and hope for the best. It worked really well… until it rained. Then it just looked like sad trash blowing in the wind.

A wasp nest decoy made of brown paper works, but doesn't last. Try my knitting pattern to make a more weather-proof knit wasp nest decoy.

This year, I’m declaring war. I’ve been stung too many times, and I’m done playing nice. So I grabbed some UV-resistant paracord and knit myself a proper wasp nest decoy. I stuffed it with a gray trash bag for structure. Now, it’s tough enough for summer storms, realistic enough to fool territorial insects, and, let’s be honest, a lot more fun to make.

Wait… Do Fake Nests Actually Work?

Yes… for the right bugs.

Most hornets, paper wasps, and yellowjackets are extremely territorial. If they see another nest in the area, they usually back off and go find a less “claimed” spot, often hundreds of feet away.

To the wasps? This is an intruder’s home base.
To me? It’s a cozy little hot air balloon decoration with a purpose.

These wasps are great for the garden but terrible for porch living. Keep them from building a nest in unwanted places with a hand knit wasp nest decoy designed by Liz Chandler @PurlsAndPixels.

And unlike the paper version, this one:

  • Holds its shape through wind and rain
  • Won’t disintegrate in a week
  • Actually looks like the real thing (but without the buzz and bite)

If you get nests popping up on your home, put up a decoy. It may be just enough to make the wasp change their mind about their spot. Or, you might have to knock these little nests down (if you can’t do it safely yourself, contact a professional). Placing the decoy can make the wasps think whatever lives in the fake hive ruined their nest.

A paper wasp nest begins as a small grey honeycomb like structure.

What It Won’t Do

This won’t repel:

  • Ants
  • Mosquitoes
  • Bees (they’re unbothered by wasps)
  • Termites or ground dwellers

But if your porch or eaves are regular nesting sites for hornets or wasps, this might be just the nudge they need to build elsewhere.

Knit wasp nest decoy hanging on the porch. Get the free pattern from Liz Chandler @PurlsAndPixels.

Where to Hang It

  • Under eaves
  • Porch rafters
  • Barns, sheds, or garages
  • Any spot that’s been a favorite for wasps in the past

Choose a place that’s visible to flying insects but slightly sheltered. Early in the season is best. It is easier to deter wasps before nests are started.

How to Knit this Wasp Nest Decoy Pattern

This quick knit is worked in the round and shaped to mimic the tapered, layered form of a real wasp nest. It’s practical, weirdly charming, and deeply satisfying, especially if you’ve ever flailed around with a broom trying to knock a real one down.

Use a UV resistant nylon paracord for this project to keep it sun and water resistant. I chose a gray color, but light brown also works for this decoy. Then, stuff with a plastic bag to keep it’s shape.

Materials to Knit a Wasp Nest Decoy

Knitting Needles

Double Point Needles (DPNs)

Or Long Circular Needles

Yarn

One 100 Foot Hank of Paracord* (shown Paracord Planet Paracord color Diamonds), in your choice of color.

* Length estimated with Paracord Planet Paracord; other materials may vary. Does not include gauge swatch.

Tools

Gauge 

8 stitches x 10 rows = 4 x 4 inches in Stockinette Stitch on No. 10 (6.0 mm) needles.

Abbreviations

k = knit
p = purl
** = repeat the pattern between the asterisks
M1L = make one left [Pick up the strand between the stitch just worked and the next stitch from front to back with the left needle and knit into the back of it.]
k2tog = knit two together

Paracord and US No. 10 knitting needles will get you started on making your own wasp decoy. Get the free pattern from Liz Chandler @PurlsAndPixels.

Instructions: Wasp Nest Decoy

(measures 6 inches [15.24 cm] tall by 5 inches [12.7 cm] wide)

This project is knit from the top down. Use the Long-Tail Cast On method. Knit in the round. For Double Point Needles, follow DPN instructions written in italics. For circular needles, follow Magic Loop instructions written in bold. If desired, use a stitch marker to keep track of the beginning/ends of your rows/rounds by placing it between the last and first stitch of each row/round.

[Using DPNs or long circular needles] Row 1: Cast on 6 stitches. Divide onto 3 DPNs (2 on each DPN). Or separate stitches on long circular needles for Magic Loop (3 on each side). (6 stitches)

Row 2: Join the round (taking care not to twist stitches) and k 6. (6 stitches)

Row 3: *k, M1L* x 6. (12 stitches)

Row 4: k 12. (12 stitches)

Row 5: *k, M1L* x 12. (24 stitches)

Row 6: k 24. (24 stitches)

Row 7: *k, M1L* x 24. (48 stitches)

Rows 8 – 11: k 48. (48 stitches)

Row 12: *k 2, k2tog* x 12. (36 stitches)

Row 13: k 36. (36 stitches)

Row 14: *k, k2tog* x 12. (24 stitches)

Rows 15 – 17: k 24. (24 stitches)

Row 18: *k, k2tog* x 12. (12 stitches)

Row 19: k2tog x 6. (6 stitches)

Turn wrong-side (purl-side) out.

Cut yarn and draw through remaining 6 stitches.

Bring the yarn tail from the bottom of the project through to the inside up towards the top. Tie both yarn tails together to create a loop that can be used to hang the decoy.

Stuff the decoy with a plastic bag or your desired weatherproof filling.

Printable version of this free knitting pattern

Printable Free Wasp Nest Decoy Knitting Pattern PDF by Liz @PurlsAndPixels

Learn to knit a weatherproof wasp decoy with Liz Chandler's free pattern at PurlsAndPixels.

⚠️ Quick Disclaimer:

This project is a preventive trick, not a full-on wasp removal plan. It may deter hornets, paper wasps, or yellowjackets, especially if used early in the season before nests are built. But if you’ve already got an active infestation, please don’t try to knit your way out of it.
Call a pest control professional to handle the sting-y stuff safely.

Enjoy your relaxing porch time by keeping yellowjackets from building their own nests. Use a decoy knit yourself with a pattern from Liz Chandler @PurlsAndPixels.

Liz Chandler of PurlsAndPixels.

This pattern is for personal use, gifting, and charitable donation of completed items. You may also sell handmade items created using this pattern. Do not copy this pattern and distribute it. If you’d like to share the pattern, refer your friends to my website, purlsandpixels.com so they may obtain a copy.

If you find any errors or have any questions, email purlsandpixels@gmail.com and I will do my best to help.

I’d love to see your finished work! Tag your photos with @PurlsAndPixels on Twitter or Instagram.


Quick & Easy Coffee Cup Cozy: Fun to Knit and Use

🧣Chunky Knit Scarf Pattern: Simple, Quick, and Beautiful

🙏 Gratitude Blanket Pattern: Cozy Comfort for Every Home

🛁 Double-Thick Cotton Washcloth Pattern: Knits Up in No Time

🥾 Quick & Easy Boot Cuffs Knitting Pattern: Cute & Cozy

Looking for More Help Around the Homestead? 🌱

Don’t Miss a Stitch! 🧶

Love cozy knitting projects? Sign up for my newsletter to get more free patterns, helpful tips, and updates straight to your inbox. 💌

DIY No-Sew Cedar Sachets

Learn to make DIY Cedar shachets using sustainable materials to help repel moths and other critters in this quick no-sew tutorial from Liz Chandler @PurlsAndPixels.

Make Your Own Moth Repellent Using Cedar Chips and Cotton Cloth 🦋🌳

Living in an overgrown cedar forest has its perks: beautiful views, a rich natural scent, and an endless supply of cedar wood chips. But after discovering one too many moth holes in my favorite sweaters, I knew it was time to put those cedar chips to good use. Enter: DIY no-sew cedar sachets.

These quick, eco-friendly sachets are a chemical-free way to protect your clothes and keep your home smelling fresh. And the best part? With precut cotton cloth, cotton cord, and cedar chips, they’re so easy to make you’ll have a batch ready in no time. Plus, no sewing required.

Here’s how I made my sachets and how you can make yours, too!

Materials You’ll Need:

Order supplies for your DIY No-Sew Cedar Sachets thru my Amazon Affiliate links below, or find these supplies at your favorite local shops:

Use cotton cloth of your choosing to make no-sew diy cedar sachets. Liz Chandler @PurlsAndPixels used this cute set with a pastel cactus pattern.

Step 1: Gather Your Supplies

I started with a 5-piece fabric bundle in beautiful patterns and cut each piece into roughly 10×10-inch squares. These precut bundles are perfect for projects like this because they’re affordable, versatile, and save time on measuring.

Living near a cedar forest, I always have cedar chips handy from yard work. But if you don’t, don’t worry. Untreated cedar chips or shavings are widely available online, at garden centers, or even in pet stores (sold as bedding).

Cut your cotton cloth into squares to start making your DIY No-Sew Cedar Sachets with Liz Chandler @PurlsAndPixels

Step 2: Prep the Cedar Chips

Place your cedar chips in a bowl. If you’d like a stronger scent, add a few drops of cedar essential oil. For a more aromatic blend, mix in dried lavender or rosemary.

For me, the pure cedar scent is enough—it’s nostalgic, reminding me of crisp mornings in the woods. But lavender gives a calming touch that’s perfect for closets or drawers.

Place a small handful of cedar chips on top of your cotton cloth square. Add in lavender, mint, or cedar oil for extra scent if you like. Find the guide from Liz Chandler @PurlsAndPixels.

Step 3: Fill and Tie the Sachets

  1. Lay one of your 8×8-inch fabric squares flat on your art table.
  2. Place a small handful of cedar chips (about 2–3 tablespoons) in the center of the square.
  3. Gather the edges of the fabric to form a pouch.
  4. Use the cotton cable cord to tie the pouch closed tightly, securing it with a double knot.

This method creates rustic yet charming sachets that keep the cedar chips securely inside. Sitting at my art table, cutting fabric, and tying sachets was surprisingly meditative. Making these DIY No-Sew Cedar Sachets were both a creative and practical way to spend the afternoon!

Use cotton cord, twine, or yarn to tie a tight knot then a cute bow to close the cedar chips into your DIY sachets. Read the lesson from Liz Chandler @PurlsAndPixels.

Step 4: Place Your Sachets

Now that your DIY No-Sew Cedar Sachets are ready, it’s time to put them to use:

  • Tuck them into drawers to protect your clothes.
  • Tie them to hangers for extra closet protection.
  • Place them in storage bins or on shelves for long-term freshness.

My office smelled like a cedar forest by the time I was done, and I couldn’t help but feel proud of this simple, practical creation.

DIY No-Sew Cedar Sachets - chemical free Moth Repellent Using Cedar Chips and Cotton Cloth - make them with Liz Chandler @PurlsAndPixels.

Why Cedar Works

Cedar’s strong, natural aroma masks the smell of natural fibers like wool and cotton, making it harder for moths to find their food source. Unlike harsh chemical mothballs, cedar is completely natural, eco-friendly, and safe for your family.

Bonus Benefit: Cedar Repels Mice Too!

Did you know cedar sachets don’t just repel moths? They can also help deter mice! The oils in cedar emit a strong aroma that rodents find unpleasant, making cedar an excellent, chemical-free option for pest prevention.

Place cedar sachets in:

  • Closets
  • Storage bins
  • Attics
  • Basements
  • Along baseboards or near entry points

For extra effectiveness, add a few drops of cedar essential oil to the sachets or use a cedar oil spray for hard-to-reach areas.

Tips for Best Results:

  • Refresh the Scent: Cedar’s aroma will fade over time. Add a few drops of cedar essential oil directly to the chips every few months to revive the scent.
  • Replace Regularly: Swap out the cedar chips every 6–12 months for maximum effectiveness.
  • Use Multiple Sachets: Larger spaces like closets or storage bins may need several sachets to maintain coverage.

Bringing the Forest Indoors

When I first started making cedar sachets, it was a practical way to deal with an overabundance of wood chips. But it’s become more than that—a simple, satisfying project that connects me to the natural beauty of my cedar forest.

Now, my clothes are protected, my closet smells amazing, and I’ve discovered a thoughtful, handmade gift idea for friends and family.

Creating these sachets at my art table turned into a calming, meditative experience, which reminded me of the beauty in combining creativity and practicality.

Place your cedar sachets in with your woolen yarn, sweaters, or suits, to help repel moths. Read the lesson from Liz Chandler @PurlsAndPixels.

Moth Repellent Using Cedar Chips and Cotton Cloth

Ready to start your own DIY sachets? Whether you’re working with cedar from your yard or store-bought supplies, this project is as easy as it is rewarding.

Keep Your Knits Beautiful & Your Spirit Cozy 🧶

Love this natural approach to protecting your handmade treasures? Explore these related articles to enhance your knitting and cozy living journey:

How do you protect your precious knits? Share your favorite storage tips in the comments below, or pin this cedar sachet tutorial for your next crafting session! 📌

Love sustainable crafting and cozy living? Sign up for my newsletter to get free guides, seasonal tips, and updates straight to your inbox. 💌

2025 New Year’s Traditions: Crafting & Cozy Living

2025 New Year's Crafting for Cozy Living. Tips from Liz Chandler @PurlsAndPixels.

Modern Ways to Create Comfort in the New Year 🌿

As we embrace the New Year, the art of cozy living is evolving into something deeply intentional. Like a perfectly stitched pattern, today’s comfort combines sustainability and mindfulness with 2025 New Year’s crafting spaces and traditions that truly nurture both body and soul. 🧶

Make cozy cabin mornings part of your 2025 New Years resolution. Mindful crafting and calm planning make for the most relaxing days. Join Liz Chandler @PurlsAndPixels.

Creating Your Sustainable Cozy Haven

This year’s home trends focus on merging comfort with consciousness. Transform your space into a sanctuary with these key elements:

  • Natural materials: Opt for wood, cotton, or wool for timeless charm.
  • Sustainable decor: Incorporate vintage finds or upcycled treasures.
  • Handmade touches: Add warmth with DIY crafts or family heirlooms.
  • Smart home features: Use technology for energy efficiency and convenience.

Whether it’s a cozy reading nook or a craft station by the window, design spaces that feel as good as they look.


Modern New Year’s Traditions for 2025

Reimagining how we celebrate the New Year can bring fresh meaning to familiar customs. Try these cozy 2025 New Year’s crafting traditions for a memorable and mindful start to your new year:

  • First Cast-On: Begin a knitting project at midnight to set the tone for the year.
  • Gratitude Blanket: Add a row each day to commemorate moments of gratitude. (Free Gratitude Blanket Pattern Here)
  • New Year’s Crafting Circle: Gather virtually for creative inspiration.
  • Mindful Making Resolutions: Set thoughtful crafting goals for the year ahead.
  • January Comfort Box: Fill it with handmade winter essentials.
Start your New Year crafting off with a cozy, mindfulness project. A grattitude blanket is a great way to encourage yourself to remember the positive and happy moments of life. Start knitting now!

Modernizing Traditional New Year Customs

Blend the old with the new for a meaningful celebration:

  • Digital Declutter: Organize your digital patterns and enjoy a quiet coffee or tea break.
  • Eco-Friendly Resolutions: Jot down your goals in a handmade journal.
  • First Sunrise Crafting: Greet the day with early morning creativity.
  • Memory Project: Start a craft that chronicles your year in stitches.
Celebrate the new year with craft projects and cozy home decor. And, lets make a grattitude blanket together this year. Love, Liz Chandler @PurlsAndPixels

Daily Comfort Rituals for 2025

Cozy living isn’t just about spaces—it’s about nurturing daily habits:

  • Morning mindfulness paired with a hot drink in a handmade mug.
  • Afternoon creative sessions that revive your spirit.
  • Evening slow-living moments like journaling or knitting.
  • Dedicated digital-free crafting time to reconnect with analog joys.
2025 New Year's crafting for cozy, mindful living this year! Knit and cozy up your home with Liz Chandler @PurlsAndPixels.

Sustainability takes center stage in 2025’s lifestyle trends:

  • Stash-busting: Use up leftover yarn or materials.
  • Zero-waste crafting: Embrace upcycling and sustainable supplies.
  • Natural fibers: Prioritize wool, cotton, or bamboo over synthetics.
  • Homemade essentials: Create your own candles, blankets, or home accents.
Organize your craft supplies for a relaxing 2025 new years crafting tradition. Read more from Liz Chandler @PurlsAndPixels

Building Connection in the Digital Age

Community remains at the heart of cozy living:

  • Join virtual craft circles for shared creativity.
  • Share patterns and ideas in online forums.
  • Explore teaching opportunities in your craft niche.
  • Get involved in sustainability initiatives within your community.
Share your love of yarn and cozy traditions as part of your 2025 New Years crafting resolution.

Simple Ways to Start Your Cozy Year

  1. Curate an intentional crafting space.
  2. Commit to learning one new skill.
  3. Join a virtual crafting group.
  4. Establish a daily comfort ritual.
  5. Plan seasonal DIY projects.
  6. Organize your stash for sustainable crafting.
Start your 2025 new year with a cozy new crafting corner. Organize what you have and make your home a comfortable place to work on your cozy crafting projects.

Closing Thoughts

Creating a cozy lifestyle in 2025 is about more than trends; it’s about aligning with what feels authentic to you. Whether you’re casting on your first project of the year or savoring quiet moments in your newly designed space, each stitch and each intention creates a more meaningful year ahead.

Find More New Years Inspiration

🏡 Cozy Lifestyle Basics

🧶 Knitting: A Timeless Resolution for the New Year

📃 Organize this Year’s Knitting Projects with a Free Planner Download

🌱 Starting Seedlings on New Years Day

👐 Simple DIY Handmade Crafts

Here’s to a 2025 filled with comfort, creativity, and community! ✨ Join me on Pinterest, Instagram, Facebook, or X . I am @PurlsAndPixels. Let’s be friends and share our crafty projects!

How to Wind a Center-Pull Yarn Ball

How to wind yarn into center-pull balls by hand - a lesson with Liz @PurlsAndPixels.

Whether you have unraveled a project or just have some leftover yarn, by now you probably have some scraps that are in need of organization. Winding yarn into neat balls keeps your strings from becoming a hopeless tangled mess. While there are many ways to coil yarn for storage, center-pull yarn balls are the most versatile; they allow you to work directly from either end of the string.

(In the article below, I have linked to items on Amazon.com, so you can see examples of the equipment I reference. Please know all links to Amazon are affiliate links, and if you make a purchase through them, I will earn a small commission at no cost to you. Now, on to the important information.)

Center-Pull Yarn

Learn to wind a center-pull yarn ball with just your hands in this lesson with Liz @PurlsAndPixels.

Each ball of yarn is made of one long strand with two ends. There are a number of ways to coil the yarn so that it does not tangle. Some yarn is pre-wound into center pull balls or skeins (tube-shaped balls) by the manufacturer. When you see a string coming from the center of the ball or skein, you can probably work directly from either end.

Working from the center of a ball is often more convenient. When you work with the end on the outside of the ball, the yarn will likely roll and flop around. Yarn bowls and containers can help keep your yarn from escaping. But center-pull balls can be even more effective at reducing the movement of your ball of yarn. Pulling from outside of the ball forces it to roll. But when you pull from the center, the yarn uncoils without turning the ball.

Many yarn-makers, however, wind their yarn into “hanks” instead of center-pull balls or skeins. To make a hank, the manufacturer makes one large circle of yarn then twists it together for storage and shipping. Hanks are incredibly difficult to work from directly, so to use yarn that comes in a hank, you will need to wind it into a ball.

Winding frogged yarn, scrap yarn, and hanks of yarn into center-pull balls keeps yarn neat, organized, and ready to use.

Machines like “yarn swifts” and “yarn winders” are available to assist you in turning yarn into a usable form. A yarn swift holds the yarn from a hank in place while you wind your ball. Then, you can use a yarn winder to turn that yarn into a “cake” which is much like a center pull ball. Or, instead of investing in fancy machines, you can use just your hands and wind hanks, leftovers, and frogged yarn into center-pull balls.

Video Guide: How to Wind a Center-Pull Yarn Ball

Written Guide: How to Wind a Center-Pull Yarn Ball

Below I’ll show you how to wind a center pull yarn ball step-by-step. I am winding the ball from a larger center-pull skein so that I can knit two items at once from the same yarn. I also wind partially used skeins into new balls for tidier storage.

Step 1: Learn to wind a center-pull yarn ball with just your hands in this lesson with Liz @PurlsAndPixels.

Wind Yarn into a Ball, Step 1:

Drape the yarn end between your left pointer finger and thumb, laying it across your palm.

Step 2: Learn to wind a center-pull yarn ball with just your hands in this lesson with Liz @PurlsAndPixels.

Wind Yarn into a Ball, Step 2:

Clasp the end of the yarn with your left ring and pinkie fingers, then, with your right hand, pick up the other end of the yarn just above your left pointer finger. With the strand in your right hand, begin to wrap the yarn over the top of your left pointer finger.

Step 3: Learn to wind a center-pull yarn ball with just your hands in this lesson with Liz @PurlsAndPixels.

Wind Yarn into a Ball, Step 3:

Bring the yarn down between your pointer and middle fingers, then between your thumb and pointer finger, forming a loop around your left pointer finger.  

Step 4: Learn to wind a center-pull yarn ball with just your hands in this lesson with Liz @PurlsAndPixels.

Wind Yarn into a Ball, Step 4:

Wrap the yarn around your left thumb in a counterclockwise motion.  

Step 5: Learn to wind a center-pull yarn ball with just your hands in this lesson with Liz @PurlsAndPixels.

Wind Yarn into a Ball, Step 5:

Wind the yarn up between your left thumb and pointer finger to form a figure-eight (8) shape.

Step 6: Learn to wind a center-pull yarn ball with just your hands in this lesson with Liz @PurlsAndPixels.

Wind Yarn into a Ball, Step 6:

Continue wrapping the yarn around your pointer finger and thumb in figure eight shapes (as in steps two thru five).

Step 7: Learn to wind a center-pull yarn ball with just your hands in this lesson with Liz @PurlsAndPixels.

Wind Yarn into a Ball, Step 7:

When you have wrapped the yarn around your fingers in figure eights at least 20 times, you can stop and move to the next step. To make a larger ball of yarn, wrap more figure eights; when the yarn wraps reach your left thumb knuckle, move to step eight.  

Step 8: Learn to wind a center-pull yarn ball with just your hands in this lesson with Liz @PurlsAndPixels.

Wind Yarn into a Ball, Step 8:

With your right thumb and pointer finger, pinch all the strands at the center of the figure-eight shape (just between your left thumb and pointer finger).

Step 9: Learn to wind a center-pull yarn ball with just your hands in this lesson with Liz @PurlsAndPixels.

Wind Yarn into a Ball, Step 9:

While continuing to pinch the center of the yarn figure-eight with your right hand, gently remove your left hand from the yarn loops.

Step 10: Learn to wind a center-pull yarn ball with just your hands in this lesson with Liz @PurlsAndPixels.

Wind Yarn into a Ball, Step 10:

Continue to pinch the center of the figure-eight with your right hand.

Step 11: Learn to wind a center-pull yarn ball with just your hands in this lesson with Liz @PurlsAndPixels.

Wind Yarn into a Ball, Step 11:

With your left hand, fold the two loops of the figure eight up, toward each other, pinching them together over your right thumb.

Step 12: Learn to wind a center-pull yarn ball with just your hands in this lesson with Liz @PurlsAndPixels.

Wind Yarn into a Ball, Step 12:

While continuing to pinch the loops with your left hand, gently remove your right thumb. Pick up the yarn strand you have been winding with your right hand.  

Step 13: Learn to wind a center-pull yarn ball with just your hands in this lesson with Liz @PurlsAndPixels.

Wind Yarn into a Ball, Step 13:

Gently wind the strand in your right hand around the yarn you have pinched in your left hand. Be sure you do not wrap the tail end of the yarn into the ball, or you will lose your center-pull. Also, try not to wind too tightly; this can make yarn lose its stretch.

Step 14: Learn to wind a center-pull yarn ball with just your hands in this lesson with Liz @PurlsAndPixels.

Wind Yarn into a Ball, Step 14:

Continue winding your yarn around until you have formed a ball in your desired size. Always ensure you do not wrap the center-pull end into the ball. When you are finished wrapping, clip the yarn with scissors (if necessary). Carefully tuck the end that you held with your right hand into the ball to secure it in place.

Learn to wind a center-pull yarn ball with just your hands in this lesson with Liz @PurlsAndPixels.

Practice With My Knitting Patterns

Simple Washcloth Knitting Pattern Collection from Liz @PurlsAndPixels

If you’ve been following my lessons, you now have enough information to knit all of the washcloths and face scrubbies in my Simple Washcloth Knitting Pattern Collection. Happy knitting!

How to wind yarn into center-pull balls by hand - a lesson with Liz @PurlsAndPixels.

Up Next

Next up, a lesson about gauge. Learn what gauge means in knitting and you to check your gauge to make sure your knits end up the right size.

Go Back to the Learn to Knit Index

How to Remove Labels from Beechnut Baby Food Jars with No Chemicals

How to take off Beechnut baby food jar labels, guide by Liz @PurlsAndPixels

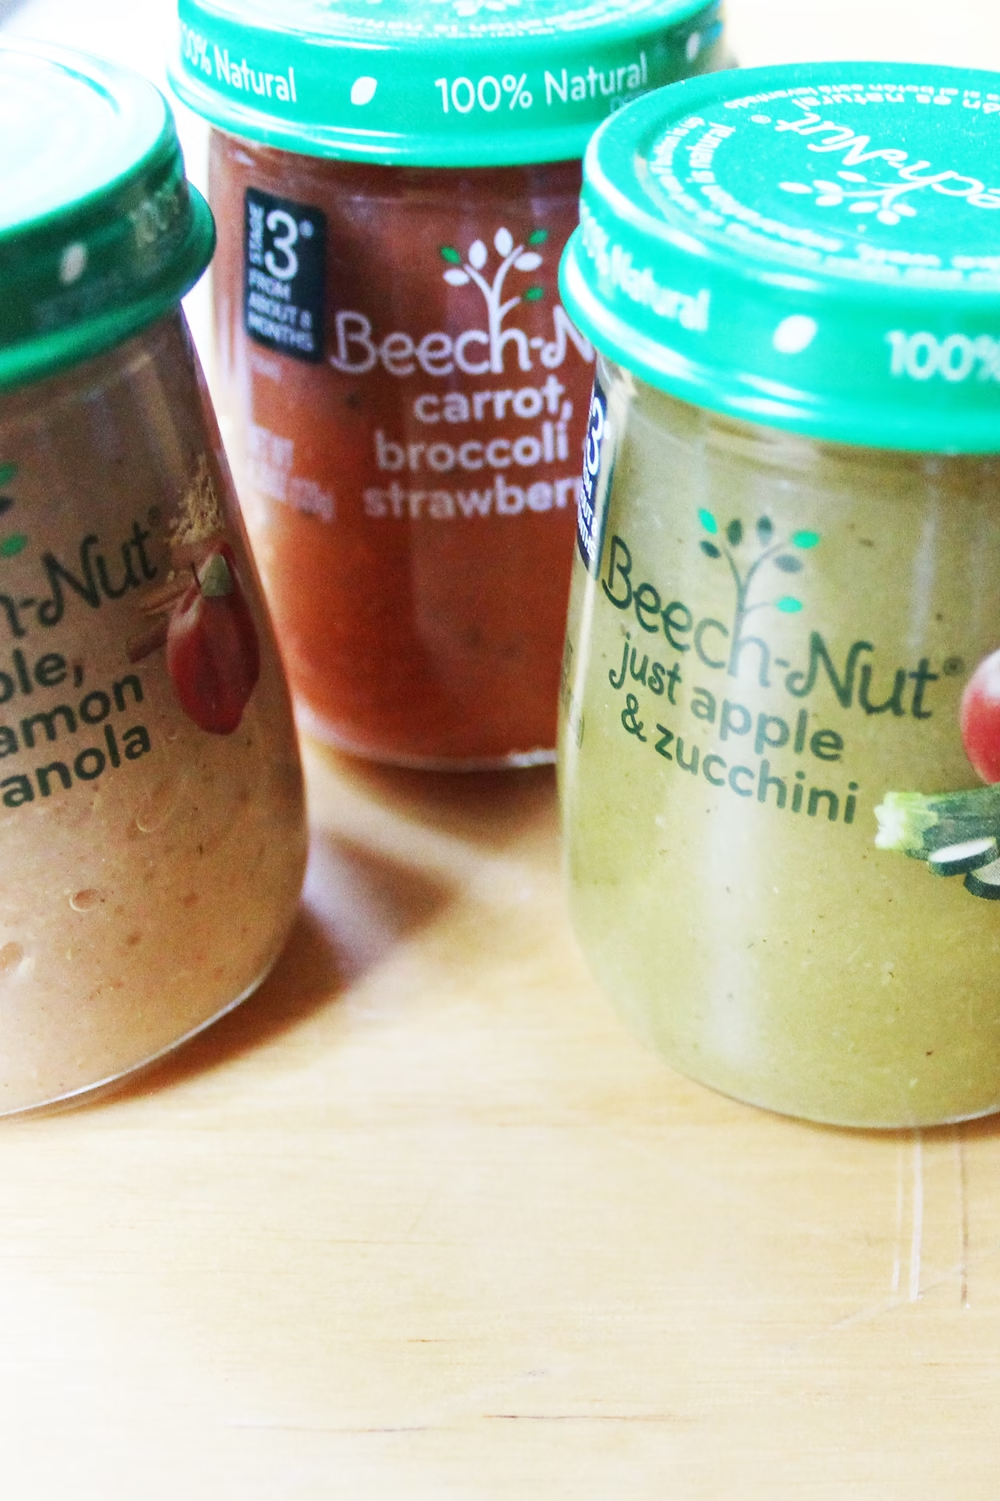
Beechnut Baby Food Jars

How to remove labels form Beechnut baby food jarsThe new baby food jars from Beechnut are my absolute favorite. The canning jars Beechnut chose are a unique pear shape that flares at the bottom. They were so adorable I could not resist collecting them and saving them up for some kind of craft project that I’d get to “one of these days.”


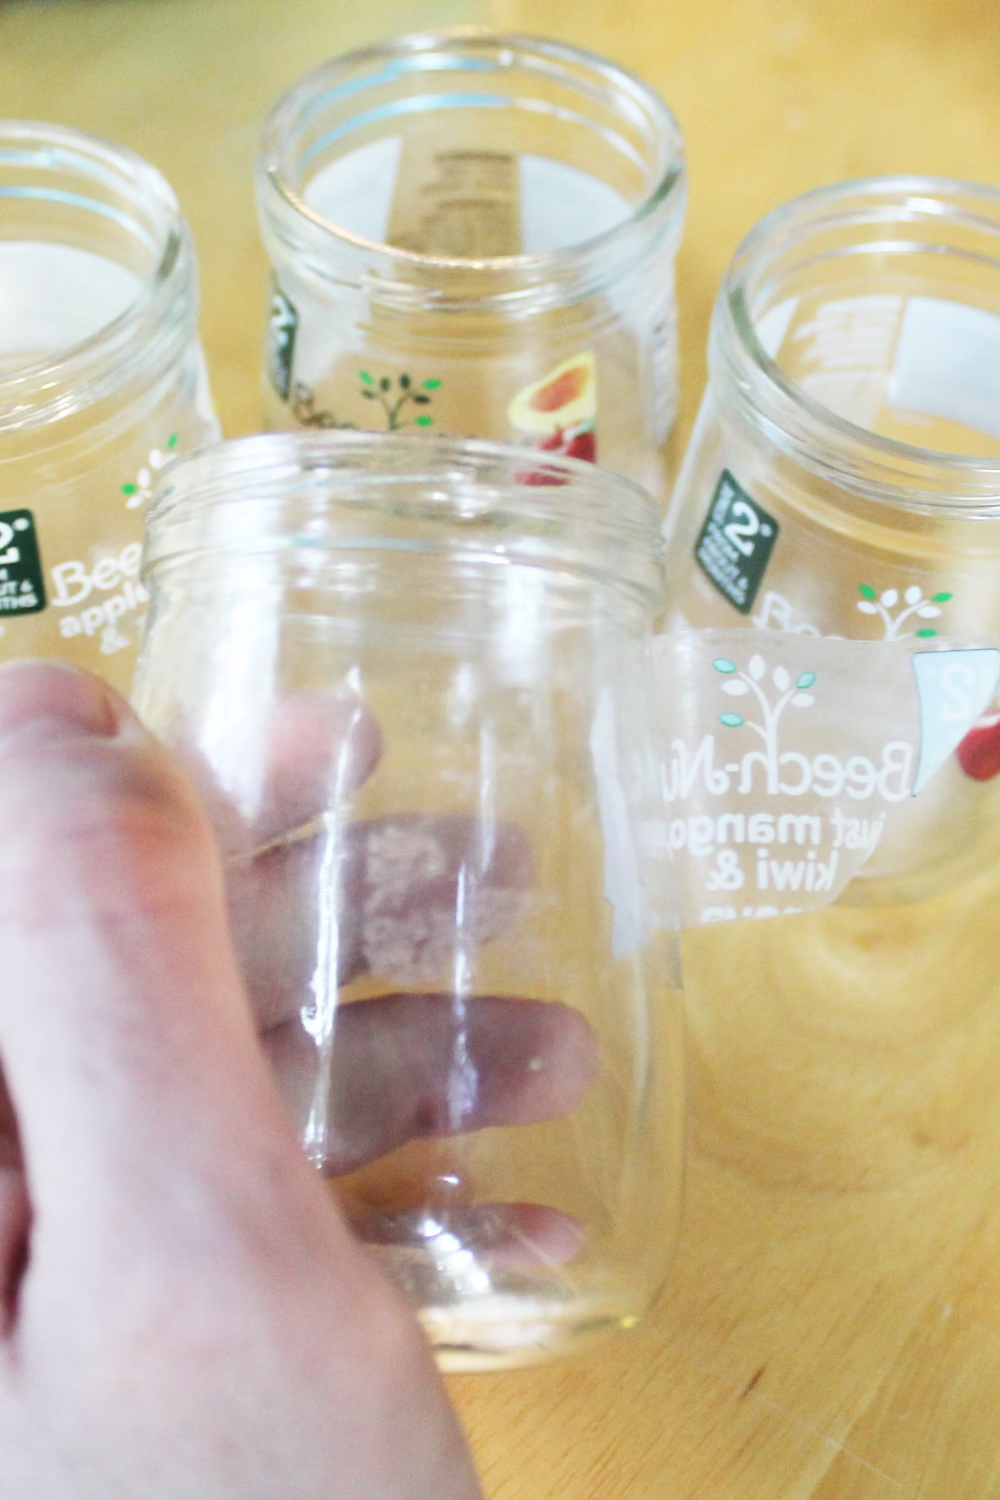
Remove Labels from Beechnut Baby Food JarsWhen I finally got around to making this baby food jar stash into a craft project, I ran into a problem. The clear plastic labels do peel off easily. Unfortunately, the glue used to adhere the label to the jar leaves behind a terrible sticky residue. I could not get the sticky residue off the baby food jars just by tossing the jars in the dishwasher, as I had hoped. And to just leave the glue on the jars on was not a good solution; it is incredibly sticky, so it collects dirt and hair like an icky magnet. Icky, sticky containers aren’t pretty or useful, so I was determined to find a way to be rid of the glue on all my little jars.


Solution: How to Remove Labels from Beechnut Baby Food Jars

I tried all sorts of ways to figure out how to remove labels from Beechnut baby food jars. And, after a few experiments, I think I have found the best solution! It is easy, normally around the house and chemical free. What is this miracle solution? Plain old vegetable oil.How to remove labels from Beechnut baby food jars

It does still take a bit of elbow grease to get the gooey label residue off, but here’s what I did. And there are no harsh chemicals involved, so I didn’t have to worry about doing my project around the kiddo.

I grabbed an old toothbrush, and a bottle of vegetable oil and got to scrubbing. Dip the toothbrush in the oil, scrub the residue loose, wipe with a paper towel or dry cloth, and voila, no more residue!

Run the oily jars thru the dishwasher to get rid of the remaining vegetable oil, and you are ready to craft.

What to Make with Beechnut Baby Food Jars


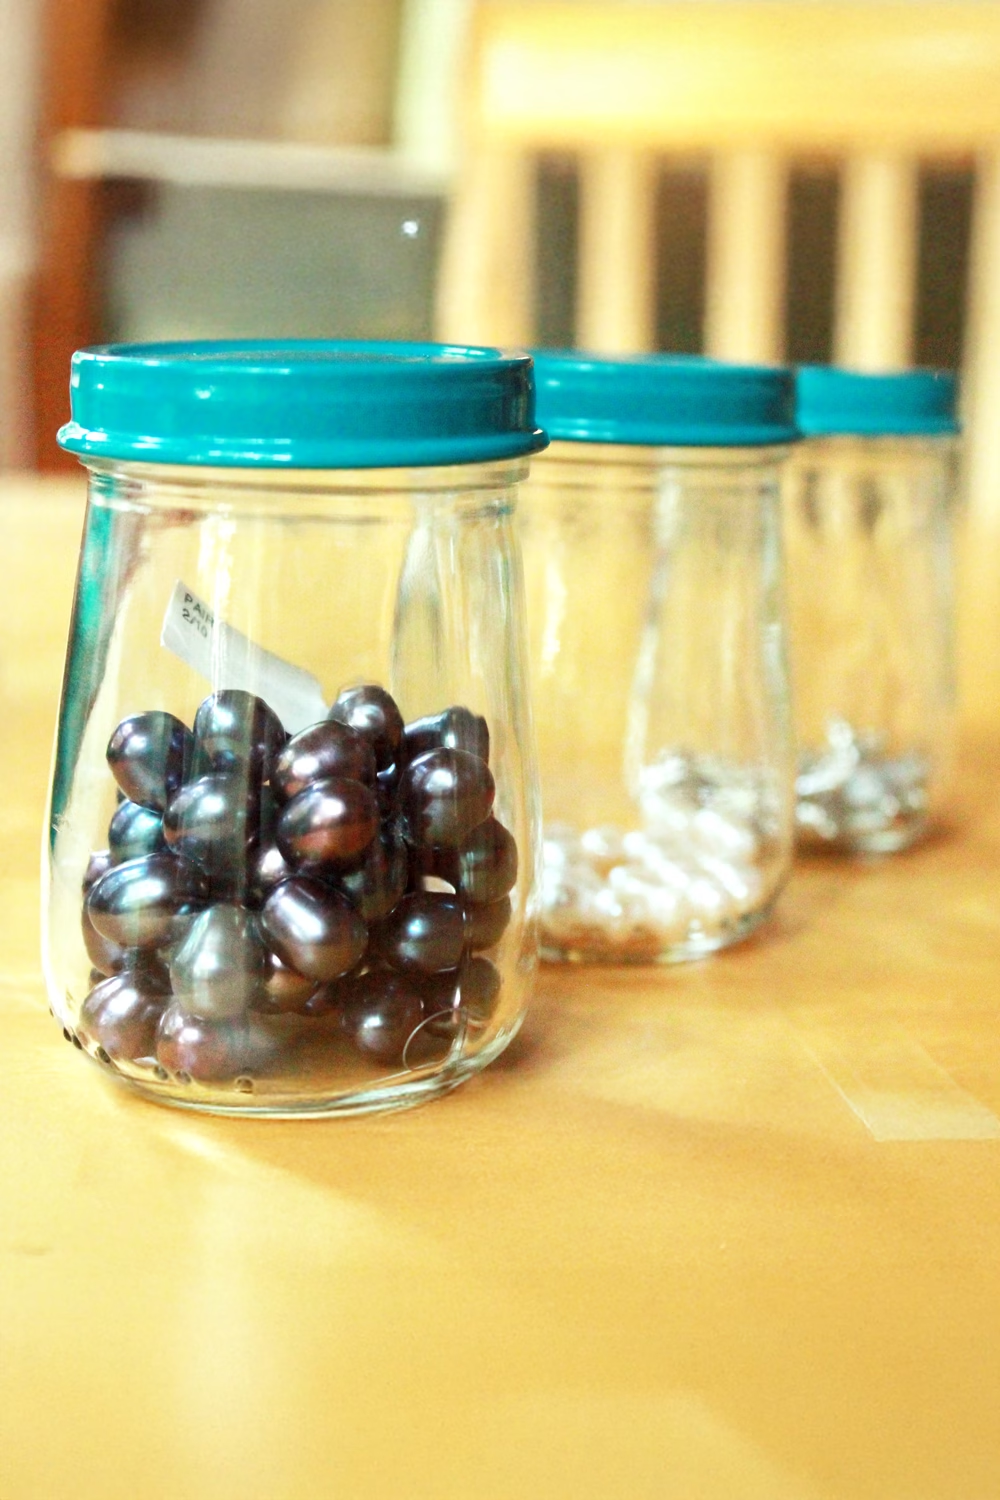
I needed a new storage system for my beads, since I make jewelry. I re-purposed the baby food jars to store my gems andbaby-food-jar-craft stones. To make them a little prettier, I got a bottle of teal spray paint (Rustoleum). A couple thin coats made the lids fresh and new, and I think this baby food jar craft project looks adorable siting on my shelf.

You could make lots of cute things from the uniquely shaped Beechnut jars, just be creative and use them to fill a need you have.

RE-PURPOSING Jars, Some ideas to try:
  • small item storage (like beads!)
  • office supply holders (for pens, paperclips, tacks, etc.)
  • pin cushions
  • candles

Check out and follow my Pinterest board, up-cycling baby food jars.

Enjoy and happy crafting!How to remove labels from Beechnut baby food jars with no chemichals, a tutorial from Liz @PurlsAndPixels