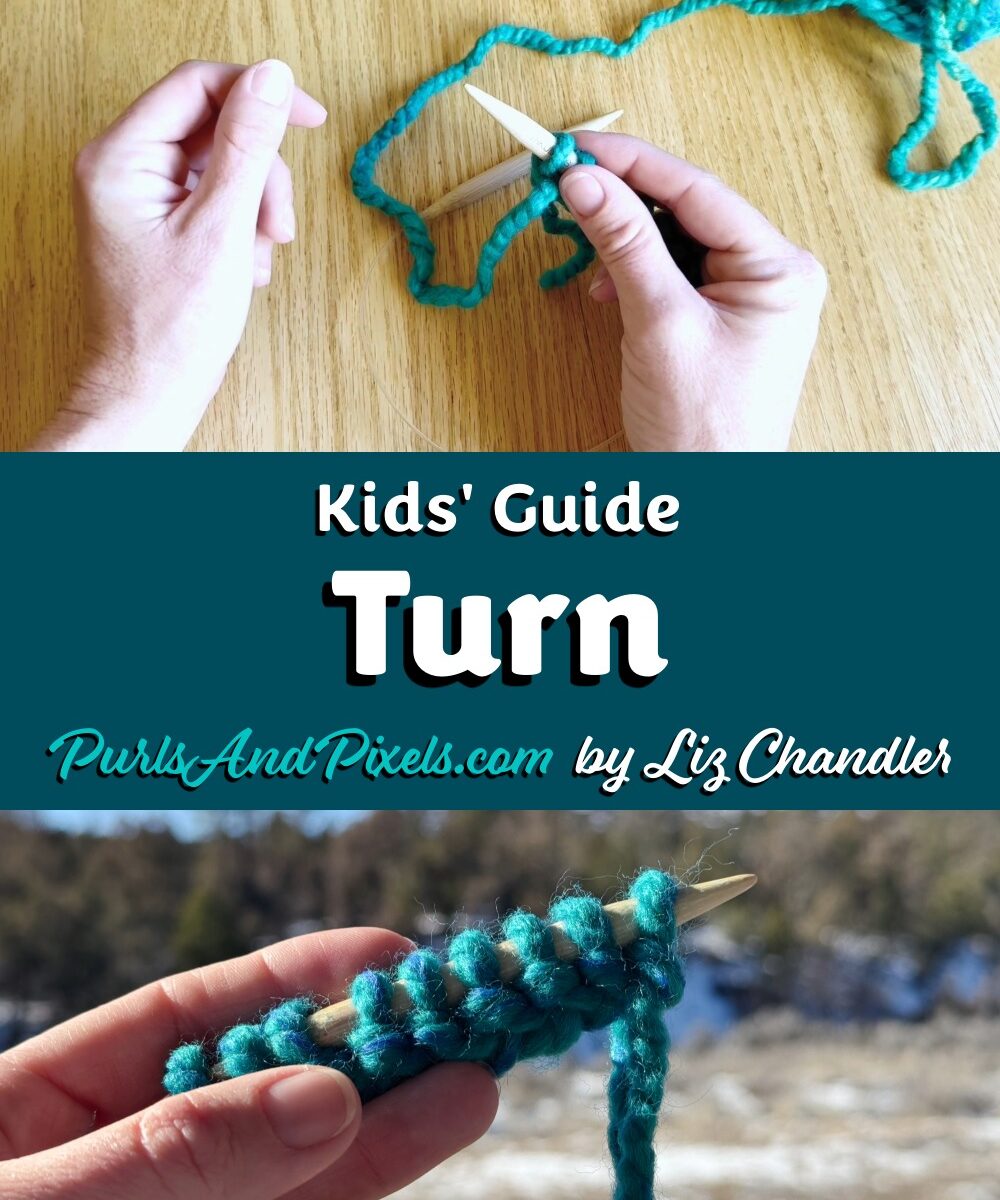
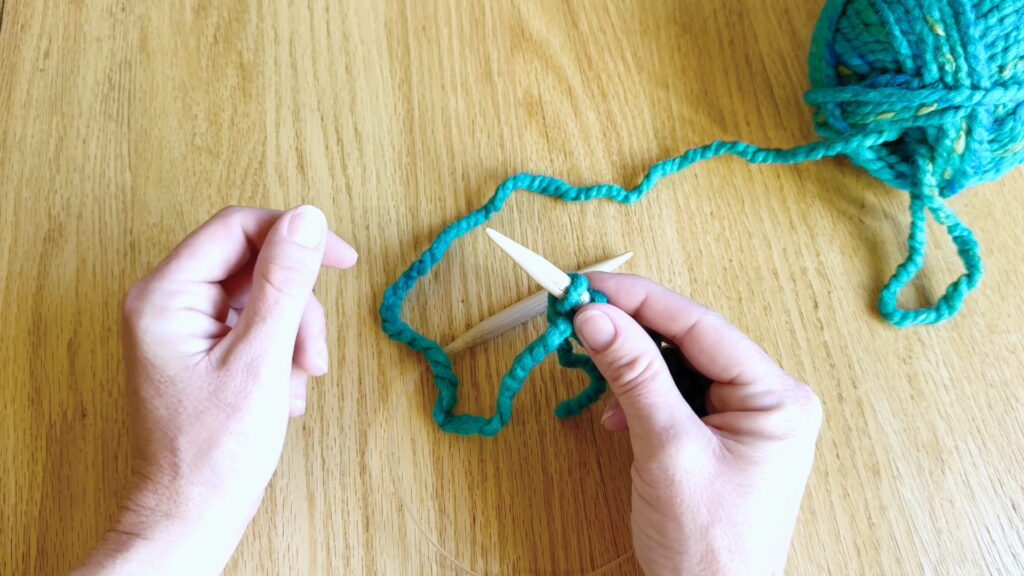
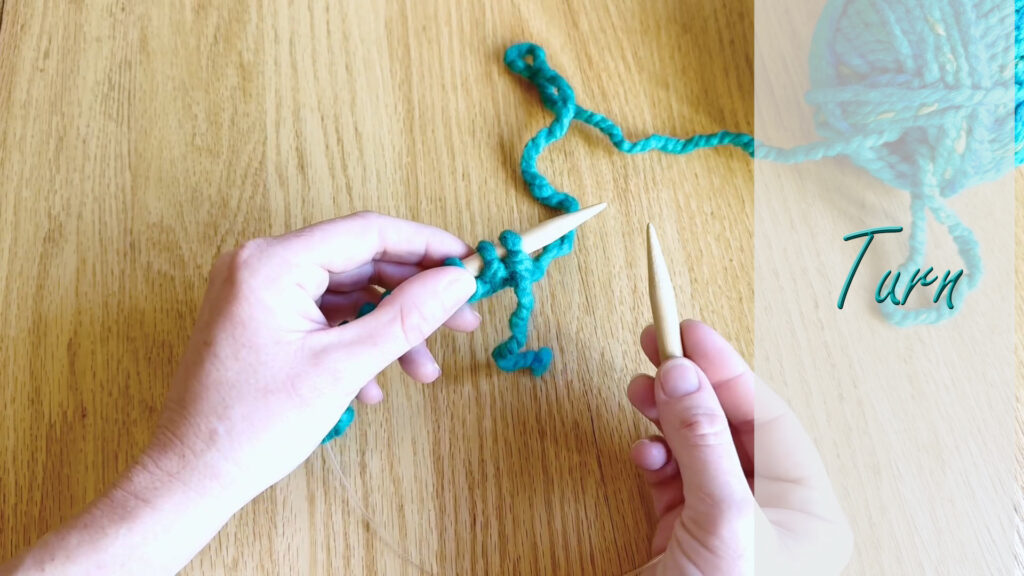
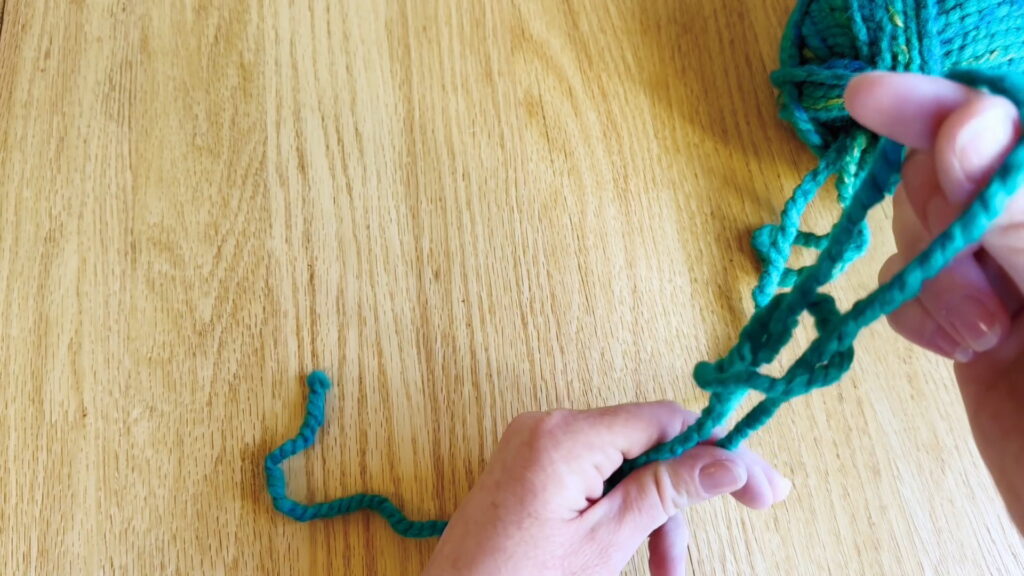
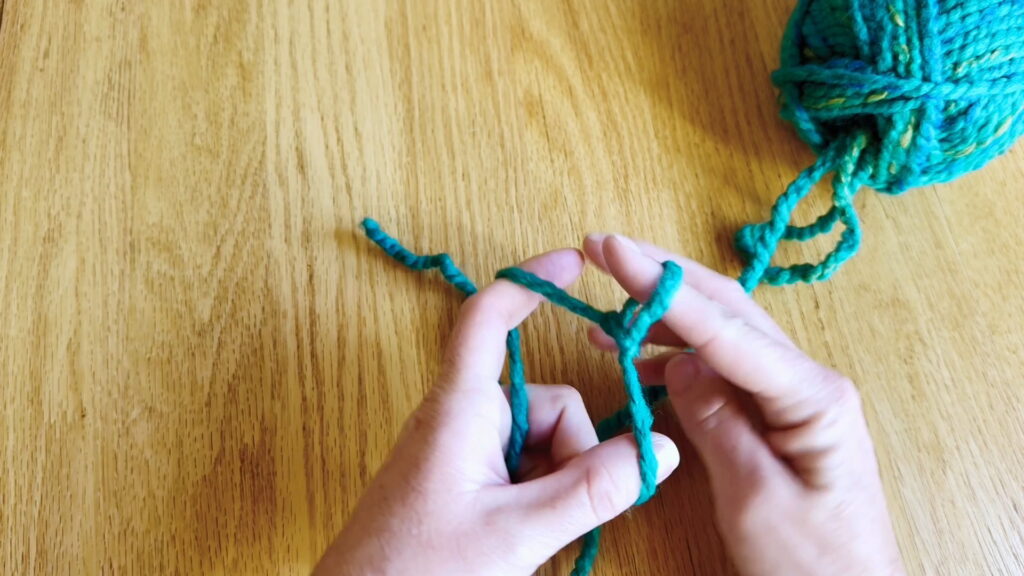
Now that you have cast on all your stitches, you are ready for the next step. Following our coaster pattern, we’ve now cast on all 10 stitches, and the pattern says: “Turn.” Turning your work after each row lets you knit a flat square or rectangle.
Turning your work in knitting means flipping your knitting over so you can make the next row in a flat project. In this kids’ knitting lesson, you’ll learn how to turn your work to keep going on your first project.
Turning your work is a simple hand switch. You’ll flip the knitting needle that is full of stitches from your right hand to your left hand, so the tip is facing right. This will set you up to make your first knit stitch and start knitting in flat rows.
Below are both video and written tutorials to help you learn how to turn your work. Working on the Beginner Coaster? You can check your pattern here.
Kids’ Video Guide: How to Turn Knitting
Turn Your Work (Kids’ Knitting Lesson)
Kids’ Picture Guide: How to Turn Knitting
Step 1: From Right Hand
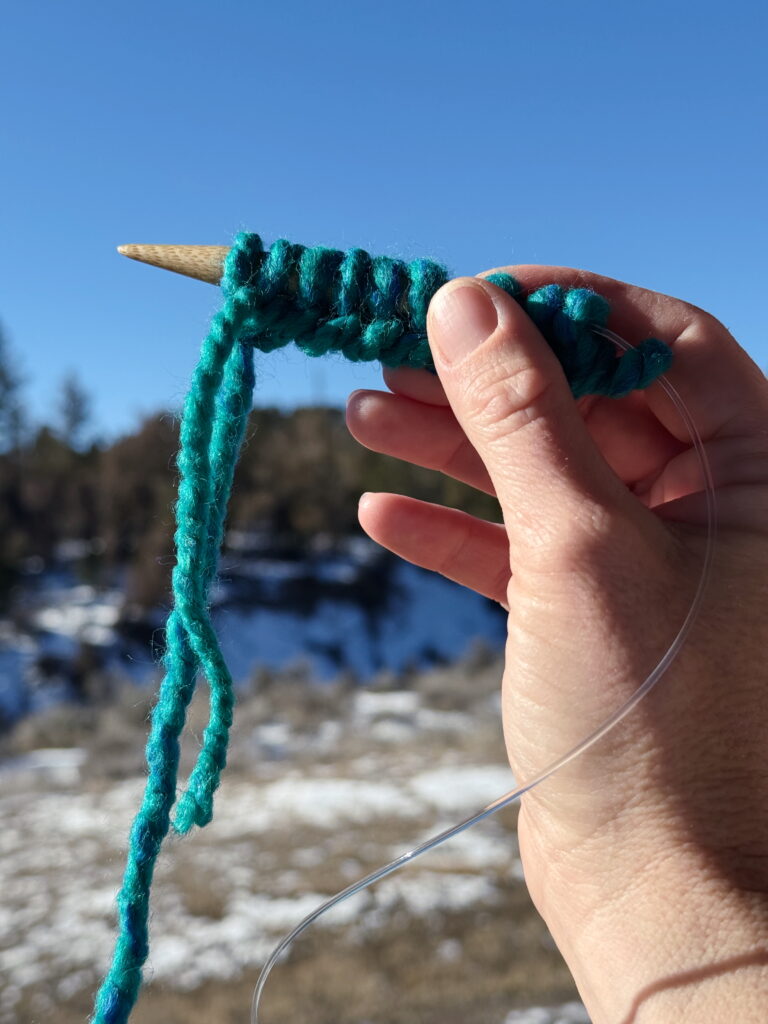
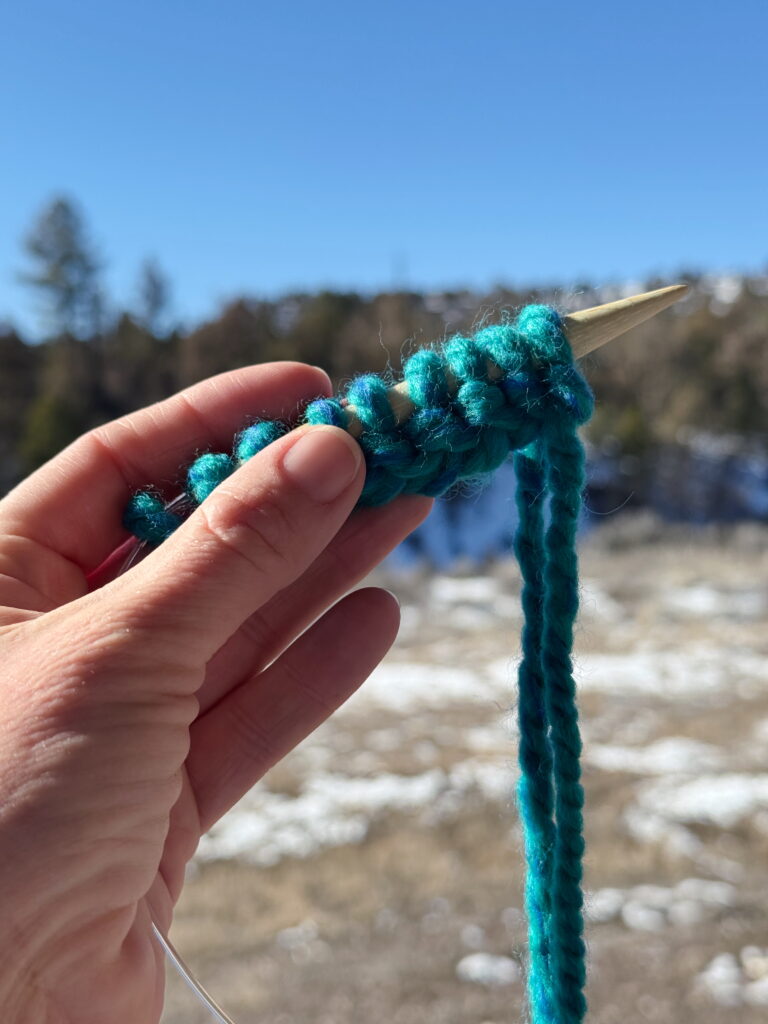
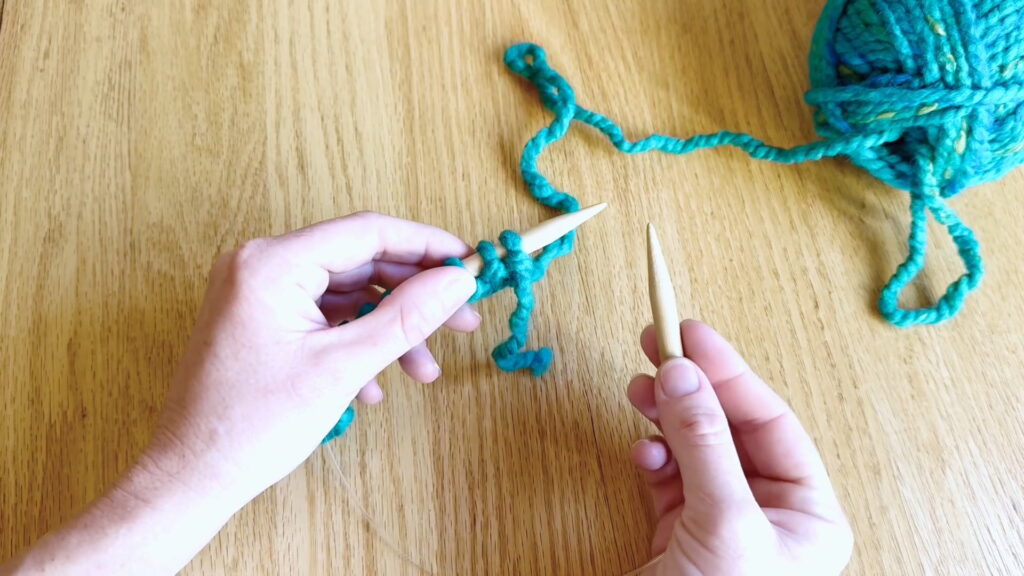
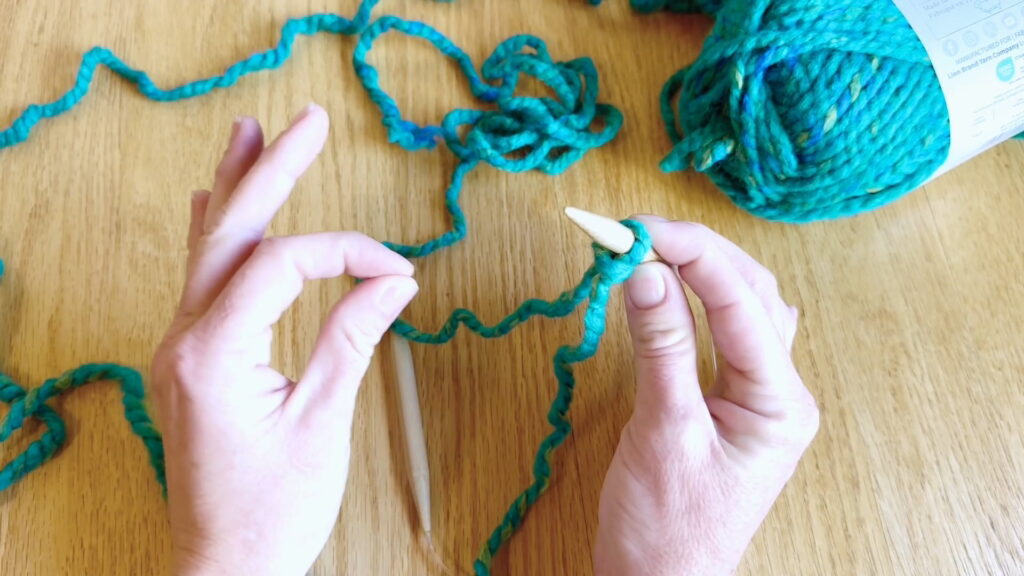
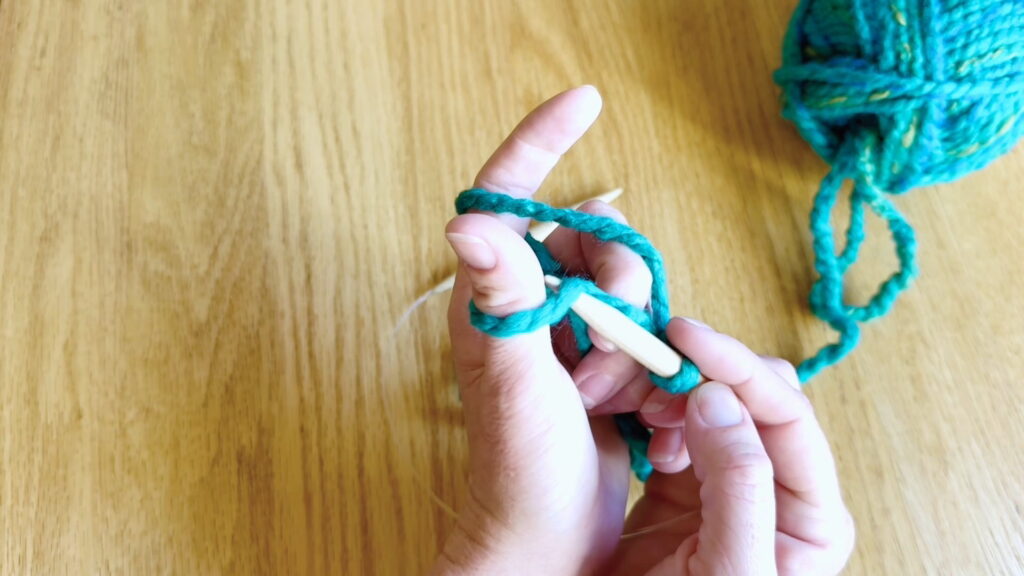
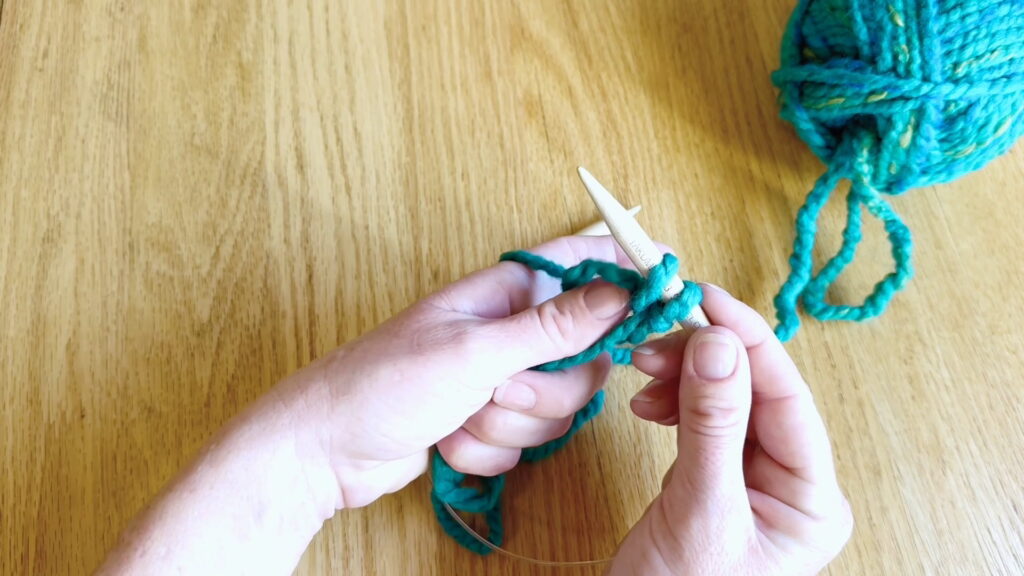
After you have cast on (or finished making a row), your stitches will be on the needle held in your right hand. The tip of the needle will be pointing toward the left.
Step 2: To Left Hand
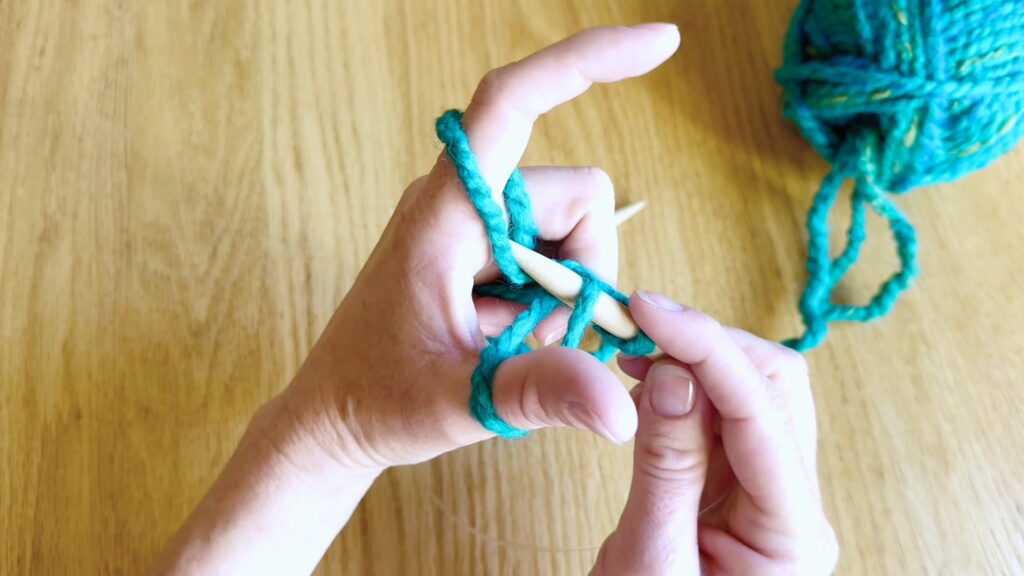
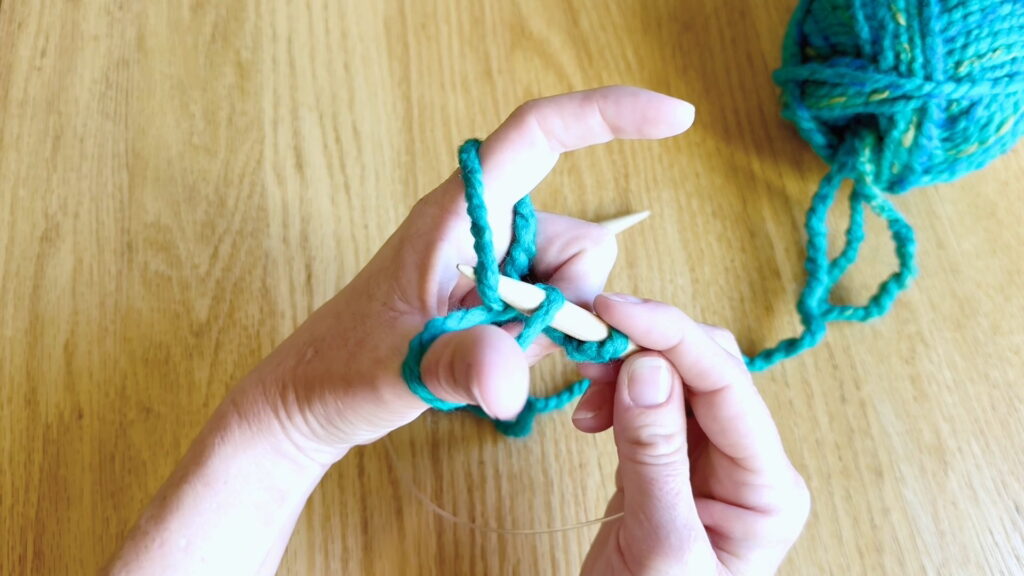
To turn your work, flip your knitting needle over, so the tip points toward the right, then place it in your left hand. Pick up the empty knitting needle with your right hand, making sure it points toward the left.
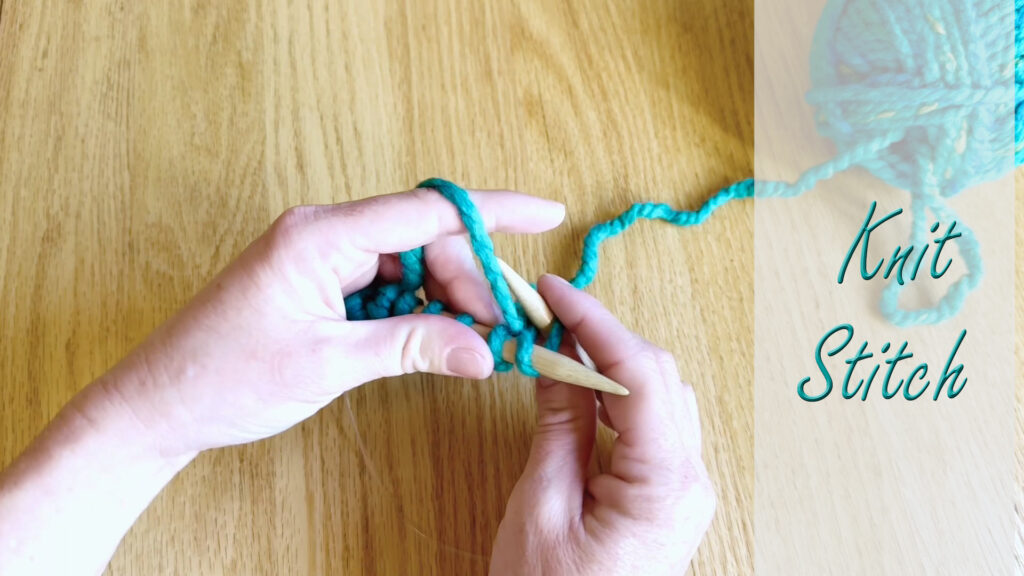
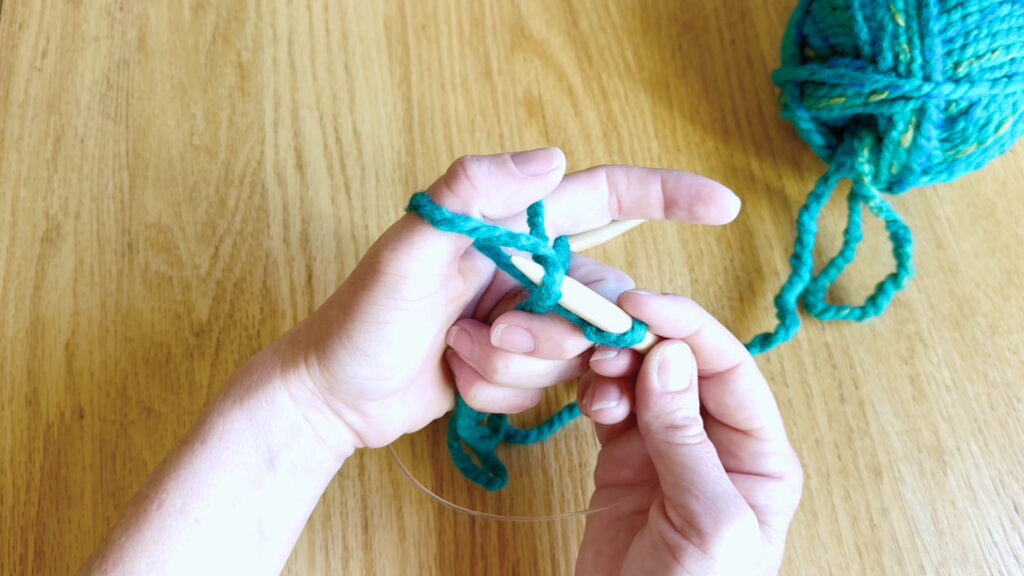
Once you are holding the needle with stitches in the left hand and the empty needle in the right hand, you will be set up to start making your first knit stitches.
Up Next
The knit stitch. Go to Kids’ Lesson 5 to continue.
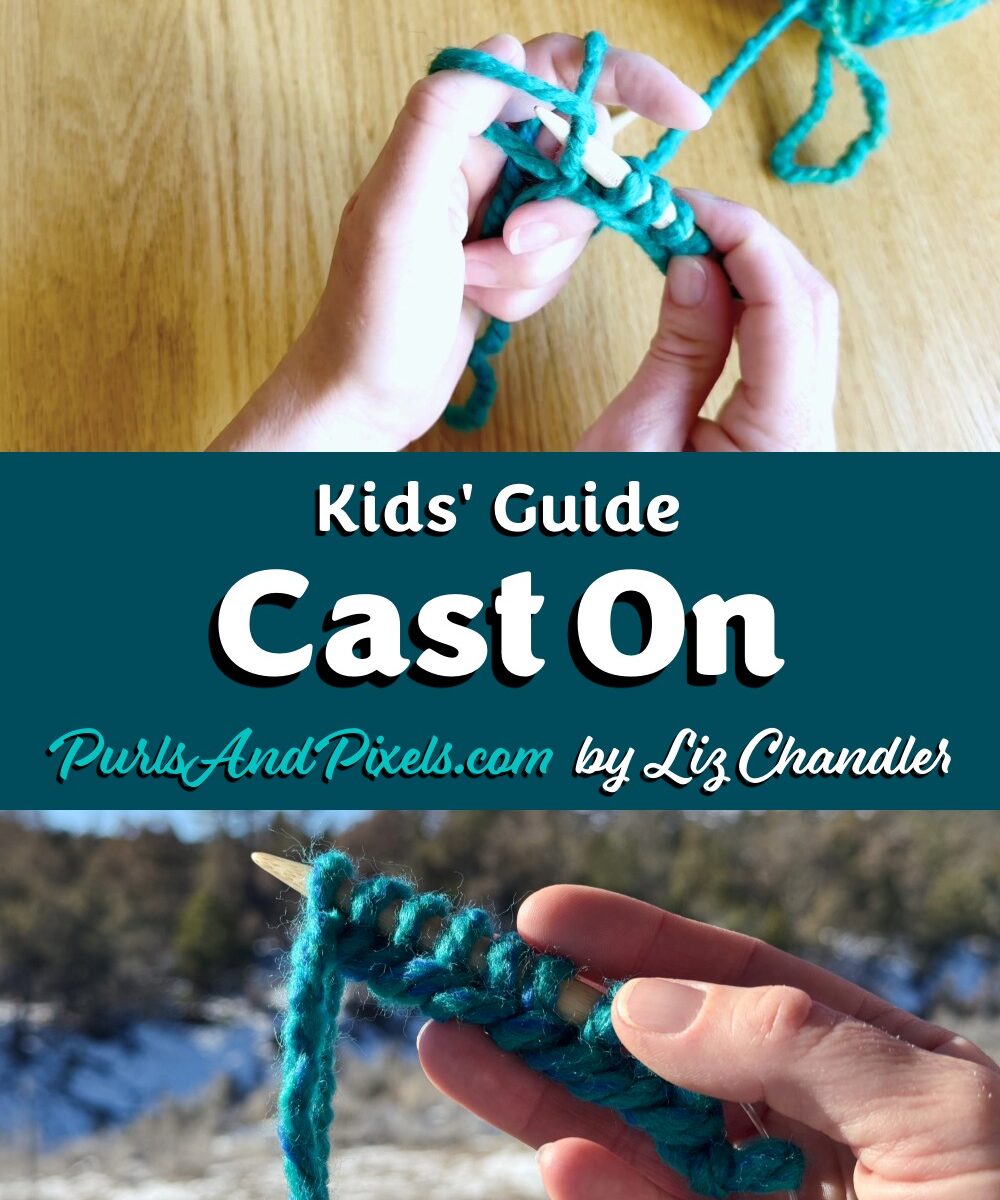
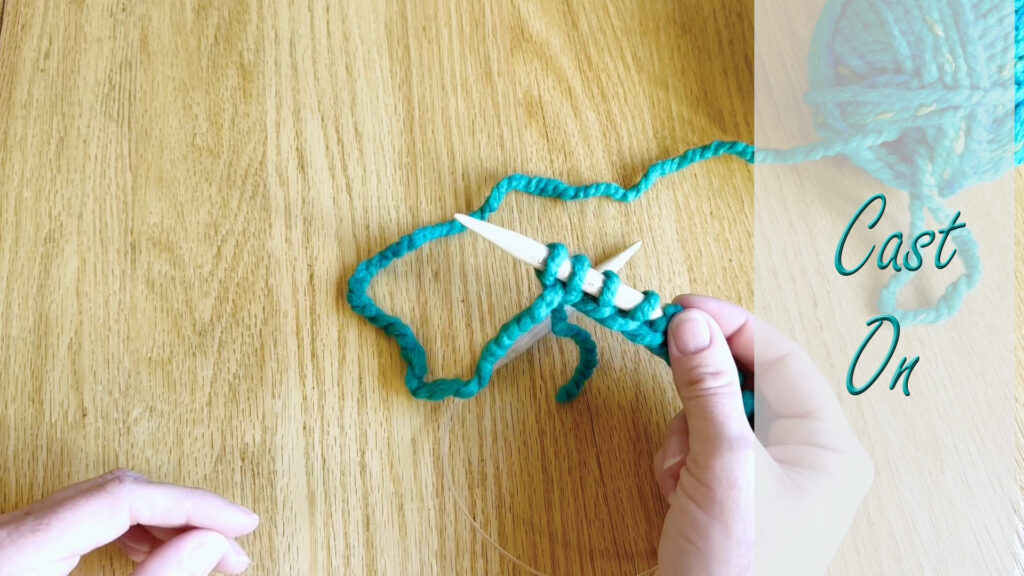
“Cast on” is knitter-speak for putting your first stitches on the needles. There are a lot of different ways to cast on. Here, you’ll learn the “long tail cast on.” It’s called this because you pull a long piece of yarn (or “tail“) out of the ball before you start. Using that long tail, you will make loops that wrap around your knitting needle. These “cast-on stitches” make the base of your knitting project.
Check your knitting pattern to see how many cast-on stitches you need for every new project. Since we will make a coaster first, you can start by making ten (10) cast on stitches. Grab your knitting needles and your yarn. It is time to cast on your first knitting project!
The long-tail cast-on is a way of creating your first knitted row of stitches. In this kids’ knitting lesson, you will learn the long-tail cast on so you can knit your first project.
Below are both video and written tutorials to help you learn how to cast on stitches. Working on the Beginner Coaster? You can check your pattern here.
Kids’ Video Guide: How to Cast On
Cast On for Kids (Beginner Knitting Lesson)
Kids’ Picture Guide: How to Cast On
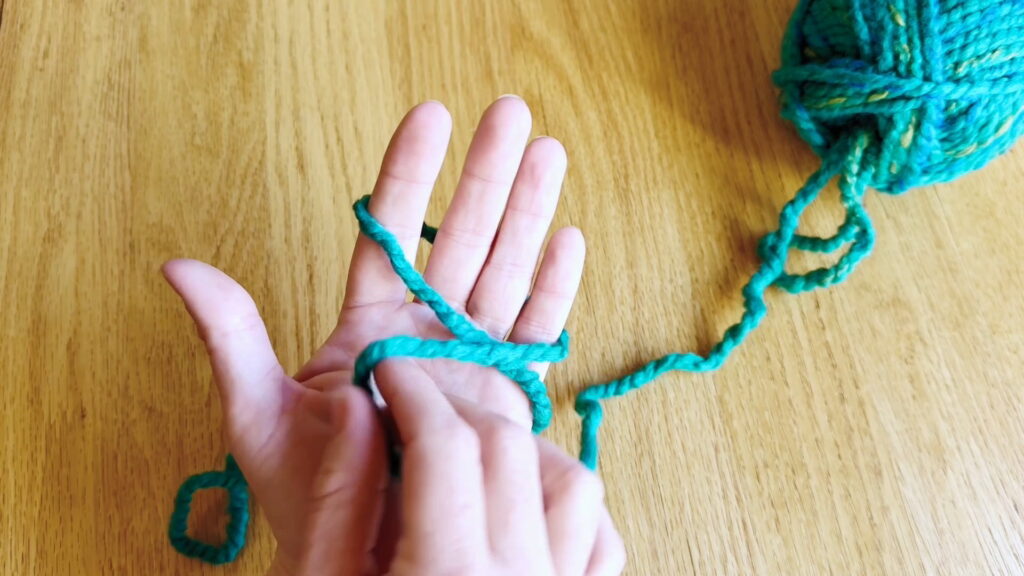
After you have made and placed your slipknot, follow the steps below to hold your yarn and needles so you can start making cast on stitches. Then, you’ll begin adding cast-on stitches to form your first row.
How to Hold the Yarn for a Cast On
Hold Step 1: Pinch
Hold the knitting needle tip with the slipknot in your right hand. Pinch your left thumb and pointer finger together, holding the other three out.
Hold Step 2: Under
Place the pinched fingers under the ends of the slipknot.
Hold Step 3: Grab
Close your hand over the yarn and grab the yarn with the last three fingers on your left hand.
Hold Step 4: Rotate
Rotate your left hand so that you can see your last three fingers and spread out your thumb and pointer fingers, so each holds one strand of yarn.
Once you are holding the yarn and needles correctly, you will start making cast-on stitches.
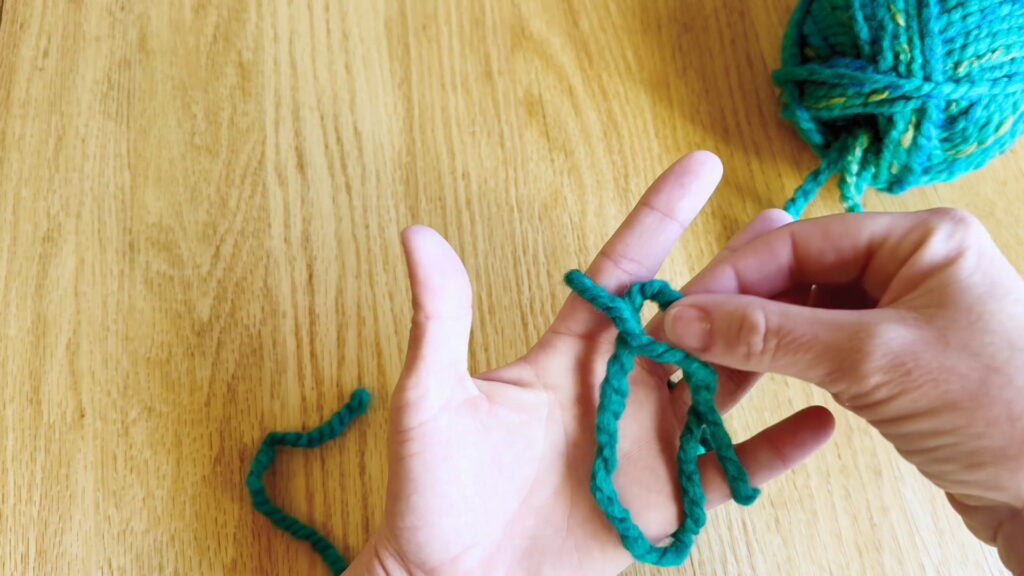
How to Make Cast On Stitches
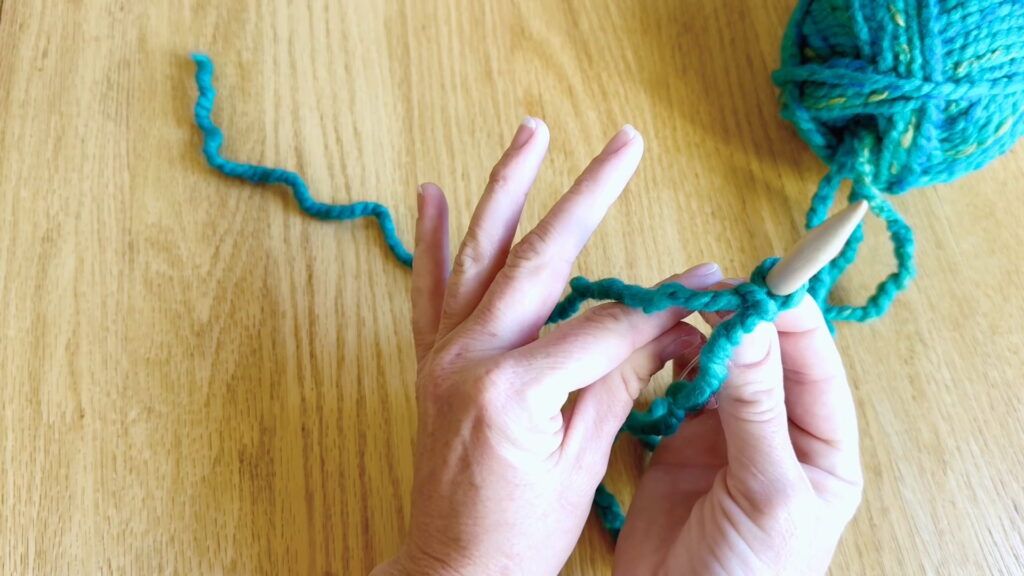
Cast On Step 1: Under 1
Move the needle tip under the strand of yarn that is looped around your left thumb.
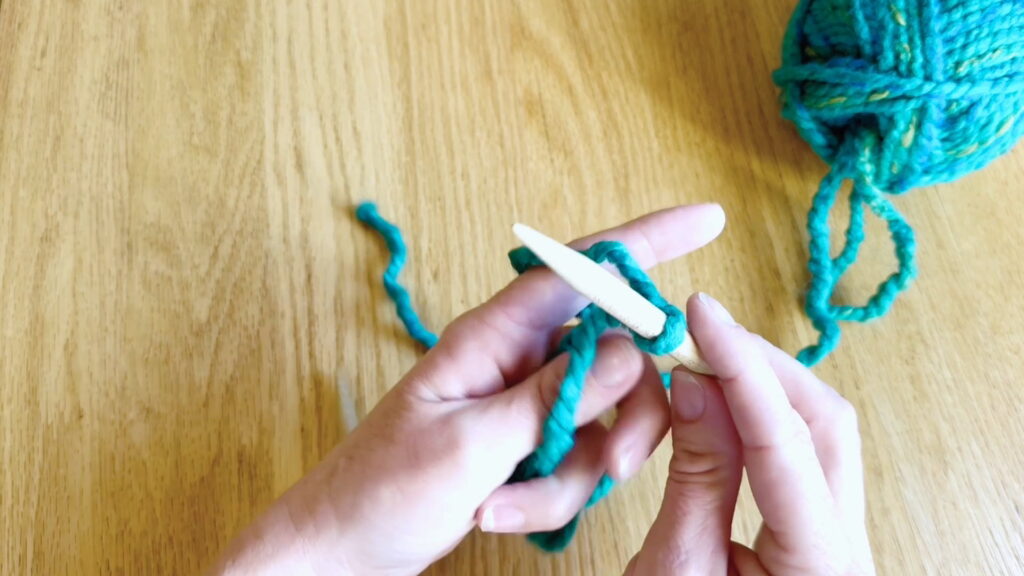
Cast On Step 2: Over 2
Bring the needle tip over the next two strands moving toward your palm.
Cast On Step 3: Grab the Yarn
Grab the second strand of yarn with the needle tip by placing it over the yarn and pulling the needle and yarn toward your thumb.
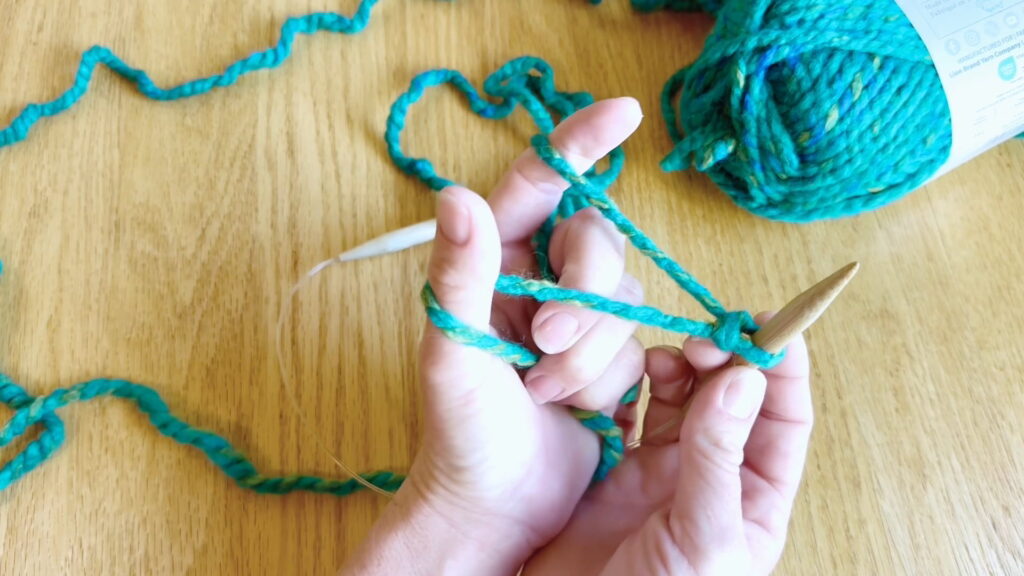
Cast On Step 4: Pull it Through
Pull the yarn and needle tip through the yarn loop that is on your thumb.
Cast On Step 5: Slide Off Thumb
Slide the loop off your thumb. Make sure to keep the loop on your knitting needle. The loop you just made on your needle is your second cast on stitch.
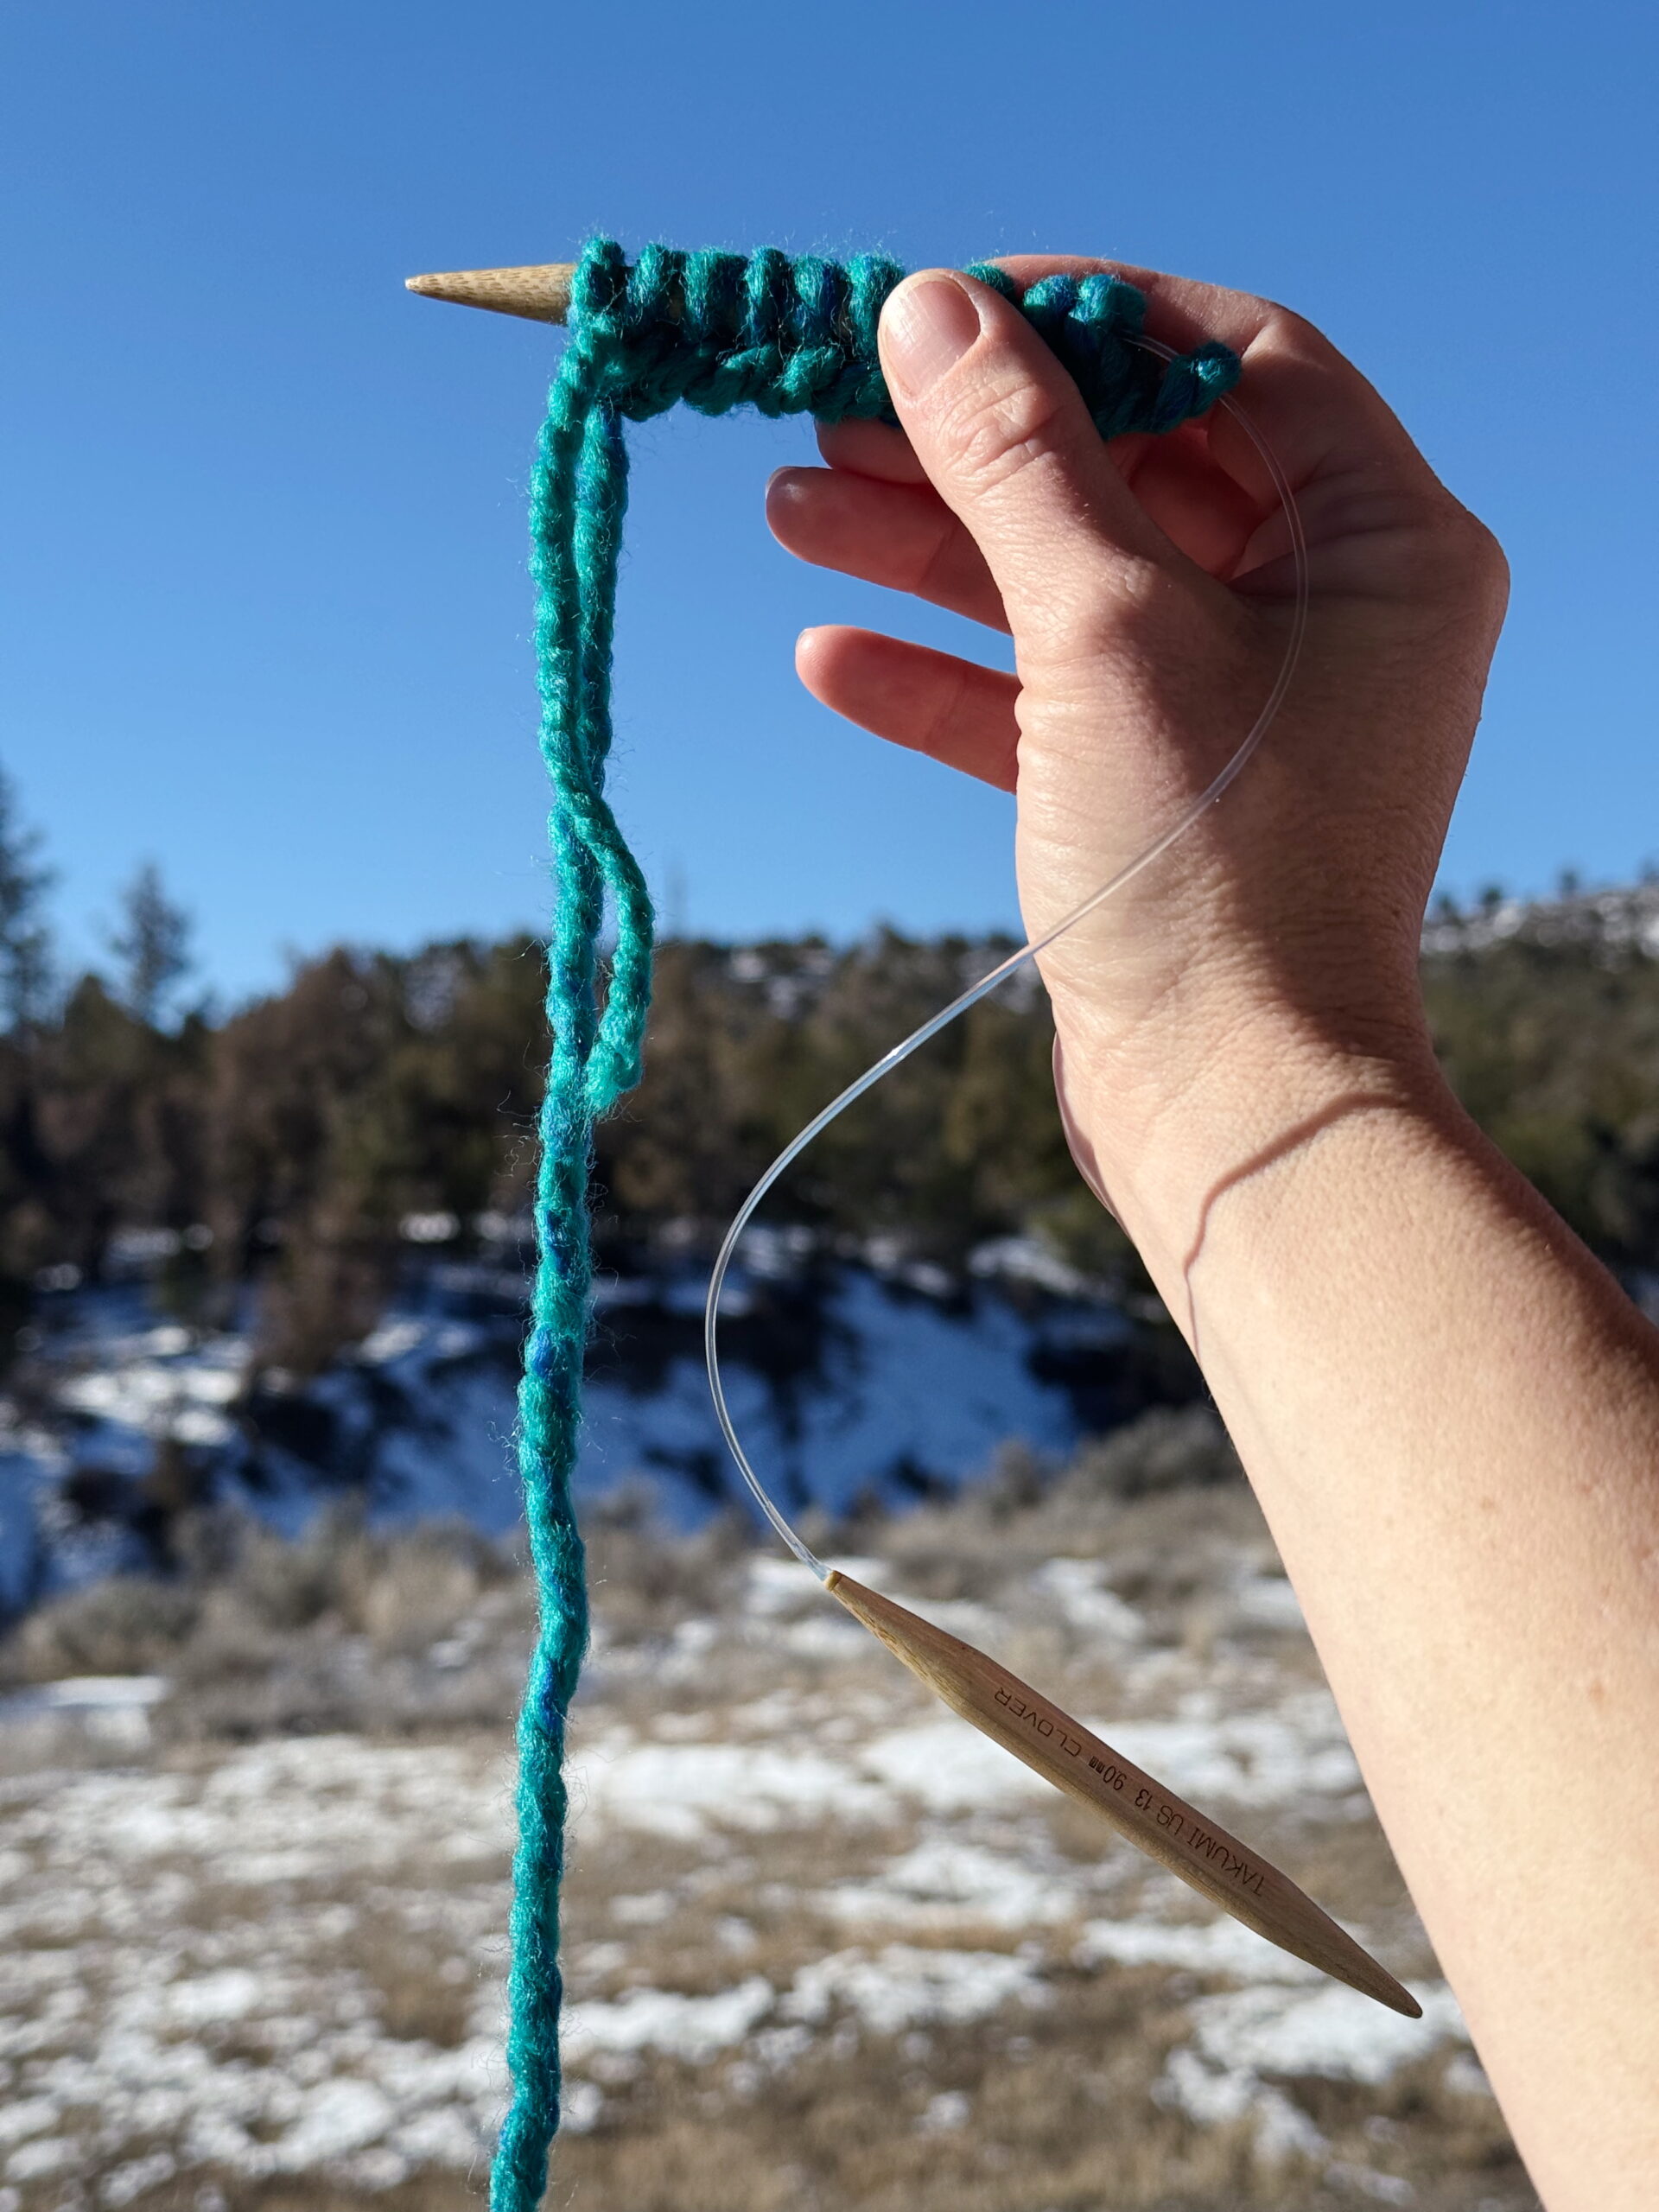
While continuing to hold the yarn in the same way, repeat cast on steps one through five to make as many stitches as your pattern instructs. For our coaster, stop casting on stitches when you have 10 on the needle.
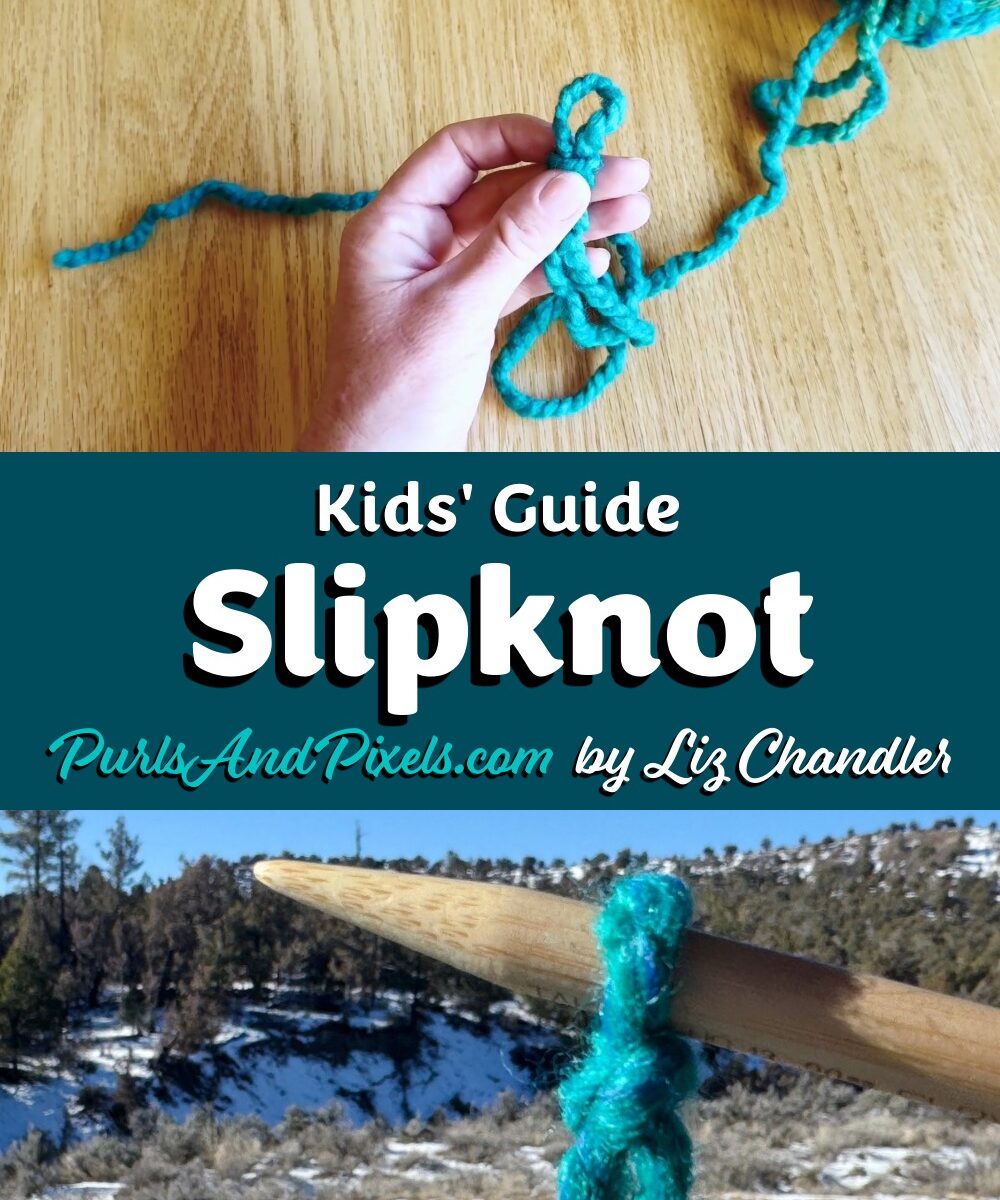
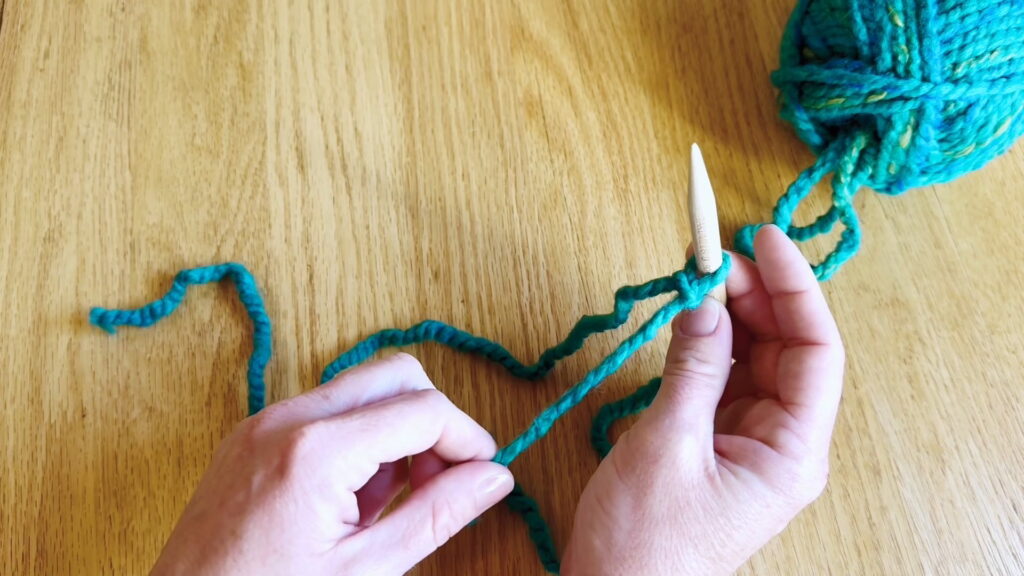
To start knitting, you will make a slipknot as your first stitch. Wrap the yarn around your hand, bring a bit up and under to create a loop with a knot at the bottom. This loop starts big and then slips tighter when you pull the end of the string.
A slipknot is the first loop you will put on a knitting needle to begin a project. In this kids’ knitting lesson, you’ll learn to make a slipknot to start your first guided knitting project.
Below are both video and written tutorials to help you learn how to make a slipknot. Working on the Beginner Coaster? You can check your pattern here.
Kids’ Video Guide: How to Make a Slipknot
Slipknot for Kids (First Knitting Lesson)
Kids’ Picture Guide: How to Make a Slipknot
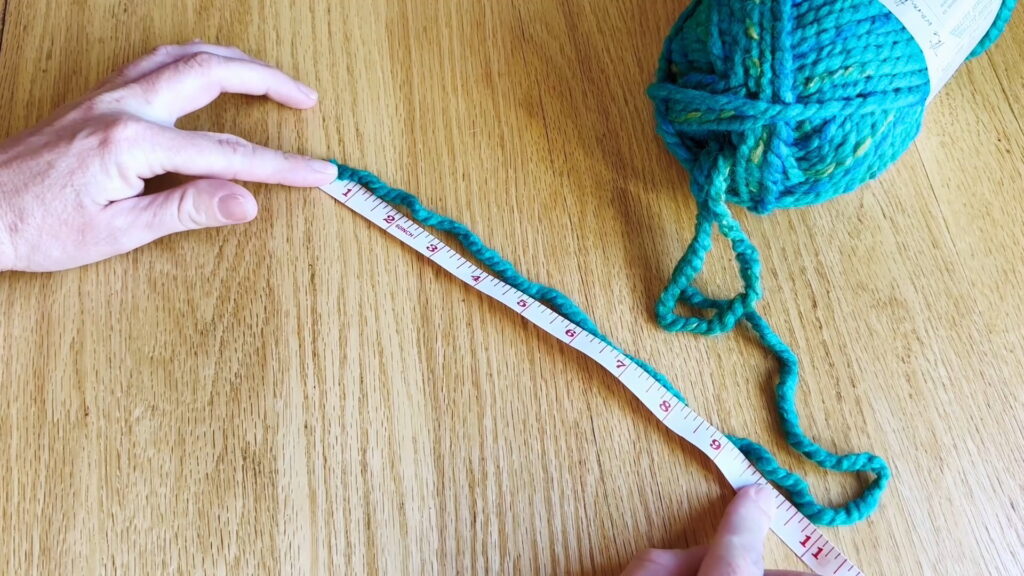
Step 1: Pull the Tail
Find the end of the yarn and pull it out of the ball. Measure about 2 inches of yarn for every stitch you need to cast on. For our coaster, measure out 20 inches of yarn. This is your “long tail.”
Step 2: Wrap Around Your Hand
Starting at the 20-inch point, wrap the yarn around your left hand so that it crosses over your palm.
Step 3: Loop Under
Loop the yarn you are holding in your right hand under the yarn that is wrapped around your left hand. This will make a small loop. Pinch the loop and carefully take your left hand out of the yarn.
Step 4: Pull Up
Hold the loop in your right hand and gently pull on the ends of the yarn with your left hand. This will tighten the knot at the bottom of the loop.
Step 5: Tighten
Continue pulling on the yarn ends to tighten the loop until it is small enough to fit around your finger loosely.
Step 6: Slip Onto Needle
Pick up one end of your circular knitting needle in your right hand with the tip pointing toward the left.
Slide the slipknot onto the knitting needle tip.
Tighten the slipknot so it fits snugly around the needle but can still slide back and forth.
Up Next
Now we can finish our cast on. Go to Kids’ Lesson 3 to continue.
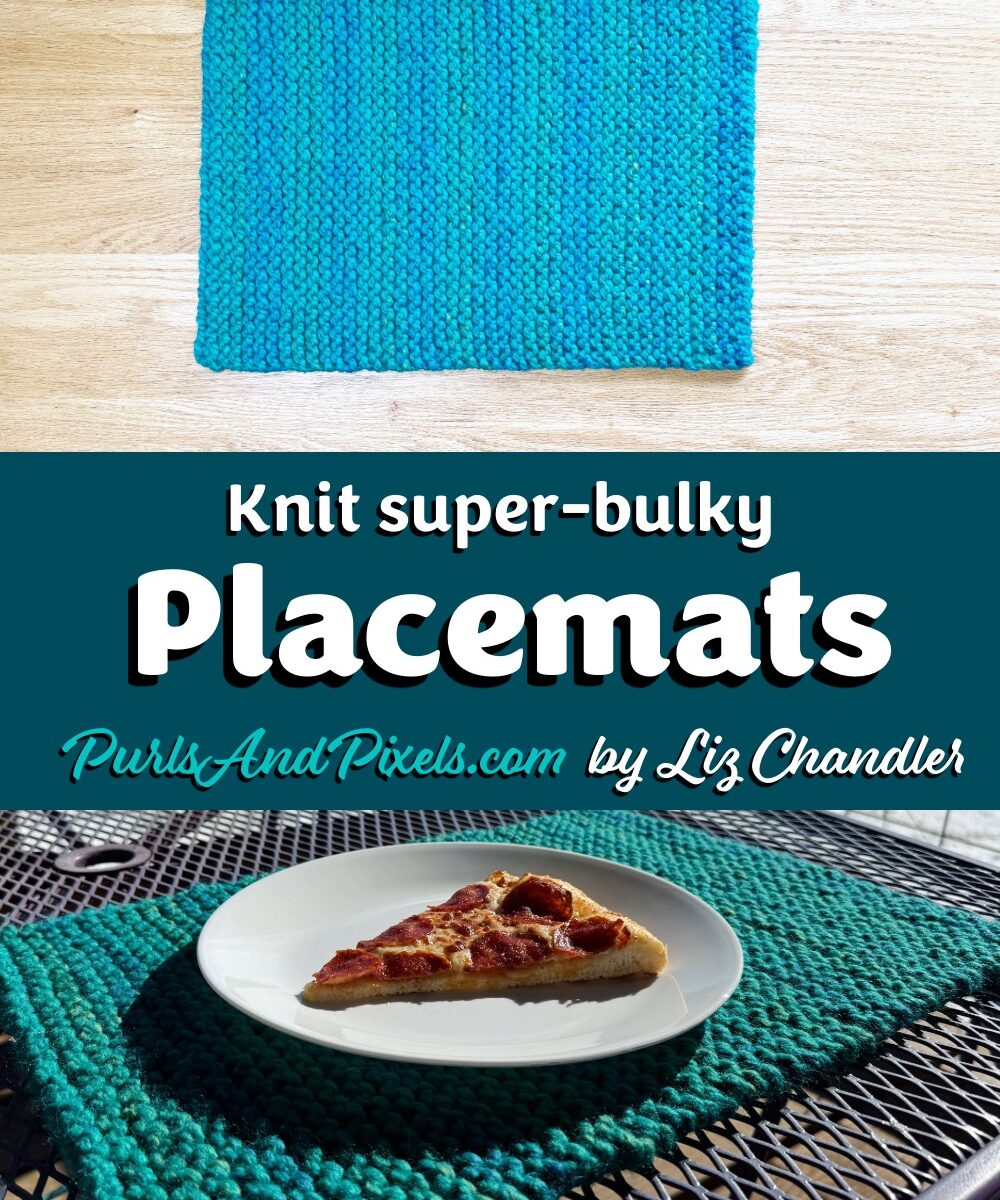
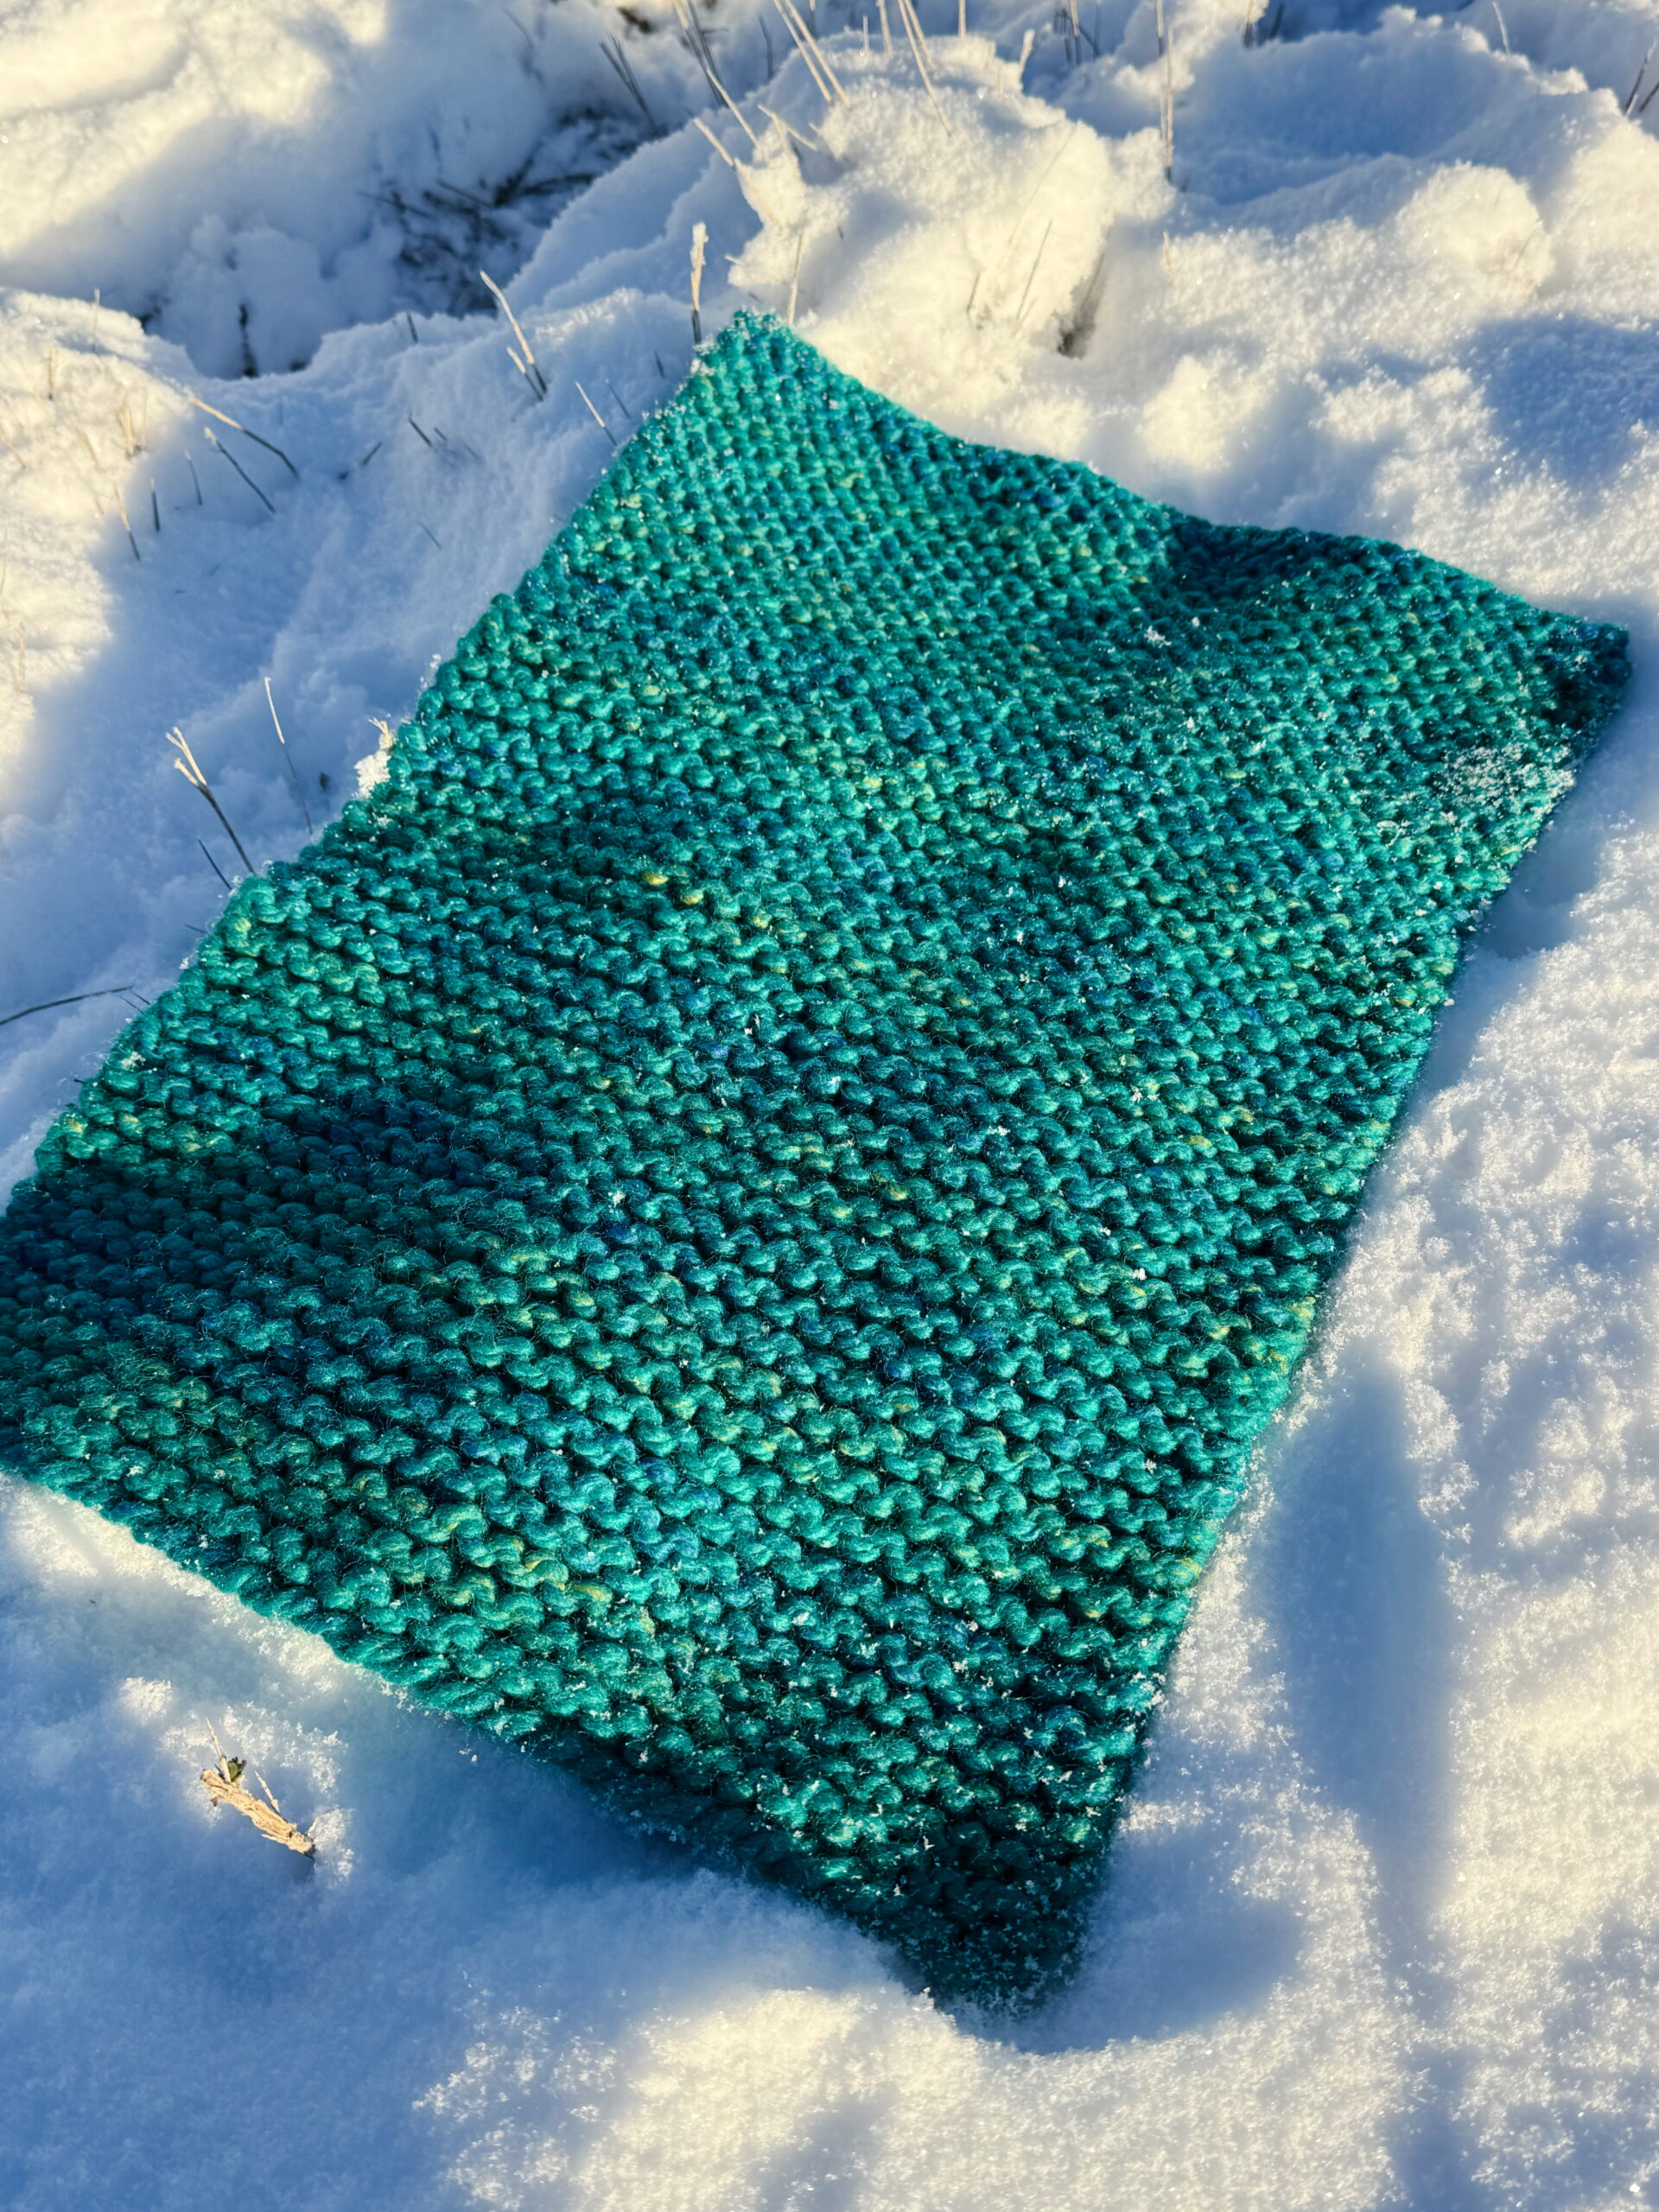
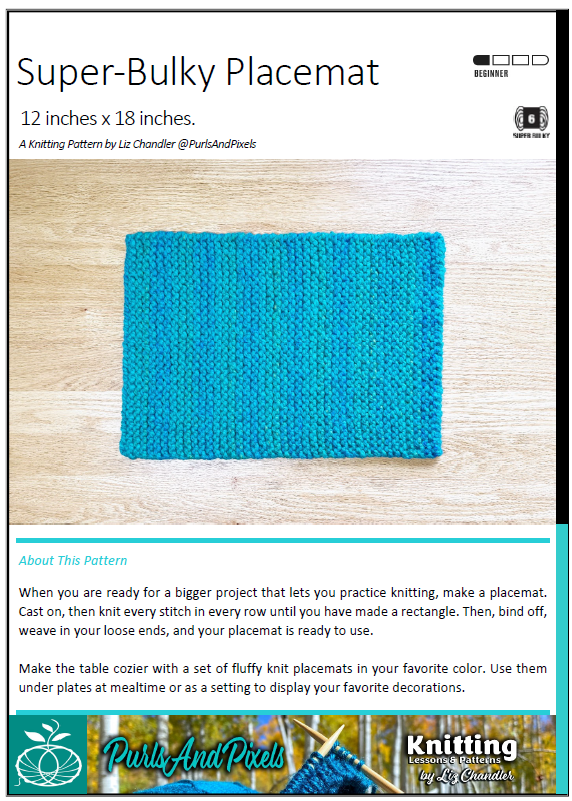
This super-bulky knit placemat is intentionally designed as a first knitting project and has been used successfully by kids and adult beginners learning to knit. The pattern limits techniques to one stitch (garter stitch), uses a flat rectangular shape, and works with thick yarn so stitches are easy to see and common beginner mistakes are avoided. There is no shaping, no stitch pattern changes, and no decisions to make once you begin knitting.
This article explains how to knit a super-bulky placemat, with step-by-step instructions suitable for complete beginners. You will knit a simple rectangle in garter stitch (knit every row), then bind off and weave in your ends to create a sturdy, usable placemat.
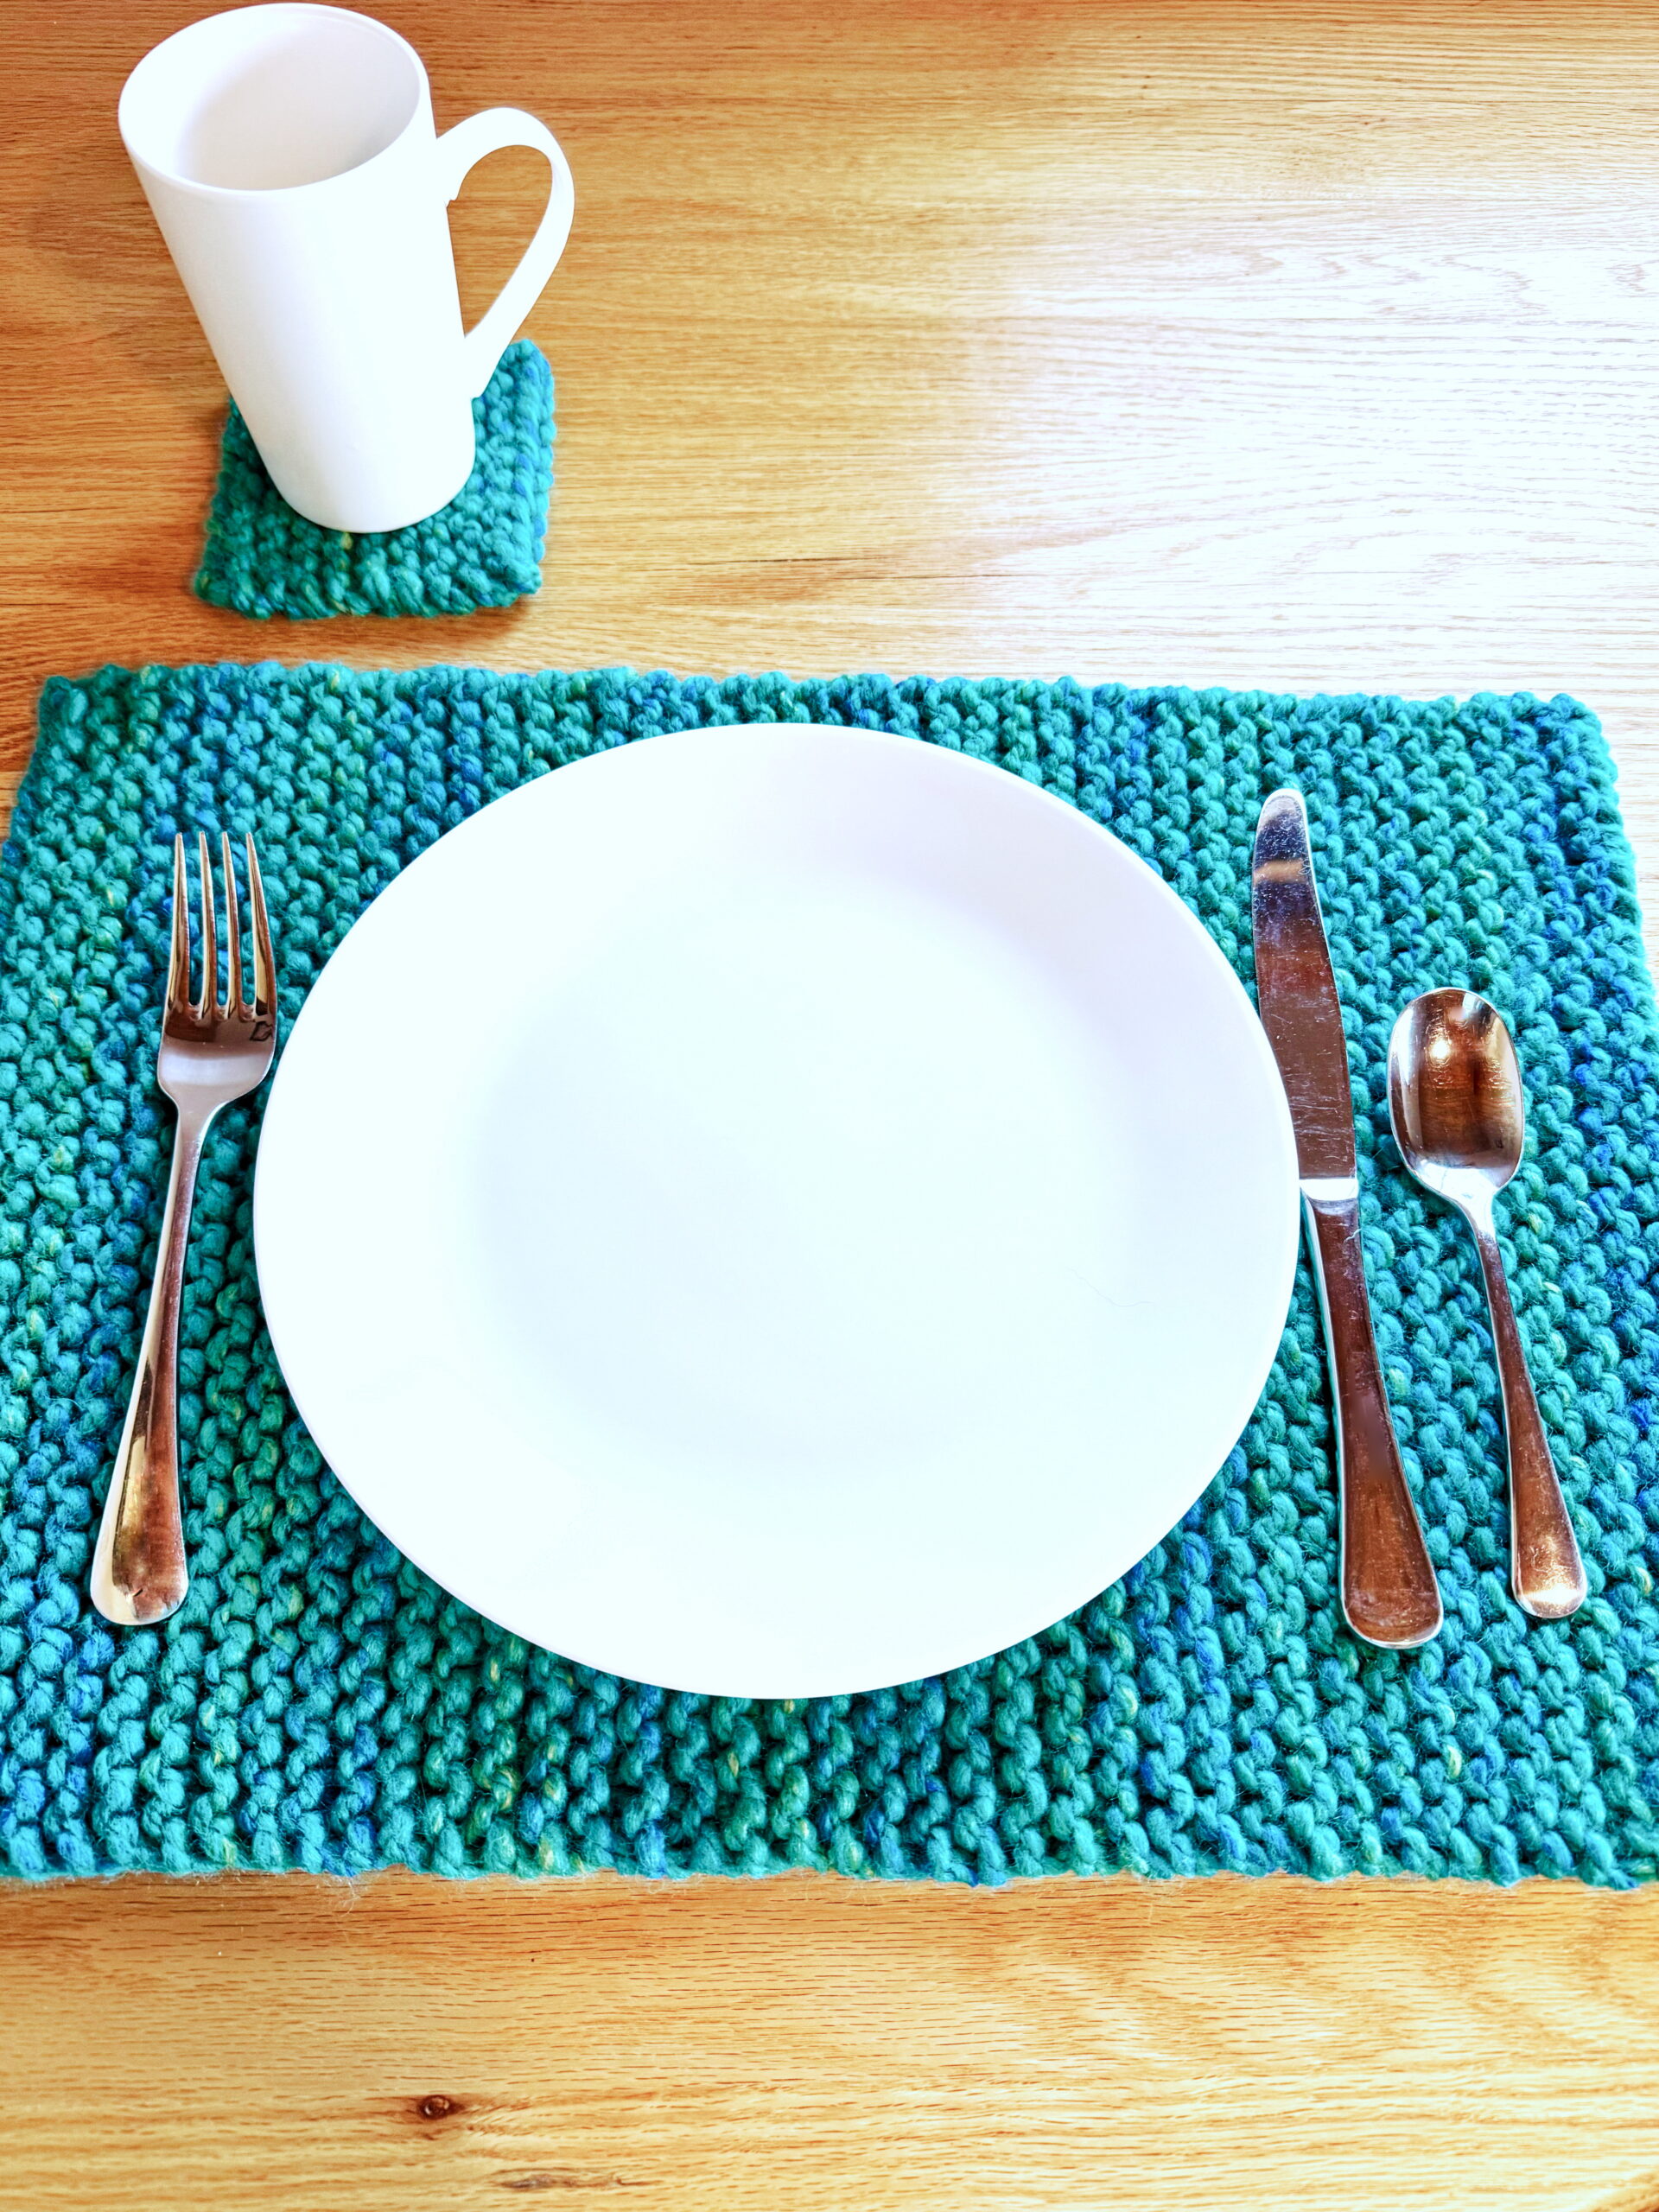
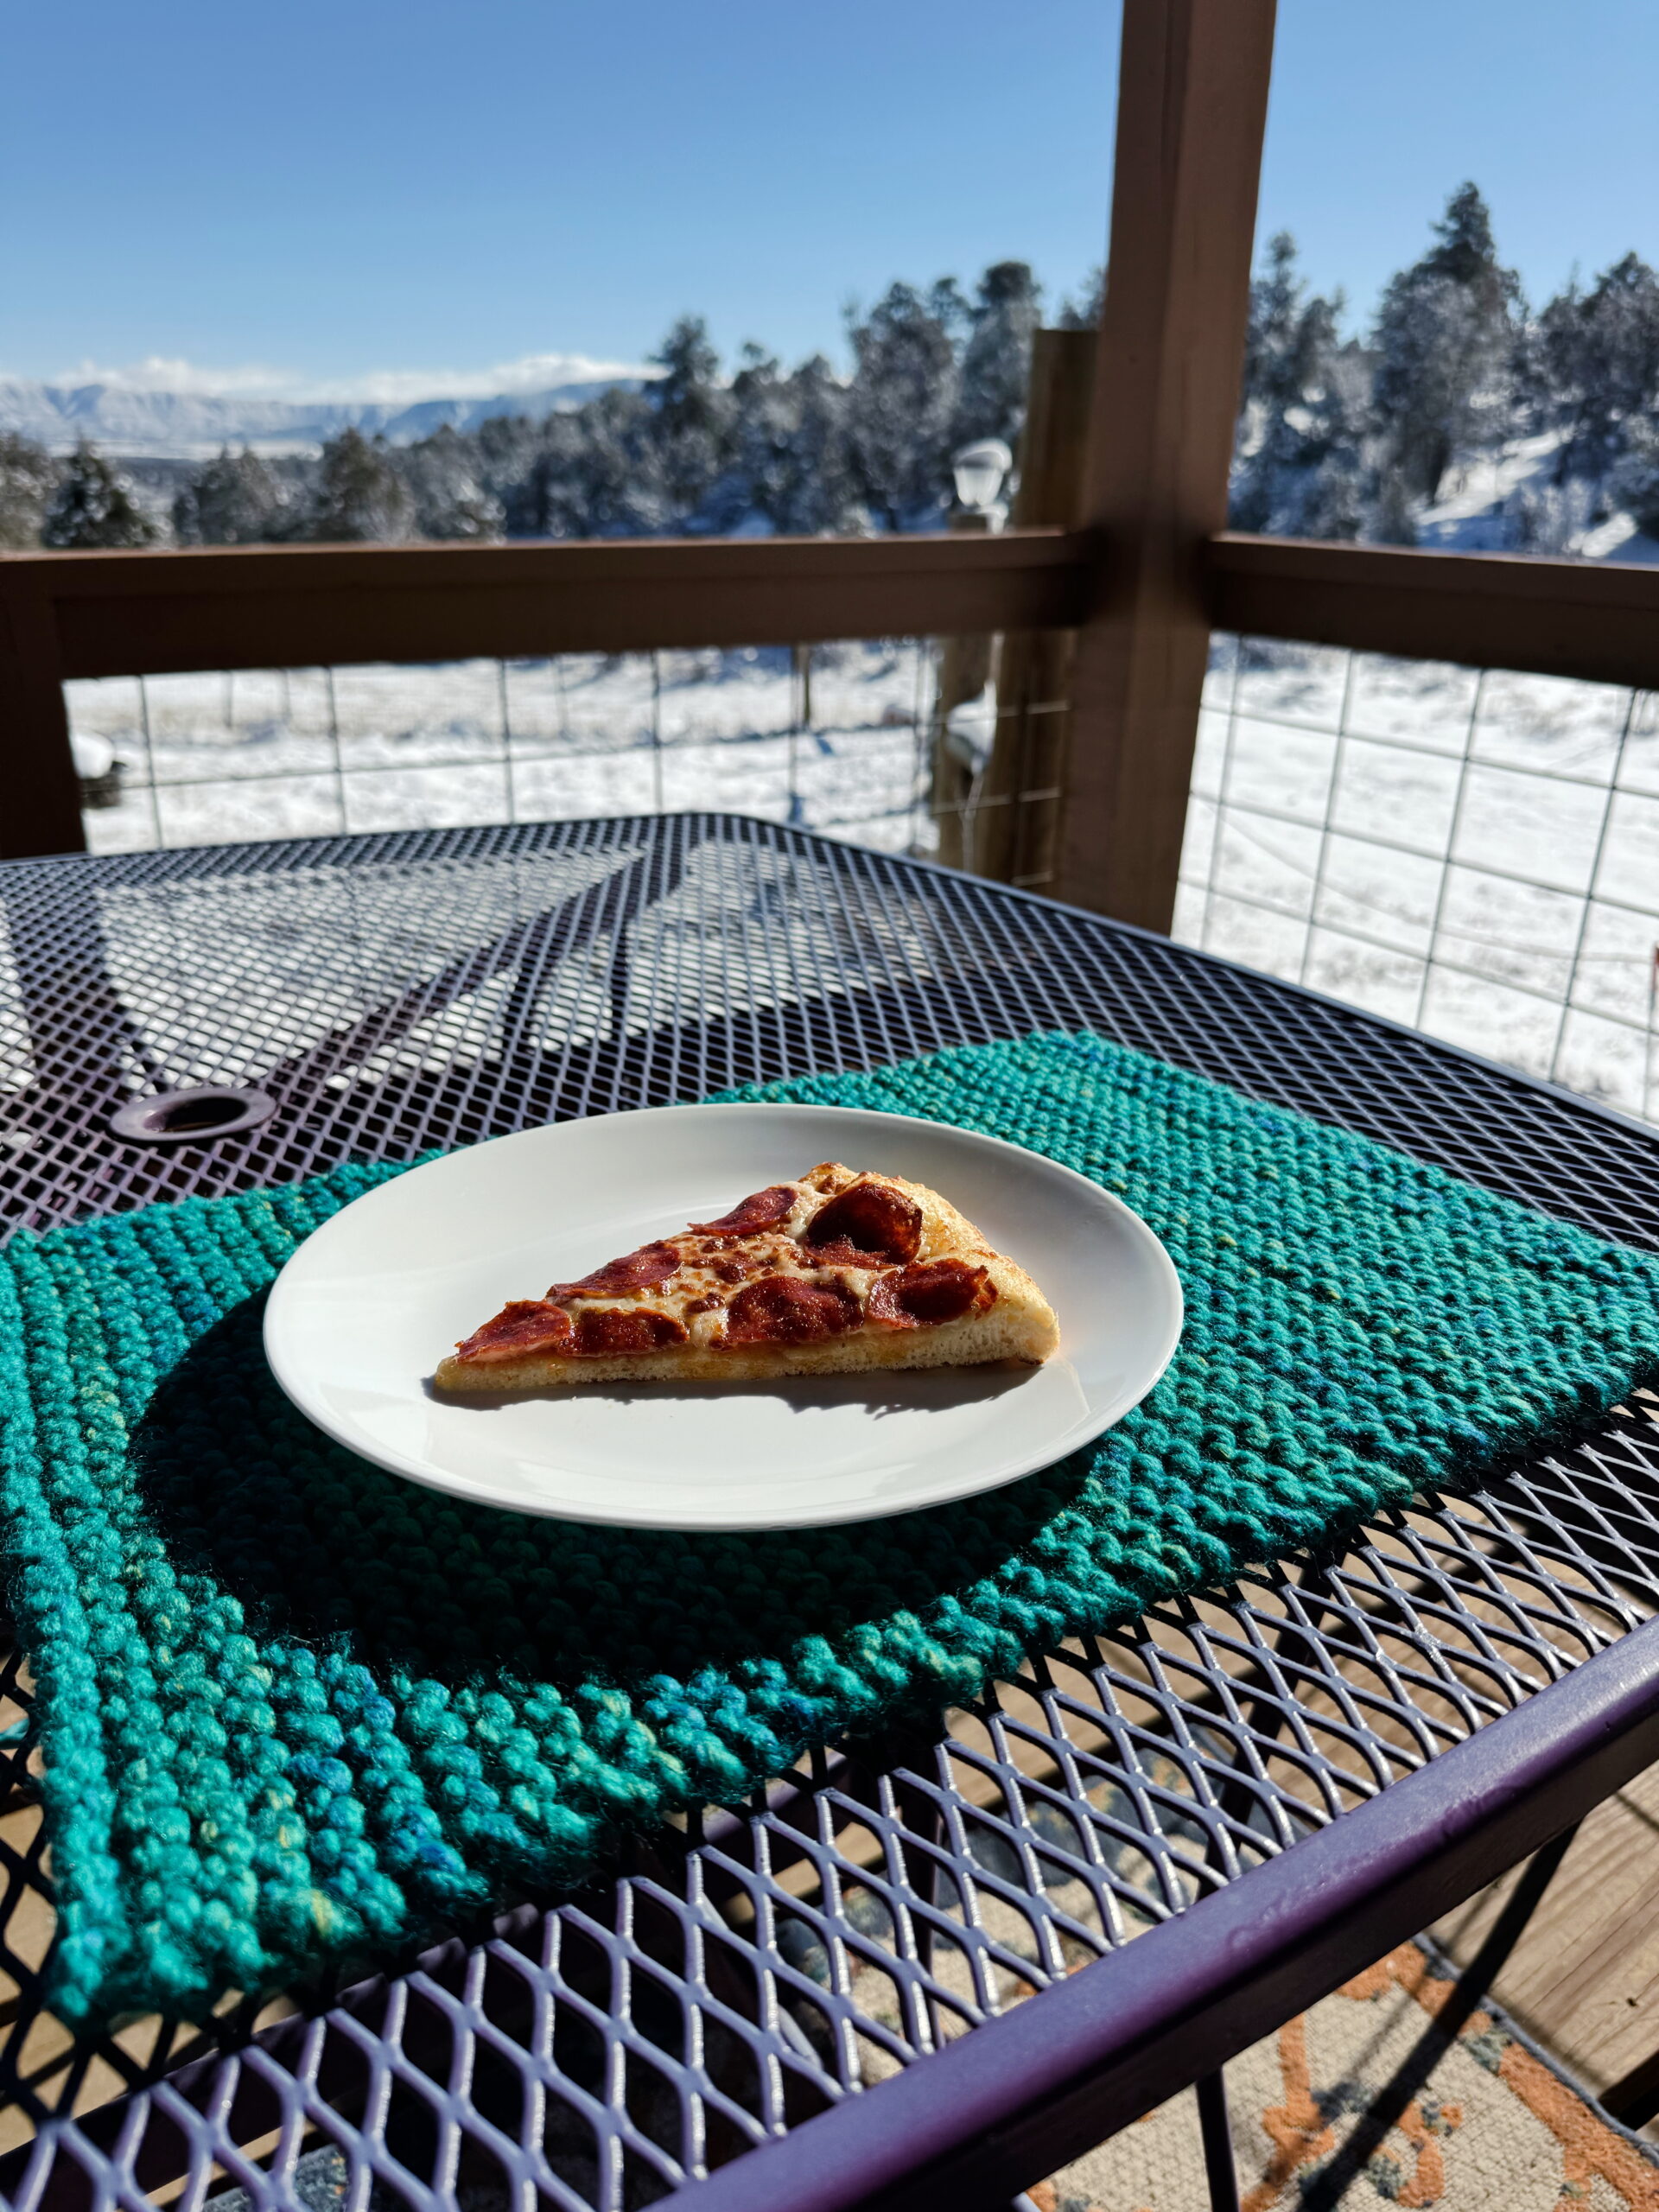
This placemat is designed to feel simple and doable. You will repeat the knit stitch over and over, and the fabric will grow quickly because the yarn is thick. When you are done, you will have a sturdy placemat you can use at the table, for crafts, or as a cozy landing spot for snacks and hot cocoa.
This pattern is knit flat in garter stitch (knit every row). There is no shaping, no color changes, and no tricky steps. It is a great way to practice tension and learn how to make neat edges.
10 stitches x 18 rows = 4 x 4 inches in Garter Stitch on No. 13 (9.0 mm) needles. Gauge is typically measured in stockinette stitch, but this project uses garter stitch throughout, so gauge is measured in garter stitch to reflect the finished fabric. Exact gauge is not critical for this project.
If you need help, there are instructions and video tutorials here on PurlsAndPixels for every step you’ll take.
This placemat is knit in garter stitch, which means you will knit every stitch in every row. Repeating the same motion over a wide piece like this is a great way to build confidence and get comfortable with even tension across the row.
Try to keep your stitches snug, but not tight. They should slide easily on the needle so you can insert your needle into each loop without forcing it. This pattern is a simple place to practice finding that balance.
Want to knit along with me? I’ve linked a video lesson that shows the full project from cast on to finishing. 🧶
Prefer to knit offline?
This pattern is free to read below, but if you’d rather print it or save it for later, I’ve created a clean, ad-free PDF version for you.
If you use the materials called for in the pattern, your final product will be machine washable. To keep your placemats looking their best, hand wash or machine wash separately on delicate cycle in cold water. Lay flat to dry.
This pattern is for personal use, gifting, and charitable donation of completed items. You may also sell handmade items created using this pattern. Do not copy this pattern and distribute it. If you’d like to share the pattern, refer your friends to my website, purlsandpixels.com so they may obtain a copy.
If you find any errors or have any questions, email purlsandpixels@gmail.com and I will do my best to help.
I’d love to see your finished work! Tag your photos with @PurlsAndPixels on Twitter or Instagram.
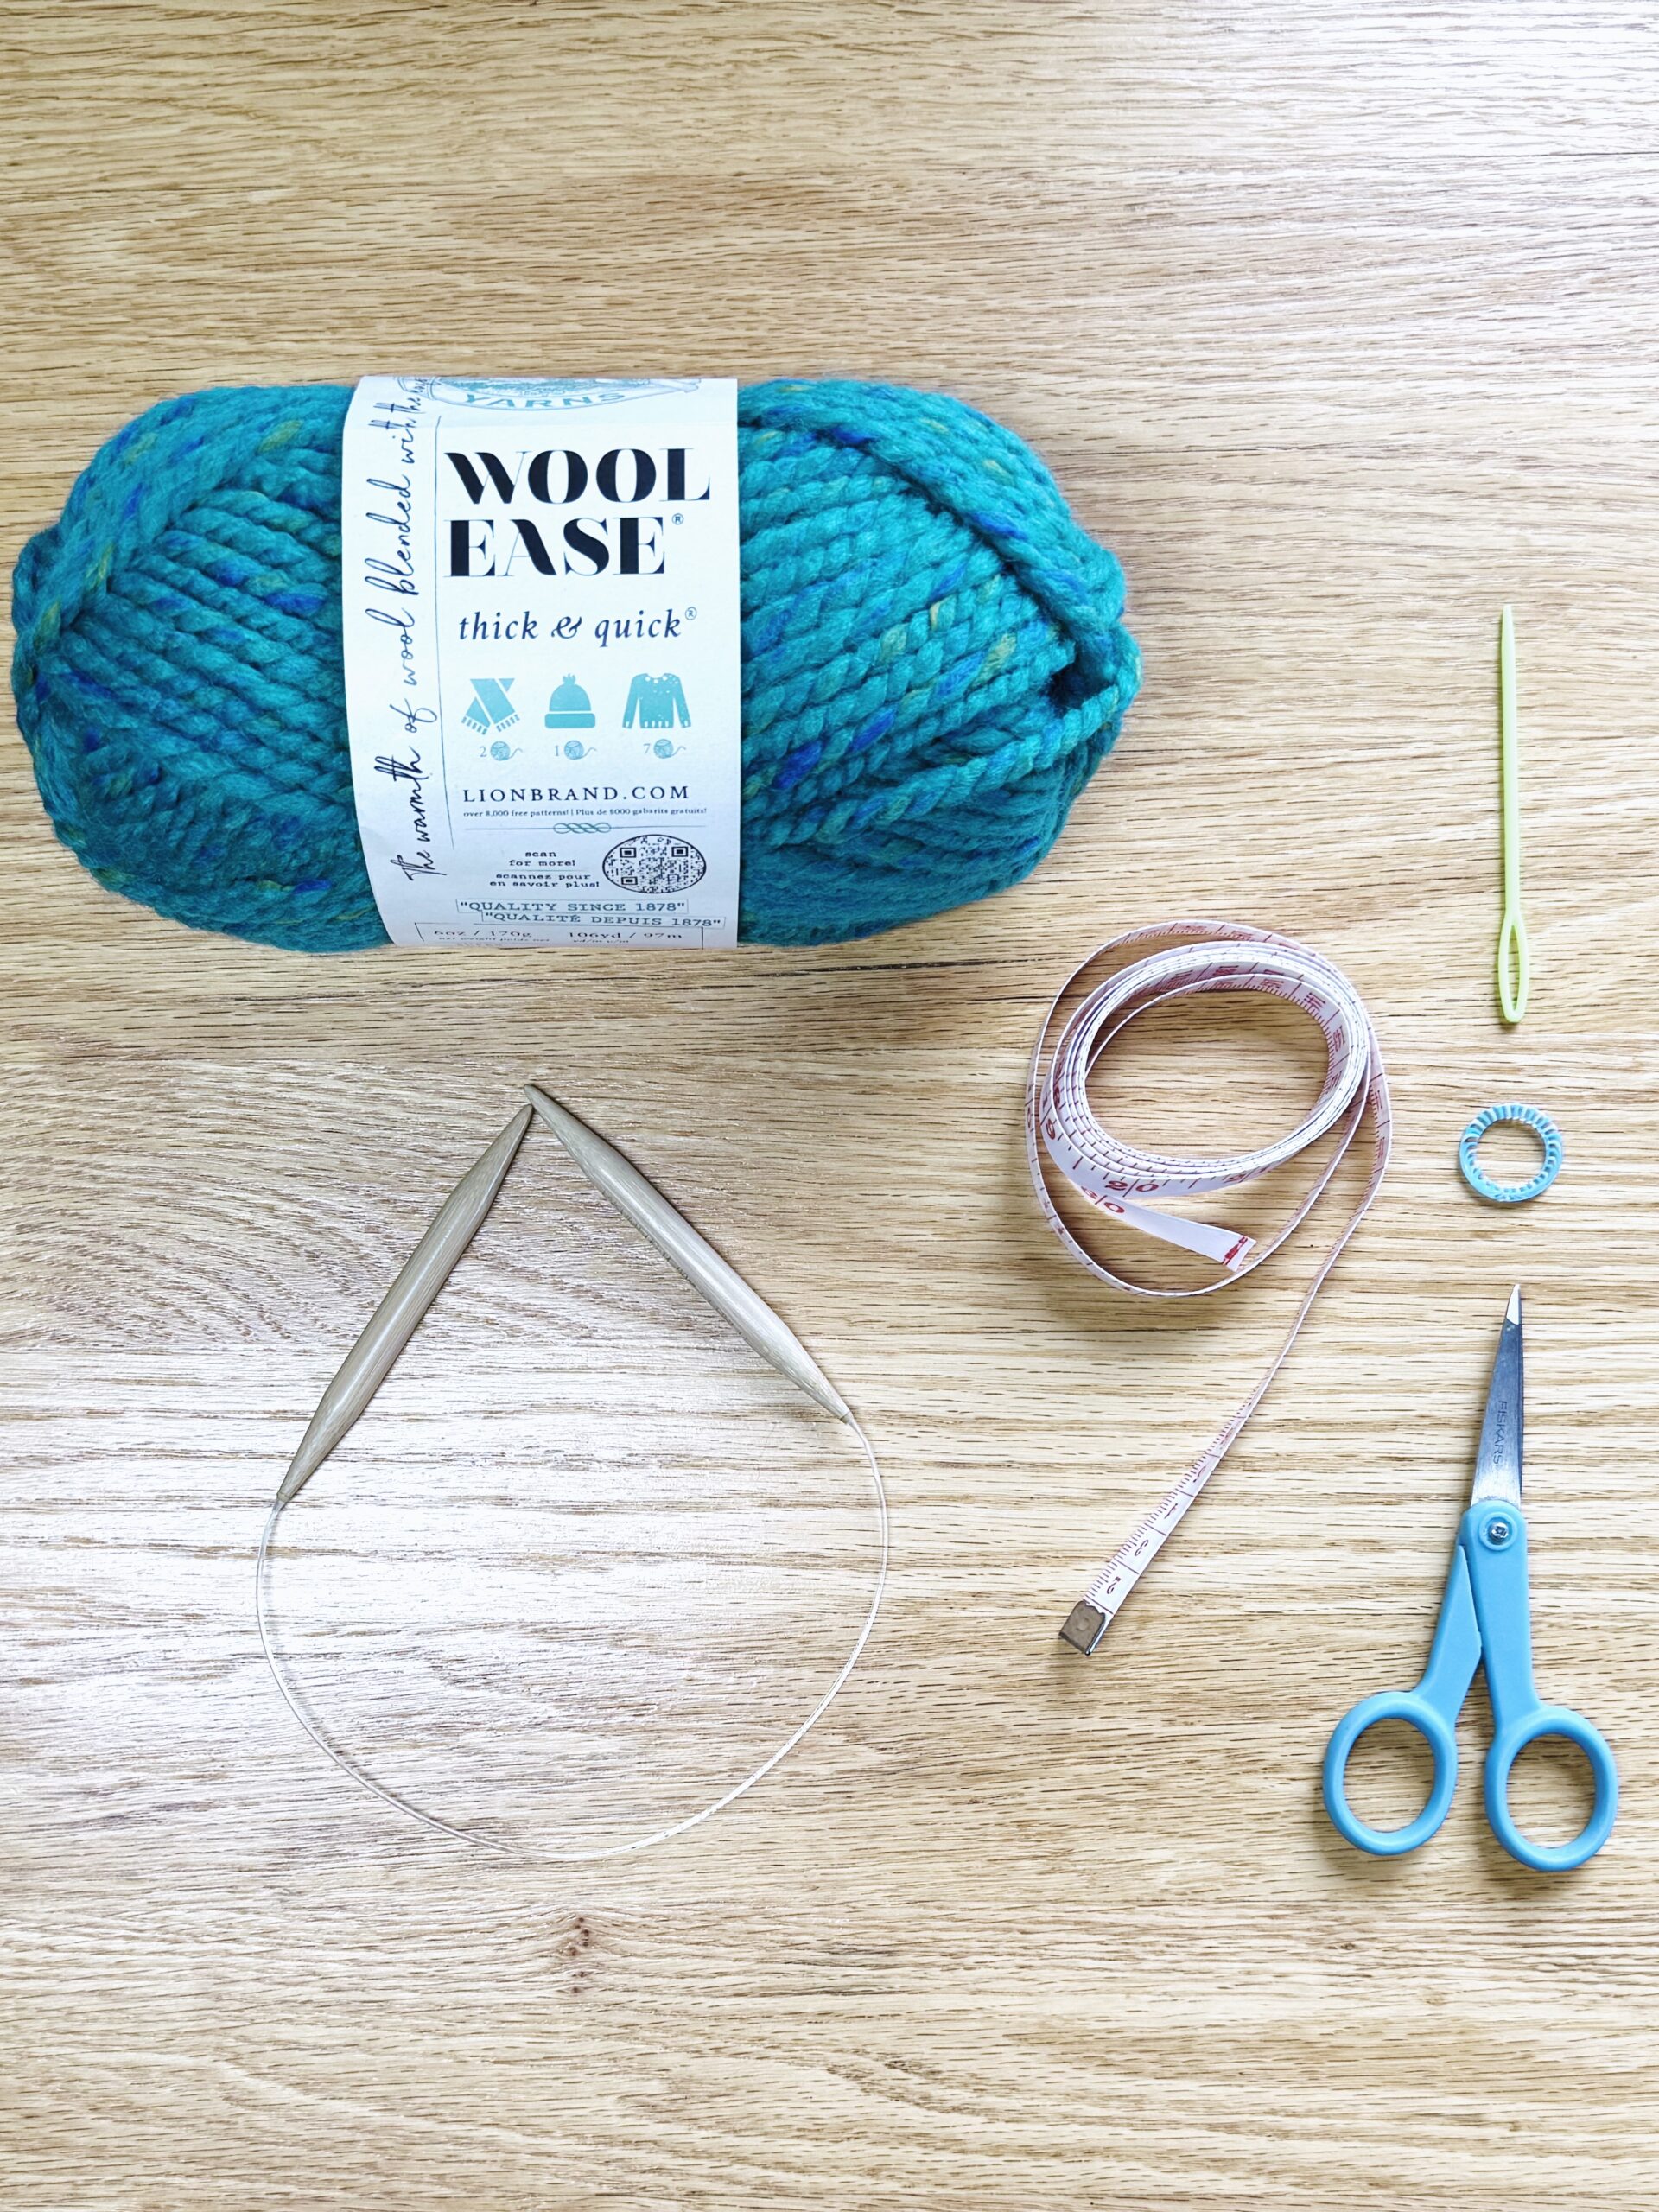
As a new knitter, you’ll discover an exciting world of yarn and knitting needles. To keep things simple, we are going to start with just one type of yarn and one pair of knitting needles. They will be the perfect set of kids’ knitting tools to learn the basics and make all five knitting projects.
The knitting tools for kids and beginners looking for a fast project are extra-thick yarn and knitting needles, plus a few small gadgets to help finish up. Use the affiliate links here to shop on Amazon or you can usually find these knitting supplies at your favorite local yarn shop.
Video Guide: Knitting Supplies for Kids & Beginners
In this video, I’ll walk you through the knitting supplies for this series of lessons. Then, keep reading below to find everything you’ll need.
Kids’ Knitting Materials (Everything Needed for All Lessons)
Yarn
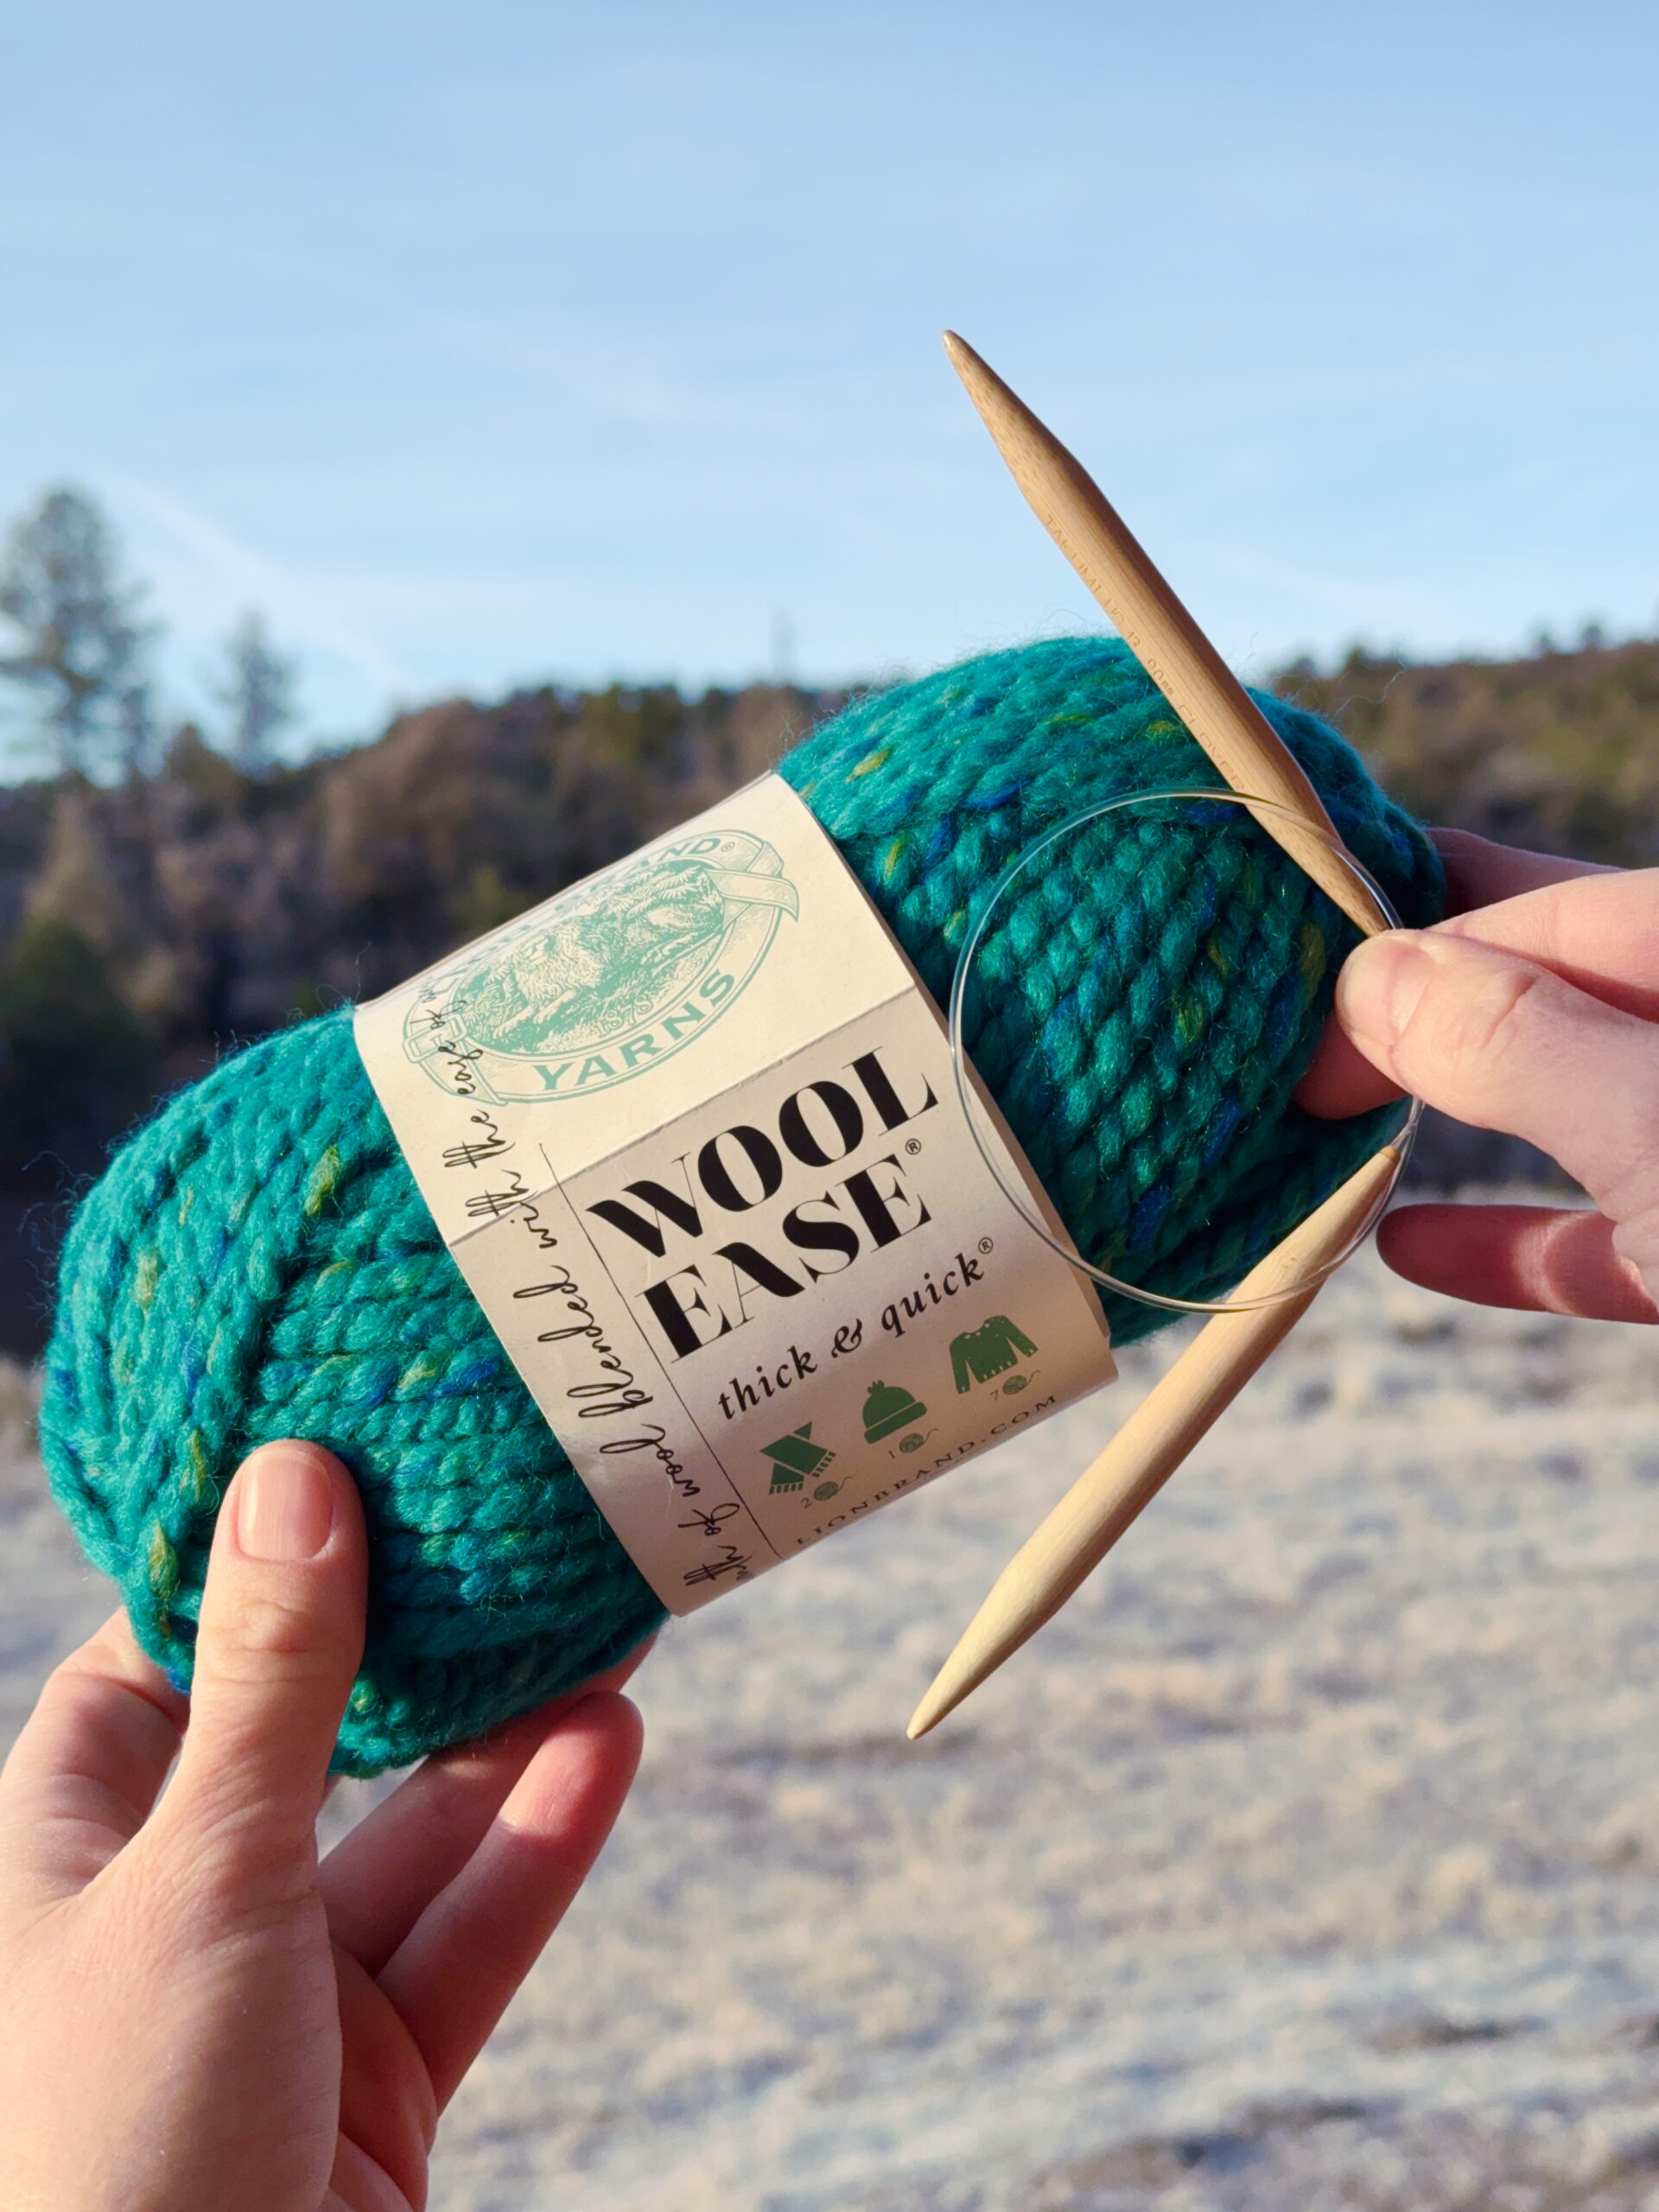
The thickest, squishiest yarn that is still easy to handle is called “super-bulky” or “No. 6” yarn on the label. This fluffy string knits up in a flash. Here, we will use Wool-Ease Thick & Quick by Lion Brand Yarn. I worked in the color “Bluegrass,” but there are lots of choices. Choose your favorite! You will need seven balls of yarn to make every pattern in the Kids’ Knitting Guide. Or start with one ball of yarn for your first project.
Knitting Needles
Each yarn size has knitting needle sizes that match. For our super-bulky yarn, we’ll use a thicker needle. The size of needles is shown on the package with a US number and millimeter number. To learn with this series, look for a needle that is labeled US 13 (9 mm).
Instead of using the two sticks you might imagine when you think of knitting needles, we are going to use a “circular knitting needle.” This knitting needle has a bendy cable between the two pointy sticks. It will let you knit both flat things, like scarves, and round things, like hats. The cords can be long or short. For now, choose a circular needle that is 16 inches (41 cm) long.
The last thing you’ll need to choose from a knitting needle is material. They often come in metal, wood, and bamboo. When you’re learning, choose bamboo. It helps keep your yarn from slipping off your needles. Plus, it’s a little quieter to work with.
Other Kids’ Knitting Tools
Now that you have yarn and needles, you’ll just need a few more small tools.
A measuring tape is helpful for your whole project. You’ll measure your yarn and your knitting projects to make sure they are the right size.
A stitch markeris a small ring that you can slip onto your knitting needles. This will help you keep track of where you are in your knitting projects.
Darning needles look like big sewing needles, but they are not sharp. These let you sew the yarn ends back into the knitting project. Make sure you get a darning needle with a large opening (called the needle “eye”) for our big yarn.
Scissors clip the leftover yarn away. These are make just for kids, but all scissors are sharp! (Kids, be careful and adults, make sure you help or supervise.)
Below, you’ll find a complete shopping list. Gather your tools and we can start knitting!
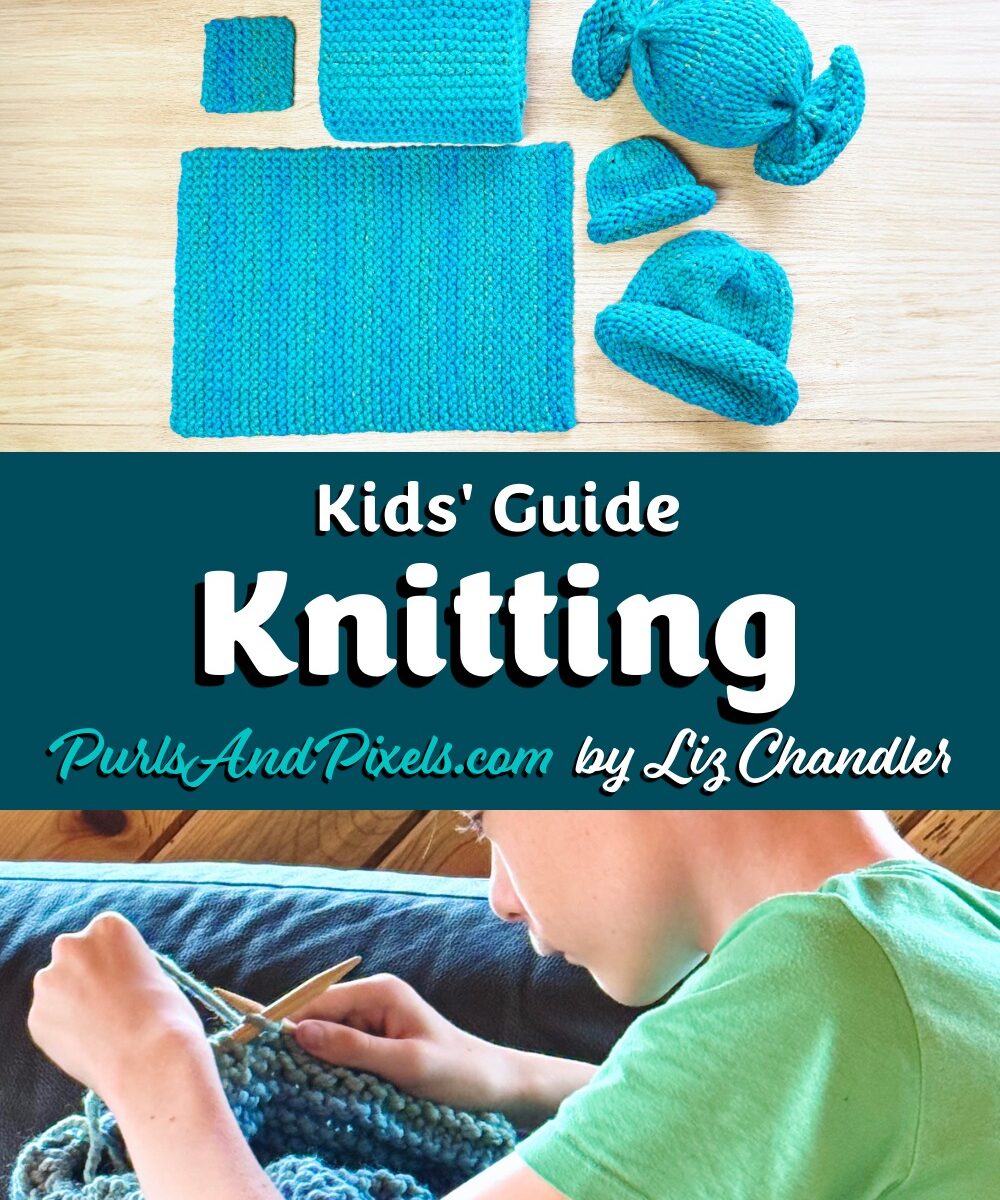
Find your first knitting pattern. Here we will make a coaster. Open the coaster pattern, and also open your first lesson: Making Your First Stitch. (available next week) The lessons will teach you how to use a pattern and make your first knitted thing.
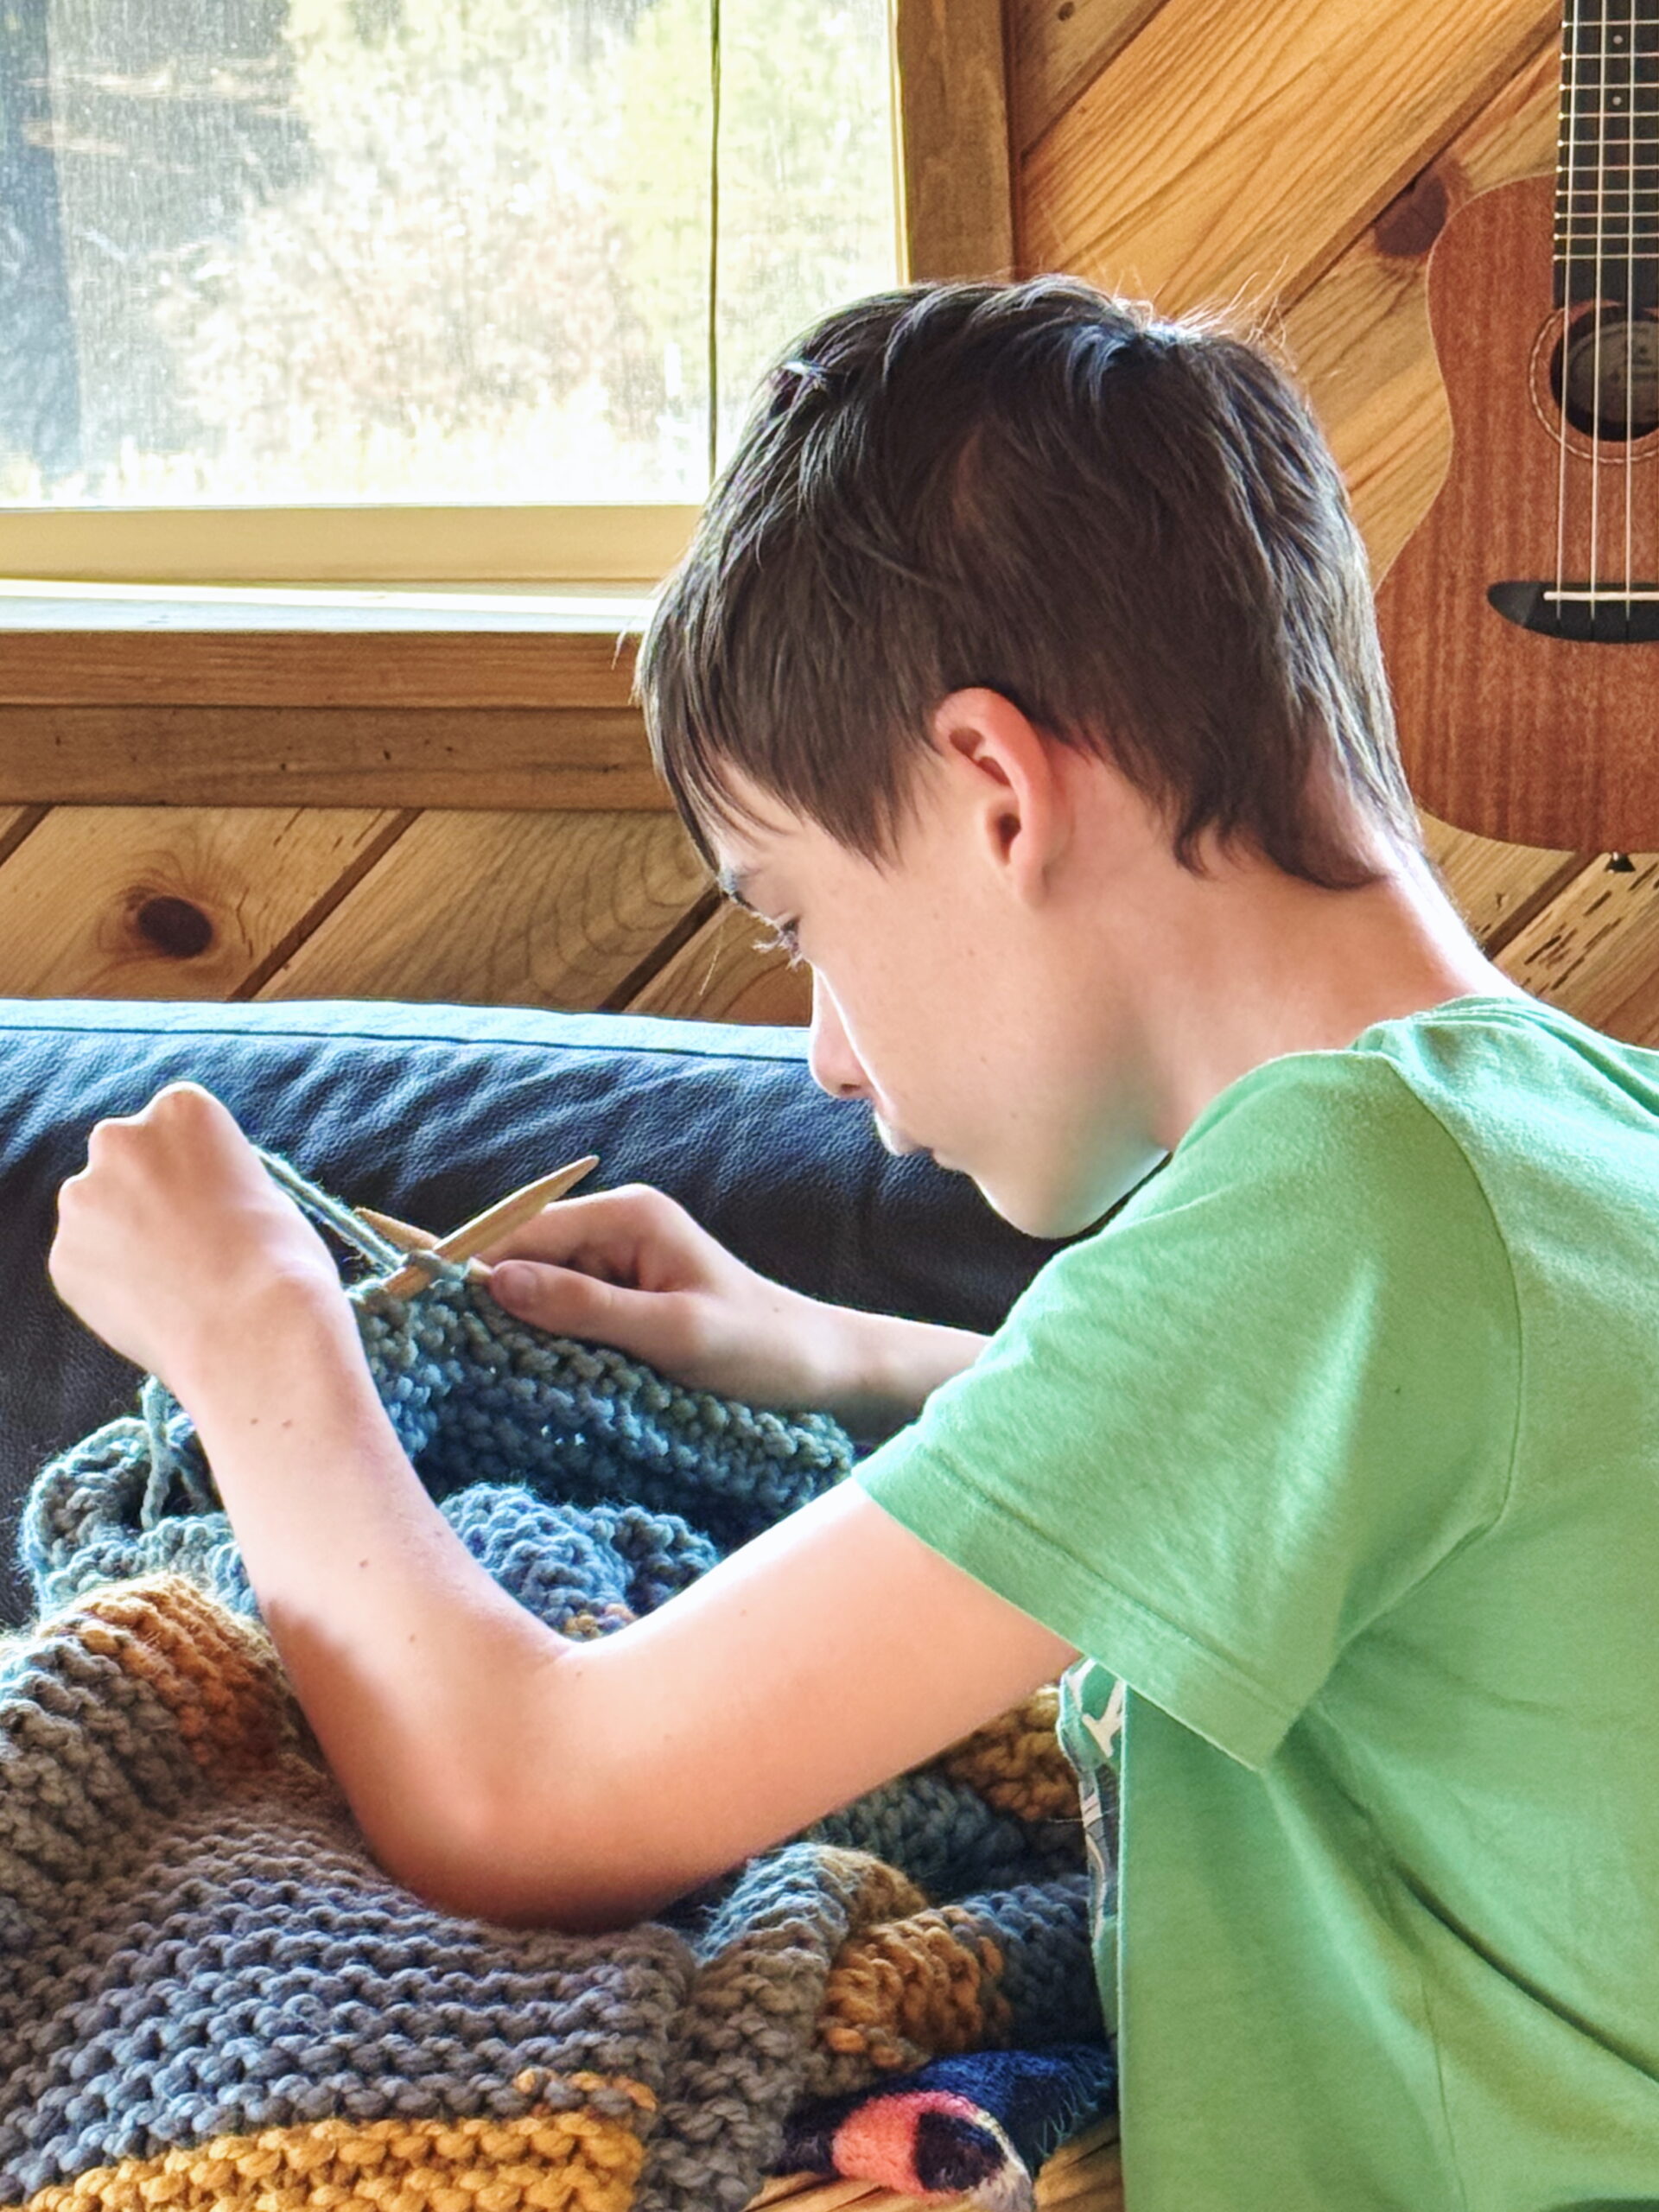
Hi, friends! Do you want to make your own awesome stuff? Did you know that with just one set of knitting needles and some fluffy yarn, you can create all sorts of fantastic things? That’s knitting. And I know you’re going to love it!
Knitting is a way to make fabric by looping yarn with two needles, one stitch at a time. In Kids’ Knitting Corner, you’ll learn how to knit step by step, starting with your very first stitch.
What You’ll Learn Here
Start with Lesson 1 below. I’ll add the next lessons to this page as they’re published, so you can come back here for the next step.
In this cozy corner, we will start right at the beginning. Together, we will:
Lesson 5: Learn the knit stitch (the thing you’ll do most)
Lesson 6: Take your project off the needles (almost finished)
Lesson 7: Knit in a circle (this makes hats and toys without sewing)
Lesson 8: Take a circular project off the needles (so close to done)
Lesson 9: Get rid of any loose strings (all done!)
If you are anything like me, you’ll want to be done and use your project as quickly as you can. So, in these lessons you’ll knit with super-bulky yarn. This big, squishy yarn makes fluffy projects that will be finished in a flash.
What You’ll Knit First
We will use this big yarn to let us learn more quickly, too. Every project you knit gives you a new skill. And the bigger the yarn, the faster the project. By the time you knit through this series, you will be able to make:
Want to knit the projects that go with these lessons? Explore the full Kids’ Knitting Guide Pattern Bundle with all five project PDFs in one convenient download.
🧷 Helpful Knitting Resources
Looking for more ways to support your knitting goals?
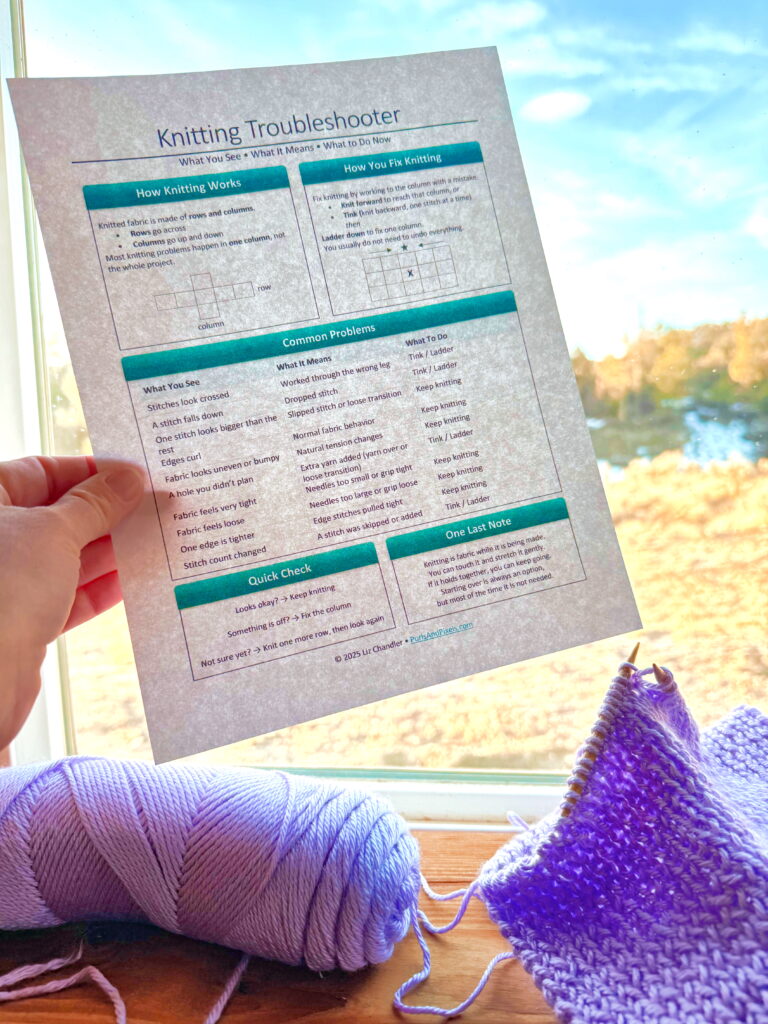
🙋 Knitting Troubleshooter: Download a printable cheat sheet to keep next to your project, so you know what to do if you make a mistake.
(And How to Fix Knitting Mistakes Without Starting Over)
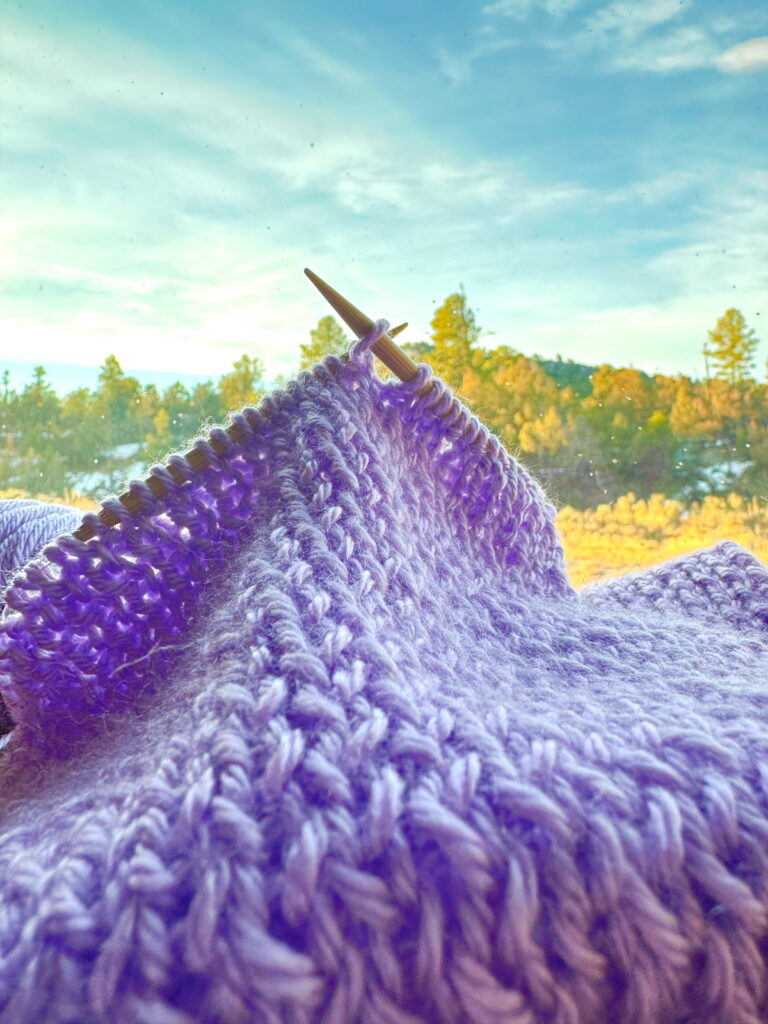
Something is twisted. It is not stretching right. Your knitting just looks… weird.
You will make mistakes knitting. But don’t let that be the reason you put the whole basket in the closet and walk away forever.
Most knitting mistakes can be fixed. If you are new to knitting, the Learn to Knit section walks through the basics from the very beginning.
This article explains what you are usually seeing when something looks wrong, how knitted fabric actually behaves, and how to decide what to do next without undoing hours of work. It focuses on recognition and judgment rather than step-by-step repairs.
Most Knitting Does Not Need Immediate Fixing
When something looks off, it is easy to assume you have done something wrong and need to correct it immediately.
In practice, most things that look wrong in knitting are not urgent.
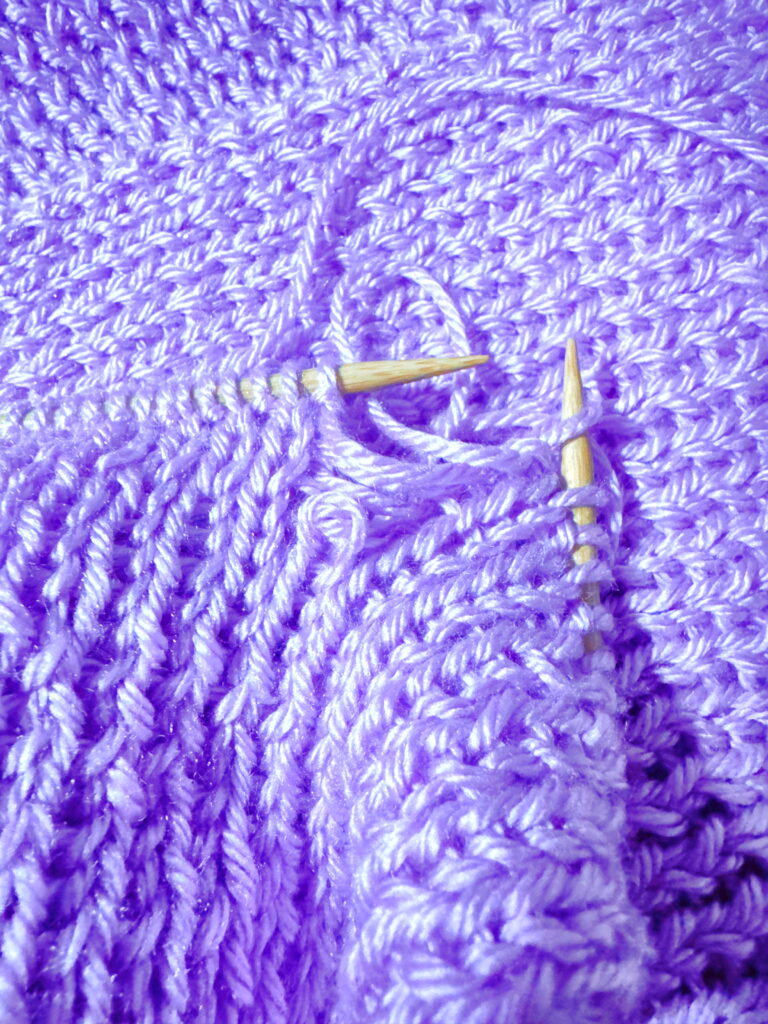
Knitted fabric is made of interlocking loops. Those loops support each other. While the work is still on the needles, the fabric often looks less even and less stable than it will once finished.
Uneven stitches, loose edges, and small visual inconsistencies are common. They often resolve themselves with continued knitting, blocking, or simple wear, and they do not weaken the fabric.
In many cases, the correct response is to keep knitting.
Rows and Columns: How Knitting Actually Works
Although knitting is worked across the needles in rows, the fabric itself is built in vertical columns.
Most true knitting mistakes exist in a single column of stitches rather than across an entire row.
Understanding this changes how you approach fixing problems and makes it easier to use targeted techniques instead of starting over. You are rarely repairing the whole project. You are usually working with one narrow section of fabric.
Because of this structure, many issues can be corrected later, or left alone entirely, if they do not affect the strength or function of the fabric.
Two Questions to Ask Before You Fix Anything
When you notice something that looks wrong, pause and ask:
Does this affect the structure of the fabric?
Will this continue to bother me if I leave it alone?
If the answer to both questions is no, continuing to knit is the best choice.
If the answer to either question is yes, the issue can usually be corrected by working to the column where it occurred, rather than undoing large sections of work. Many of these fixes are covered step by step in the Fix Knitting Mistakes lessons.
Why You Rarely Need to Rip Back Rows
Many knitters are taught that fixing a mistake means undoing rows (“frogging“) until the problem disappears.
While that approach works, it is often unnecessary.
Techniques such as knitting backward one stitch at a time (“tinking”) or dropping down a column to fix a stitch (“laddering down“) allow you to correct issues without starting over. If you want detailed, step-by-step instructions for specific fixes, my Fix Knitting Mistakes lessons walk through those techniques in depth.
Knowing that these options exist makes knitting feel less fragile and gives you more control over your work.
Confidence Comes From Knowing What You Are Looking At
Experienced knitters are not people who avoid mistakes. They are people who can recognize what they are seeing and decide whether action is needed.
If you find yourself pausing mid-row to decide whether something needs fixing, having a simple reference nearby can help.
I put together a one-page Knitting Troubleshooter that outlines common situations, what they usually mean, and how to decide what to do next. You can find the Knitting Troubleshooter here if you want a printable reference to keep nearby. It is meant for the moment when you are holding your needles and thinking, “Is this a problem, or can I keep going?” It is designed to sit beside you while you knit and support your decision-making in the moment.
This article may be enough for some knitters. Others find it helpful to have a reference nearby so they can keep working without second-guessing each stitch or stopping to search for answers.
The goal is the same either way: continue knitting, learn as you go, and finish the projects you start.
Knitting becomes easier when it stops feeling fragile.
Uneven tension can make it look like your knitting has mistakes. Don’t rip it out. Just keep practicing. In this lesson, we will learn how to make stitching more even by improving knitting tension.
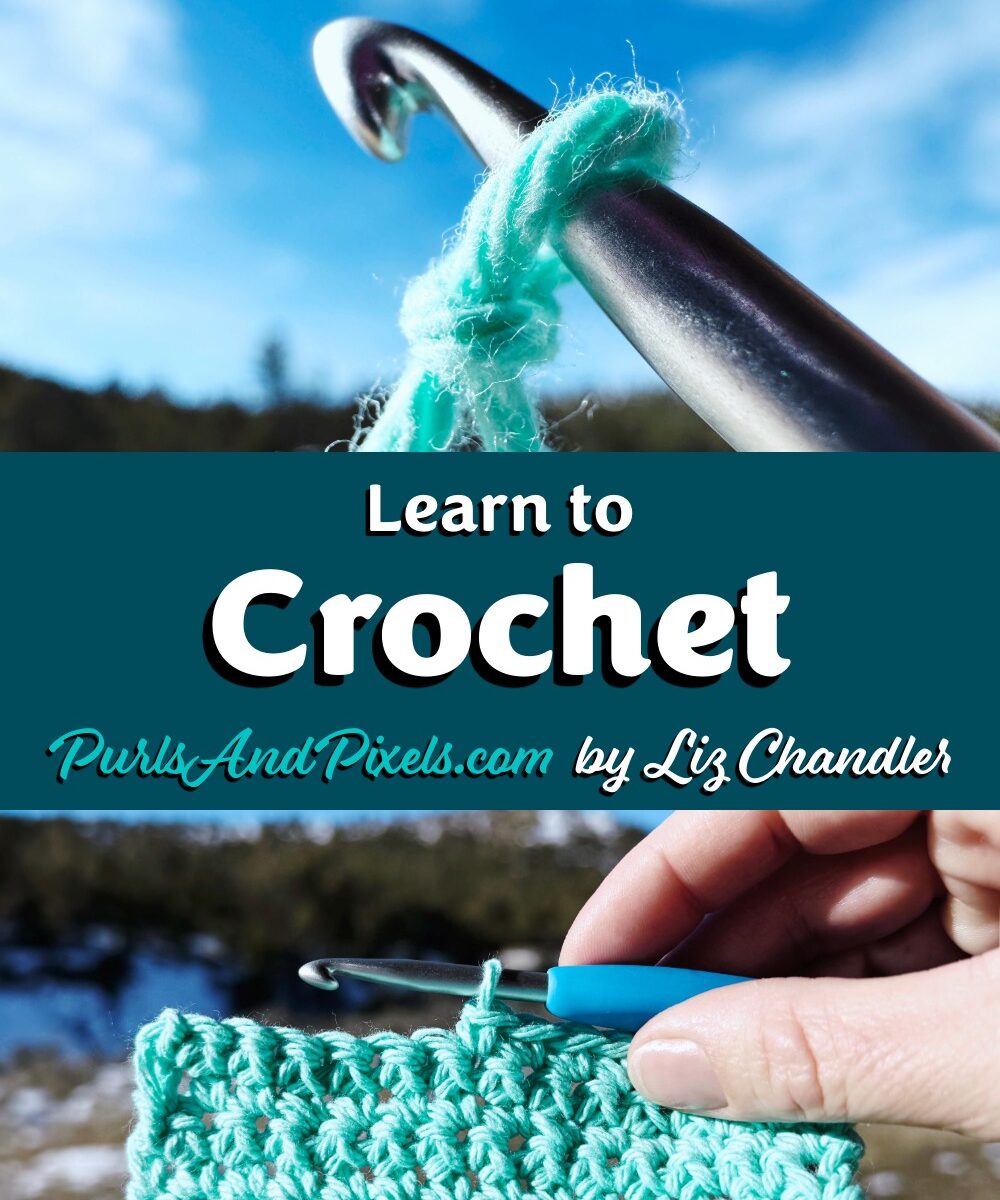
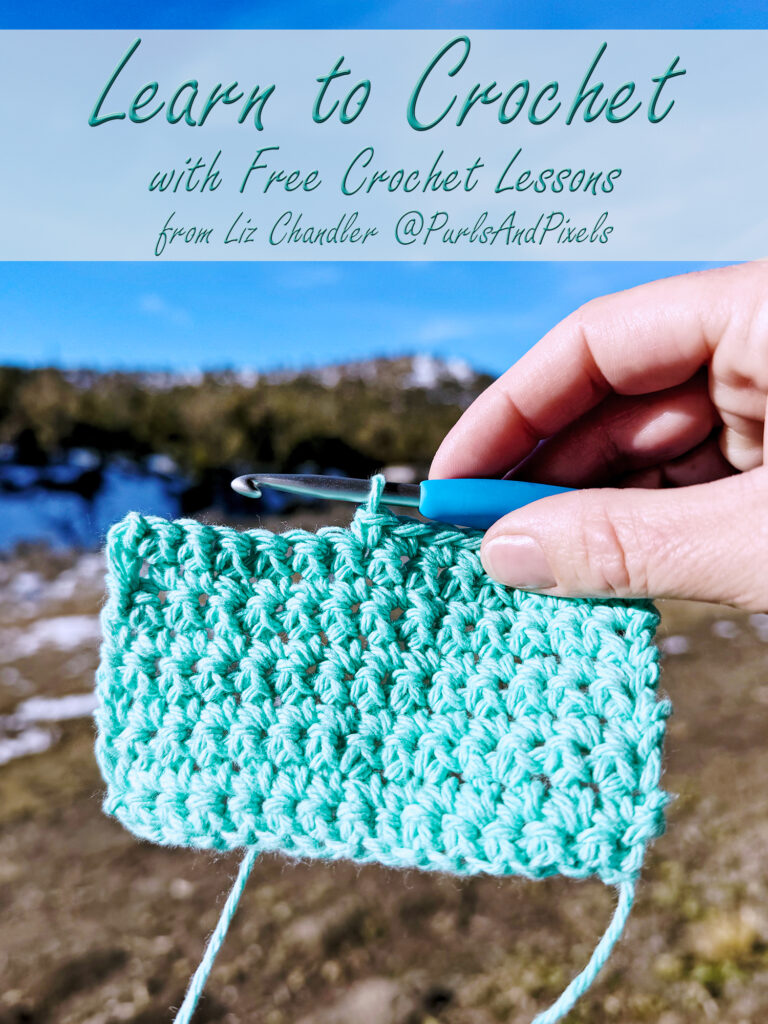
Learn to Crochet Online with Free Crochet Lessons from Liz Chandler @PurlsAndPixels
If you’ve been curious about crochet, you’re in the right place. Crochet is a hands-on skill built one loop at a time, using a hook, yarn, and a bit of patience. From blankets and accessories to everyday home items, crochet lets you make practical things while learning as you go. This page serves as the home base for crochet resources at PurlsAndPixels as the lesson library develops.
Crochet does not need to feel overwhelming. Whether you are a true beginner or picking your hook back up after a break, these lessons are designed to be clear, friendly, and easy to follow as you build confidence stitch by stitch.
📘 Prefer Learning with Printable Patterns?
While the full crochet lesson library is still coming together, you can absolutely start stitching right away. My crochet patterns are written with beginners in mind and walk you through each row and repeat so you can build skills while making something useful and enjoyable.
Before you start, you will want to decide how you prefer to hold your hook and manage your yarn. Many crocheters use either a “knife” grip or a “pencil” grip, and the working yarn can be held in whichever hand gives you smooth, comfortable tension. There is no single correct way to crochet. Comfort and happy stitches matter most.
💡 New to Crochet? Start Here
Go step-by-step. You do not need to master everything in one day.
Practice is normal. Repeating the same stitch a bunch of times is how your hands learn.
You will surprise yourself. The first chain is the hardest, and it gets easier from there.
As new crochet lessons are published, they will be added here in a clear order so you always know what to learn next.
The Learn to Crochet Index
This page will grow into the complete learn-to-crochet curriculum used throughout PurlsAndPixels. The lessons will be intentionally organized and will build naturally from foundational skills to more advanced techniques. If you are new to crochet, starting at the top and working your way down will give you a thorough, confident understanding of crochet from first stitch to finished projects.
Use this section as your learning roadmap. As new tutorials go live, I will add them here in a beginner-friendly sequence, along with both written instructions and videos.
🧵 Crochet Foundations (Start Here)
These are the core skills that everything else in crochet builds on. Once you are comfortable with these, most beginner patterns will make sense.
Choosing yarn and hooks for crochet (lesson coming soon)
How to hold a crochet hook comfortably (lesson coming soon)
Making a slip knot (lesson coming soon)
Chain stitch (your first crochet stitch)
➕ Basic Crochet Stitches
After you can chain comfortably, these stitches form the backbone of beginner crochet projects.
Single crochet (sc)
Half double crochet (hdc)
Double crochet (dc)
Counting stitches and rows
(Individual stitch tutorials will be linked here as they are published.)
📐 Reading Crochet Patterns
Learning how to read a crochet pattern turns written instructions into real projects.
How crochet patterns are written
Common crochet abbreviations
Understanding repeats, rows, and rounds
🧶 Beginner Crochet Projects
These projects are designed to reinforce the basics while giving you something useful to show for your time.
Simple dishcloths and washcloths
Easy scarves and rectangles
First blanket-style projects
Patterns and tutorials will be added here as they go live.
🚀 Next Steps in Crochet
Once the foundations feel comfortable, you can begin expanding your skills.
Working in rows vs. rounds
Increasing and decreasing stitches
Joining new yarn
Finishing and weaving in ends
New lessons are added in order as they are completed, so this page can continue to serve as your central crochet reference over time.
🧷 Helpful Crochet Resources
Looking for more ways to support your crochet goals?