The Raising Animals category covers practical, day-to-day care for animals you keep. These posts focus on housing, feeding, health, safety, and problem-solving based on real experience, not idealized setups.
This category includes guidance for caring for animals responsibly, adapting to changing conditions, and making informed decisions that support animal well-being in everyday environments.
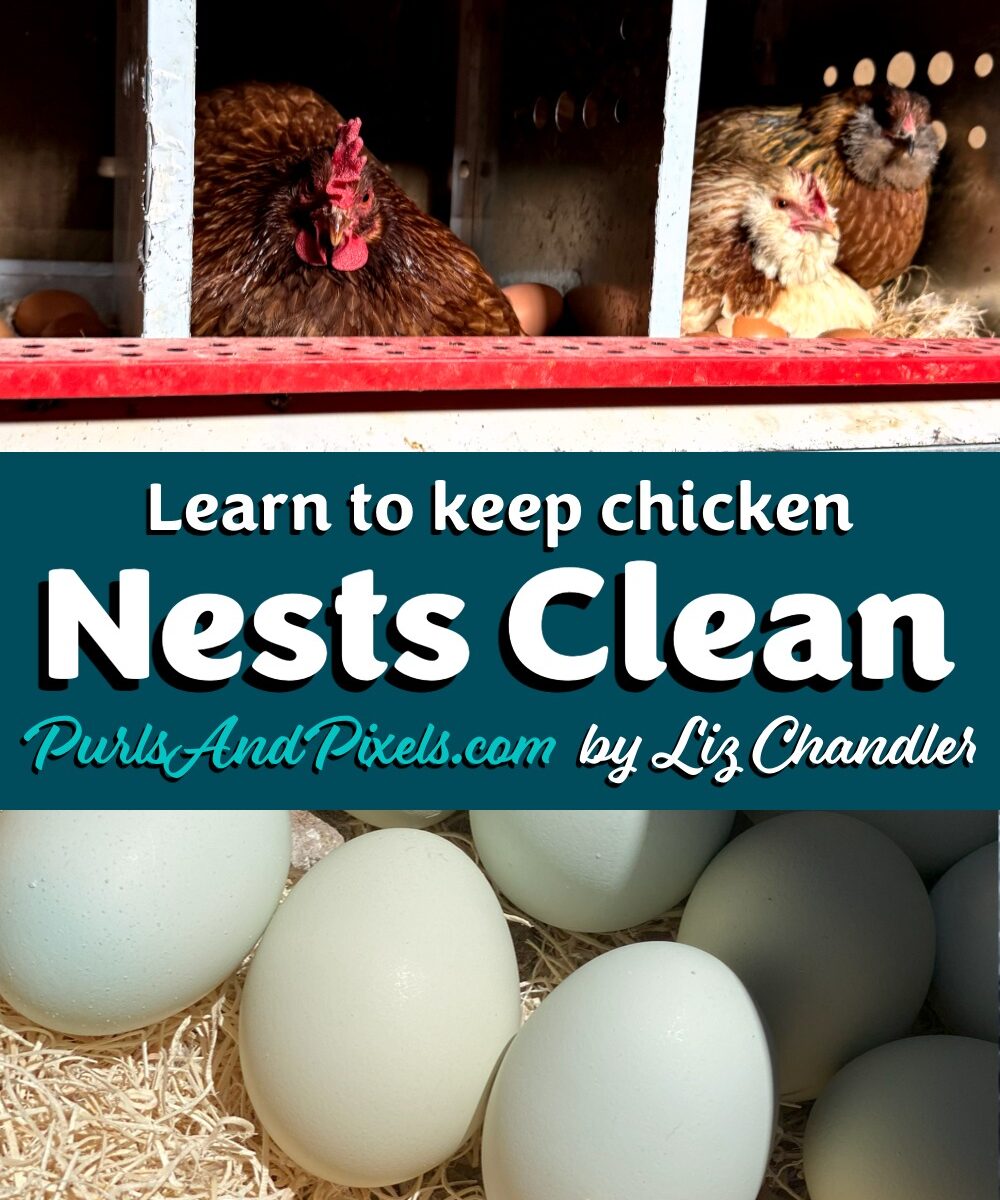
How to Keep Chickens from Leaving Poo in the Nest Boxes 🥚🐔
If you’ve ever reached into a nest box expecting a warm egg and instead found… a little pile of poo, you know the frustration. 😕 Chickens don’t always know the difference between a nest and a perch, which means sometimes they leave more than just eggs behind. The good news? With a few simple adjustments, you can keep your boxes clean, your eggs fresher, and your mornings much more pleasant. 🌞
I learned this lesson after hatching 24 eggs (21 of them hens). 🐣 I hadn’t expected such a high hatch rate, but suddenly I had a flock of young layers all looking for a place to sleep. A few tried roosting on top of the metal nest box, which turns into a slide when a chicken dozes off. To fix it, I added more roost bars so everyone had space, replaced the old excelsior pad (affiliate link), and shooed one broody mamma outside (sorry, Sweetie). The result? Clean eggs again and a calmer, happier coop. 🍳
Why Chickens Poo in Nest Boxes 🤔
Nest boxes are cozy, private, and usually the cleanest part of the coop. That makes them perfect for laying, but also tempting as a nighttime perch. Chickens poo the most while they’re roosting, so if they decide to sleep in the nest boxes, you’ll end up with messy eggs.
In my experience, the main culprits are:
Not enough nest boxes: You’ll want about one box for every three hens. Crowded hens stay put longer, which leads to mess.
Wrong location: Hens prefer darker, calmer corners. Nest boxes in quiet spots get used properly.
Not collecting eggs often enough: When eggs pile up, hens may decide to sit tight and go broody. And once a hen goes broody, the nest box turns messy fast. 🐓
1: Provide Proper Roosts 🪵
Chickens need a higher, more comfortable spot to sleep. Install sturdy roosting bars above the nest boxes. Give each bird at least 8 to 10 inches of space. Flat wooden bars or dowels, about 2 inches wide, are ideal for their feet. If your roost is too low or cramped, your flock will head for the boxes instead.
2: Block Access at Night 🌙
If you have stubborn sleepers, close the nest boxes at dusk. A hinged cover, burlap curtain, or piece of plywood works fine. Open them again after sunrise, and your hens will get the hint.
3: Make Nest Boxes Less Appealing for Sleeping 😴
Add slanted tops to keep birds from lounging on top, and keep bedding soft and fresh. Boxes that are too big or flat often become bunk beds. A snug 12×12×12-inch space is ideal—plenty of room for laying, but not enough for a sleepover.
4: Keep Things Clean 🧹
Stay ahead of the mess. Scoop out dirty bedding daily and replace it often. Fresh herbs or clean shavings make the boxes smell inviting for eggs only. Dry bedding is best—never let it stay damp or packed. If you have broody hens, refresh even more often.
5: Add Distractions 🛝
Sometimes hens need redirection. Provide dust-bathing spots, extra perches, or even a hanging cabbage. Busy hens won’t see the nest boxes as their playground.
6: Don’t Let Hens Go Broody 🐥
A broody hen often claims a nest box, settles in, and makes a mess while she’s at it. Broody mammas = messy eggs. If you’re not raising chicks, break broodiness early.
Collect eggs regularly; leaving them to pile up invites broodiness.
Create a “broody break” pen or shady separation spot if needed.
Choose breeds less prone to broodiness if clean eggs are your priority.
Quick Fix Checklist ✅
🪵 Give your flock sturdy roosts set higher than the nest boxes
🚪 Close off nest boxes at night to train stubborn sleepers
😴 Design nest boxes so they’re snug and less tempting for naps
🧹 Refresh bedding often to keep the boxes clean and welcoming for eggs
🎲 Offer fun extras like dust baths or hanging treats to keep hens busy
🥚 Gather eggs daily so hens don’t settle in and go broody
Now that your nest boxes are poo-free and your hens are less tempted to go broody, you’re ready for the next chicken-keeping challenge: winterizing the chicken coop.
👉 Want more cozy homestead tips? Sign up for email updates, and I’ll send the next lesson straight to your inbox.
Homemade Emergency Chick Feed from Kitchen Staples🥚
If you have been following along, you already know I just hatched a healthy bunch of chicks. Fifteen out of twenty-four eggs made it, and they are thriving. They are about two weeks old now, and we are well past the yolk sac phase. But this morning, I hit a snag: I ran out of chick starter feed.
Living in a rural area, I cannot exactly dash out for feed at six a.m., so I had to improvise. Here is what I fed my baby chicks using pantry staples. Spoiler alert: they loved it.
Sometimes you run out of chicken feed. Here is what I do….
Emergency Chick Feed Recipe for Baby Chicks 🐥
Ingredients:
1 dozen hard-boiled eggs (including shells)
Generous shake of ground cinnamon
A few pinches of red pepper flakes
A generous pour of dry oats
Instructions:
Boil the eggs until solid, then peel and keep the shells. These are a great source of calcium.
Mash the entire egg, including the shell, with a potato masher until it no longer resembles an egg. The goal is zero recognition. No confusing breakfast for relatives.
Stir in cinnamon and red pepper flakes.
Add dry oatmeal to soak up moisture and provide texture.
This batch made enough for two full feedings for my brooder of hungry chicks.
Keep refrigerated between feedings and use within 24 hours to maintain freshness and prevent spoilage.
I also give a version of this mash as an occasional treat to my adult chickens. I throw in leftover greens, cooked vegetables, and other healthy kitchen scraps to bulk it up. They go wild for it, and it is a great way to reduce waste while giving them something nutritious and fun to scratch through.
Red Pepper Flakes and Cinnamon? But, Can Chicks Eat Spices? 🌶️
Yes, chickens can eat spicy things, for a very surprising reason. Chickens do not have receptors for capsaicin, the spicy compound found in chili peppers. That means red pepper flakes will not bother them at all. In fact, hot peppers and cinnamon can help deter pests and may even support digestive health. Cinnamon is thought to offer mild immune support and reduce mold growth, making it a handy pantry addition.
Add Apple Cider Vinegar to Their Water 🍎
When using a homemade chick feed, it is helpful to add a splash of raw apple cider vinegar (about one tablespoon per quart of water) to their waterer. This may support gut health, boost immunity, and help keep the water clean. However, avoid using it daily. Three to four times a week is plenty.
Why This Works in a Pinch
⚠️ This is not a long-term feeding solution, but it checks the boxes when you are in a bind:
Protein: Eggs provide high-quality protein that is essential for early chick development.
Calcium: Crushed shells offer calcium to support bone strength. Be sure they are finely mashed to avoid egg-eating habits later on.
Spices: Cinnamon and red pepper flakes are natural additives that may help control bacteria and parasites.
Oats: Gentle on digestion and good for fiber.
How Long Is This Safe for Baby Chicks?
This homemade mix can sustain your chicks for up to one or two days. That should be enough time to pick up a proper chick starter feed. Return them to their regular balanced ration as soon as possible.
Rural Living Tip 🏔️
If you can, keep an extra bag of chick starter on hand. But if you run out, do not panic. A dozen eggs and a few pantry basics can help you bridge the gap. Just do not make it your go-to method.
Quick Note from the Coop 🐣
This mix worked well for my chicks, but every flock is different. If something does not sit right with your little fluffballs, please trust your gut and do what feels safest. This is just a stopgap meal shared from one chicken mama to another. This is not veterinary advice.
Did You Enjoy Learning What I Feed Baby Chicks in a Pinch?
Browse more tips, homestead resources, and beginner-friendly gear recommendations right here on the blog.
Because sometimes the best gear is already in your laundry pile. 👕
Cleaning the chicken coop is not glamorous, but it is part of the homestead routine. It goes right alongside gathering eggs and keeping an eye on that one suspicious rooster. If you have ever stepped into the coop on a dry day, you know how quickly dust can rise and coat everything, including your lungs. I always wear a dust mask, but this time I was in a pinch and needed an alternative.
This week, I needed a dust mask and did not have one. In search of an alternative, I scoured the house to find something to substitute. What I found was a pile of old kid clothes destined for the rag bag.
Enter: the humble, worn-out toddler tee. This old kid’s shirt made a great dust mask substitute. (And please don’t mind my oh-so-glamorous hairstyle – I am about to clean a chicken coop after all. 💅)
🧼 How to Make a Dust Mask from a Kid’s Shirt
This kid’s shirt dust mask is definitely not Pinterest-perfect. This is real life and ready-to-go. No sewing necessary.
Here is what I did:
Grabbed one of my son’s outgrown cotton T-shirts (bonus points for stains).
Pulled it over my head like a scarf, then up over my nose and mouth.
Tucked the collar over my ears for a snug fit. (No ear loops? No problem.)
And just like that, I had an instant dust barrier. I added a pair of sunglasses to keep the dust out of my eyes, which made the whole setup feel almost intentional. Sure, it is not OSHA-approved, but it kept the coop dander out of my face and let me breathe much easier.
Disclaimer: This setup is no N95, and I doubt it keeps out germs. But for the dusty chore I was doing, it was certainly better than nothing.
👕 Why This Works
Cotton is breathable yet still filters most of the floating feathers, fluff, and straw particles.
T-shirts are stretchy, so they provide a comfortable fit without pinching.
It is reusable. Hose it off, toss it in the laundry, and use it again.
Homestead tip: a worn out toddler shirt works as a dust mask in a pinch. 👕🐣 #homesteadlife
🐣 Bonus Tip
This method also works well when stirring compost, mowing dry fields, or handling dusty hay.
If you are looking for ways to clean your chicken coop without store-bought masks or expensive gear, this easy DIY hack can help you breathe easier and save money.
🌾 Real Homesteading Is About Resourcefulness
You do not need expensive equipment to do the job well. Often, all you need is something clean-ish, soft, and stretchy.
And those stained, worn-out shirts that are too rough for Goodwill donations? They are perfect for this task.
Read More
Enjoy homesteading and gardening tips like this dust mask alternative? Explore more small farm content:
From Almost Tossed to Tiny Miracles: My First Hatch 🐣
This was not the plan. It was not even a plan.
I had gone out of town for a few days to celebrate my son’s birthday. When we returned, the hens had been busy: there were eggs everywhere. Not a few… a lot. Some were tucked in corners. Some were still warm. Most were definitely not what you would call “clean.”
And I almost just tossed them all.
But something about that pile of potential made me pause.
On a whim, equal parts curiosity and defiance, I pulled out 24 of the best-looking eggs and my son and I set up the incubator. We didn’t share what we were doing. I was not sure it would work, and I did not want to get anyone’s hopes up or make them sad if nothing happened.
Backyard Chicken Breeds and the One Proud Rooster
These were not carefully collected hatching chicken eggs from a breeder. They came from my own eclectic backyard flock, which includes Ayam Cemani, Faverolles, Jersey Giant, Rhode Island Red, and a few mystery hens. The eggs were all completely unique. Some were big, some small, and a few were speckled. There was even one shaped like a football.
As for the father, that part was easy. My Jersey Giant rooster is the only guy on the scene: big, bold, and proud of it. He struts like a bodyguard and crows like he is announcing royalty. I am certain every single chick in that incubator is half giant, even if the mamas come from all corners of the feathered world.
I picked the eggs based on shell quality and vibes. That was it.
And then we waited.
A few days later, I candled the eggs for the first time and could hardly believe my eyes… all 24 showed signs of life! Each one was fertilized, and most of them were moving. It felt like the kind of beginner’s luck you shouldn’t question. I was stunned, thrilled, and just a little intimidated by the idea that I might actually be preparing for hatching the chicken eggs into two dozen chicks.
Day 18 Wiggles and a Tiny Powerhouse Chick 🐥
Most chicks hatch at day 21. But, around day 18, one little egg started rocking. Then came the peep. Then the pip.
The tiniest chicken egg in the bunch hatched first. And not just first: it popped out, fluffed up, and immediately started helping its sibling hatch. Like a tiny, damp nurse chick, it gave the other egg a few swift, determined kicks as if to say, “I am not going to be out here alone,” until chick number two emerged.
I thought I would be assisting these babies.
It turns out, they had each other’s backs.
Time to hatch! Happy birthday little baby chickens. 🐣
Newborn Chick Rituals: Egg Cuddles 💛
One of the sweetest, most unexpected things I noticed? As soon as they hatch, every chick picks an egg to cuddle and dry out on. Not necessarily their own, just whichever shell they bonded with. It is like they choose a comforting pebble in the chaos, nuzzling into it and falling asleep, wet wings hugging their little egg buddy as if it had already hatched. I’m sure they can hear the faint peeping and movement inside the soon to hatch shells.
It is instinctive. It is soft. And it is one of the most beautiful and adorable things I have ever seen.
Seven Chicks, Plus a Coffee Break Surprise
By the time I went to bed, two chicks were dry and wreaking havoc in the incubator. I moved them to the brooder so they would not smother their unhatched siblings.
Now that the chicks are dry and fluffy, it’s time to move from incubator to brooder! 🐥
By morning?
Seven.
Seven real, squirmy, perfect little chicks. 🐣
Most of them are black: my baby ravens. I have always wanted to tame a raven, so seeing these tiny black fluffballs peep and wobble their way into the world felt like a dream come true. They might not caw or perch dramatically on my shoulder, but for now, they are my miniature, feathery versions, and I adore them.
One has a blonde streak on her belly and way too much personality already. Another hatched so loudly she scared me half to death, peeping like a car alarm the moment she broke free. Others were quiet, cuddly, and content to nap on top of unhatched eggs while whispering motivational fluff into the shells.
And then… coffee happened.
One hatched while I stepped away to make coffee. Surprise! I came back to find a new chick where there had been an egg just moments earlier. Now eight fluffballs sit where eggs once were. One tiny overachiever kicked off her eggshell while I was making coffee. ☕
What I Learned From My First Hatch
This hatch was not pristine. The eggs were not washed. The humidity dipped. At least one chick emerged to kicks in the face from it’s impatient sibling.
But it still worked.
It reminded me that sometimes, we do not need ideal conditions. We just need to believe in unlikely beginnings, even if it starts as a pile of forgotten eggs after a birthday weekend.
What is Next for My Backyard Chicks?
More eggs are still in the incubator. I do not know how many more will chicken eggs will be hatching, and I am okay with that. The eight already here are plenty to love.
They eat, sleep, peep, and flop under the brooder plate like tiny potatoes with opinions. They cuddle unhatched eggs like baby blankets and peep at me like I owe them snacks.
A good boy always protects his babies. 🐶 🐣 💕
If you have been sitting on an idea, a maybe, a what-if… try it.
You never know when a quiet egg will turn into the loudest little peep in the brooder.
Thinking about starting your own backyard flock or hatching eggs for the first time?
Browse my tips, homestead resources, and beginner-friendly gear recommendations right here on the blog.
Keeping backyard chickens started a simple idea: just a few hens for fresh eggs. But it quickly became a delightful and unexpected adventure. I thought four birds would be plenty. A few years later, I somehow have fourteen happy, clucking companions, each bringing a little extra joy and personality to my days. What started as a small flock quickly turned into a fun and rewarding hobby. These feathered friends have a way of making every morning brighter, every day a little more amusing, and every egg collection feel like a tiny victory. Once you hear that first contented cluck and gather your first egg, you’ll wonder how you ever lived without them!
Why Keep Chickens?
Chickens offer so much more than just fresh eggs. They bring personality, daily entertainment, and a touch of chaos to life. If you’re looking for a way to become more self-sufficient, chickens are a great place to start.
Benefits of Raising Chickens
Fresh, Nutrient-Dense Eggs: Homegrown eggs are superior in taste and nutrition compared to store-bought varieties.
Pest Control: Chickens love eating insects, helping reduce unwanted bugs in your garden.
Composting Powerhouses: Their manure is rich in nitrogen, making it an excellent addition to compost piles.
Low Maintenance: Compared to other livestock, chickens require minimal care and space.
Entertainment and Companionship: Chickens have unique personalities and can be surprisingly affectionate.
Choosing the Right Chicken Breeds
Since I keep chickens strictly for eggs, I’ve learned a thing or two about the best layers. Not all chickens are equal in the egg department, and some have more personality than others.
My Favorite Egg-Laying Breeds:
Rhode Island Reds – Hardy, prolific layers of brown eggs.
Easter Eggers – Fun and quirky birds that lay beautiful blue, green, and sometimes even pink eggs.
Leghorns – Excellent white egg layers with high energy.
Australorps – Calm and productive with a record-breaking egg-laying history.
I started out with a mix, and soon found myself fascinated by the subtle differences in egg colors, sizes, and laying habits. Watching them scratch around the yard while collecting fresh eggs each morning has become a daily joy. 🥚💞
Setting Up a Coop and Run
One of my biggest lessons in raising backyard chickens? These birds need a well-secured, well-planned space. When I started, I thought a simple wooden coop with a little fenced-in yard would be enough. But I quickly learned about predators, escape attempts, and the importance of giving chickens a comfortable space to lay. Find my favorite chicken keeping supplies on Amazon to help get you started.
Coop Essentials:
Proper Ventilation: Keeps fresh air circulating and prevents respiratory issues.
Roosting Bars: Chickens prefer to sleep off the ground.
Nesting Boxes: Provide one nesting box per 3-4 hens for egg-laying.
Predator Protection: Secure latches, wire mesh, and covered runs prevent attacks from bears, foxes, raccoons, and hawks.
Space Requirements:
Inside the Coop: 2-3 square feet per chicken.
Outside Run: At least 10 square feet per chicken for outdoor access.
Free Ranging: If you let your chickens out of their run, it’s good to watch them or have a well trained guard dog on duty to protect them from predators.
Feeding and Nutrition
Good food means good eggs.
Layer Feed: Provides essential nutrients for egg production.
Scratch Grains: Treats like corn and wheat, best in moderation.
Kitchen Scraps: Fruits, vegetables, and grains can supplement their diet.
Calcium Supplements: Crushed oyster shells support strong eggshells.
Fresh Water: Chickens need constant access to clean water.
Health and Common Issues
Chickens are generally hardy, but they can encounter health problems. Watch for:
Parasites: Mites and lice can cause feather loss and irritation.
Respiratory Issues: Sneezing or wheezing can signal an illness.
Egg-Binding: If a hen struggles to lay an egg, she may need extra calcium or warm baths.
Keeping the chickens’ coop clean, ensuring proper nutrition, and regularly checking for signs of illness keeps my flock happy and healthy.
Raising Chicks vs. Adult Chickens
I actually started with chicks, which was an adventure of its own. Raising baby chicks requires a brooder, heat source, and plenty of patience, but watching them grow from tiny fluff balls to full-fledged hens is incredibly rewarding. If you’re considering starting with chicks, check out this article for a detailed guide on how I raise my baby chicks.
Raising Backyard Chickens and the Homestead Life
My chickens aren’t just egg producers; they’re part of my daily routine. I collect eggs in the morning, chat with them while filling their feed, and watch them scratch around the yard as I sip my coffee. They’ve made my homestead feel more alive, and despite my original plan for just four birds, I wouldn’t trade my flock for anything.
You’ll Want to Collect them All
Raising backyard chickens is a fulfilling experience that connects you to your food and nature in a meaningful way. Whether you’re a beginner or an experienced keeper, these birds bring joy, self-sufficiency, and productivity to any homestead.
But don’t say I didn’t warn you! Chickens have a way of multiplying 🐓. If you’re thinking about getting started, just know that four chickens can easily turn into fourteen before you know it.
Read More About Chicken Keeping
If you’re looking for more chicken-keeping tips, DIY coop plans, or solutions to common problems, check out my other articles on raising happy, healthy hens!
A Guide to Transitioning Chicken Pullets from the Brooder
Raising baby chicks has been one of the most rewarding parts of homesteading for me, but figuring out the right time to move those growing little ones outside from their cozy brooder to the big world of the chicken coop can be nerve-wracking. Over the years, I’ve learned (sometimes the hard way) that the timing is key. You want your pullets (young hens) to be comfortable, safe, and well-prepared for the elements and their new life outside.
Here’s what I’ve found to be the best approach when deciding when and how to transition your pullets from their warm indoor space to the great outdoors.
When Are Pullets Ready to Move Outside?
Knowing when your pullets are ready to move outside depends on a few things: their age, feathering, outdoor temperatures, and the safety of your coop setup. Let me walk you through what I’ve learned from my own experience.
Age and Feather Development
Chicks are usually ready to move outside at around 6 to 8 weeks old, but what really matters is their feather development. I remember being so eager to move my first batch of chicks outside that I almost jumped the gun. But they weren’t fully feathered yet, and it would have been too cold for them to handle. Lesson learned! Fully feathered means they’ve grown their adult feathers and can better regulate their body temperature.
Look for that full set of feathers before considering the move. If you see baby down (like in the picture below), they’re not ready yet.
Outdoor Temperature
Even with all their feathers, you want to be sure the nighttime temperatures are warm enough. I usually wait until the nights are consistently above 60°F (15°C). I once tried moving pullets out when it was still dipping into the low 50s at night, thinking they’d be fine since they had feathers. But I ended up sneaking out to the coop in the middle of the night to bring them back inside because they were huddling and cold!
I personally don’t use heat lamps because they can be dangerous—especially in wooden coops. Instead, I recommend using a brooder plate, heating plate, or even heated roosting posts to provide gentle, safe warmth for your pullets if needed.
Coop Setup and Safety
Before moving chicks outside, make sure your coop is ready to welcome them. I can’t stress this enough: your coop needs to be predator-proof. I lost a few pullets early on because I didn’t properly secure the coop. Now, I use hardware cloth instead of chicken wire to close up any gaps where predators like raccoons might try to get in. It’s also worth double-checking your coop’s ventilation and making sure you’ve got good bedding in place.
If your coop has a run, make sure it’s well-covered and secure. Pullets are small and can easily be preyed on by hawks or other predators. Be sure the run is escape proof. It’s for their safety, not to keep them locked up. These little ones are sneaky and can get out through much smaller openings than the bigger hens. When they get loose, it can be an adventure trying to get them back into the pen.
Flock Integration
If you already have an established flock, introducing your pullets can be tricky. I once made the mistake of tossing my new pullets into the coop without a proper introduction, and let’s just say, it didn’t go well. Older hens can be bullies as they assert the pecking order.
The typical approach is to section off part of the run or use a chicken wire divider so the older hens can see the pullets without being able to peck at them. After about a week, they’ll be more familiar with each other, and the integration should go smoother.
Or, you can choose to let your chicks grow into pullets alongside the rest of your birds. But, never just toss new chicks in without protection; set up a rabbit hutch inside your main coop. The babies will be able to grow up safely, since the bigger chickens can’t get to them. Once they are big enough to be set free, they will already have been accepted as part of the main flock’s daily life. Read more about how I set up a rabbit hutch to work as a chick brooder here.
Quick Steps to Transition Pullets Outside
So let’s sum up. Here are the four key steps I’ve taken to successfully move my chicks outside in the past:
1. Gradually Reduce Brooder Heat
About a week before I plan to move the chicks outside, I start reducing the heat in their brooder. If you’ve been using a brooder plate, gradually lower it to help them adjust to cooler nights. This helps them acclimate to the outdoor conditions. I didn’t do this with my first flock, and they struggled a bit with the cold at first.
2. Introduce the Coop During the Day
I always like to start by letting the pullets explore the outdoor coop during the day. It gives them a chance to get used to the space without the stress of a cold night. After a few days, they’re usually more confident and familiar with their new home, making the nighttime transition easier.
3. Move Them Out at Night
After a few days of daytime exploring, I move them to the coop overnight. The first night, I won’t lie—I’m always a bit anxious! I check on them (probably too much), but they generally settle in just fine.
4. Monitor Their Behavior
For the first few nights, I keep a close eye on them. If they seem huddled together for warmth, I’ll make sure their brooder plate or heated roosting post is working well. But usually, by the time they’re fully feathered and it’s warm enough, they do just fine.
What to Watch For After Moving Them Outside
Once your pullets are in the coop, watch for signs that they’re adjusting well. Here are a few things to look out for:
Huddling together at night: This can be a sign that they’re cold. Make sure they have enough bedding, and consider using a brooder plate or heated roosting post if needed.
Pecking and aggression: It’s normal for the older hens to peck a bit as they establish the pecking order, but if it turns into constant bullying, you may need to separate them temporarily.
Feather loss or stress: Keep an eye on their feathers and energy levels. If they seem overly stressed, it might be worth giving them a bit more time in their separate area before full integration.
What to Do If a Pullet Gets Injured when Joining the Flock
Unfortunately, accidents can happen during the transition, whether it’s due to pecking from older hens or just rough play among the pullets. Separate an injured chicken if the others are hurting her.
Clean then cover her wounds before exposing her to the other chickens again, or they will peck at the open sores. I always keep Rooster Booster Pick No More on hand for these situations. This product is a lifesaver when it comes to protecting an injured pullet’s wounds from further pecking by the flock. The bitter taste discourages other chickens from pecking at the injury, which helps prevent infection and allows the pullet to heal.
Essentials for the Transition
From my own experience, having the right supplies can make the transition easier for both you and your pullets. You pick up these supplies at your local farm store, or stock up before there is a problem by using my Amazon Affiliate links. Here’s what I recommend having ready:
Chicken First Aid Kit
Assemble an emergency first aid kit for your chickens. Make sure to include Vetericyn Plus Poultry Care Spray – it’s sort of like a spray-on Neosporin for chickens. Also pick up Rooster Booster Pick No More. After you clean the wound, you will use Pick No More to cover it like a liquid Band-aid. This product helps prevent further pecking at open sores and keeps the injured pullet safe while they heal. I can’t take credit for this tip, my dear friend at Stealin’ Blue Minis told me about this magical chicken medicine. And she was right! Look, the injured chicken shown above grew into a healthy member of the flock:
Heating for Chickens and Pullets
If the nights are still chilly, a brooder plate, heat mat, or heated roosting post is a safer alternative to heat lamps. I never use heat lamps because of the fire risk, so having one of these options helps keep my pullets warm without the danger.
Final Thoughts
Moving pullets outside is a big step, and it can feel a little nerve-wracking the first time. But if you take the time to ensure they’re ready—fully feathered, temperatures are warm enough, and your coop is secure—it will go smoothly. With the right supplies and a gradual transition, your pullets will thrive in their new outdoor space. And don’t forget, if you need to stock up on essentials for your coop, check out my Amazon Affiliate recommendations page to get everything you need for a safe, successful move!
There are downsides to free-ranging hens. Obviously, predators can be a huge risk to your chickens when they are allowed to wander outside of an enclosure. But I did not guess that the hens would stop laying in the coop and start new nests for their eggs in secret forest spaces.
Letting Chickens Free Range with Rooster Protection
I used to keep my hens in the shelter to protect them from predators like hawks and ravens. But with the addition of two large roosters (twin Jersey Giants named Colonel Sanders and Popeye), I felt the hens were safe enough to free range. The roosters have been great at keeping an eye on the flock, but clearly, they have not been concerned with keeping the eggs in the coop.
The Missing Egg Mystery
For the past two weeks, not a single egg has been laid in the coop. I worried there was something wrong with the chickens’ feed, so I started supplementing with healthy table scraps. Still no eggs.
Finally I started following a pair of hens through the woods to try to find out what they were up to. I discovered that they had created a maze of hidden nests under trees and brush. I don’t think these were just dust baths; the hens had been laying here.
My Hens Stopped Laying in the Coop
So the mystery is solved; my hens decided the forest was a better place to lay eggs than the swanky nest boxes in their safe coop. After days of searching for their hidden nests amongst the trees, I’m pretty sure the local wildlife has been getting a buffet of fresh eggs.
I would love to live and let live, but I feed the chickens to get eggs in return. This is supposed to be a two-way deal. It is time for a brief time-out.
Some Time in the Enclosure to Reset
Don’t get me wrong, this isn’t a punishment for the chickens. Their coop is a large shed, and their enclosure is roomy enough for all the chicken-y activities they can dream up. They’re safer from predators, so Popeye and Colonel Sanders can relax a bit. Plus, they’re getting extra treats to encourage egg laying. But, for now, they need to stay in their run until they re-learn to lay eggs in their cozy inside nests.
So, Here is the Egg-citing Plan
(Spoiler alert!) I got an egg! Here’s what I have done to encourage these little feathered dinosaurs to lay eggs in the coop not the woods:
Keeping Them in the Coop and Run
First, I made sure to shut the enclosure after all the chickens had gone to bed for the night. They may have forgotten how to lay in the coop, but they are still certain to sleep there. This saves me the hasle of chasing wild chickens, that can fly, through a wooded area; I would never catch them this way.
Now that they’re safe and secure, I’m keeping the hens in the coop and run for now. It is giving them a chance to refocus on using their nest boxes. I hope this temporary shift helps them reestablish their laying routine permanently.
Freshening Up the Nest Boxes
I gave their nest boxes a little makeover by adding fresh bedding. In my hens’ boxes, I use excelsior nest pads (Amazon affiliate link), which makes clean-up much faster. I tossed in some calming chamomile and lavender from my garden, as well. The herbs help make the nest boxes feel like a cozy, welcoming spot to lay eggs.
Collecting Eggs More Regularly
To be sure I get as many eggs as possible, I am checking the coop much more often. Usually, I would go out for eggs once a day. But, this time, I want to ensure the eggs end up where they should. One hen, for example, likes to lay on the cold bare floor. This can encourage snakes and packrats to steal eggs. We are working on laying up in the fluffy nest, instead.
Monitoring the Hens’ Habits
I’m closely watching their behavior, especially during the times when they’re most likely to lay. I have several hens who are early layers; they give me eggs for breakfast. The rest of the hens lay through out the late morning and early afternoon. I am closely watching these ladies, because they were the first group to wander.
It worked!
I am now in possession of one, single egg! It is a start. Hopefully the girls will all jump on board and start laying where they ought to!
Once I see the hens laying in the coop again regularly, I’ll gradually let them free-range. Since winter is coming on, though, the flock just might choose their warm enclosure until spring. Either way, hooray for fresh eggs straight from my yard!
Stopping at the farm store when baby chicks are in season means I’ll be unable to resist temptation. I brought home four new baby chickens this weekend. But, I already had a home for them. Here, I’ll show you where I keep baby chicks until they are big enough to live in the main coop. Hopefully, you’ll get some ideas to build your own chicken brooder.
Where I Raise Baby Chicks
Rabbit Hutch
Yes, we are talking about baby chickens. So why am I bringing up rabbit hutches? Well, my chicks go into a rabbit hutch to grow up. I used to do what many of you may do; raise the babies in a bucket in my bathtub. That got smelly fast! So, I came up with an alternative solution that has worked well for my last three groups of chicks.
Now, I set a rabbit hutch on the floor of my chicken coop. This allows the babies to get to know the big girls and roosters in a safe space. The weave of the bars is small enough that the babies can’t get through the holes and the hens can’t get into the chicks’ space. Believe it or not, hens will kill baby chicks so it is important to keep them separated.
Another useful thing about a rabbit hutch is that the kit I bought comes with a feeder; one less thing to pick out! The rabbit feeders do have a mesh bottom, which allows chick crumbles to fall out. This is not good! So I took a piece of cardboard, cut it to size, and lined the bottom of the feeder first. This does the trick to keep the baby chicken food inside the rabbit feeder.
You can get the same hutch I have from Amazon. I did not fully assemble mine, leaving the legs and tray off the bottom. But if you have some extra time, assembling the hutch completely would work just as well.
The links on this page are Amazon Affiliate Links.
Home
Rabbit Hutch Complete Kit – Easy to Assemble Housing, Feeder, & Water Bottle Kit
The floor of a rabbit hutch is not safe for delicate baby chick legs, though. To keep them from hurting themselves, I lay out excelsior pads as flooring. These pads come in squares are made of fine wood strands that have been woven together to create a soft, squishy mat. The babies don’t try to eat the flooring like they do with hay, so it lasts longer. They are also much less messy than wood shavings. The excelsior pads are easy to pick up and throw away once they’re too dirty to stay. (I also line my hens’ nesting boxes with excelsior pads. They’re pretty handy!)
Floor
Nest Box Pads for Chicken Nesting Boxes – 13 x 13 Pads Made in USA from Sustainably Sourced Aspen Excelsior
To keep the babies alive, it is very, very important to get them a heat source. If hatched naturally, a mama chicken would still be sitting on chicks well after they are hatched. Baby chickens cannot produce enough body heat to stay alive on their own. Many people get their chicks a heat lamp, but this poses a huge fire risk. I love using brooder plates instead. These little plastic trays warm up just enough to keep the babies comfy, but I’ve never had any worries that they will catch on fire while I am sleeping. Plus, the chicks can go under the plate when they are cold and leave if they get hot. It makes me feel better that they’re not trapped in a bucket under a hot lamp.
There are tons of choices for water containers for little chicklets. I have a simple hanging poultry waterer for my chicks like the one shown below. I hang it on the roof of the rabbit hutch with a carabiner clip and it seems to work well for me.
When you pick up those baby chicks, you’ll need to grab a bag of “Chick Starter” crumbles for them to eat. You will have about a million brands and types to choose among. But, from what I have seen, the brands offer roughly the same product with two main choices: medicated and unmedicated. What type you choose will be up to you. Medicated feed helps prevent bad bacteria from growing in a baby chick’s digestive system. But this also may prevent good bacteria from growing there, as well. I think your personal preference should win out on this choice.
Food
Non-Medicated Starter Crumble Feed for Chicks & Ducklings
I am so glad I already had my chick brooder set up when I made my impulse purchase. If you haven’t, I hope this helps you get started raising your new chicks up to be the best hens ever!
Thinking about starting your own backyard flock or hatching eggs for the first time?
Browse my tips, homestead resources, and beginner-friendly gear recommendations right here on the blog.