Knitting one item at a time can be problematic when your gauge gets a little off. Sometimes, one piece can end up a lot bigger than the other. A great way to solve this knitting problem is to learn to knit two at once. This method is especially useful for gloves, mittens, socks, sweater sleeves, hats, and almost any small knit that is made in the round.
Learn to cast on two matching knits at once
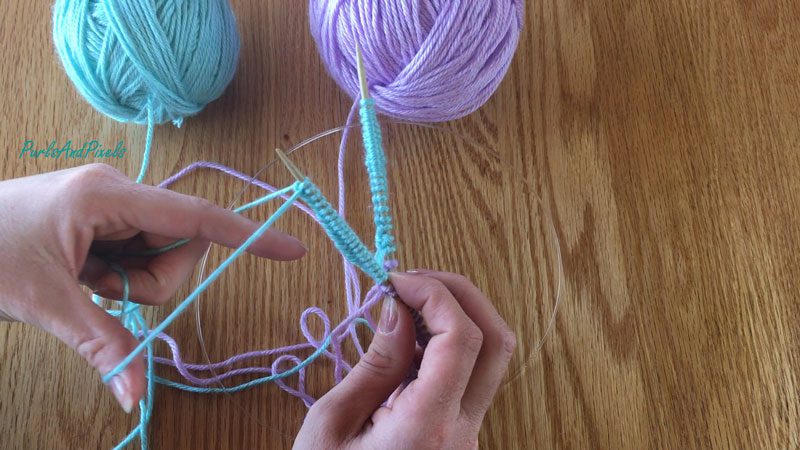
For this knitting method, you will use a long circular needle, and you’ll essentially be knitting with the “magic loop” method, except that you will cast on two items instead of one.
Watch the tutorial video below to see how I convert all of my one at a time knitting circular patterns into two at a time knits.
Quick visual cheat sheet:
Written instructions to knit two at once from a one at a time knitting pattern
1: Choose the appropriate needles and divide your yarn into two separate balls.
2: Cast on half the stitches with your first ball of yarn.
3: Cast on all the stitches from the pattern with a second ball of yarn.
4: Slide the first set of cast on stitches and half the second set of cast on stitches to the back needle.
5: Cast on the second half of the pattern stitches with the first ball of yarn.
6: Turn your work.
7: Pull back needle through.
8: Start knitting in the round, making sure to use the working yarn ball that matches the stitches you are working.
9: Follow your pattern, row by row. For each row, work half the stitches each row calls for with yarn ball 1, then all the stitches each row calls for with yarn ball 2, then to finish the second half of the row with yarn ball 1.
Knit this little frog for your favorite person. This little knitted toy is a great project for left over yarn, using only about 20 yards.
How this Little Knit Frog is Made
This little frog is knit in three main pieces. You’ll make his body first, then make and sew his legs on. I have included instructions for crochet eyes, but you can also substitute small buttons for eyes. I chose Caron Simply Soft in Kelly Green to make this guy, but try him in your favorite worsted weight yarn and color.
make 1 = Pick up the strand between the stitch just worked and the next stitch from front to back with the left needle and knit into the back of it.
k2tog = Knit two together.
ssk = Slip, slip, knit. [Slip two stitches as if to knit. Insert left needle from left to right into the fronts of the two slipped stitches. Pull working yarn through both stitches with right needle to knit together.]
sl1pwyif = Slip one stitch purlwise with yarn in front.
sl1kwyib = Slip one stitch knitwise with yarn in back.
sc = single crochet
Gauge
20 stitches and 28 rows in stockinette = 4 inches on No. 5/3.75 MM needles
Instructions: Little Knit Frog
(measures approximately 3” x 2”)
Frog Body
(Knit in the round with Color 1. Use stitch marker to keep track of the beginning/ends of your rows by placing it in the first stitch of each row/round.)
Row 1: Provisionally cast on 8. Join round.
Row 2: k 8 (8 stitches).
Row 3: k 8 (8 stitches).
Row 4: k1, make 1, k2, make 1, k2, make 1, k 2, make 1, k1 (12 stitches).
Row 5: k 12 (12 stitches).
Row 6: k1, make 1, k4, make 1, k2, make 1, k 4, make 1, k1 (16 stitches).
Row 7: k 16 (16 stitches).
Row 8: k1, make 1, k6, make 1, k2, make 1, k 6, make 1, k1 (20 stitches).
Rows 9 thru 16: k 20 (20 stitches).
Row 17: k1, make 1, k8, make 1, k2, make 1, k 8, make 1, k1 (24 stitches).
Row 18: k 24 (24 stitches).
Row 19: k1, make 1, k10, make 1, k2, make 1, k 10, make 1, k1 (28 stitches).
Cut yarn, leaving a 12-inch tail and pull through.
Allow the legs to curl up into themselves a bit, as they naturally will. Sew both legs to the narrow end of the frog, leaving some of the curled edges inside.
Frog Front Legs
(Knit flat with Color 1, turning after each row. Make 1.)
Row 1: Cast on 14 stitches. Turn.
Row 2: sl1pwyif, p13 (14 stitches).
Row 3: sl1kwyib, k13 (14 stitches).
Row 4: sl1pwyif, p13 (14 stitches).
Row 5: Bind off in knit stitch pattern.
Cut yarn, leaving a 12-inch tail, and pull through. Allow the fabric to curl long-ways, with the purl-side facing out. With darning needle, sew to body in a “v” shape, with the point of the “v” ending under the frog’s “chin.” Sew one tight stitch across the middle point (the bottom of the “v”) to make the front feet appear separate. Weave in loose ends.
Frog Eyes
(Crochet with Color 2. Make 2.)
Row 1: Chain 2.
Row 2: sc4 into 1st chain.
Pull yarn tail to tighten center of circle.Cut yarn, leaving an 8-inch tail, and pull through.With darning needle, sew tail trough the legs of the first sc stitch.Next, bring tail down and between the legs of the last sc stitch.This will create a smooth finished circle.Sew frog eyes (or buttons) to frog’s face, on top of its head. Weave in loose ends.
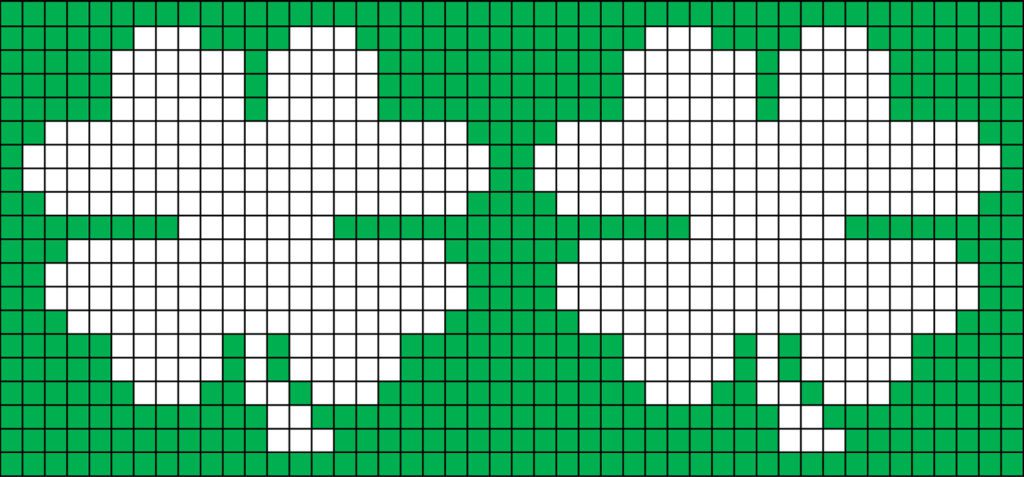
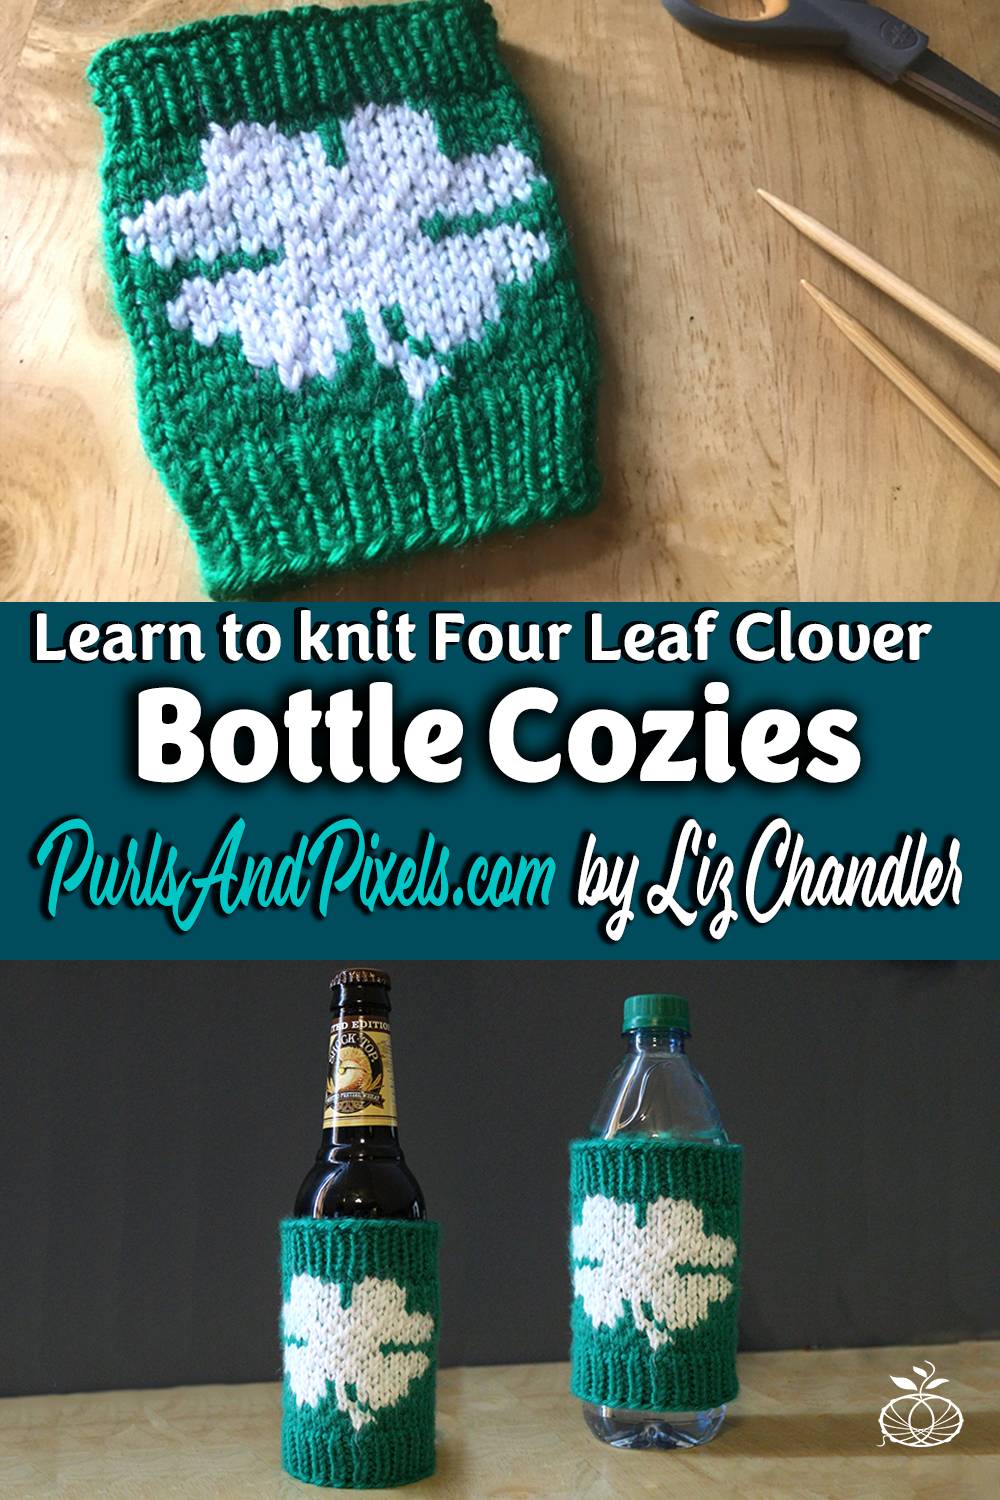
Knit an adorable sweater for your favorite bottle or coffee cup. This little green knit coffee cozy has a big white shamrock on each side. Knit your own bottle cozy or coffee cozy from my free patterns and charts here.
How this Coffee Cozy is Made
Here you will find two separate, but similar knitting patterns. One pattern is for a lucky clover beer and bottle cozy. The other knitting pattern shows you how to make a lucky clover coffee cozy. The coffee cozy is four rows wider, so it should fit most tall, handle-less coffee cups. The bottle cozy will fit most 16-20 ounce bottles of beer, water, soda, or even baby bottles.
These adorable cozies are made with two basic stitch patterns, that are knit in the round: the knit, purl rib, and the stockinette stitch. The four leaf clover pattern is knit into the cozy using a fair isle technique and carrying the two colors along together as you work.
This cozy is a quick project that is perfect for scrap yarn that has been left over from another project. You only need between .6 and .8 ounces or 19 -21 yards of yarn to make this minimalist coffee cozy. If you need help figuring out how much scrap yarn you have left, my post on yarn math might be useful.
I used Caron Simply Soft yarn to design the pattern, which is a basic, acrylic, worsted-weight yarn. Try any solid color you like, or mix it up with a variegated or patterned yarn. You can substitute almost any worsted weight yarn in almost any material, like sheep’s wool, alpaca, cotton or even a silk-blend for this project.
20 stitches and 28 rows in stockinette = 4 inches on No. 5/3.75 MM needles
Instructions: Lucky Coffee Cozy
(4.5 inches tall and fits cups 9-11 around)
Knit in the round. Use stitch marker to keep track of the beginning/ends of your rows by placing it in the first stitch of each row/round.
[Using no. 3 DPNs] In Green, Row 1: Cast on 50 stitches. Divide onto 3 DPNs. Join, taking care not to twist stitches. *k 1, p 1* x 25 (50 stitches).
Rows 2 thru 7: *k 1, p 1* x 25 (50 stitches).
[Switch to no. 5 DPNs] Start applying the knitting chart, switching between green and white yarn. Begin at the bottom right corner and work to the left, while knitting in this pattern: Rows 8 thru 28: k 50 (50 stitches).
[Switch to no. 3 DPNs] Rows 29 thru 35: *k 1, p 1* x 25 (50 stitches).
(4.5 inches tall and fits bottles 7-8 inches around)
Knit in the round. Use stitch marker to keep track of the beginning/ends of your rows by placing it in the first stitch of each row/round.
[Using no. 3 DPNs] In Green, Row 1: Cast on 50 stitches. Divide onto 3 DPNs. Join, taking care not to twist stitches. *k 1, p 1* x 23 (46 stitches).
Rows 2 thru 7: *k 1, p 1* x 23 (46 stitches).
[Switch to no. 5 DPNs] Start applying the knitting chart, switching between green and white yarn. Begin at the bottom right corner and work to the left, while knitting in this pattern: Rows 8 thru 28: k 46 (46 stitches).
[Switch to no. 3 DPNs] Rows 29 thru 35: *k 1, p 1* x 23 (46 stitches).
This pattern is for personal use, gifting, and charitable donation of completed items. You may also sell handmade items created using this pattern. Do not copy this pattern and distribute it. If you’d like to share the pattern, refer your friends to my website, purlsandpixels.com so they may obtain a copy.
If you find any errors or have any questions, email purlsandpixels@gmail.com and I will do my best to help.
I’d love to see your finished work! Tag your photos with @PurlsAndPixels on Twitter or Instagram.
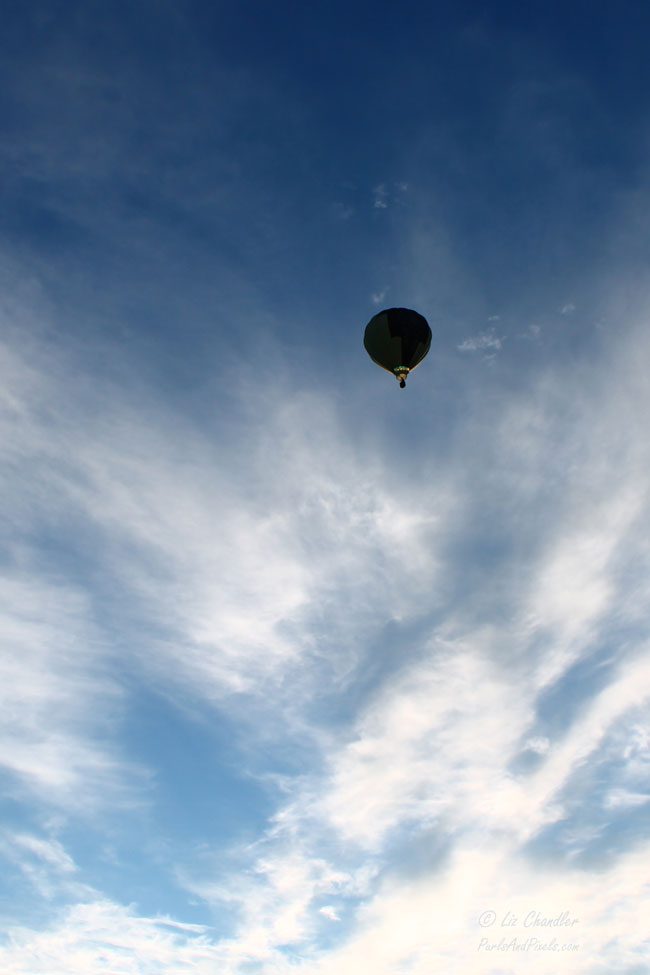
Transforming the Colors of the Wild into Cozy Creations 🏔️
Life out here in the Rocky Mountains is wild. Literally. Some days, I’m watching deer stroll past my window like they own the place. Other days, I’m rescuing my knitting from a particularly bold gust of wind. No matter what the day brings, one thing stays the same: wherever I go, yarn is never far behind. My knitting inspiration comes from all the nature around me.
I love taking pictures of mountains, forests, and cozy little moments. If you look closely, you’ll probably notice a trend. There’s often a ball of yarn or a half-finished project lurking in the shot. That’s not a coincidence. That’s just me, living my life, chasing daylight to get the perfect shot, and occasionally “shooting” coyotes. With a camera, of course. Knitting inspiration can come from anywhere, even wildlife. No need to alert the game warden. 📸
Why PurlsAndPixels is Packed with Pretty Nature Photos
Knitting inspiration from nature is everywhere, when you know where to look. The rich reds of autumn leaves, the deep blues of a twilight sky, and the soft neutrals of river stones all create the perfect yarn color inspiration from nature. Every time I step outside, I see textures and hues that practically beg to be turned into a new project. A misty morning might call for a delicate lace shawl, while the rugged bark of an old pine tree whispers, “You need more cozy cables in your life.” Living in the mountains, knitting is not just a hobby; it is a cozy knitting lifestyle, where the rhythm of the needles matches the quiet pace of nature. This mountain knitting aesthetic finds its way into everything I create, blending the beauty of the outdoors with the comfort of handmade warmth. Whether it is the soft tones of fresh snowfall or the earthy richness of autumn, knitting inspired by nature is always waiting right outside my door, tempting me to cast on just one more project.
1. Color Inspiration is Everywhere
The vibrant stripes on a canyon wall? Perfect for a chunky scarf. The soft blues of a misty morning? That’s a cozy pair of mittens waiting to happen. Nature is basically a giant, untamed yarn store, and I take full advantage of it. If you are looking for knitting inspiration from nature, step outside and see what colors you can find.
2. Texture, Texture, Texture
Knitting is all about feel. Soft wools, bumpy cables, smooth stitches. When I see the rough bark of an aspen tree or the soft fluff of a baby bunny’s fur, I can’t help but think, this would make a fantastic sweater. The natural textures found in the woods offer endless knitting inspiration.
3. It’s All About the Cozy Life
I don’t just knit. I live the whole cozy, slow-living, tea-sipping, blanket-wrapped experience. Taking these photos lets me freeze those moments. The ones where the fire is crackling, my needles are clicking, and everything feels just right. Since I can’t invite the whole internet into my cabin for cocoa, this is the next best thing.
Whether you have unraveled a project or just have some leftover yarn, by now you probably have some scraps that are in need of organization. Winding yarn into neat balls keeps your strings from becoming a hopeless tangled mess. While there are many ways to coil yarn for storage, center-pull yarn balls are the most versatile; they allow you to work directly from either end of the string.
(In the article below, I have linked to items on Amazon.com, so you can see examples of the equipment I reference. Please know all links to Amazon are affiliate links, and if you make a purchase through them, I will earn a small commission at no cost to you. Now, on to the important information.)
Center-Pull Yarn
Each ball of yarn is made of one long strand with two ends. There are a number of ways to coil the yarn so that it does not tangle. Some yarn is pre-wound into center pull balls or skeins (tube-shaped balls) by the manufacturer. When you see a string coming from the center of the ball or skein, you can probably work directly from either end.
Working from the center of a ball is often more convenient. When you work with the end on the outside of the ball, the yarn will likely roll and flop around. Yarn bowls and containers can help keep your yarn from escaping. But center-pull balls can be even more effective at reducing the movement of your ball of yarn. Pulling from outside of the ball forces it to roll. But when you pull from the center, the yarn uncoils without turning the ball.
Many yarn-makers, however, wind their yarn into “hanks” instead of center-pull balls or skeins. To make a hank, the manufacturer makes one large circle of yarn then twists it together for storage and shipping. Hanks are incredibly difficult to work from directly, so to use yarn that comes in a hank, you will need to wind it into a ball.
Machines like “yarn swifts” and “yarn winders” are available to assist you in turning yarn into a usable form. A yarn swift holds the yarn from a hank in place while you wind your ball. Then, you can use a yarn winder to turn that yarn into a “cake” which is much like a center pull ball. Or, instead of investing in fancy machines, you can use just your hands and wind hanks, leftovers, and frogged yarn into center-pull balls.
Video Guide: How to Wind a Center-Pull Yarn Ball
Written Guide: How to Wind a Center-Pull Yarn Ball
Below I’ll show you how to wind a center pull yarn ball step-by-step. I am winding the ball from a larger center-pull skein so that I can knit two items at once from the same yarn. I also wind partially used skeins into new balls for tidier storage.
Wind Yarn into a Ball, Step 1:
Drape the yarn end between your left pointer finger and thumb, laying it across your palm.
Wind Yarn into a Ball, Step 2:
Clasp the end of the yarn with your left ring and pinkie fingers, then, with your right hand, pick up the other end of the yarn just above your left pointer finger. With the strand in your right hand, begin to wrap the yarn over the top of your left pointer finger.
Wind Yarn into a Ball, Step 3:
Bring the yarn down between your pointer and middle fingers, then between your thumb and pointer finger, forming a loop around your left pointer finger.
Wind Yarn into a Ball, Step 4:
Wrap the yarn around your left thumb in a counterclockwise motion.
Wind Yarn into a Ball, Step 5:
Wind the yarn up between your left thumb and pointer finger to form a figure-eight (8) shape.
Wind Yarn into a Ball, Step 6:
Continue wrapping the yarn around your pointer finger and thumb in figure eight shapes (as in steps two thru five).
Wind Yarn into a Ball, Step 7:
When you have wrapped the yarn around your fingers in figure eights at least 20 times, you can stop and move to the next step. To make a larger ball of yarn, wrap more figure eights; when the yarn wraps reach your left thumb knuckle, move to step eight.
Wind Yarn into a Ball, Step 8:
With your right thumb and pointer finger, pinch all the strands at the center of the figure-eight shape (just between your left thumb and pointer finger).
Wind Yarn into a Ball, Step 9:
While continuing to pinch the center of the yarn figure-eight with your right hand, gently remove your left hand from the yarn loops.
Wind Yarn into a Ball, Step 10:
Continue to pinch the center of the figure-eight with your right hand.
Wind Yarn into a Ball, Step 11:
With your left hand, fold the two loops of the figure eight up, toward each other, pinching them together over your right thumb.
Wind Yarn into a Ball, Step 12:
While continuing to pinch the loops with your left hand, gently remove your right thumb. Pick up the yarn strand you have been winding with your right hand.
Wind Yarn into a Ball, Step 13:
Gently wind the strand in your right hand around the yarn you have pinched in your left hand. Be sure you do not wrap the tail end of the yarn into the ball, or you will lose your center-pull. Also, try not to wind too tightly; this can make yarn lose its stretch.
Wind Yarn into a Ball, Step 14:
Continue winding your yarn around until you have formed a ball in your desired size. Always ensure you do not wrap the center-pull end into the ball. When you are finished wrapping, clip the yarn with scissors (if necessary). Carefully tuck the end that you held with your right hand into the ball to secure it in place.
Practice With My Knitting Patterns
If you’ve been following my lessons, you now have enough information to knit all of the washcloths and face scrubbies in my Simple Washcloth Knitting Pattern Collection. Happy knitting!
Up Next
Next up, a lesson about gauge. Learn what gauge means in knitting and you to check your gauge to make sure your knits end up the right size.
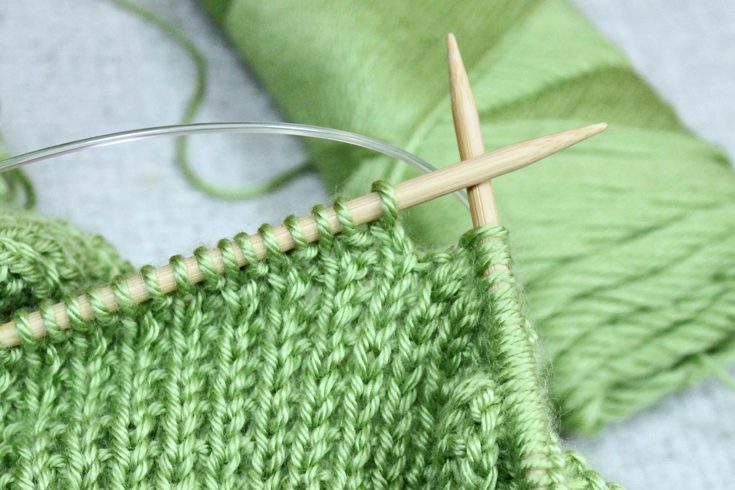
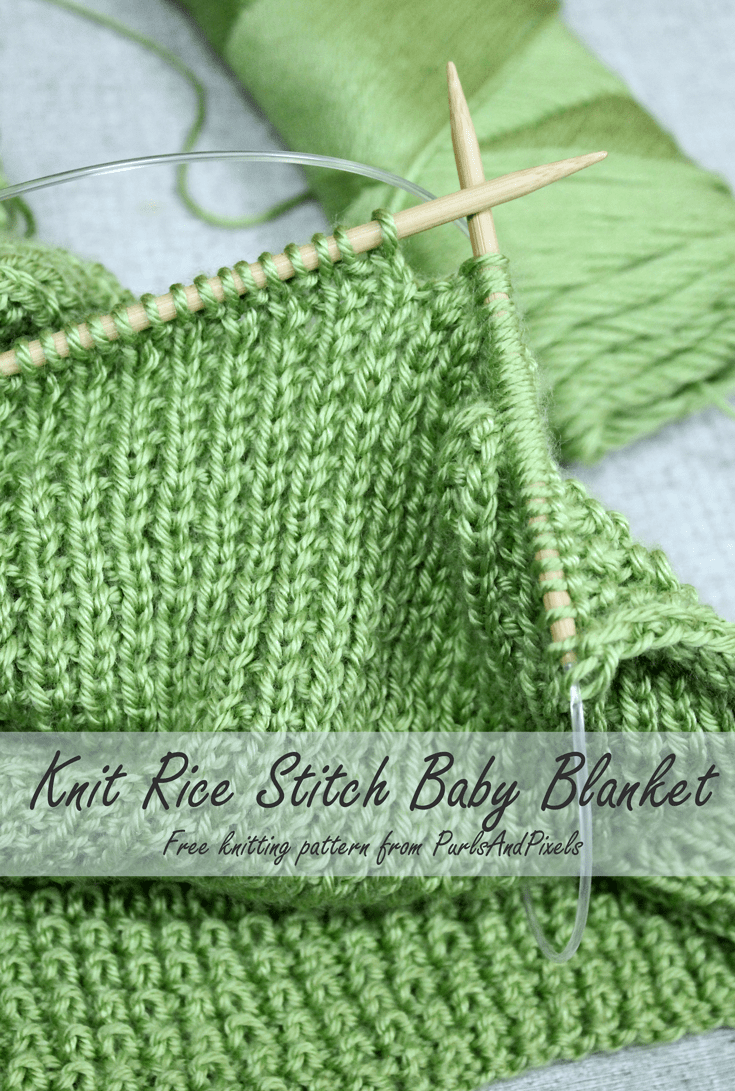
This rice stitch baby blanket is a great way to practice your knitting and purling skills. The rice stitch makes a fabric with two lovely textures on either side. This will make a soft and cuddly blanket that would make an excellent baby shower gift. It is also a great way for a new or expecting mother just learning to make something for her little one. Make this with a solid color yarn for a classic minimalist heirloom blanket. Or you can spice it up with a variegated version of worsted weight yarn like Simply Soft Paints.
Below, I will give you instructions for making the same blanket in two ways. Beginners can make this blanket with the Broken Rib Stitch, since it is all knits and purls. You can also knit it in rice stitch, to help you learn how to knit through the back loop. This can be good practice; as you “ktbl” and twist stitches intentionally, you will learn to spot twisted stitches more easily. This will help you spot mistakes in your other projects.
As you can see, the Rice Stitch has slightly more twist in the fabric. It also tends to curl a tiny bit less than the Broken Rib Stitch, but not noticeably. Either pattern you follow will result in the nearly the exact same blanket, so choose what is best for you.
Neaten knitted edges with slipped stitches
To neaten the edges of the blanket, you’ll slip the first stitch off your needle as if to purl, without actually working the stitch. On the knit rows, you’ll hold your yarn in back of your work when you do this. I’ll abbreviate this as “sl1pwyib.” On the purl rows, you will hold the yarn in the front of your work when you slip the first stitch; this will be abbreviated “sl1pwyif.” You can find a full tutorial (with a video), which shows you how to neaten your edges with slipped stitches at this link.
The most difficult part of making this baby blanket is keeping tack of the pattern. It can be easy to accidentally knit two stitches and lose your pattern in the knit, purl rows. Make sure you watch your stitch rows and columns and compare them with the pictures to make sure your pattern is developing properly. If you spot a knitting mistake, you can go back and fix it if you need to.
Row 241: sl1pwyif, *k1tbl, p* x 81. (163 stitches) Turn.
Row 242: Bind off in pattern of Row 3 with the same tension as the rest of the piece (do not bind of loosely like most other patterns call for). Cut yarn leaving an 8-inch tail and pull through. Weave in ends. Block if desired.
Instructions: Broken Rib Stitch Baby Blanket
(40 inches x 40 inches)
Use the Long-Tail Cast On method. Knit flat, turning after each row.
Row 241: sl1pwyif, *k, p* x 81 (163 stitches). Turn.
Row 242: Bind off in pattern of Row 3 with the same tension as the rest of the piece (do not bind of loosely like most other patterns call for). Cut yarn leaving an 8-inch tail and pull through. Weave in ends. Block if desired.
If you use the materials called for in the pattern, your final product will be machine washable. To keep your baby blanket looking its best, hand wash or machine wash separately on delicate cycle in cold water. You may tumble dry on low heat or lay flat to dry.
Tip:
Keep this away from Velcro! Yarn and Velcro are never friends. Your blanket will absolutely snag if you lay it on a Velcro jacket or a toy with a Velcro seam. Other than that, these little blankets last for years if you make sure to wash them gently.
This pattern is for personal use, gifting, and charitable donation of completed items. You may also sell handmade items created using this pattern. Do not copy this pattern and distribute it. If you’d like to share the pattern, refer your friends to my website, purlsandpixels.com so they may obtain a copy.
If you find any errors or have any questions, email purlsandpixels@gmail.com and I will do my best to help.
I’d love to see your finished work! Tag your photos with @PurlsAndPixels on Twitter or Instagram.
Trying to find out how much yarn you need for a project can sometimes feel like a guessing game. Do you have enough? There is one way to be sure. Do a little yarn math.
When you are finished with a project, you will often have leftover yarn; knitters call this “scrap yarn.” This leftover yarn can be perfect for smaller knitting patterns. Before you get started with a scrap knitting project, though, you will need to make sure you have enough yarn to finish it. With a bit of math, you will be able to calculate exactly what you have left. Learn how to do the quick yarn math or jump to the yarn length calculator at the bottom of this page.
Many knitting patterns are perfect for scrap yarn and pattern-writers will usually tell you exactly how much yarn you need. When an author provides you with the weight of yarn needed, calculating whether you will have enough is simple; just weigh your yarn and see if you have at least as much as the writer suggests.
Sometimes, however, a pattern-writer only lists a length of yarn needed. While this makes your calculations a bit trickier, you can do a little math to be sure you have enough yarn.
Tools Needed to Calculate Yarn Math
To find out how much yarn you have left, you will need two important items.
First, you will need the label from your yarn. Nearly every new ball of yarn you purchase will have a label noting yardage and weight. If you save the label, you will be able to calculate how much yarn you have left after a project.
You will also need a scale that weighs in ounces, so that you can measure the current weight of your yarn.
Basic Yarn Math Formula
To find out the yardage you have left after using some yarn, we will use simple ratios. A ratio compares two things; here we want to compare the length of our yarn to the weight of our yarn. Mathematically, you would write out our basic ratio like this:
But we are trying to find out the length of yarn we have now, based on information about the yarn we had when we had a full skein of yarn. So, we really want to compare two different ratios. If you can make the ratios equal to one another, you’ll have all the numbers you are looking for. Making two ratios equal in this way is called solving a proportion. Our basic math will start with this proportion:
If you’ve just finished a knitting project and you have your yarn label, you will have information to fill in three blanks in the proportion above. You will know the length of yarn in a full skein, the weight of yarn in a full skein, and the weight of the left-over yarn.
To calculate the length of your leftover yarn, you will “cross multiply, then divide.” This means, multiply the Length of Yarn in a Full Skein by the Weight of the Leftover Yarn (the two numbers you have across from each other), then divide that number by the Weight of a Full Skein of Yarn. The result will be the Length of Leftover Yarn.
Or just a bit more mathematically, use the following formula to solve:
An Example, Using the Yarn Math Formula
If you started with a ball of Caron Simply Soft Yarn, one of the suggested yarns in this book, the label would show that you started with 315 total yards or 6 total ounces of yarn. After you’ve made a project or used some of your yarn, you weighed the leftovers to find that you have exactly 1.2 ounces of yarn left. How many yards is equal to 1.2 ounces of this yarn?
Start by filling in your formula with the numbers you know:
Then solve the math problem. Cross multiply (multiply the numbers shown in purple) then divide (by the number shown in teal). If it makes it easier, fill in the formula and solve:
Now, you’re ready to calculate how much yarn you have leftover. You can do the math yourself, or use the calculator below for quick answers.
This year the holiday budget was a little tight, so I decided to make everyone cookie baskets for Christmas.
For our nearby friends and family I picked up some round, decorative plastic boxes. I used cupcake papers and aluminum foil to separate the different types of cookies and arrange them nicely.
Packing up bundles of pretty cookies to give as a gift is not too difficult to do when your friends and family are local, but much of my family lives over 2000 miles away. It took a bit of creative packaging, but I was successful at shipping cookie gifts cross-country. Let me show you how I did it so you can ship your on cookie gifts for holidays and care packages.
*If you plan to ship your cookies in the mail, choose cookies that are on the denser and thicker side. Treats that are especially thin or fragile can be tasty, but probably wont make it thru the mail. The cookies pictured held up well in shipping.
For my gift baskets this year, I made gingerbread cookies, snowball cookies, chocolate chip cookies, fudge, and peanut brittle. I’ve pinned all of the recipes for my favorite treats here, so check out and follow my cookie, candy, and crafty eats boards for ideas on home-cooked gifts.
Packaging materials
If you are mailing your cookies, you are going to need a few supplies. You’ll need:
Carefully wrap between 6 and 12 of each type of cookie in cellophane. Next, wrap that bundle of cookies again, this time loosely with in aluminum foil. Gently mold the foil around the cookies to make a block and keep the cookies from sliding around inside the bundle. Place this double-wrapped cookie bundle in a Ziploc bag. Repeat this process with the rest of the cookies that you want to ship. Place them in the shipping box, filling any empty spaces in the box with cellophane or other packing filler to make sure the cookie bundles don’t slide around in the box. I added a gift wrapped pair of handmade mittens to the box, as well. Tape up the box and you’re ready to get a shipping label and mail your cookies.
After packing up all the cookies and treats in the box, I taped it shut and wrote FRAGILE in large capital letters with a big red marker on two sides of the box.
After shipping these cookies over 2000 miles from Virginia to Colorado, I expected to loose a few cookies to breakage along the way. Trucks and airplanes are bouncy, so I thought at least a few would be lost. Lucky for me, all of the cookies this year arrived in good shape. I know using the aluminum foil as a protective cushion for shipping the cookies really helped. But, I think a major part of the success of this gift project was because I was lucky with my postal carrier for USPS. The boxes had been treated very carefully. I hope your postal worker is as kind and careful as ours.
Did you try it? Let me know how your luck was with shipping cookie gifts. What kind of cookies did you send in your gift or care package? Did they get there in good shape? Let me know in the comments below.
More Holiday Craft Ideas
Love DIY Christmas and holiday projects? Find more handmade holiday craft ideas at my Holiday Pattern Roundup Post.


 Instructions: Lucky Coffee Cozy